Hi,
I'm not sure how it can be dislodged considering the weight holding it on. Is everything tight before you install the assembly on the car?
Do me a favor. Here are the directions for removal and replacement / repair. Take a look through the directions and see if there is something you are missing. The attached pics correlate with the directions.
_______________________________
2013 Kia Rio L4-1.6L
Repair Procedures
Vehicle Steering and Suspension Suspension Suspension Strut / Shock Absorber Service and Repair Removal and Replacement Front Strut Assembly Repair Procedures
REPAIR PROCEDURES
Replacement
1. Remove the front wheel & tire.
Tightening torque :
88.3 - 107.9N.m(9.0 - 11.0kgf.m, 65.1 - 79.6lb-ft)
pic 1
CAUTION:
Be careful not to damage to the hub bolts when removing the front wheel & tire.
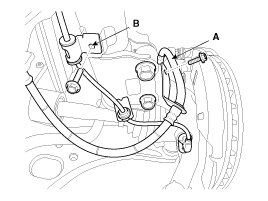
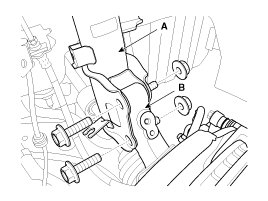
2. Remove the brake hose bracket (A) and the wheel speed sensor bracket (B) from the front strut assembly by loosening the mounting bolts.
Tightening torque :
(B,C) 7.8 - 11.8N.m(0.8 - 1.2kgf.m, 5.8 - 8.7lb-ft)
pic 2
3. Disconnect the stabilizer link (B) with the front strut assembly (A) after loosening the nut.
Tightening torque :
98.1 - 117.7N.m(10.0 - 12.0kgf.m, 72.3 - 86.8lb-ft)
pic 3
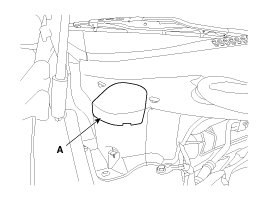
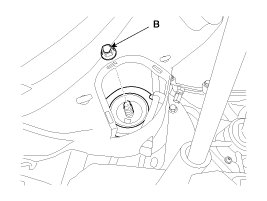
4. Remove the cover (A) and loosen the strut mounting nut (B).
Tightening torque :
49.0 - 58.8N.m(5.0 - 6.0kgf.m, 36.2 - 43.4lb-ft)
pic 4
pic 5
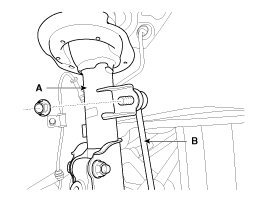
5. Disconnect the front strut assembly (A) with the front axle (B) by loosening the bolt & nut.
Tightening torque :
137.3 - 156.9N.m(14.0 - 16.0kgf.m, 101.3 - 115.7lb-ft)
pic 6
6. Installation is the reverse of removal.
CAUTION:
- Tighten with specified torque at curb position of vehicle
- Fix the strut rod and tighten the nut
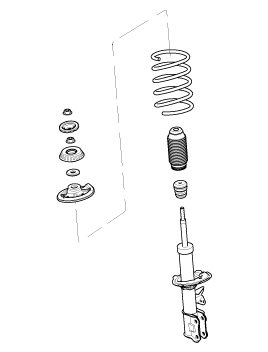
Disassembly and Reassembly
1. Compress the coil spring with a strut spring compressor. Do not compress the spring more than necessary.
2. Loosen the lock nut.
Tightening torque :
58.8 - 78.8N.m(6.0 - 7.5kgf.m, 43.4 - 54.2lb-ft)
3. Disassemble the components of front strut assembly in sequence.
pic 7
4. Reassembly is the reverse of disassembly.
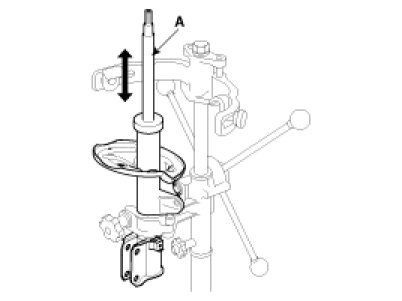
Inspection
1. Check the components for damage or deformation.
2. Compress and extend the piston rod (A) and check that there is no abnormal resistance or unusual sound during operation.
pic 8
___________________________________
If possible, upload a pic of the coil dislodged so I can see what is happening.
Take care and let me know if this helps.
Joe
Images (Click to enlarge)
Apr 21, 2020 at 5:08 PM