Good morning,
Yes, If the dimensions are the same, and they are, then it will work. Make sure you flush the system of all the old fluid.
https://www.2carpros.com/articles/power-steering-fluid-flush
I was trying to find the rack but nothing came up for over 4 turns.
Roy
Removal
CAUTION: When repairing the power steering system, care should be taken to prevent the entry of foreign material, or failure of the power steering components may result.
All engines
1. Turn the steering wheel to the straight-ahead position and turn the ignition switch to the OFF position.
Remove the key.
2. Remove the wheels and tires.
3. Remove the 2 lower steering column shaft joint cover nuts and the cover.
4. CAUTION: Make sure to correctly index-mark the steering gear-to-steering column shaft position or unequal right-to-left turns may occur, causing tire contact with the body and/or clock-spring damage.
Index-mark the steering column shaft-to-steering gear position for reference during installation.
imageOpen In New TabZoom/Print
5. CAUTION: Do not allow the steering column to rotate while the steering column shaft is disconnected from the steering gear or damage to the clock-spring may occur. If there is evidence that the steering column has rotated, the clock-spring must be removed and re-centered. For additional information, refer to Air Bag Systems.
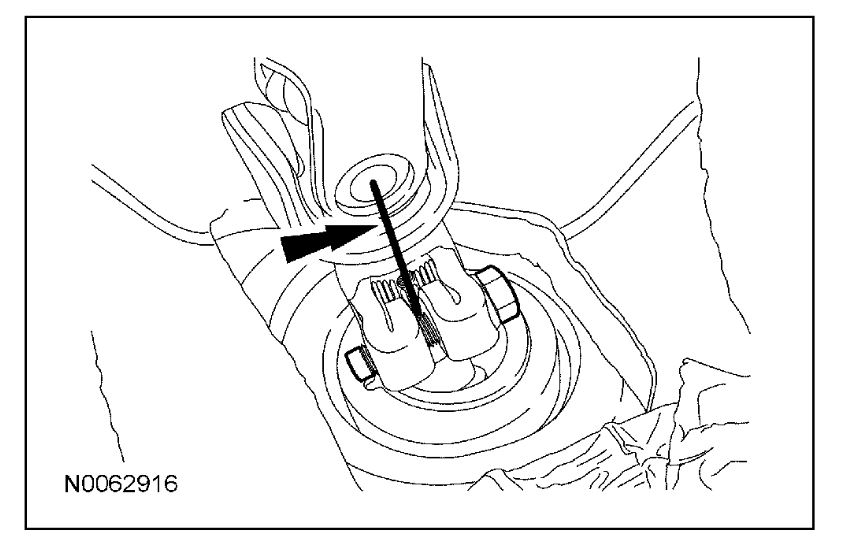
Remove the bolt and disconnect the steering column shaft from the steering gear.
imageOpen In New TabZoom/Print
6. CAUTION: Remove the steering gear/dash seal or damage to the seal may occur.
Remove the steering gear/dash seal.
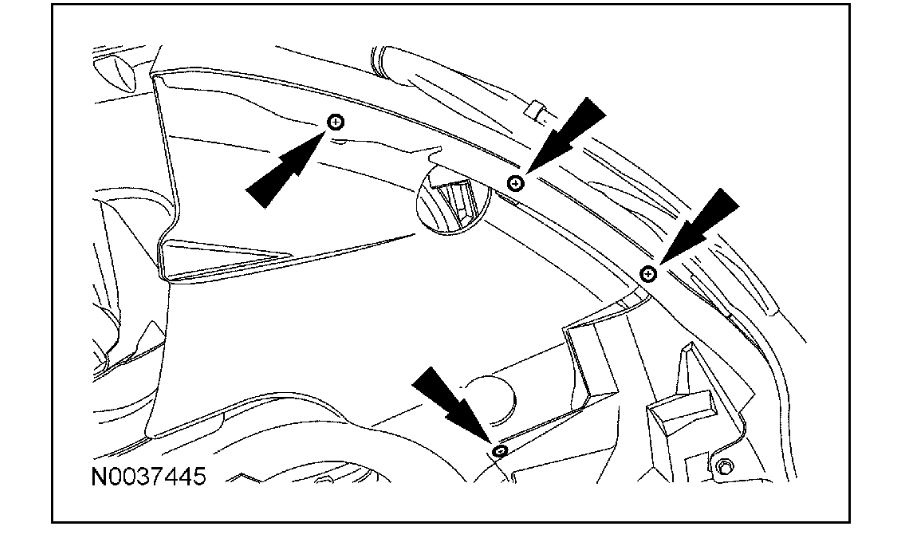
7. NOTE: RH side shown, LH side similar.
Remove 4 screws from each side and position the RH and LH fender splash shield aside.
imageOpen In New TabZoom/Print
8. NOTE: RH side shown, LH side similar.
Remove the 6 pin-type retainers (4 shown) from the LH and RH splash shield.
imageOpen In New TabZoom/Print
9. If equipped, remove the bolts and the under-body splash shield.
10. Remove the 2 outer tie-rod end cotter pins and nuts.
Discard the cotter pins.
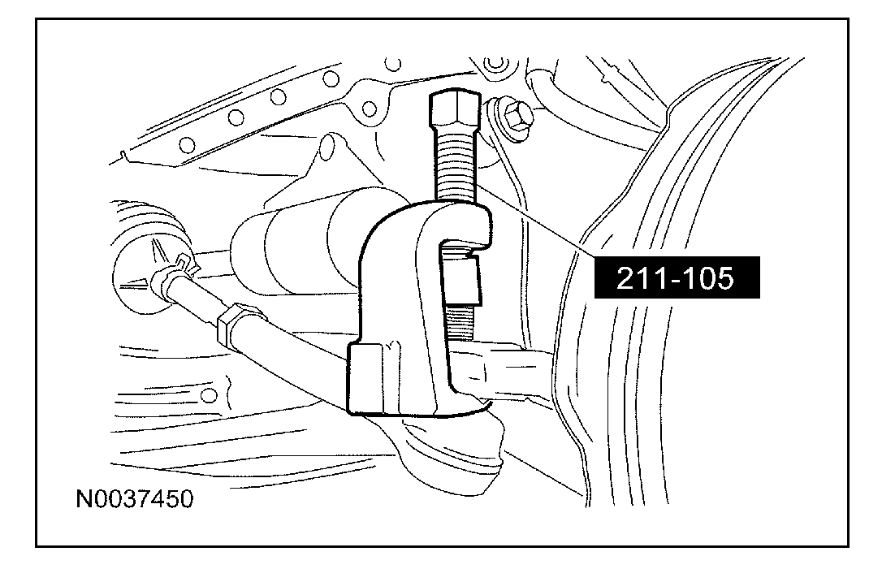
11. CAUTION: Do not use a hammer to separate the outer tie-rod end from the wheel knuckle or damage to the wheel knuckle may result.
Using the special tool, separate the outer tie-rod ends from the knuckle.
imageOpen In New TabZoom/Print
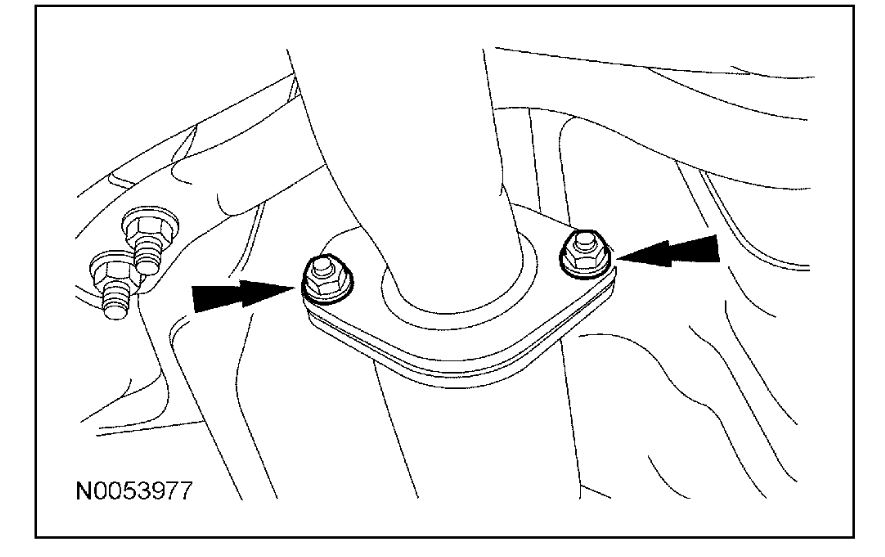
12. NOTE: Always install new fasteners and gaskets. Clean flange faces prior to new gasket installation to make sure of proper sealing.
Remove and discard the 2 catalytic converter-to-exhaust flexible pipe nuts and separate the exhaust flexible pipe.
imageOpen In New TabZoom/Print
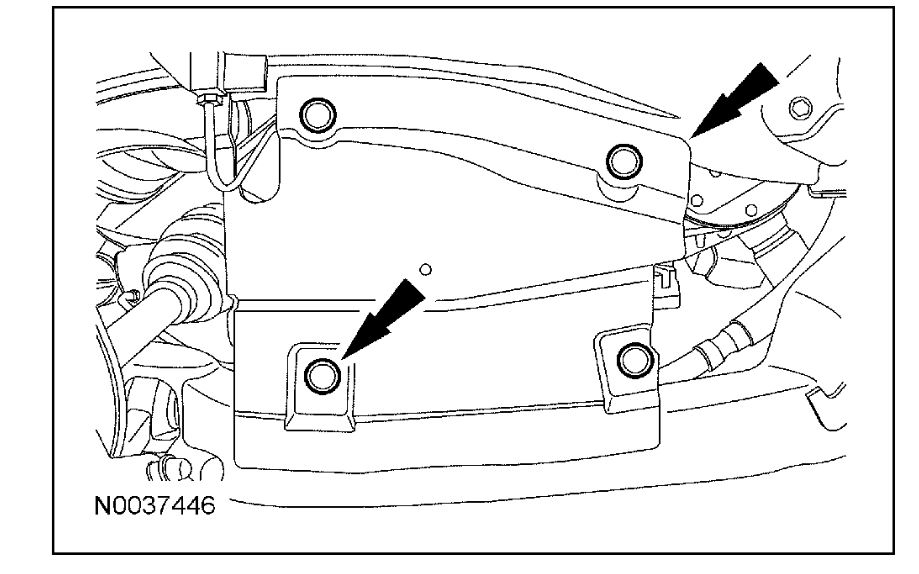
13. Remove the 2 bolts and the steering gear heat shield.
2.3L engine
14. Remove the pressure line bracket-to-steering gear bolt.
To install, tighten to 9 Nm (80 lb-in).
3.0L and 3.5L engines
15. Remove the pressure line bracket-to-steering gear bolt.
To install, tighten to 15 Nm (11 lb-ft).
All engines
16. Remove the pressure line-to-steering gear banjo bolt.
Discard the bolt and 2 seals.
17. Support the rear of the subframe with a suitable jack and remove the 4 rear subframe bolts and 2 rear subframe nuts.
18. Lower the rear of the front subframe 76.2 mm (3 in) with the support of the jack.
19. Release the clamp and disconnect the steering gear-to-fluid cooler return hose.
20. Remove the 3 steering gear bolts.
21. Remove the steering gear from the LH side of the vehicle.
Images (Click to enlarge)
Jul 15, 2020 at 5:52 AM