Hi,
The power steering belt is the same as the serpentine belt. I have to be honest, to access the tensioner, it's nearly impossible from the top. You really should go through the wheel well. Here are the directions for replacement. Also, you may want to check the alt belt at the same time and replace it if needed. The serpentine belt needs removed to access the alt belt, so since it will already be off, this is the time to get it. It has a manual tensioner on the bracket.
____________________
2001 Chrysler Truck PT Cruiser L4-2.4L VIN B
Removal and Installation
Vehicle Engine, Cooling and Exhaust Engine Drive Belts, Mounts, Brackets and Accessories Drive Belt Service and Repair Procedures Removal and Installation
REMOVAL AND INSTALLATION
ACCESSORY DRIVE BELTS
POWER STEERING PUMP AND AIR CONDITIONING COMPRESSOR BELT
REMOVAL
pic 1
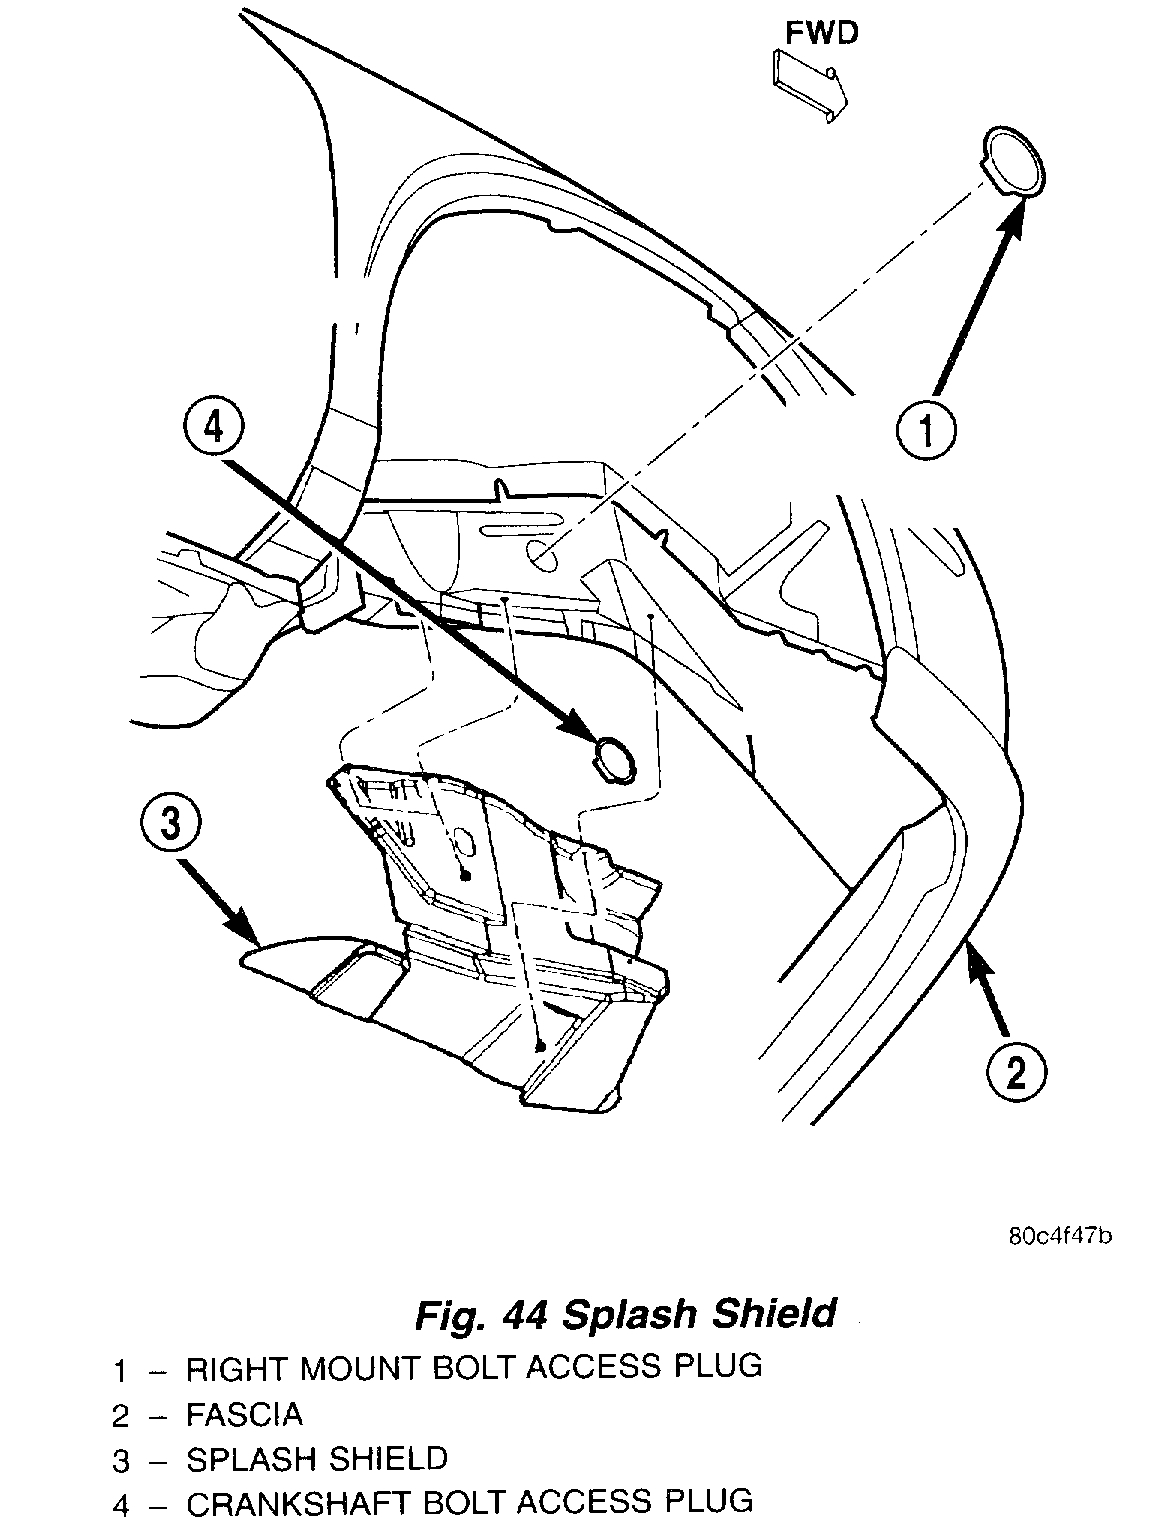
1. Remove belt splash shield (Fig. 44).
pic 2
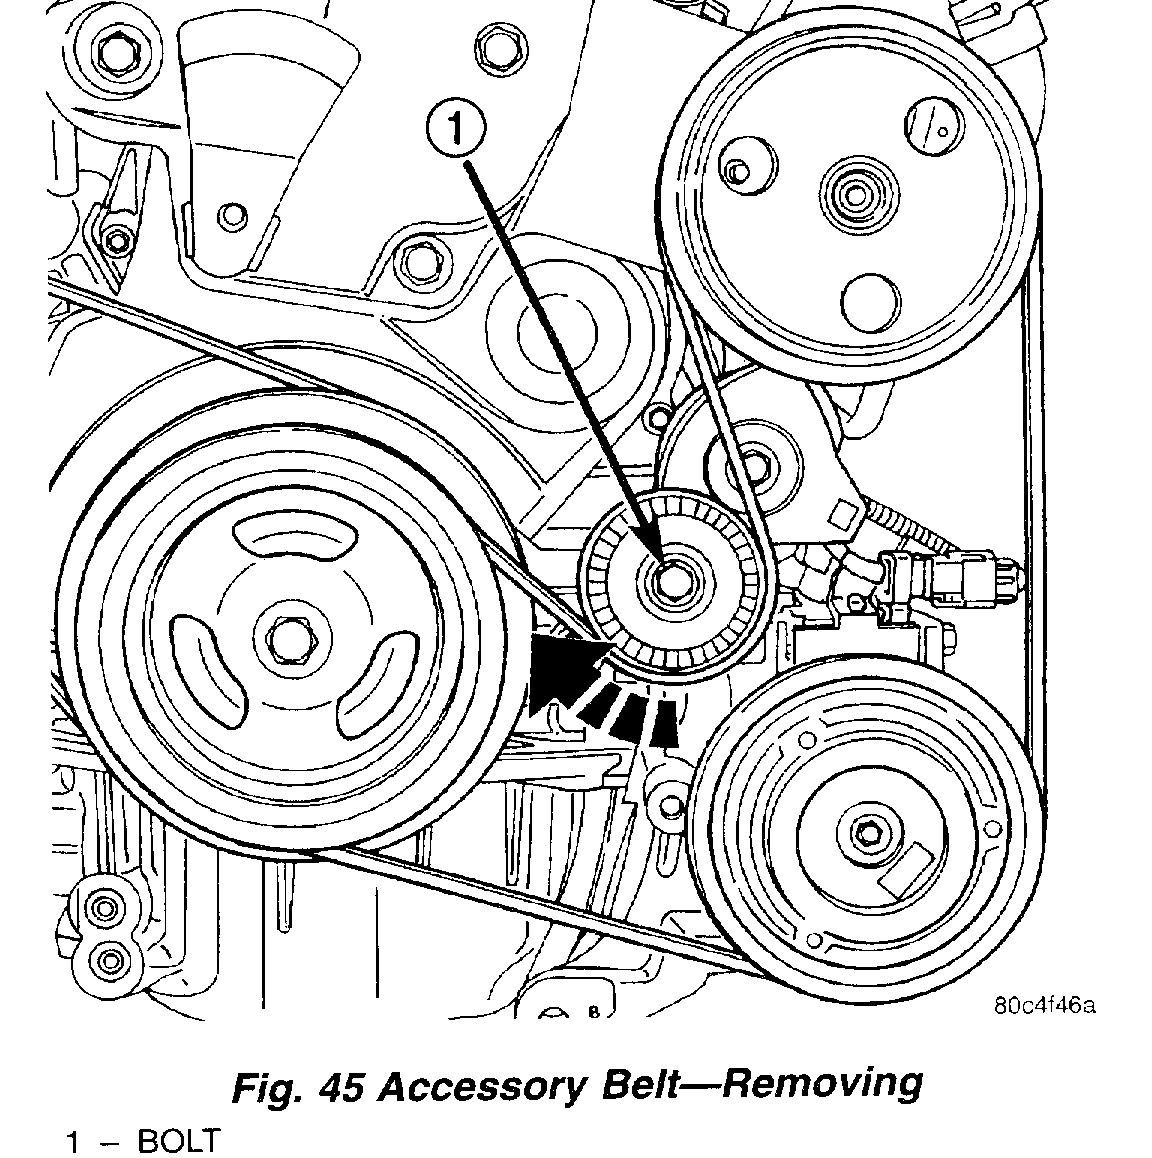
2. Using a wrench, rotate belt tensioner clockwise (Fig. 45) until belt can be removed from power steering pump pulley. Gently, release spring tension on tensioner.
pic 3
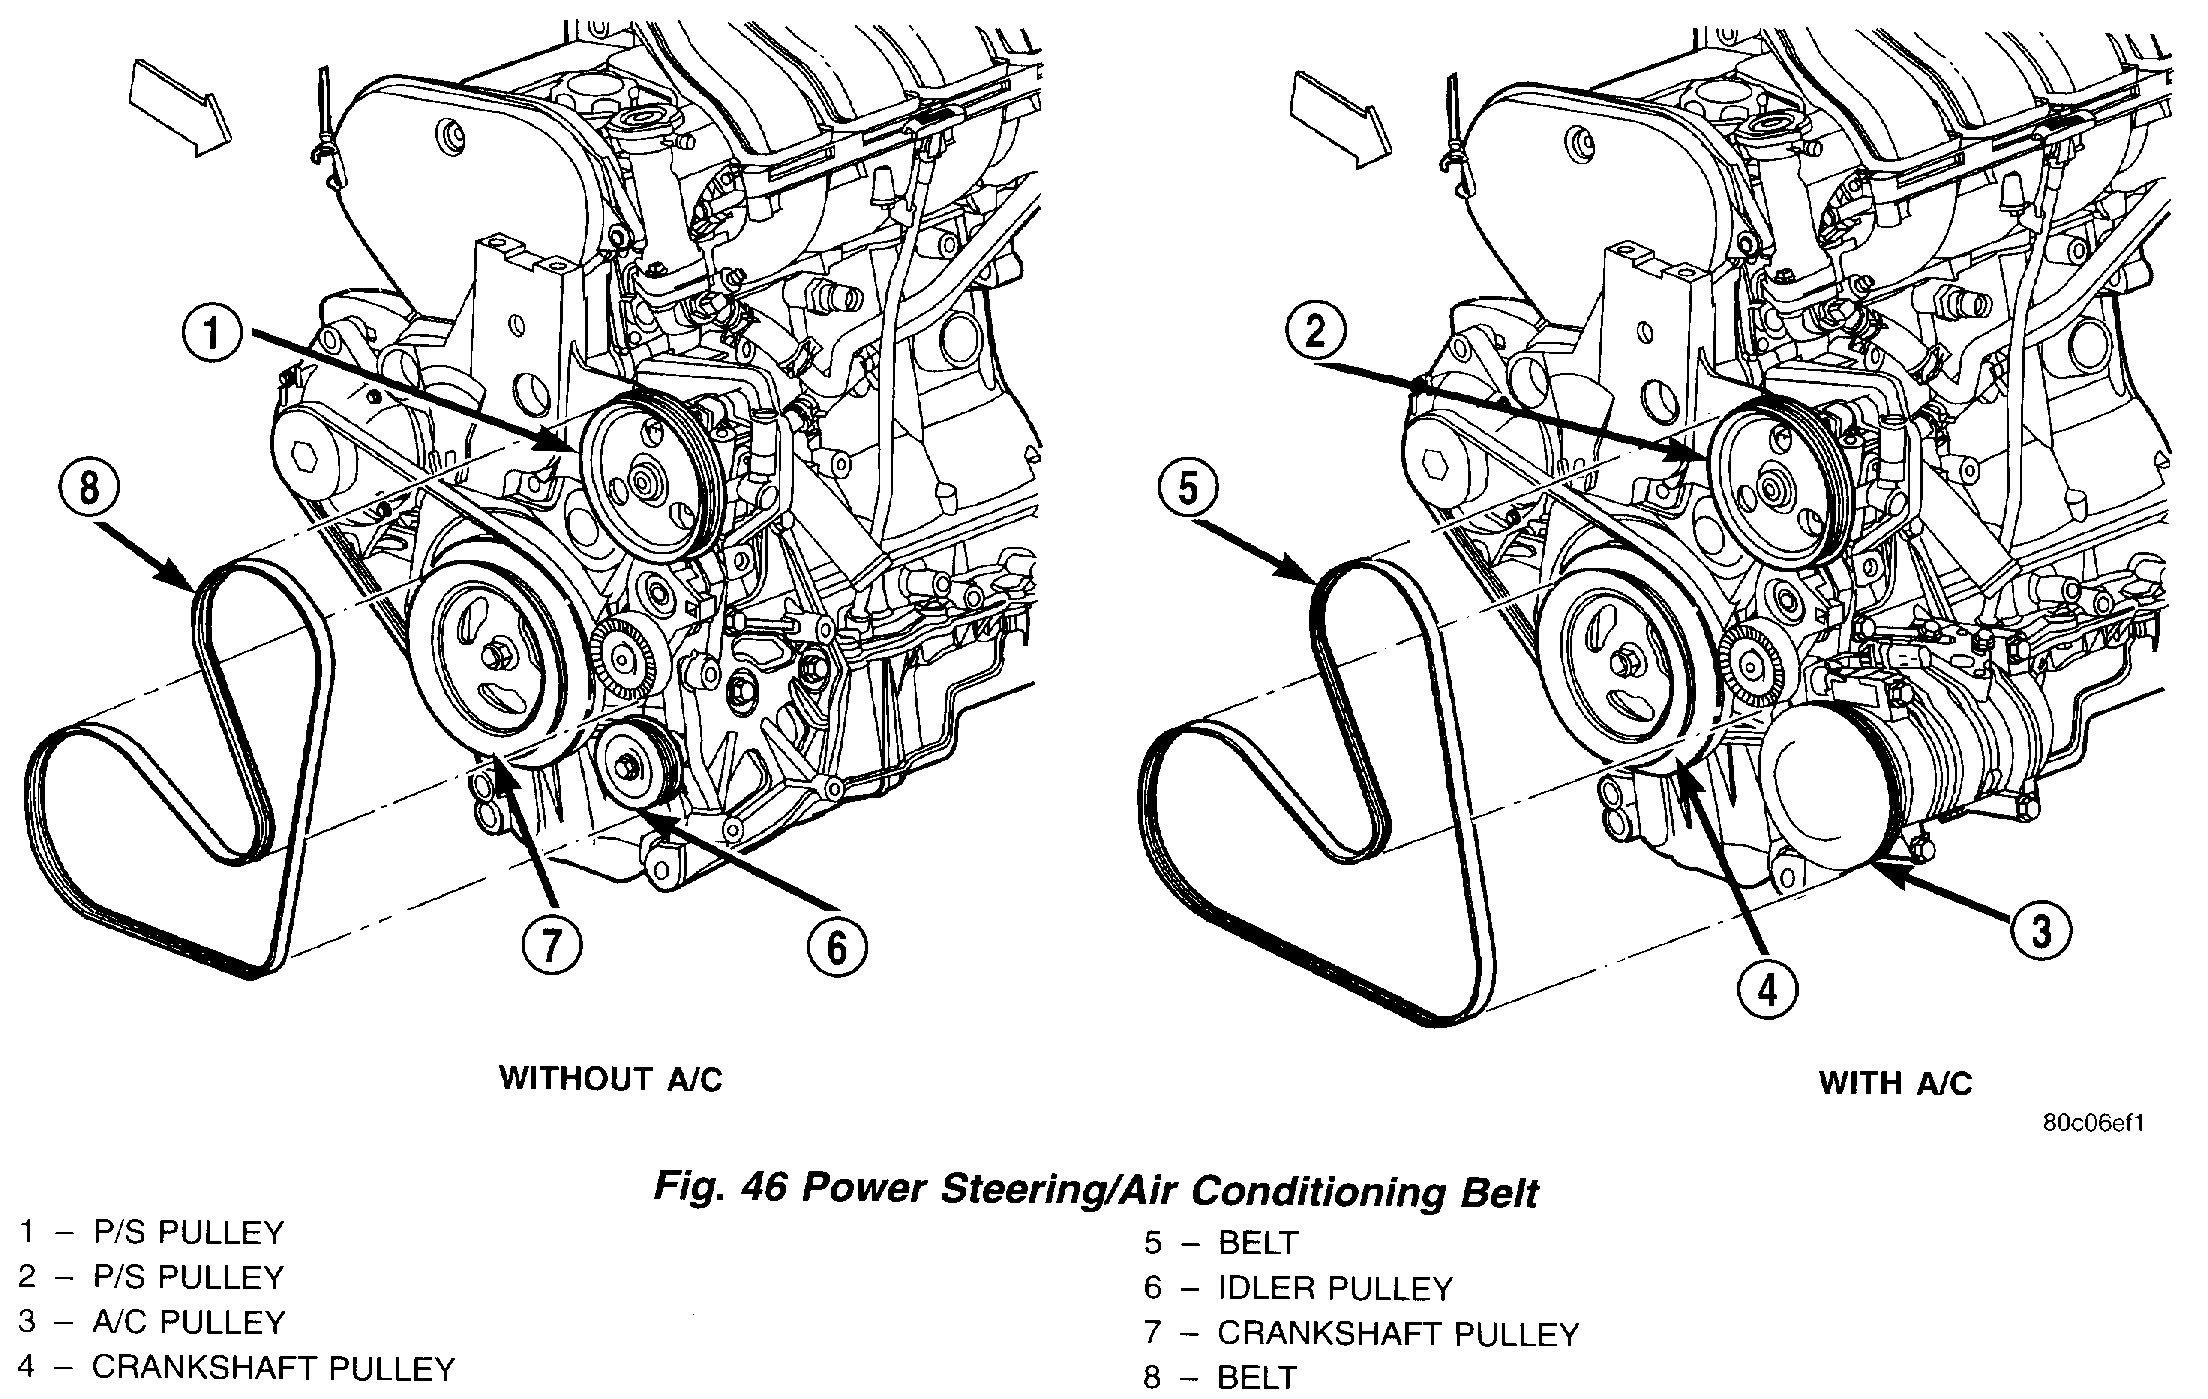
3. Remove belt (Fig. 46).
INSTALLATION
1. Install belt (Fig. 46) over all pulleys except for the power steering pump pulley.
2. Using a wrench, rotate belt tensioner clockwise (Fig. 45) until belt can be installed onto power steering pulley. Release spring tension onto belt.
NOTE: When installing drive belt onto pulleys, make sure that belt is properly routed and all V-grooves make proper contact with pulley grooves.
pic 4
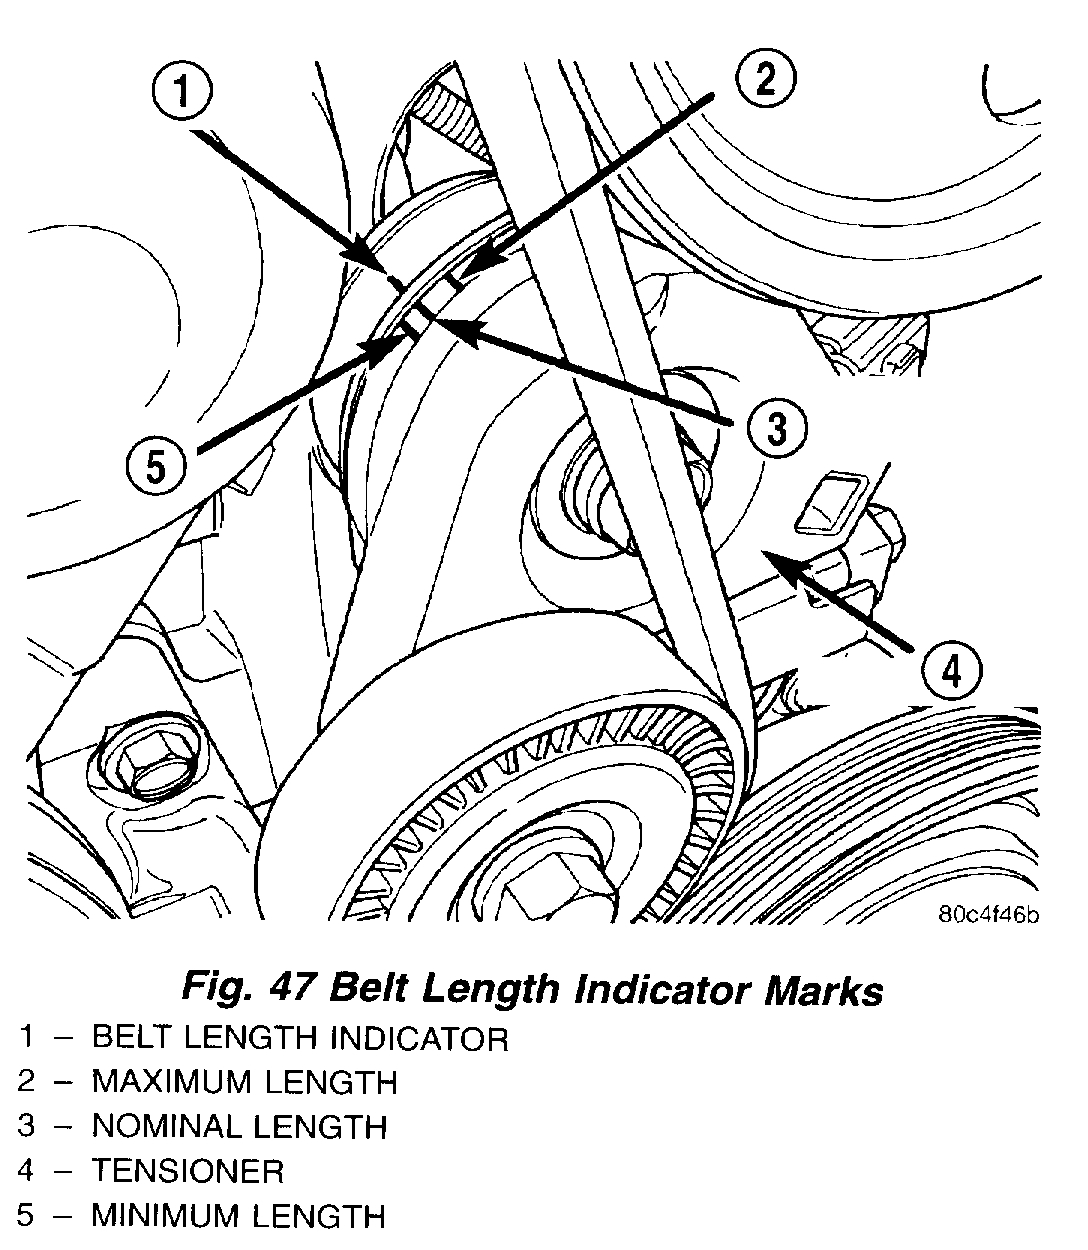
3. After belt is installed, inspect belt length indicator marks (Fig. 47). The indicator mark should be within the minimum belt length and maximum belt length marks. On a new belt, the indicator mark should align approximately with the nominal belt length mark.
4. Install belt splash shield (Fig. 44).
GENERATOR BELT
REMOVAL
1. Remove power steering pump/air conditioning compressor drive belt.
pic 5
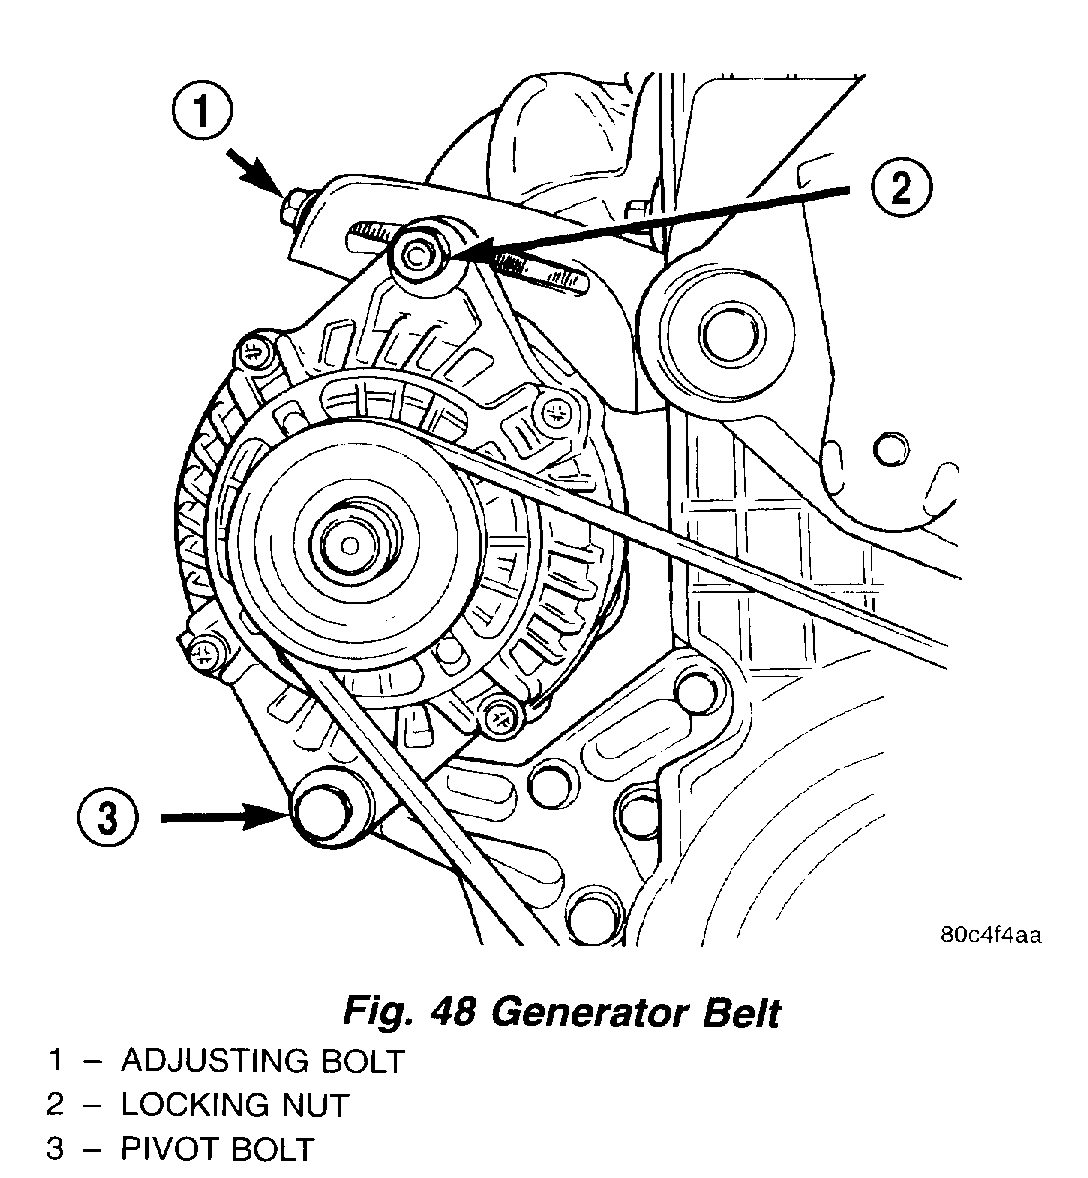
2. Loosen pivot bolt, then locking nut and adjusting bolt (Fig. 48).
3. Remove generator belt.
NOTE: When installing drive belt onto pulleys, make sure that belt is properly routed and all V-grooves make proper contact with pulley grooves.
INSTALLATION
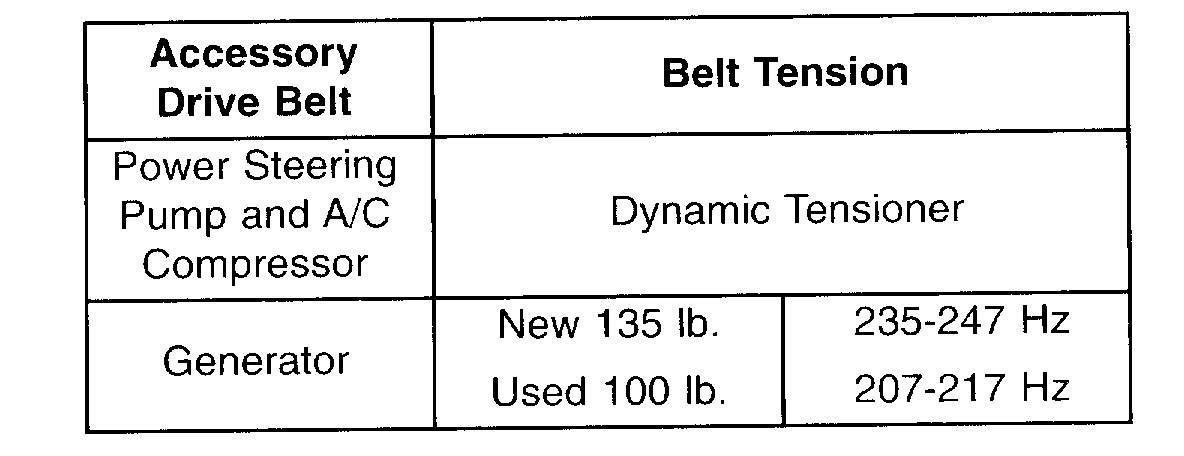
1. Install belt and/or adjust belt tension by tightening adjusting bolt. Adjust belt to specification shown in Belt Tension Chart.
2. Check belt tension using Special Tool 8371 -Belt Tension Gauge Adapter, and the DRB III using the following procedures:
WARNING: DO NOT CHECK BELT TENSION WITH ENGINE RUNNING.
a. Connect 8371 to the DRB III following the instructions provided in tool kit.
pic 6
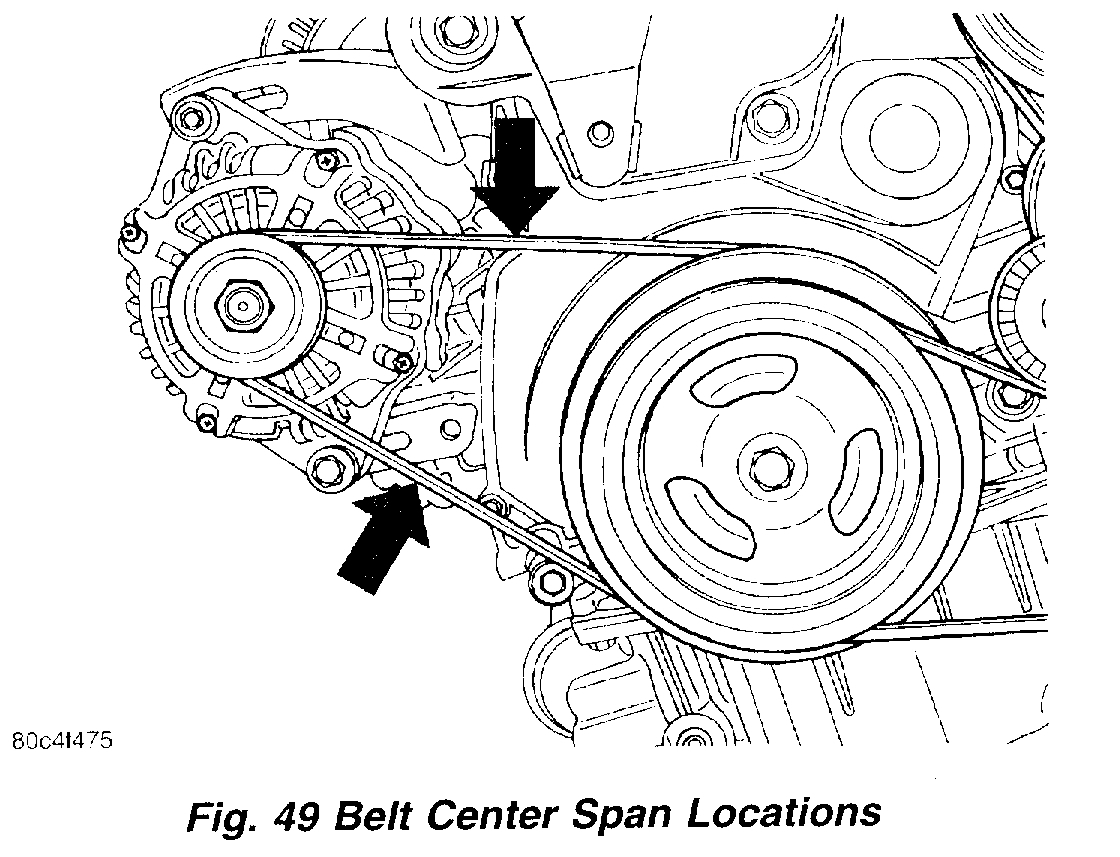
b. Place end of microphone probe approximately 2.64 cm (1 inch) from belt at one of the belt center span locations shown in (Fig. 49).
c. Pluck the belt a minimum of 3 times. (Use your finger or other suitable object)
d. The frequency of the belt in hertz (Hz) will display on DRB III screen.
e. Adjust belt to obtain proper frequency (tension). Refer to the belt tension chart for specifications.
3. Tighten pivot bolt to 54 Nm (40 ft. lbs.) and locking nut to 54 Nm (40 ft. lbs.) (Fig. 48).
4. Install power steering pump and A/C compressor drive belt.
pic 7
BELT TENSION CHART
__________________________________
Let me know if this helps or if you need anything.
Take care,
Joe
Images (Click to enlarge)
Jan 10, 2020 at 5:01 PM