Hi,
A vacuum brake booster can make an odd sound when it is bad. Oftentimes, it sounds like air escaping it when the brake pedal is pressed.
Replacing one will require that the brake master cylinder be removed and a vacuum hose to the booster.
Here are the directions specific to your vehicle for replacement. The pics below correlate with the directions.
________________________________________
2005 Pontiac Grand Prix V6-3.8L VIN 2
Procedures
Vehicle Brakes and Traction Control Power Brake Assist Vacuum Brake Booster Service and Repair Procedures
PROCEDURES
Vacuum Brake Booster Replacement (3.8L)
^ Tools Required:
- J 22805-B Power Brake Booster Holder
Removal Procedure
1. Disconnect the negative battery cable.
2. Remove the left instrument panel insulator.
3. Remove the retaining clip and disconnect the brake booster pushrod from the brake pedal.
pic 1
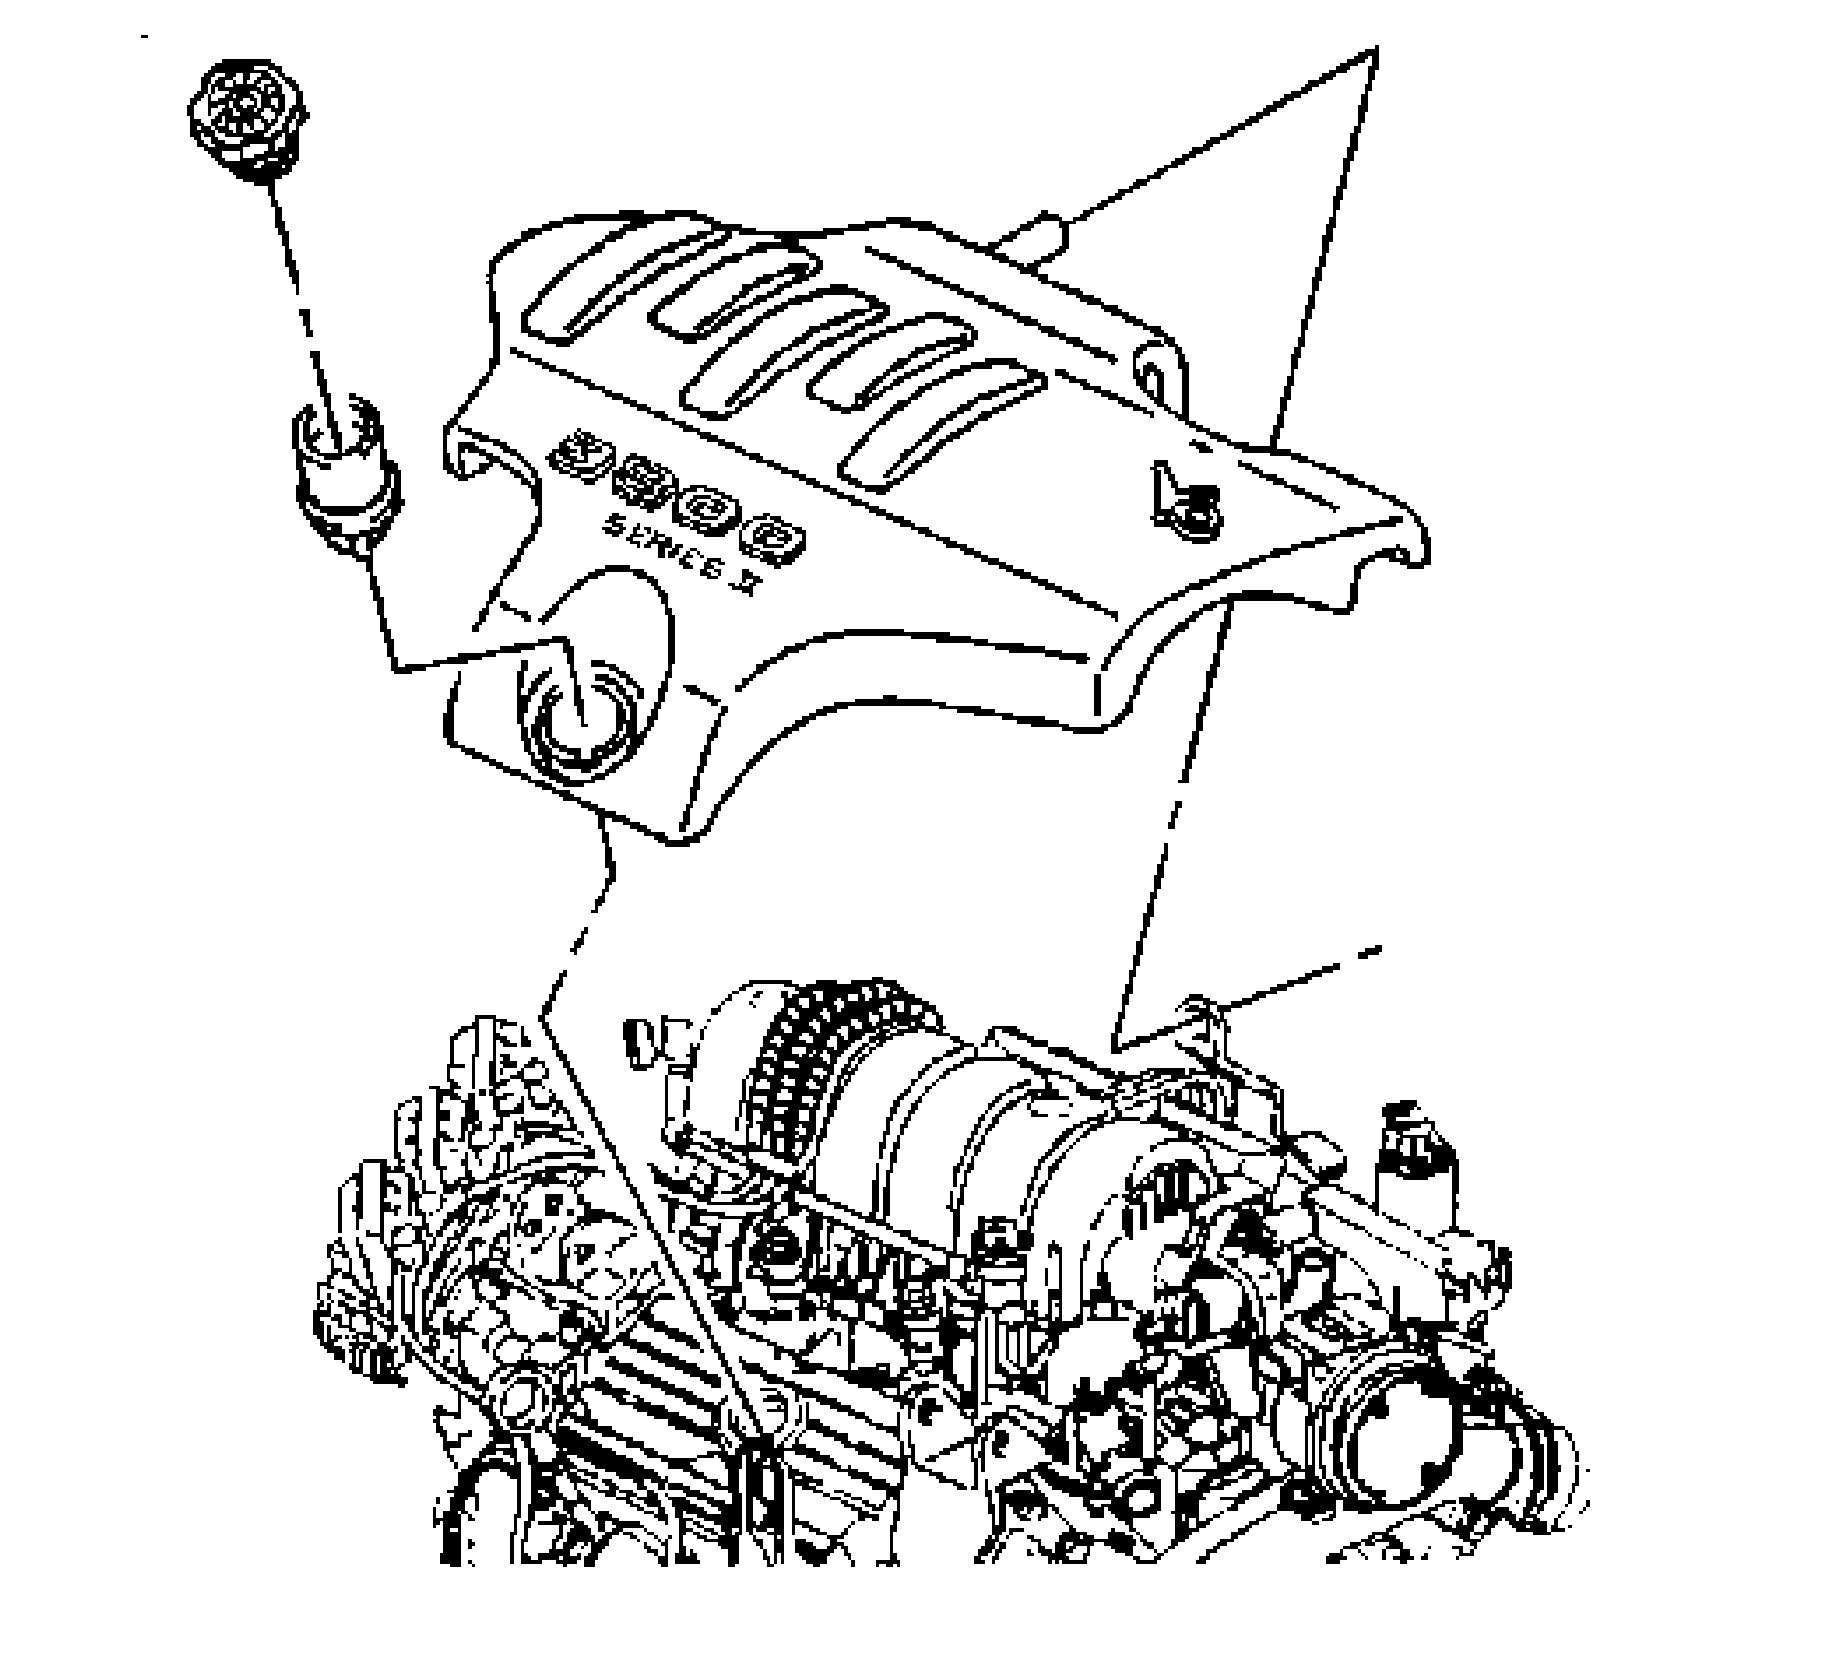
4. Remove the fuel injector sight shield.
5. Disconnect the brake fluid level sensor electrical connector from the brake fluid level sensor.
6. Important: It is not necessary to disconnect the brake pipes from the master cylinder to the BPMV.
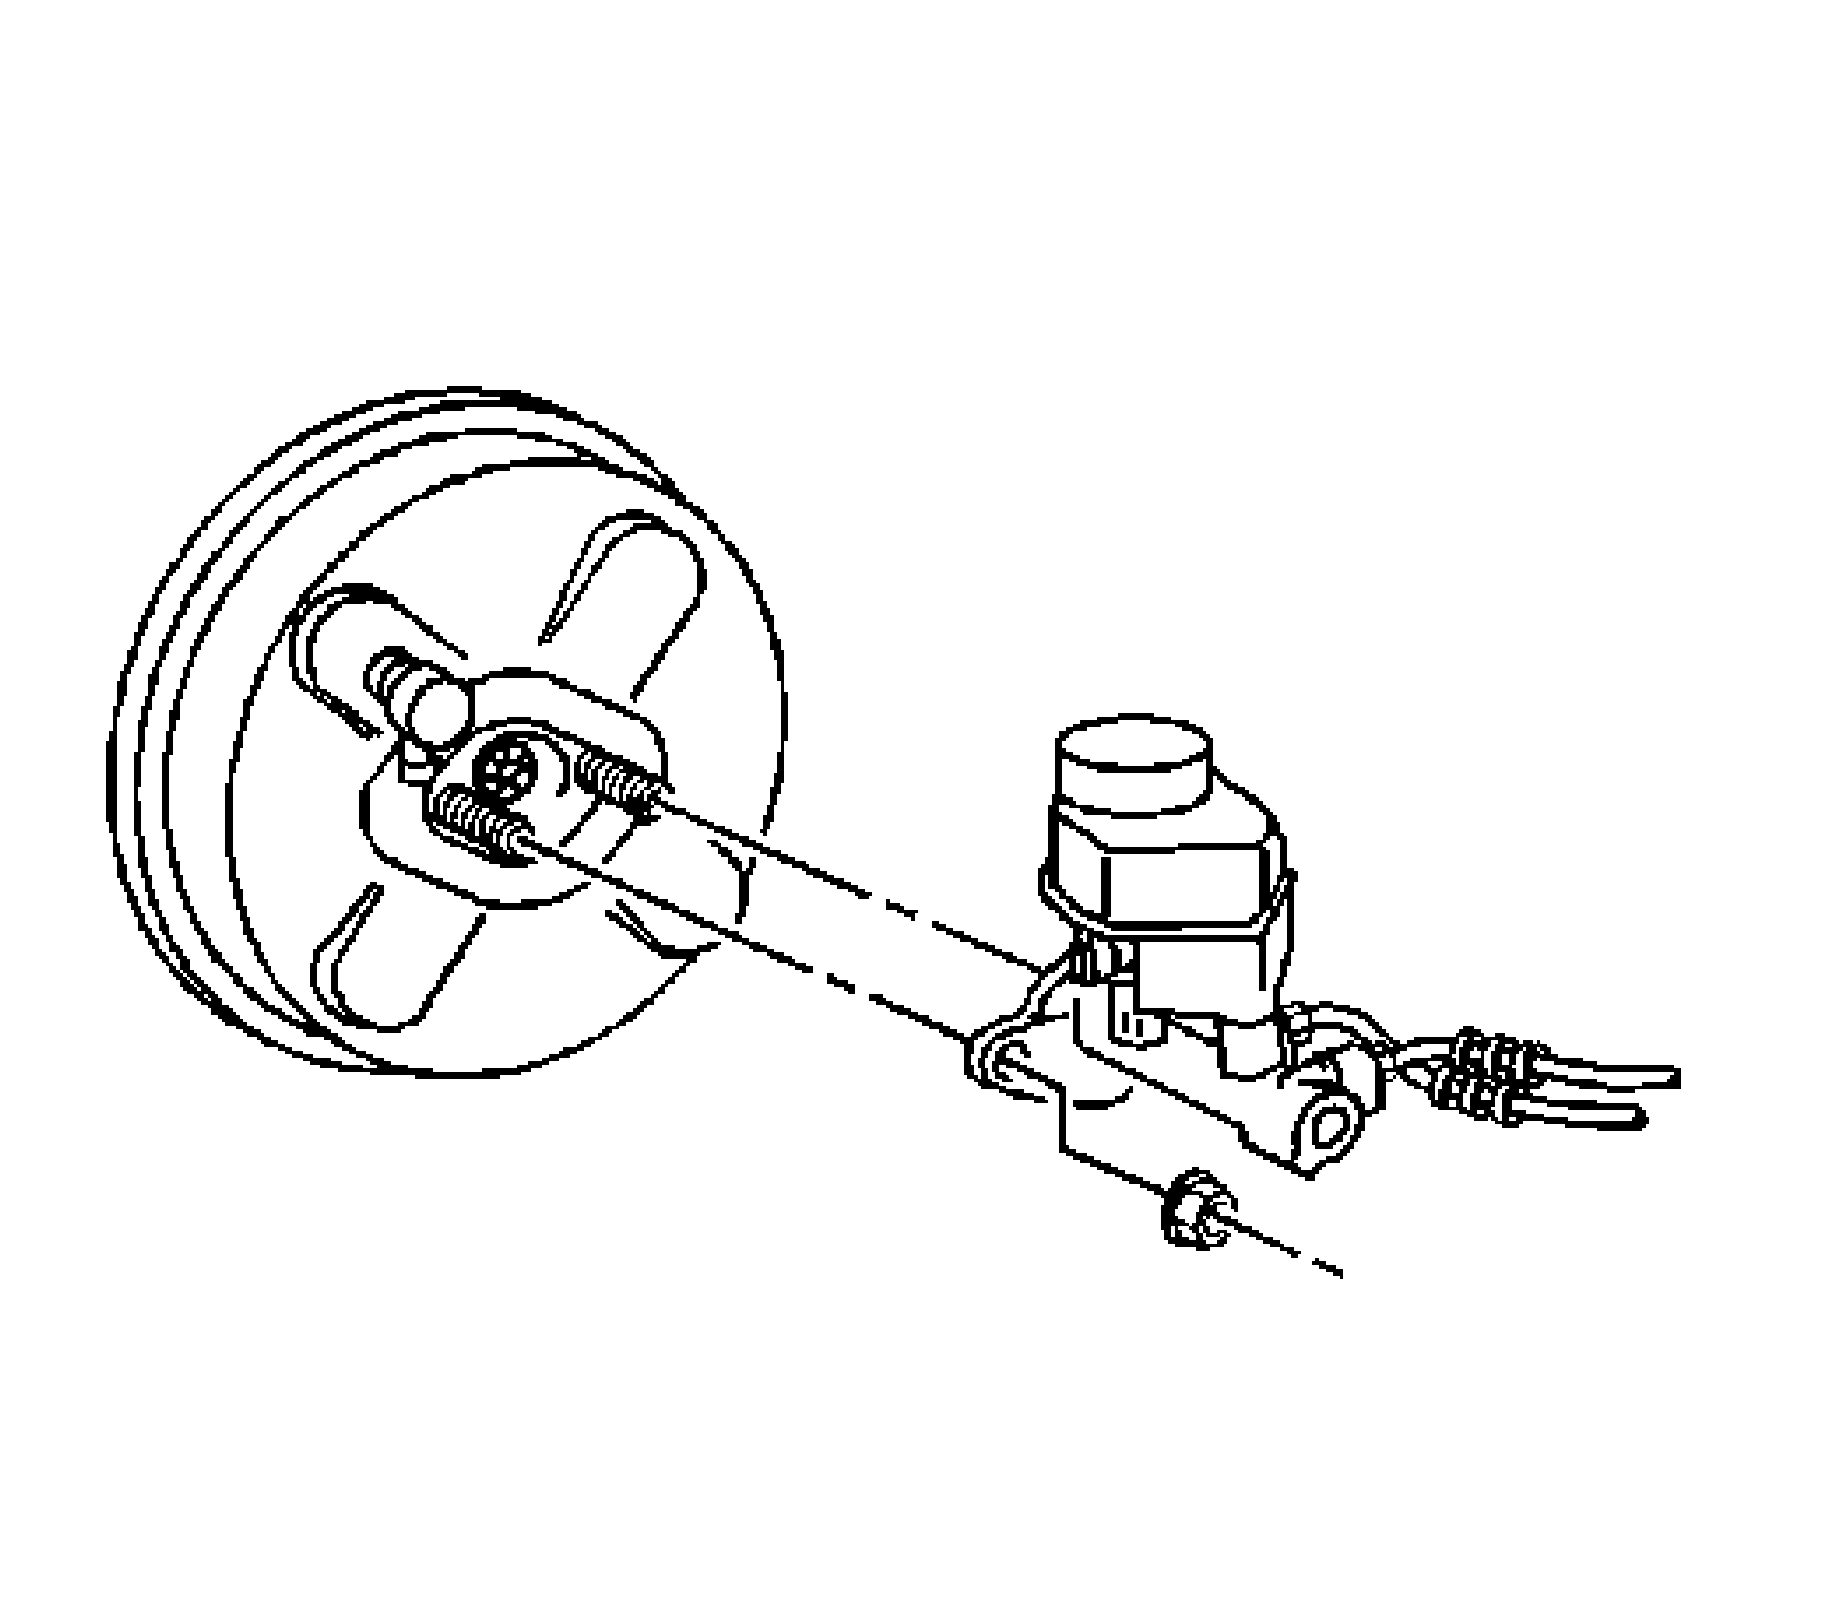
Remove the 2 master cylinder retaining nuts and position the master cylinder aside.
7. Disconnect the vacuum brake booster check valve from the brake booster. Position aside the vacuum hose and the check valve as an assembly.
8. Rotate the engine forward for service access.
pic 2
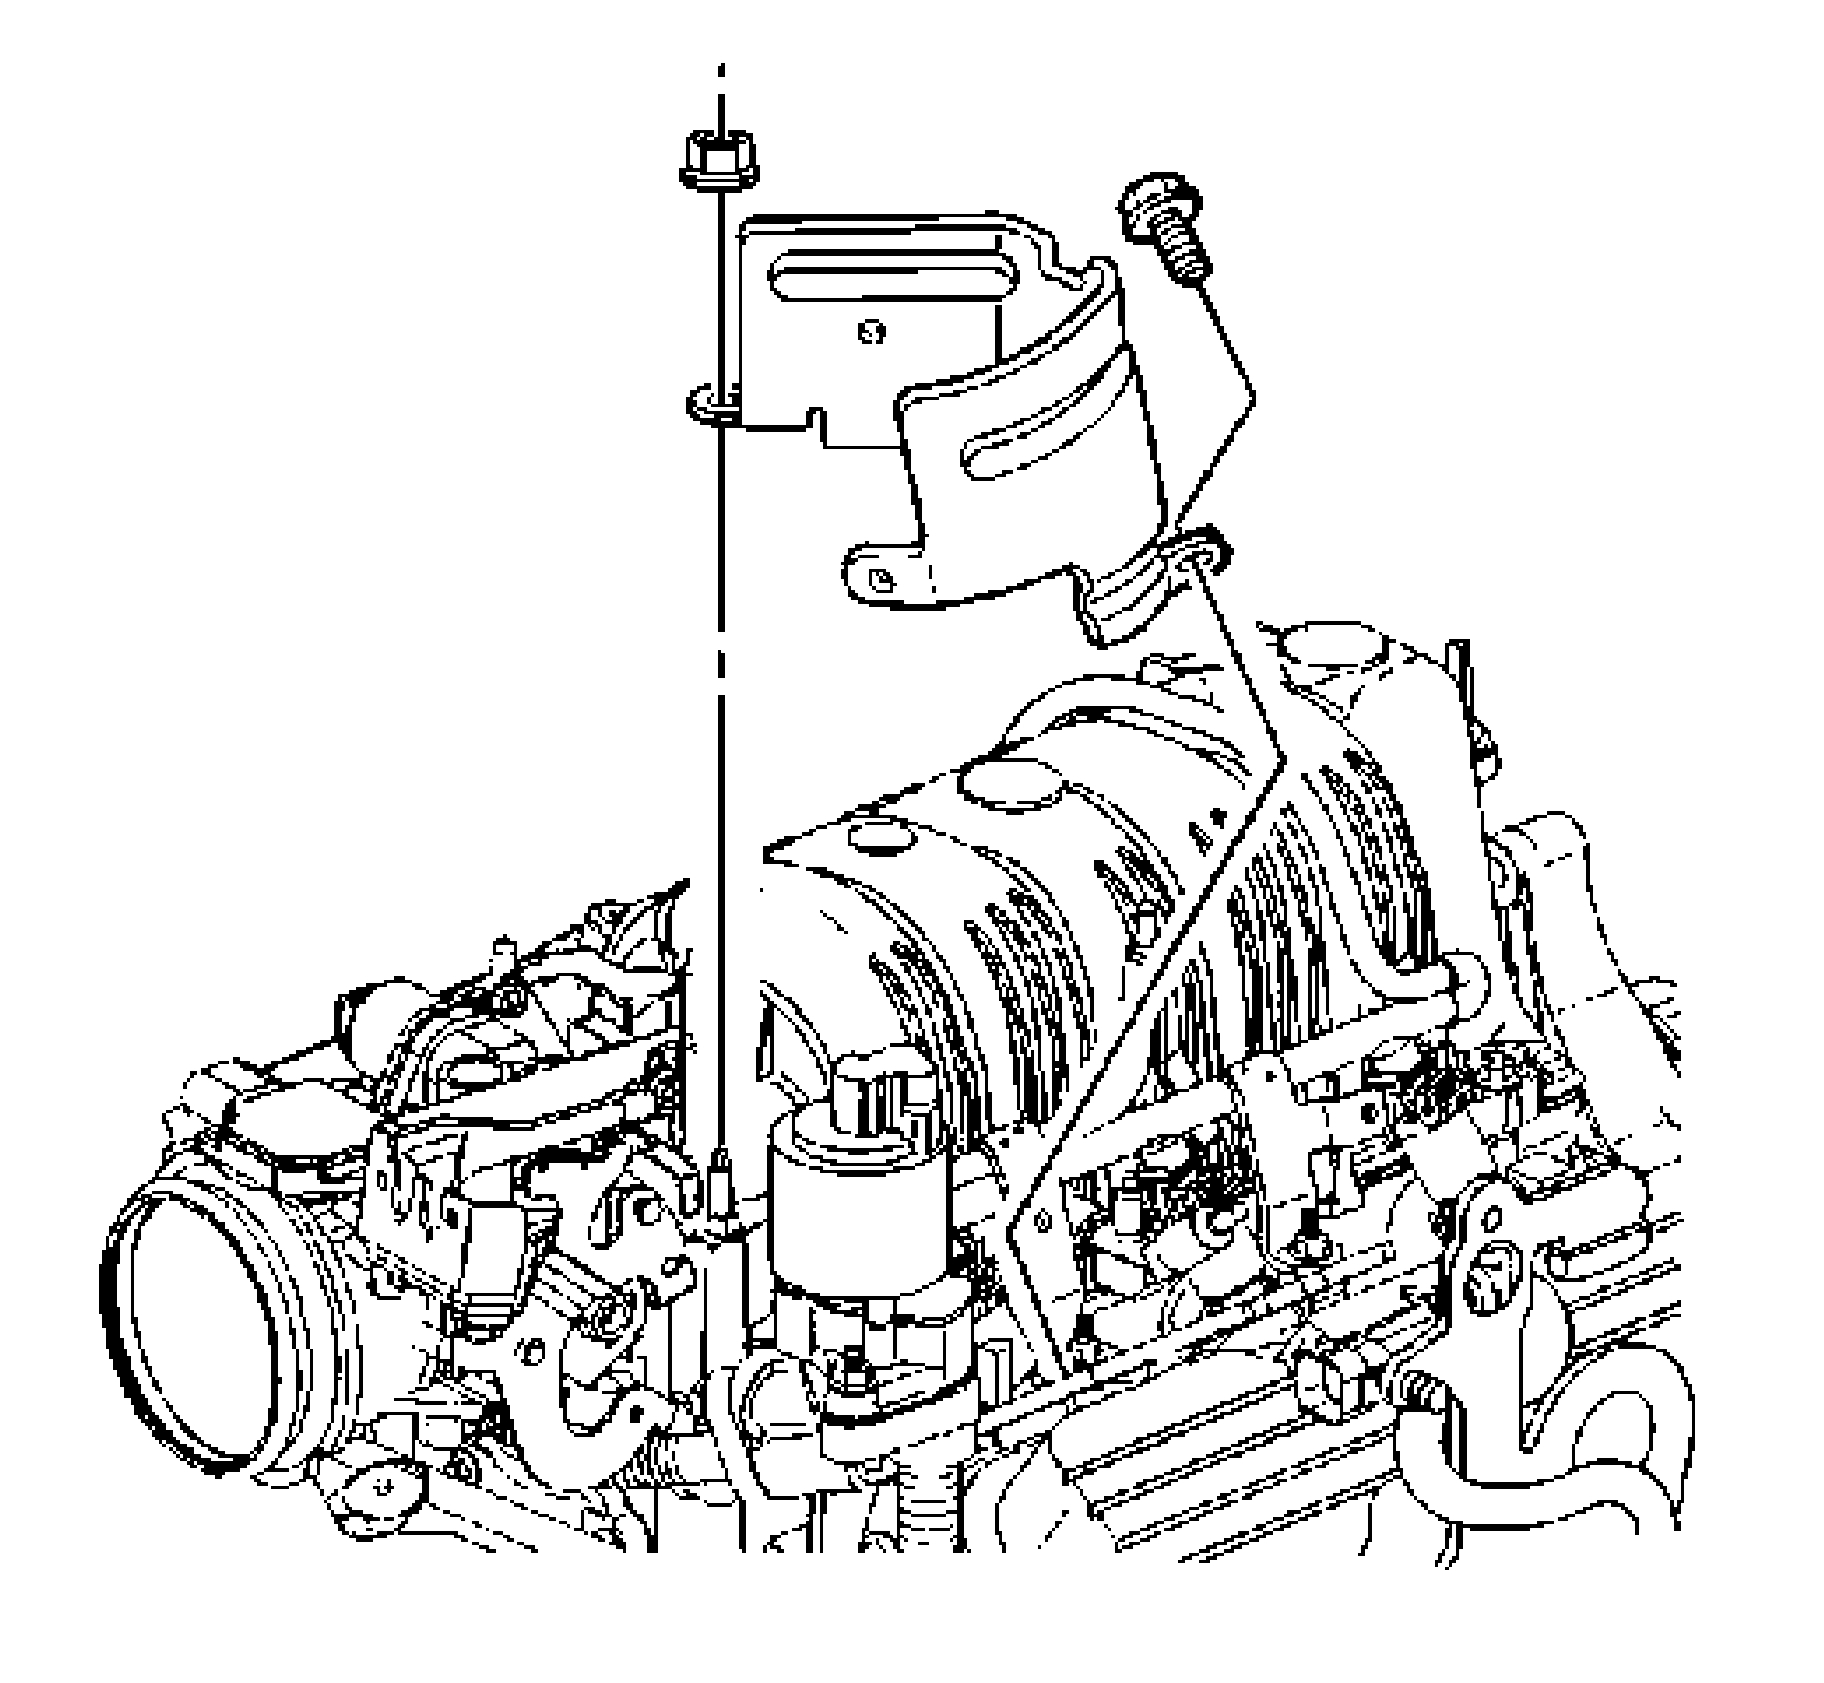
9. Remove the EGR valve wiring harness heat shield.
10. Remove the EGR valve.
11. Remove the transmission fluid filler tube bracket retainer and position the filler tube aside.
12. Remove the brake pressure modulator valve.
13. Attach the J 22805-B to the booster using the master cylinder retaining nuts.
pic 3
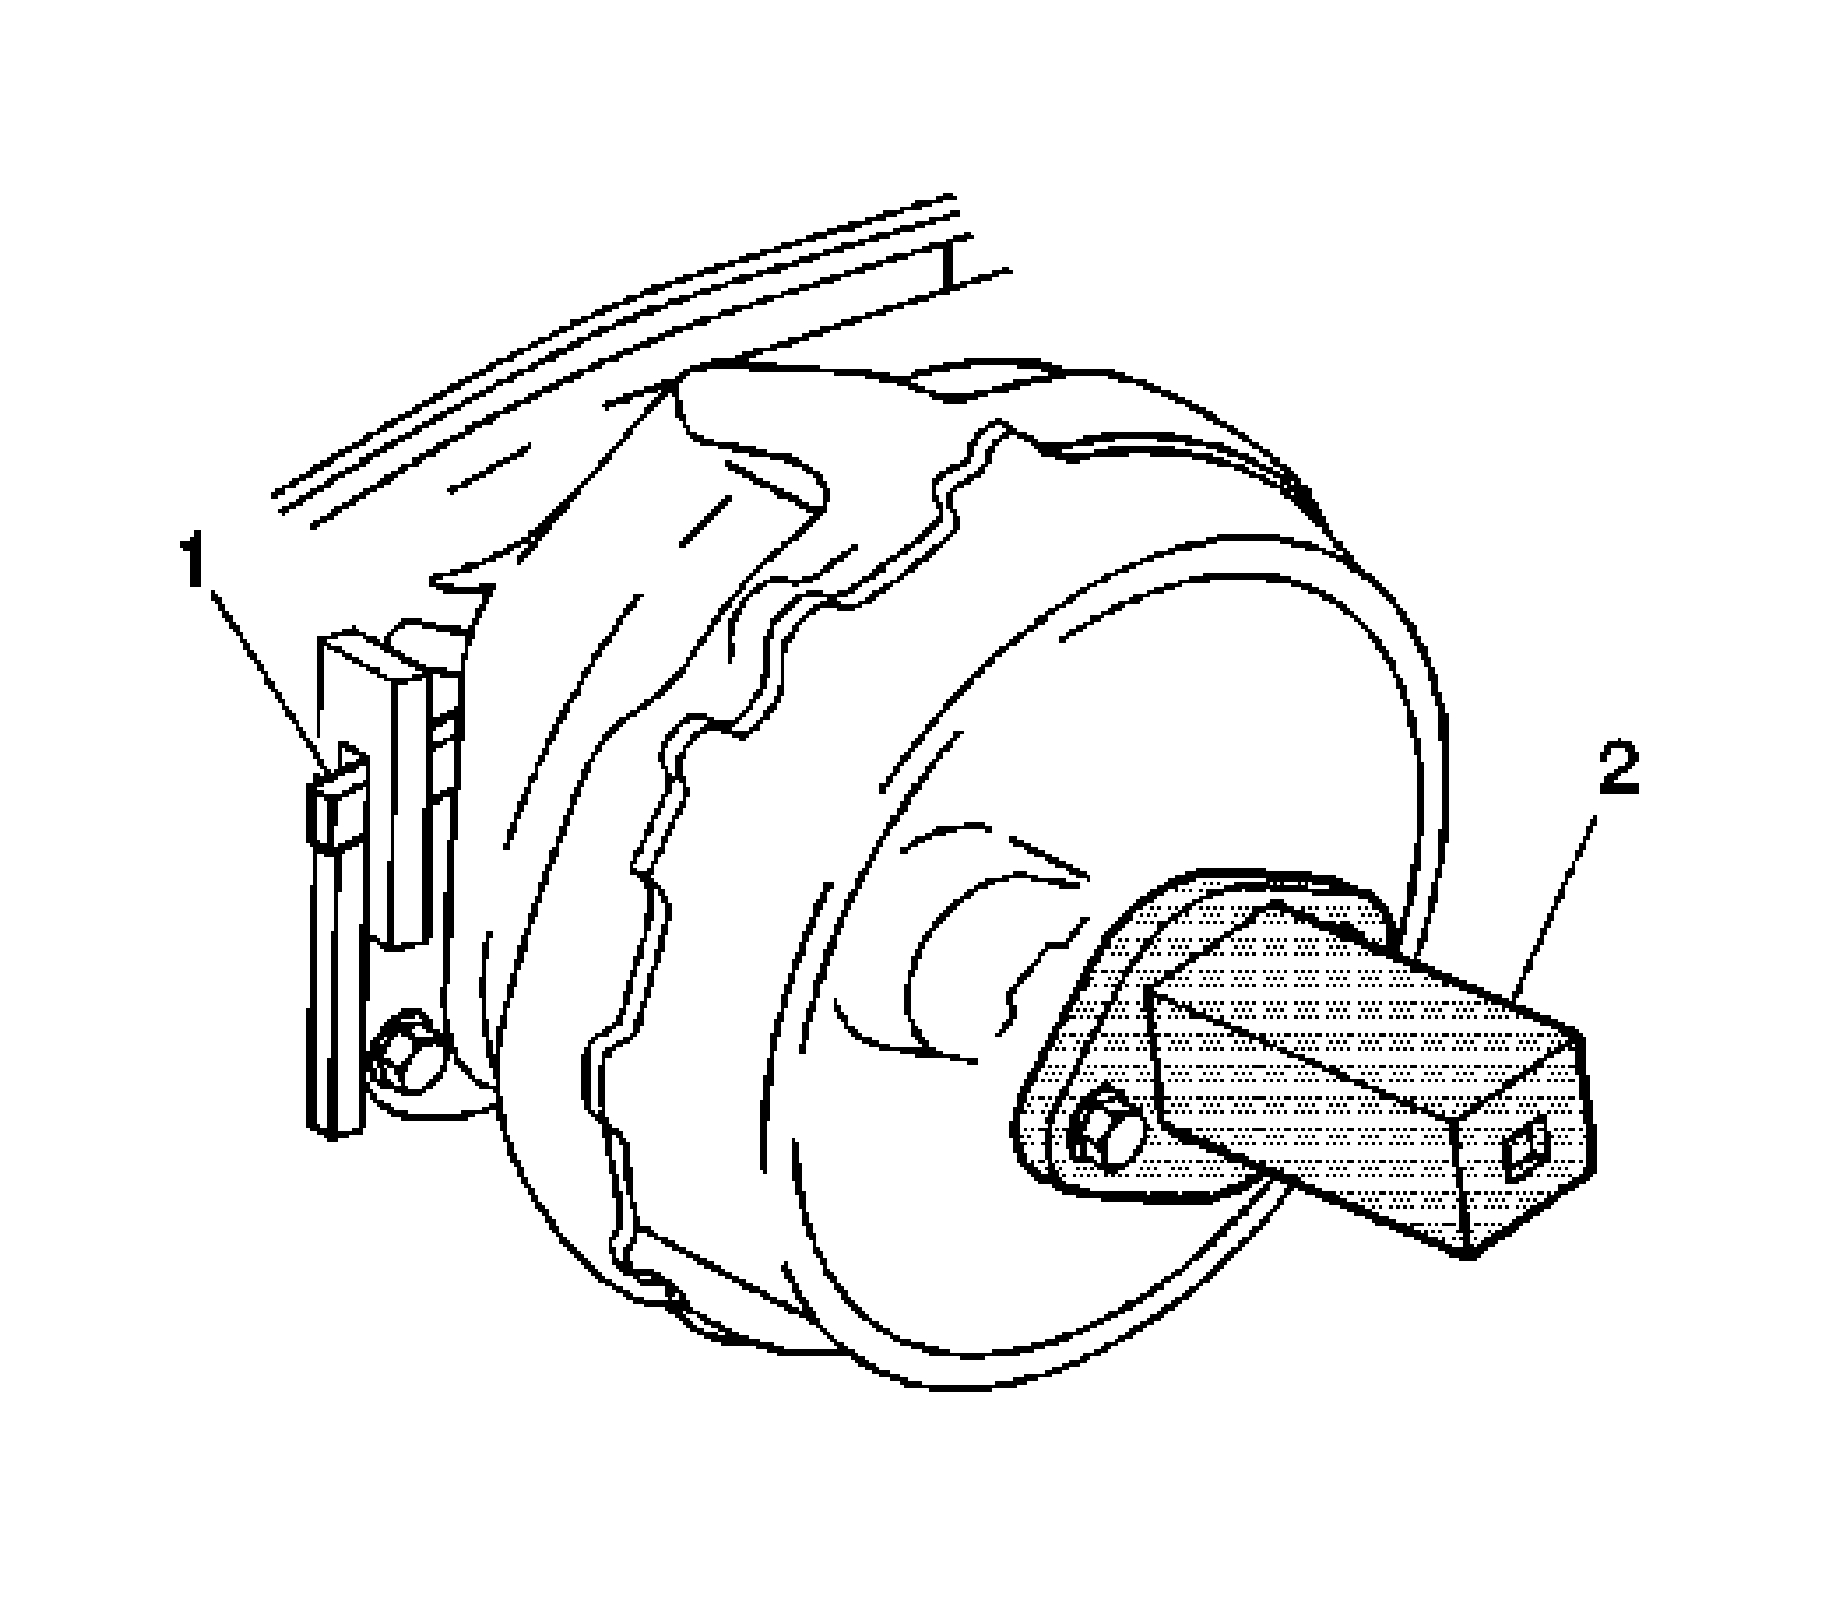
14. Unlock the booster from the front of the cowl.Use a flat bladed tool to depress the brake booster locking tab (1) out of the cowl mounting flange, while turning the booster counterclockwise with a ratchet on the J 22805-B (2).
15. Remove the vacuum brake booster.
16. Remove the J 22805-B (2) from the booster.
Installation Procedure
Notice: Internal components of this booster are not serviceable. The housing must not be unstaked and separated. Separating the housing will cause permanent deformation, preventing the booster from holding proper volume.
Notice: Inspect the locking flanges on booster and mounting plate. Replace the booster and mounting plate if the locking flanges are bent or damaged.
1. Install the vacuum brake booster.Position the vacuum brake booster on the cowl counterclockwise from the final installation position so that the locking flanges on the vacuum brake booster and on the cowl mounting flange engage.
pic 4
2. Important: Ensure that the locking tab and the flanges are in the fully engaged position.
Turn the vacuum brake booster clockwise with a ratchet on the J 22805-B (2). DO NOT use a flat bladed tool in the locking tab to install the vacuum brake booster. When the vacuum brake booster is correctly installed, the locking tab (1) slides up the flange and engages the locking notch.
3. Remove the J 22805-B (2) from the installed vacuum brake booster.
4. Install the brake pressure modulator valve.
5. Install the transmission fluid filler tube bracket retainer and reposition the filler tube.
6. Install the EGR valve.
pic 5
7. Notice: Refer to Fastener Notice in Service Precautions.
Install the EGR valve wiring harness heat shield.
Tighten the EGR valve wiring harness heat shield nut and bolt to 10 Nm (89 inch lbs.).
8. Return the engine to the original rest position. Install the left and right engine mount struts.
9. Reposition and connect the vacuum hose and check valve assembly to the booster.
pic 6
10. Reposition the master cylinder onto the booster and install the master cylinder retaining nuts.
Tighten the master cylinder retaining nuts to 33 Nm (24 ft. lbs.).
11. Connect the brake fluid level sensor electrical connector to the brake fluid level sensor.
pic 7
12. Install the fuel injector sight shield.
13. Connect the brake booster pushrod to the brake pedal and install the retaining clip.
14. Install the left instrument panel insulator.
15. Connect the negative battery cable.
______________________
I hope this helps. Let me know if you have other questions.
Take care and God Bless,
Joe
Images (Click to enlarge)
Mar 10, 2021 at 8:54 PM