Welcome to 2CarPros.
It could be several things. However, you must keep in mind, the mileage on the vehicle does play a role in it. When you get that many miles, rings start wearing in the engine and compression starts changing. Less power and lower MPG are usually the result.
With that in mind, if the vehicle hasn't been tuned up in a long time, you may want to consider it. Also, check the air filter to make sure it isn't dirty. Excessive dirt in it can restrict air to the engine and cause it to use more gas.
Keep in mind too, the timing chain may have stretched and ignition timing could be slightly off causing these symptoms.
Here are a couple links you may find helpful. If you have already done this, let me know and we'll move on.
https://www.2carpros.com/articles/how-to-replace-a-car-air-filter
https://www.2carpros.com/articles/how-to-tune-up-a-car-engine
___________________________________________________-
If you decide the timing chain may be an issue (often times is you may hear a chatter or noise from it) here are the directions for replacing one. The attached pictures correlate with these directions.
_________________________________________________
Cam Chain Removal
NOTE: Keep the cam chain away from magnetic fields.
1. Remove the front wheels.
2. Remove the splash shield and the engine undercover.
3. Remove the drive belt.
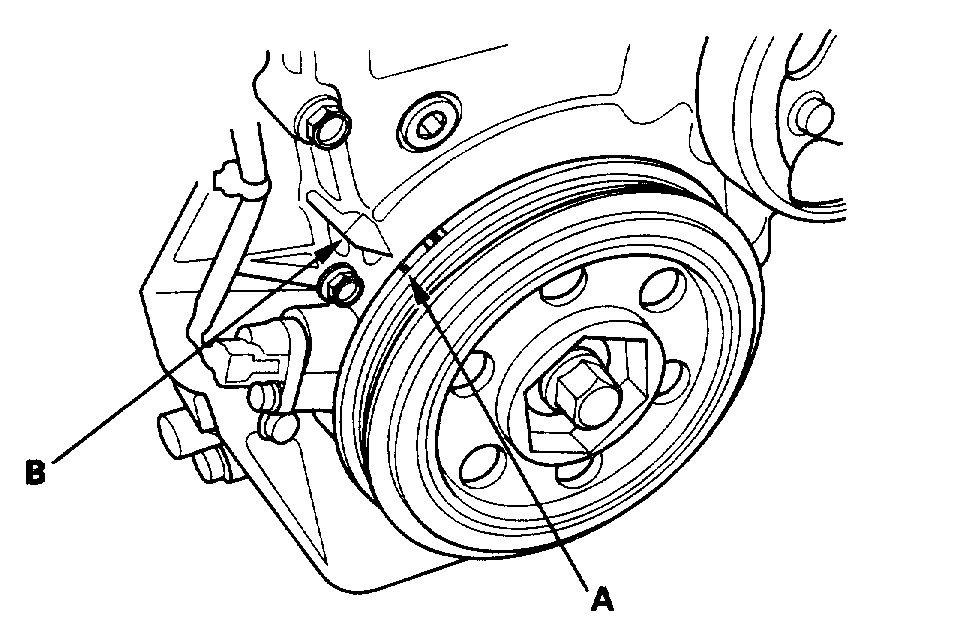
4. Turn the crankshaft pulley so its top dead center (TDC) mark (A) lines up with the pointer (B).
pic 1
5. Remove the water pump pulley.
6. Remove the cylinder head cover.
7. Remove the crankshaft pulley.
8. Remove the oil pan.
9. Support the engine with a jack and a wood block under the engine block.
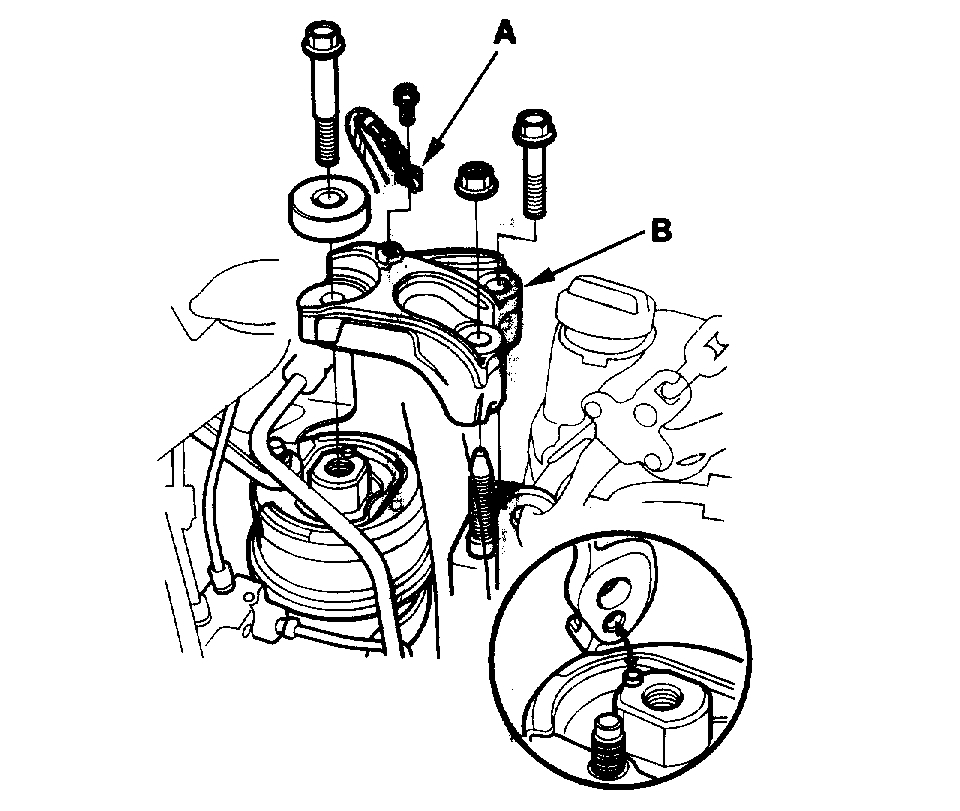
10. Remove the ground cable; (A), then remove the side engine mount bracket (B).
pic 2
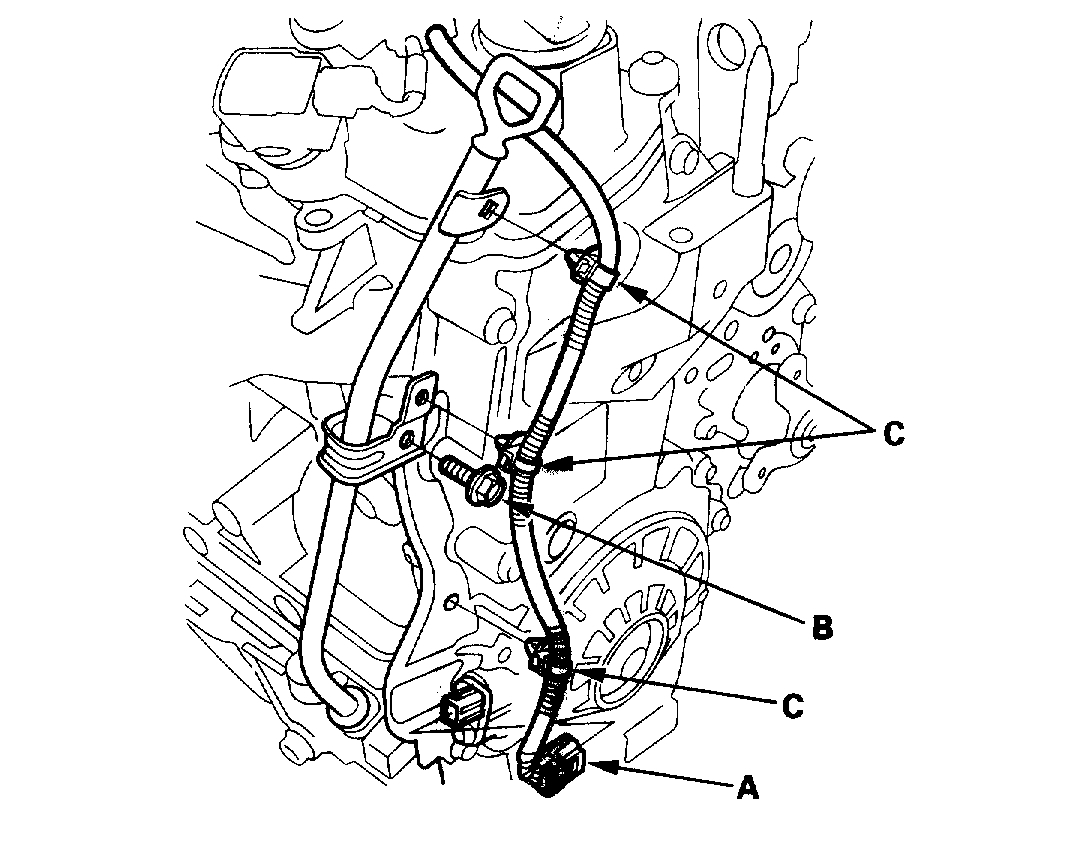
11. Disconnect the crankshaft position (CKP) sensor connector (A), then remove the dipstick tube mounting bolt (B) and the harness clamps (C).
pic 3
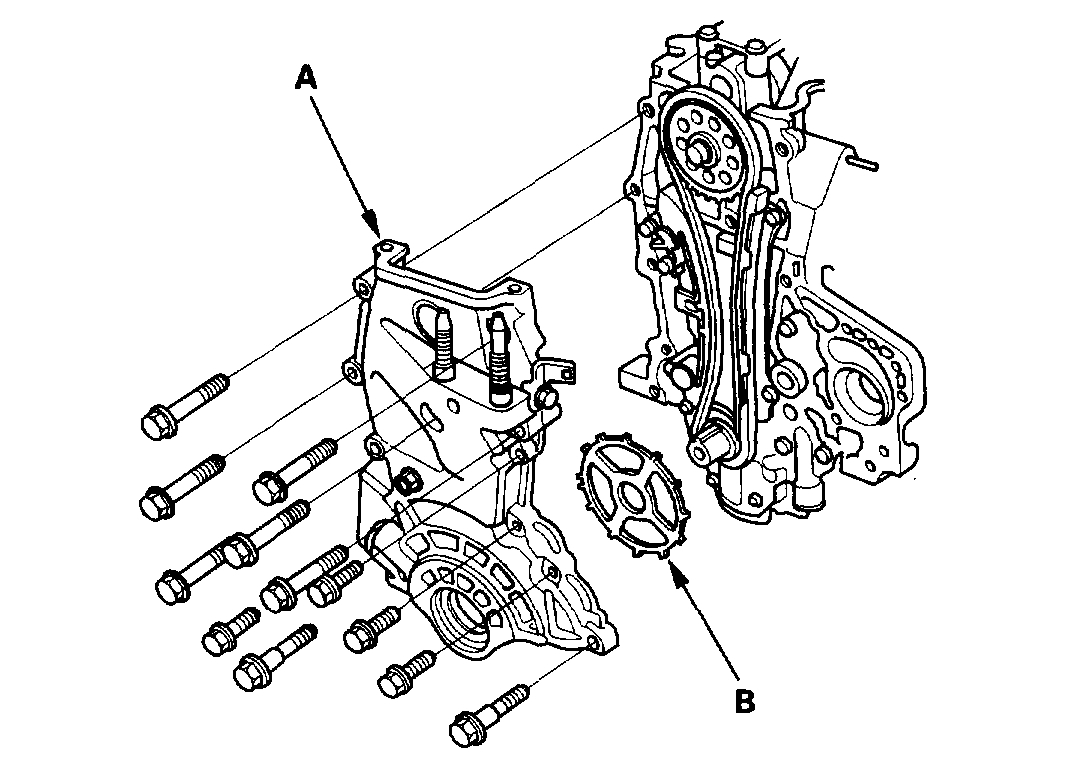
12. Remove the chain case (A), then remove the pulse plate (B).
pic 4
13. Measure the cam chain separation. If the distance is less than the service limit, replace the cam chain and the cam chain tensioner.
pic 5
14. Apply new engine oil to the sliding surface of the cam chain tensioner slider (A).
pic 6
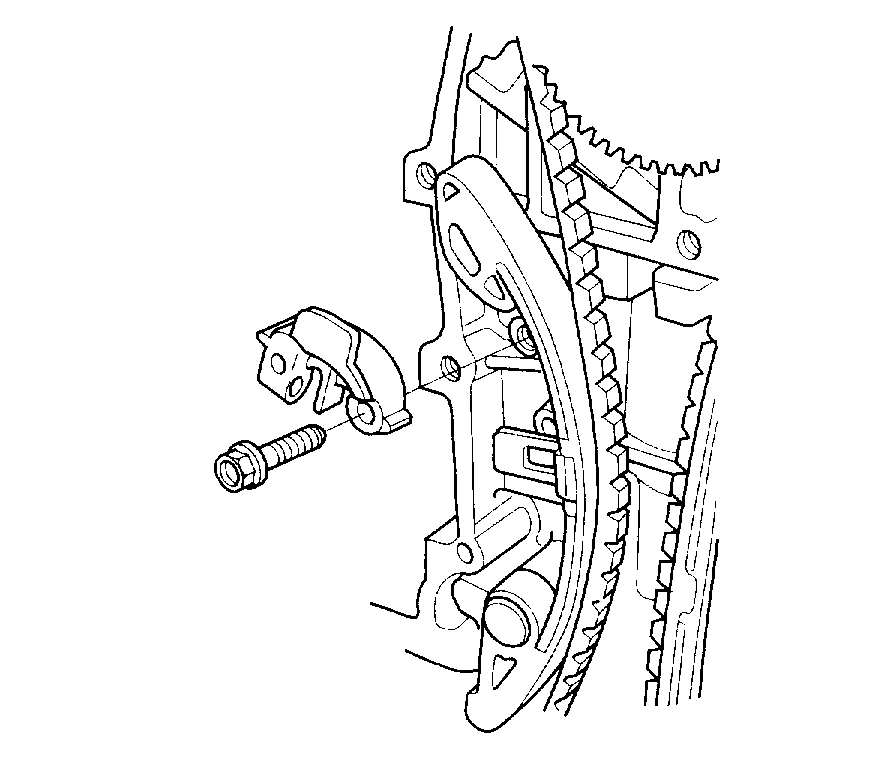
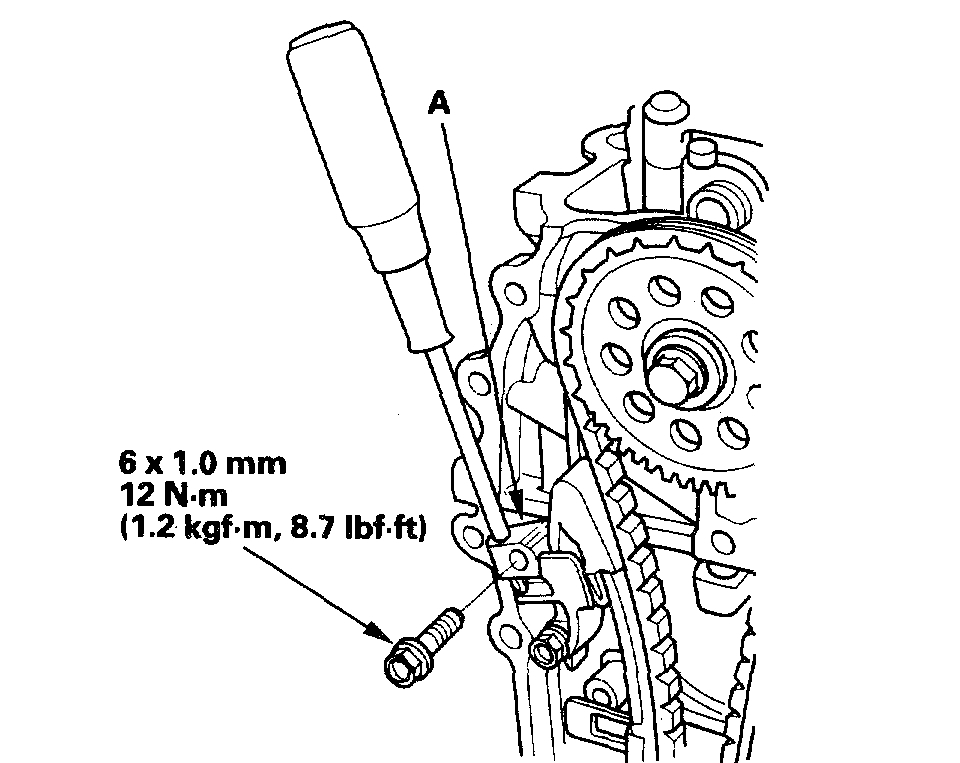
15. Hold the cam chain tensioner slider with a screwdriver, then remove the bolt (B), and loosen the bolt (C).
16. Remove the cam chain tensioner slider.
pic 7
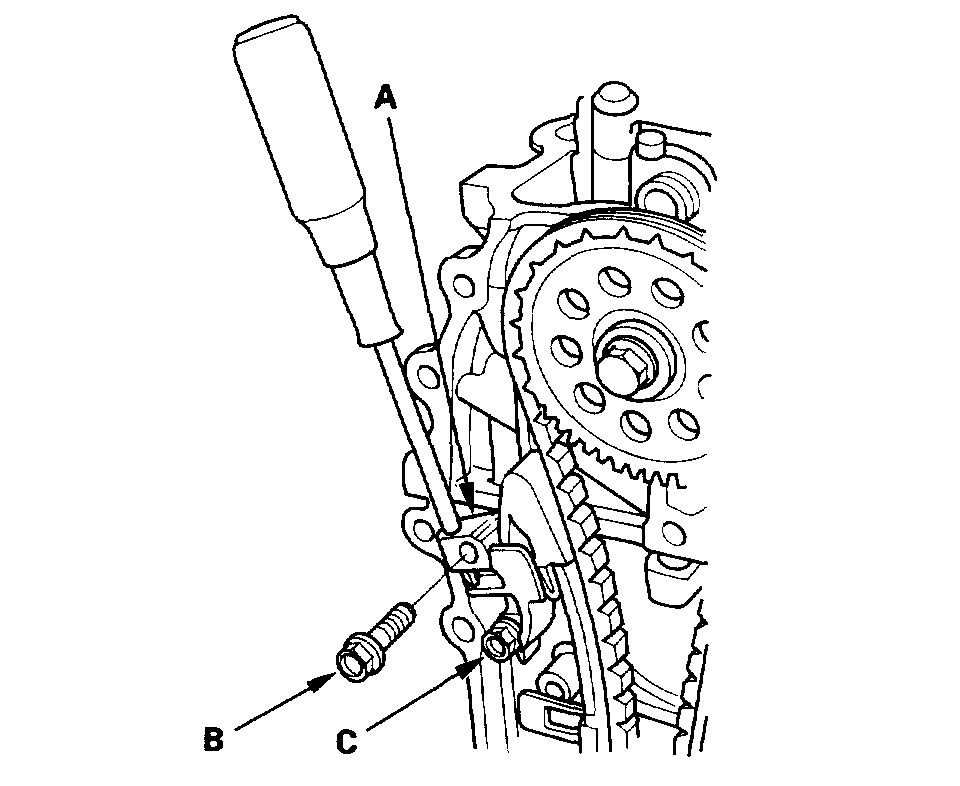
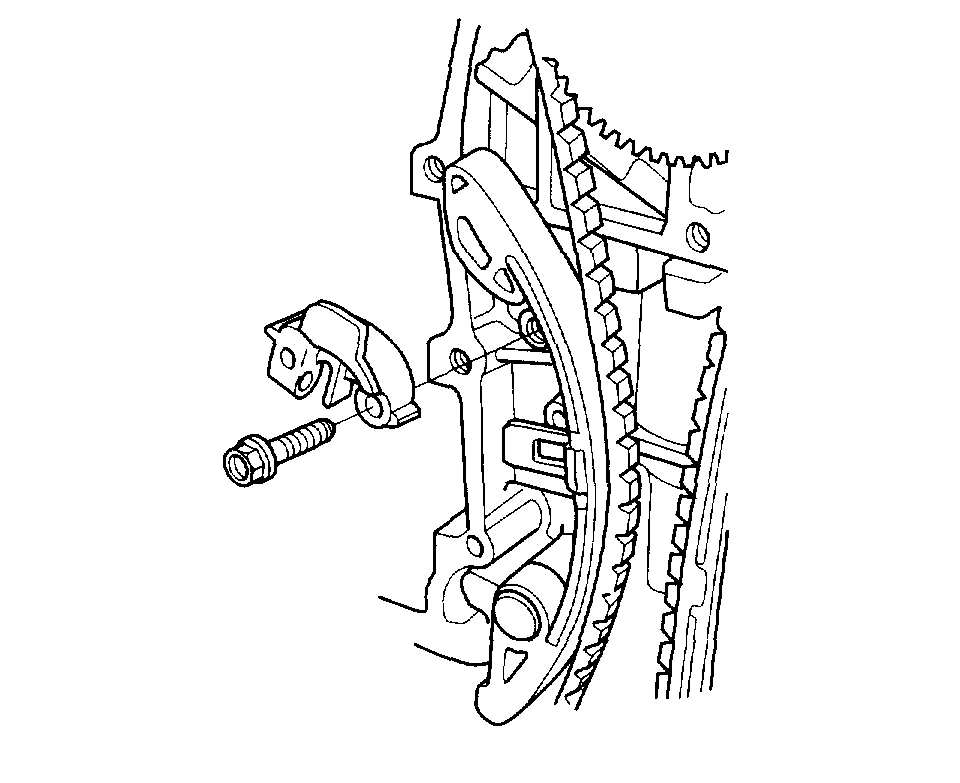
17. Remove the cam chain tensioner (A) and the cam chain guide (B).
pic 8
18. Remove the cam chain.
__________________________________________________
Cam Chain Installation
NOTE: Keep the cam chain away from magnetic fields.
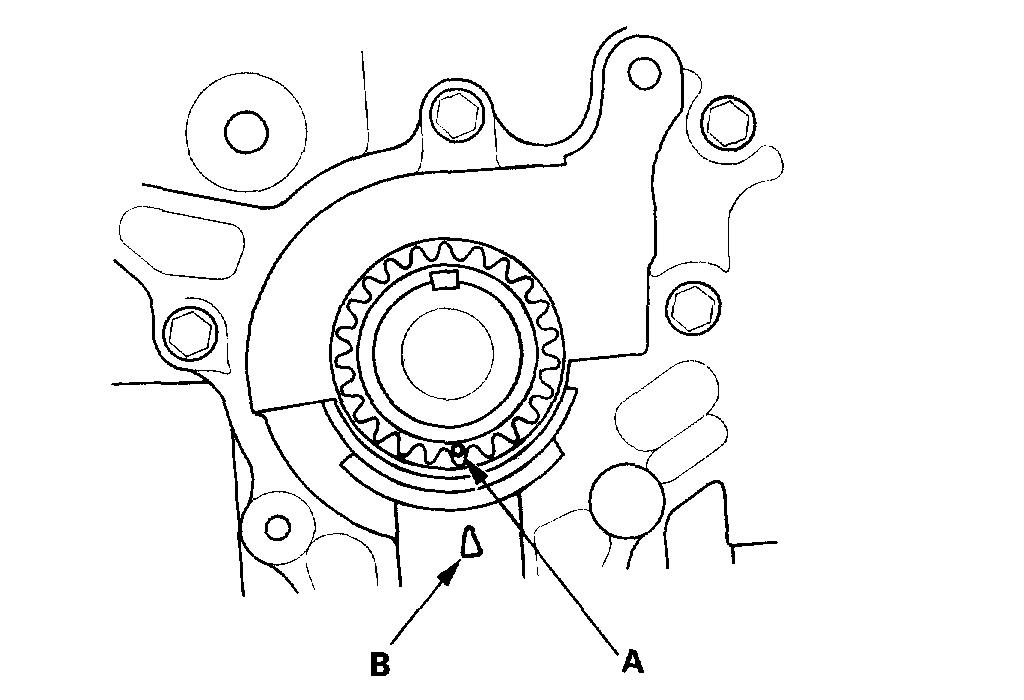
1. Set the crankshaft to top dead center (TDC). Align the TDC mark (A) on the crankshaft sprocket with the pointer (B) on the oil pump.
pic 9
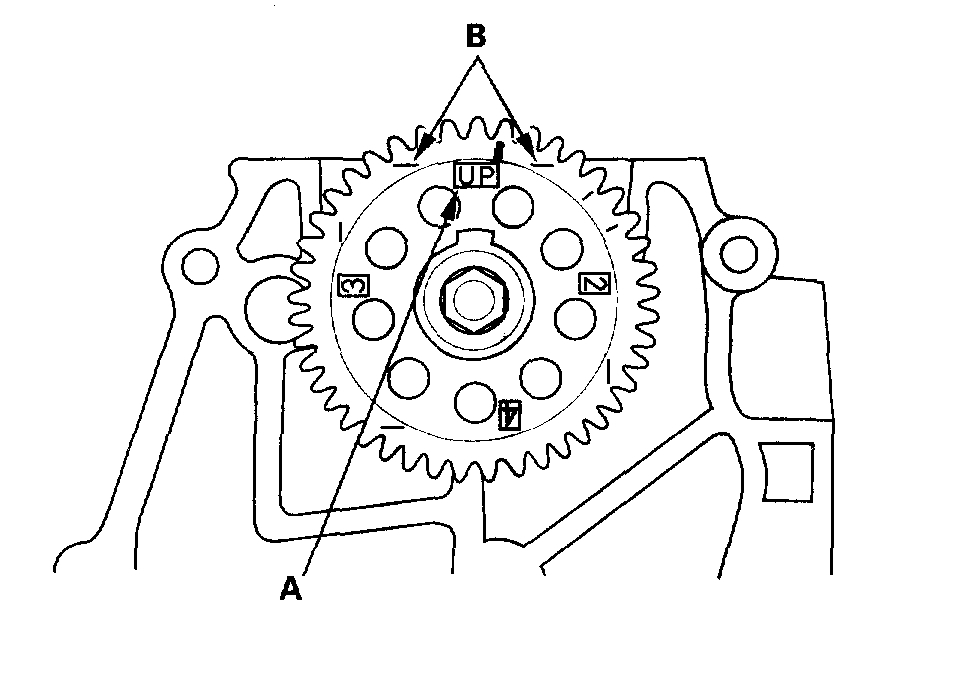
2. Set the No. 1 piston at TDC. The "UP" mark (A) on the camshaft sprocket should be at the top, and the TDC grooves (B) on the camshaft sprocket should line up with the top edge of the cylinder head.
pic 10
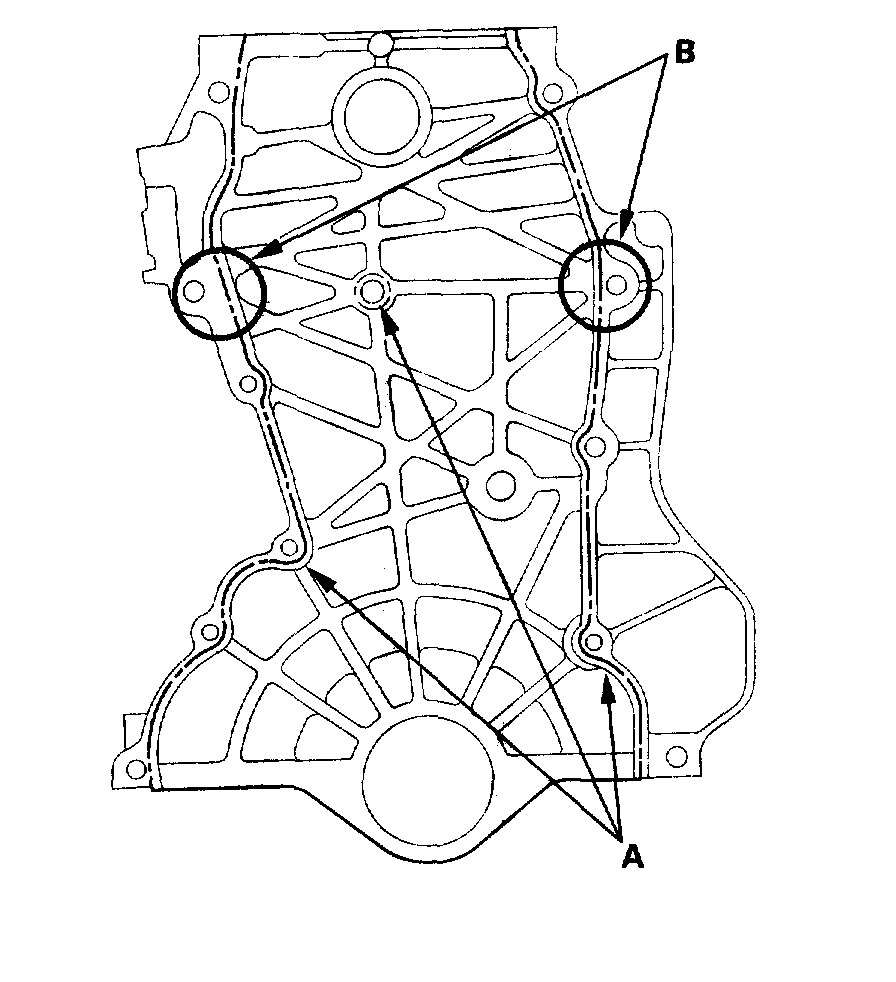
3. Install the cam chain on the crankshaft sprocket with the colored piece (A) aligned with the TDC mark (B) on the crankshaft sprocket.
pic 11
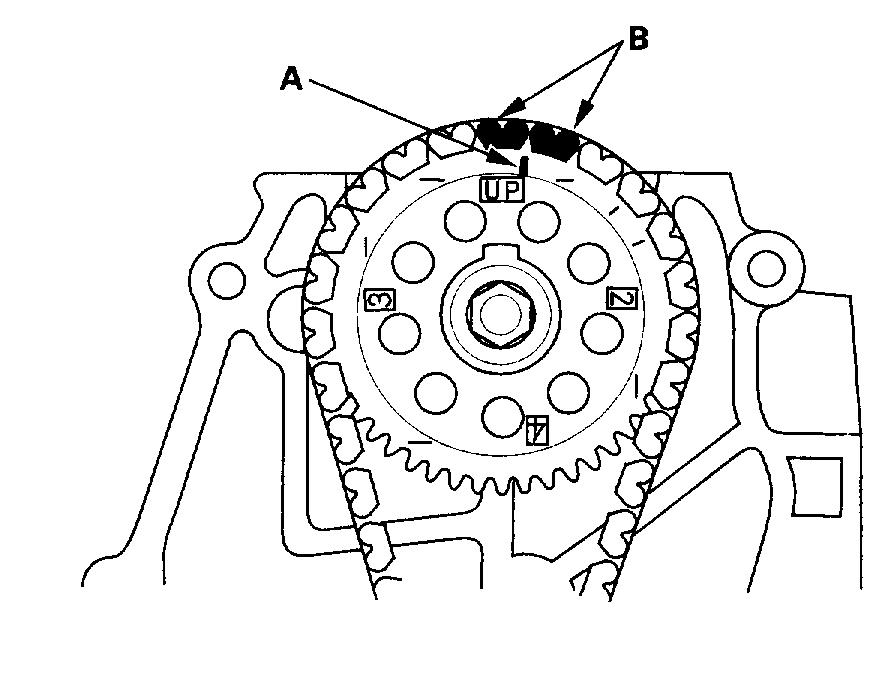
4. Install the cam chain on the camshaft sprocket with the pointer (A) aligned with the center of the two colored pieces (B).
pic 12
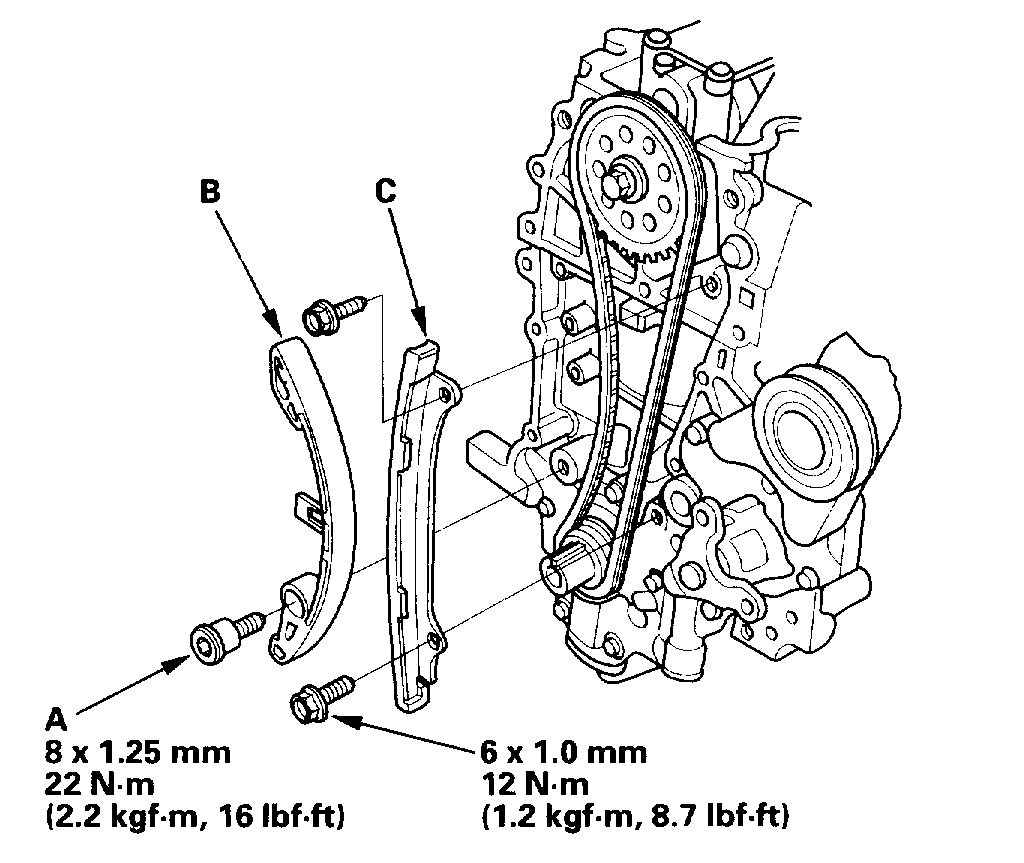
5. Apply new engine oil to the threads of the cam chain tensioner mounting bolt (A).
pic 13
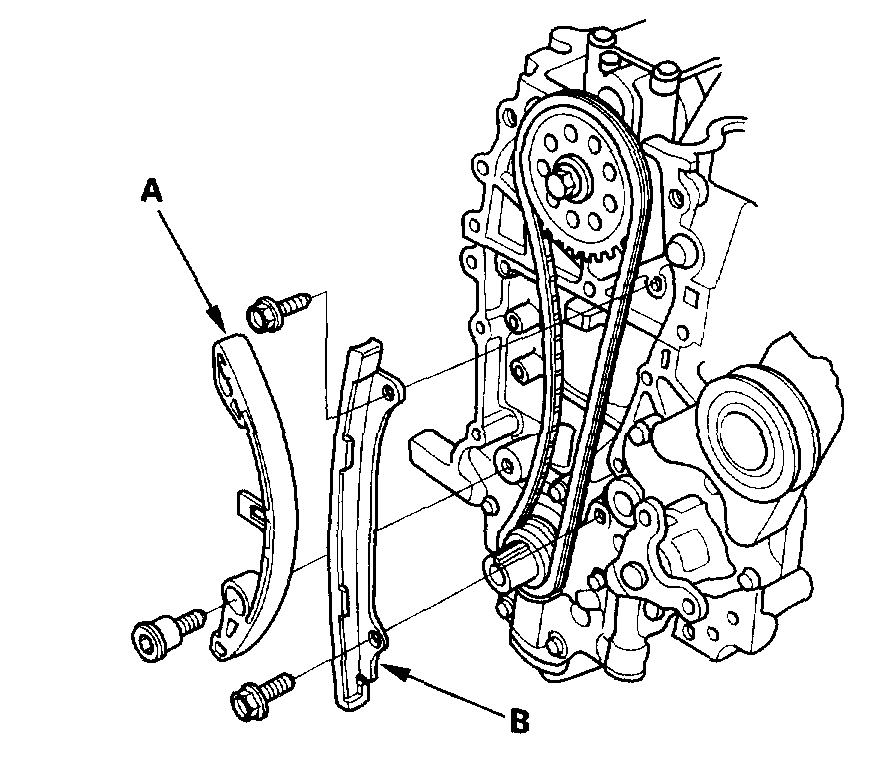
6. Install the cam chain tensioner (B) and the cam chain guide (C).
7. Install the cam chain tensioner slider, and tighten the lower side bolt loosely.
pic 14
8. Apply new engine oil to the sliding surface of the cam chain tensioner slider (A).
pic 15
9. Turn the cam chain tensioner clockwise to compress the cam chain tensioner slider. Install the remaining bolt, then tighten the two bolts.
10. Check the chain case oil seal for damage. If the oil seal is damaged, replace the chain case oil seal.
11. Remove any old liquid gasket from the chain case mating surfaces, bolts, and bolt holes.
12. Clean and dry the chain case mating surfaces.
13. Apply liquid gasket, P/N 08717-0004, 08718-0001, 08718-0002, 08718-0003, or 08718-0009, to the cylinder head and engine block mating surface of the chain case.
NOTE:
^ Apply a 1.5 mm wide bead of liquid gasket along the broken lines (A).
^ Apply a 3.0 mm wide bead of liquid gasket to the engine block upper surface contact areas (B) on the chain case.
^ Do not install components if too much time has passed after applying the1iquid gasket (for P/N 08718-0002, no more than 4 minutes, for all others, no more than 5 minutes). Instead, remove the old residue and reapply the liquid gasket.
pic 16
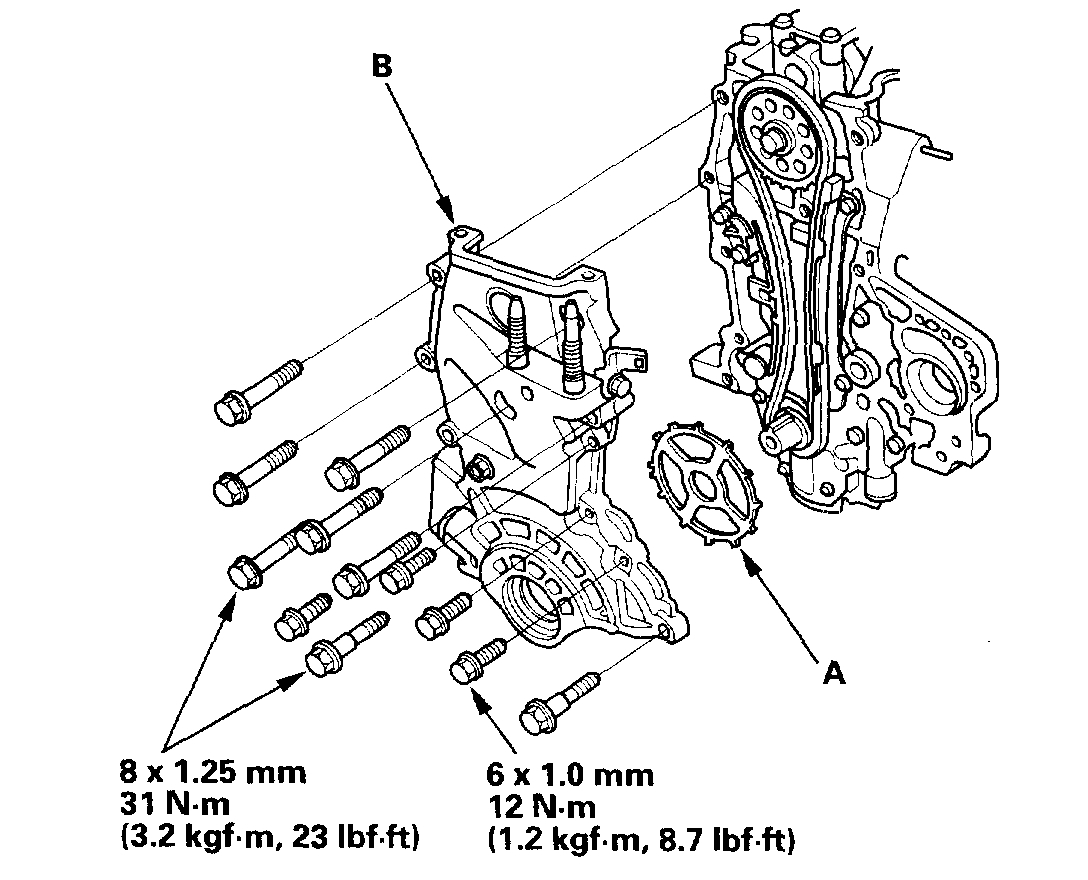
14. Install the crankshaft position (CKP) pulse plate (A) and the chain case (B).
NOTE:
^ Wait at least 30 minutes before filling the engine with oil.
^ Do not run the engine for at least 3 hours after installing the chain case.
pic 17
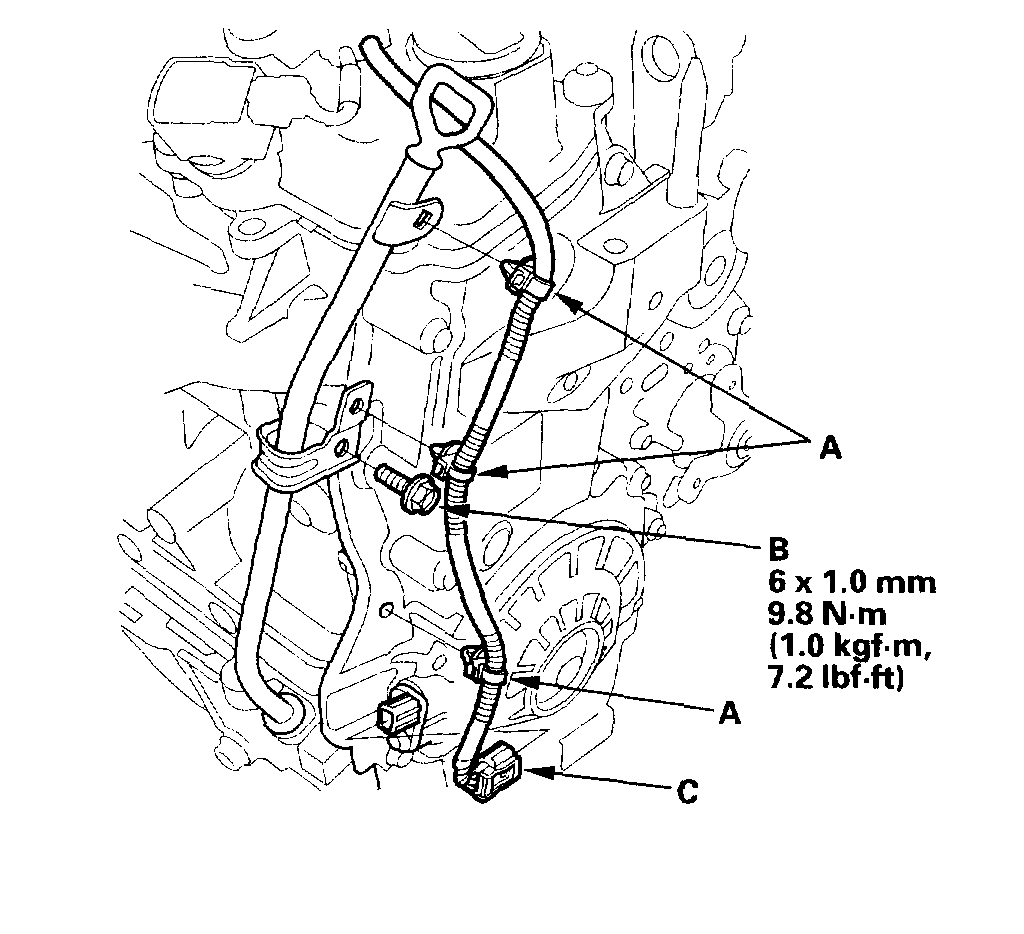
15. Install the harness clamps (A) and the dipstick tube mounting bolt (B), then connect the CKP sensor connector (C).
pic 18
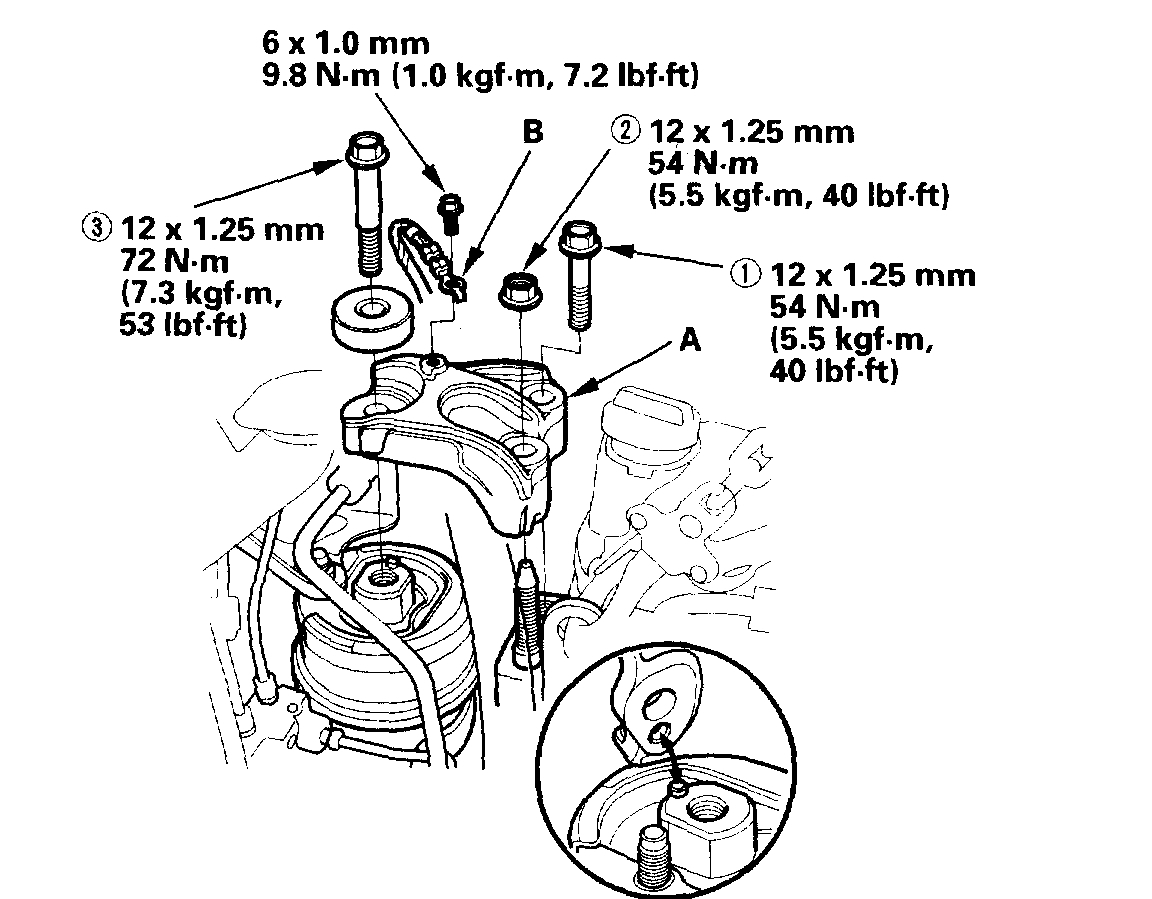
16. Install the side engine mount bracket (A), then tighten the mounting bolts and nut in the numbered sequence shown.
pic 19
17. Install the ground cable (B).
18. Remove the jack and the wood block.
19. Install the oil pan.
20. Install the crankshaft pulley.
21. Install the cylinder head cover.
22. Install the water pump pulley.
23. Install the drive belt.
24. Install the splash shield and the engine undercover.
25. Install the front wheels.
26. Do the crankshaft position (CKP) pattern clear/CKP pattern learn procedure.
Let me know if this helps.
Take care,
Joe
Images (Click to enlarge)
Mar 23, 2019 at 5:57 PM