Hi,
Here are the directions for replacing the front park assist sensor. The attached pics correlate with the directions.
_________________________________________________
2006 Cadillac DTS V8-4.6L VIN 9
Front Object Alarm Sensor Replacement
Vehicle Sensors and Switches Sensors and Switches - Accessories and Optional Equipment Parking Assist Distance Sensor Service and Repair Procedures Front Object Alarm Sensor Replacement
FRONT OBJECT ALARM SENSOR REPLACEMENT
FRONT OBJECT ALARM SENSOR REPLACEMENT
REMOVAL PROCEDURE
pic 1
1. Remove front bumper fascia.
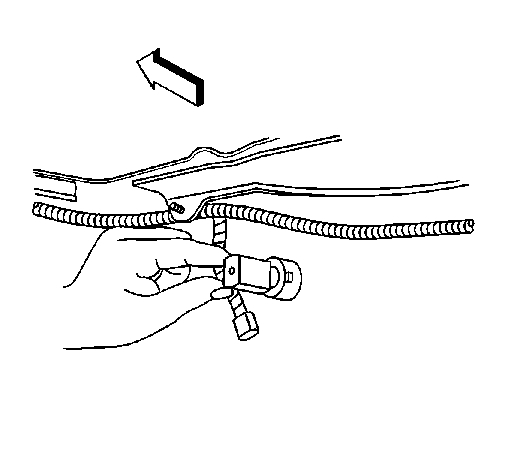
2. Disconnect electrical from the front object sensor.
pic 2
3. Lift the locking tabs on the housing (4) and remove the front object sensor (1).
pic 3
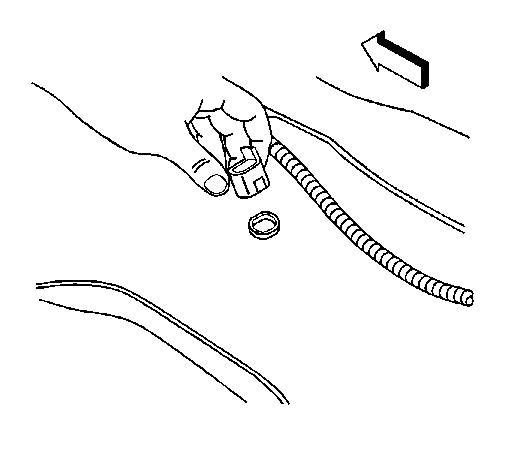
4. Squeeze the spring (1) and remove it from the housing (2).
pic 4
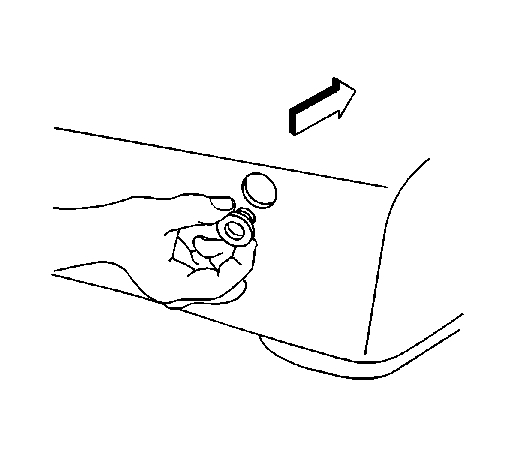
5. Release the tabs on the housing and remove.
pic 5
6. Remove the front object sensor bezel by pushing it through the fascia.
INSTALLATION PROCEDURE
1. Paint the new front object sensor. Refer to Basecoat/Clearcoat Paint Systems in Paints/Coatings.
IMPORTANT: Do not refinish previously painted sensors.
2. Check the paint thickness to ensure it does not exceed 6 mils using a paint thickness gage suitable for non-ferrous metals. Refer to Paint Gages in Paints/Coatings.
pic 6
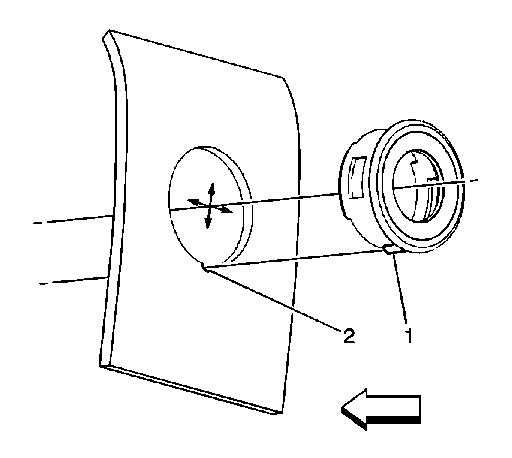
3. Align the keyhole (2) with the key (1) and press the rear object sensor bezel flush to the fascia.
pic 7
4. Install the housing to the cutouts on the bezel through the back side of the fascia.
pic 8
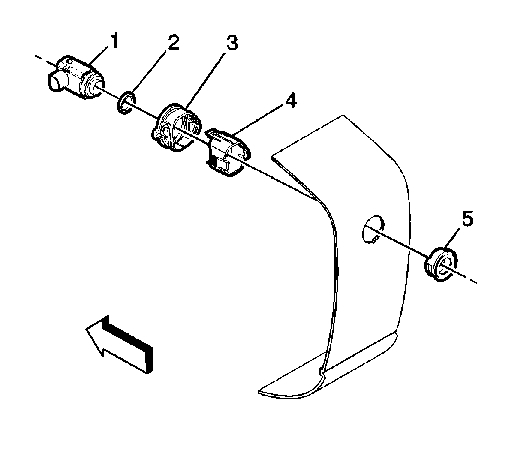
5. Install the spring (1) to the housing (2).
IMPORTANT: The spring keys must be on the top and bottom of the housing.
pic 9
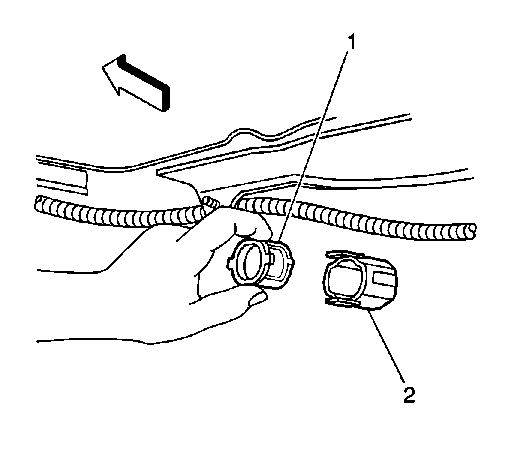
6. Install the decoupling ring (2) to the sensor (1).
7. Insert the sensor into the housing (4) with the connector pointing toward the passenger side of the fascia. Press the sensor tabs into the cutouts on the housing (4).
________________________________________
I hope this helps. Let me know if you have other questions.
Take care,
Joe
Images (Click to enlarge)
Apr 24, 2020 at 7:38 PM