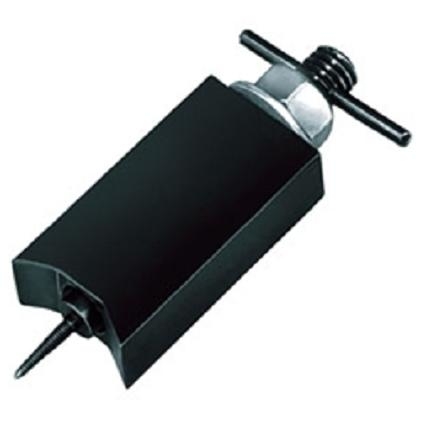
You just have to look at them. Ford often used roll pins in their original inner tie rod ends. There are special tools for pulling those out, but for professionals who have to charge for their time, that takes way too long. Instead, use the special socket and just unscrew them, The threads on the ends of the rack assembly will push the roll pins out without damaging those threads.
That special tool is shown in the first photo. The point is threaded into the center of the roll pin, then the silver nut is tightened to draw the pin out.
Count the number of revolutions needed to unscrew the inner tie rod end from the outer one, then run the new inner in the same number of turns when you install it. No two parts are ever the same, but doing this will get it close enough for the van to be driven to the alignment shop.
The second photo shows one style of replacement tie rod end at the top. The red arrow is pointing to where the roll pin would be. With this replacement, that hole is threaded, and a small Allen-head set screw is run in to stop the end from unscrewing if it comes loose. This design will have multiple threaded holes so you'll be sure to have access to one of them when the end is fully-tightened. When you have the roll pin design, if you want to pull that roll pin out, you have to unscrew the end a partial revolution until the pin is accessible. That will happen long before it gets close to the threads on the rack.
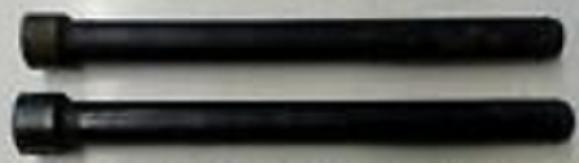
The third photo shows two sizes of special tie rod end sockets. One of these will slide over the hex part of the body, then you use a standard 1/2" ratchet to remove and install the tie rod end.
The bottom tie rod end in the second photo is for the same applications, but the design of the hex head is different. The socket can't slide over the body to reach the hex. For this design, the most common socket is shown in the fourth photo. You select the appropriate crow's foot wrench and slip that over the hex, then the socket slides over that and engages it so you can unscrew the end.
If your new tie rod end comes with the roll pin and you see it is going to be inaccessible once it is tightened fully, leave the end a partial revolution from fully-tight, tap the roll pin in, then finish tightening it. That roll pin is a long way from the threads on the rack assembly when the end is tight.
Pack the ball and socket with the grease that comes with the tie rod end, and swivel it around to work the grease into the joint before sliding the boot on. You can use a little axle grease or, (I prefer lithium-based Spray White Grease), on the threads that go into the outer tie rod end. That will insure that joint remains rust-free so the alignment specialist doesn't have to work so hard to free it up. Don't get carried away. A light coating is sufficient. Too much grease can prevent the air from escaping as the parts are screwed together. Absolutely do not use any type of penetrating oil on those threads. That stuff opens up the way for moisture to follow it in, then the next time the van needs to be aligned, those adjustments will be rusted so tight, an acetylene torch will be needed to free them up.
Torque spec for the inner tie rod end is 66 - 81 foot-pounds.
Torque spec for the jamb nut is 35 - 46 foot-pounds.
Images (Click to enlarge)
Apr 30, 2019 at 3:52 PM