Noise, especially when accelerating

Tiny
LINDA GRACE
  • MEMBER
  • 2012 NISSAN ALTIMA
  • AUTOMATIC
  • 100,000 MILES
There is a grinding sort of sound when turning corners, and accelerating. Sometimes it is there, and fairly loud, and sometimes almost unnoticeable [if you were not listening hard for it]. The car also seems to have a bit of resistance to accelerating. [I can get the speed up there, but there is a bit of resistance that was not there before]. My nephew recently replaced the back brake pads, and afterward one of the rotors actually cracked [at the right angle on the rotor, all the way around]. He is a trained mechanic, but lives too far away to come check this out. We replaced the one broken rotor. He said the other one was good. He thought that the noise might be the heat shield for the catalytic converter when accelerating or turning. What do you think? Oh, and he thought the suspension was fine. There also feels like there is more play in the steering than usual.
Tuesday, May 1st, 2018 AT 7:59 AM

1 Reply

Tiny
JACOBANDNICKOLAS
  • MECHANIC
  • 108,348 POSTS
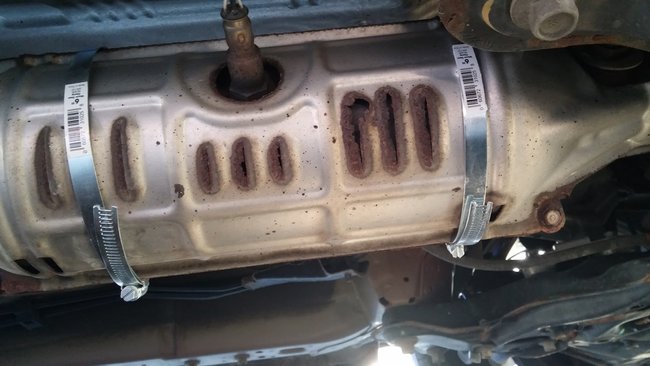
A rattle is more likely to be a heat shield and not a grinding. However, it may sound like a grind. When the vehicle is cool, check the heat shield to see if it rattles. I have attached a picture of what one looks like. It will be located on the exhaust. Additionally, the picture shows a quick and easy fix to the rattle, hose clamps.

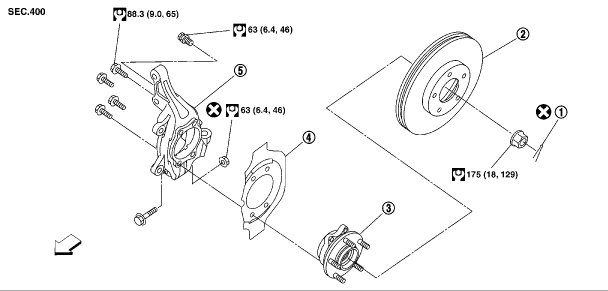
Next, if the noise seems to get louder when making a turn, that would indicate a wheel or hub bearing. Pay attention if it changes when turning. If you determine it is a bearing, here are directions for replacement:
Front:
1. Remove wheel and tire using power tool.
2. Remove brake caliper using power tool, leaving brake caliper hydraulic lines connected. Reposition brake caliper aside with wire.
3. Put alignment marks on disc rotor and wheel hub and bearing assembly, then remove disc rotor.
4. Remove wheel sensor from steering knuckle
5. Remove cotter pin, then loosen lock nut from drive shaft using power tool.
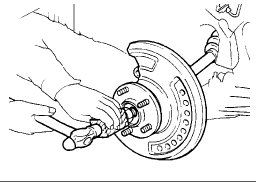
6. Using a piece of wood and a hammer, tap on the lock nut to disengage drive shaft from wheel hub.
7. Remove wheel hub and bearing assembly bolts using power tool.
8. Remove splash guard and wheel hub and bearing assembly from steering knuckle.

INSPECTION AFTER REMOVAL

Check for deformity, cracks and damage on each part, replace if necessary.
Ball Joint Inspection
- Check for boot breakage, axial looseness, and torque of transverse link ball joint and repair as necessary.

INSTALLATION

Installation is in the reverse order of removal.
Was this
answer
helpful?
Yes
No
Tuesday, May 1st, 2018 AT 6:16 PM

Please login or register to post a reply.

Sponsored links