Welcome to 2CarPros.
Off the charger, the voltage should be 12v or a bit higher. It sounds like the battery is bad, but that doesn't explain why it won't crank with the jumper pack. The only thing you can do at this point is remove the starter and test it. If you can't access it, remove it and have it bench tested at the parts store.
Here are the directions for removing and replacing the starter. The attached pics correlate with the directions.
_______________________________
2009 Honda Truck CR-V 2WD L4-2.4L
Removal and Replacement
Vehicle Starting and Charging Starting System Starter Motor Service and Repair Removal and Replacement
REMOVAL AND REPLACEMENT
Starter Removal and Installation
Removal
1. Do the battery terminal disconnection procedure See: Battery > Procedures.
2. Remove the front splash shield See: Splash Guard > Removal and Replacement > Front Splash Shield Replacement.
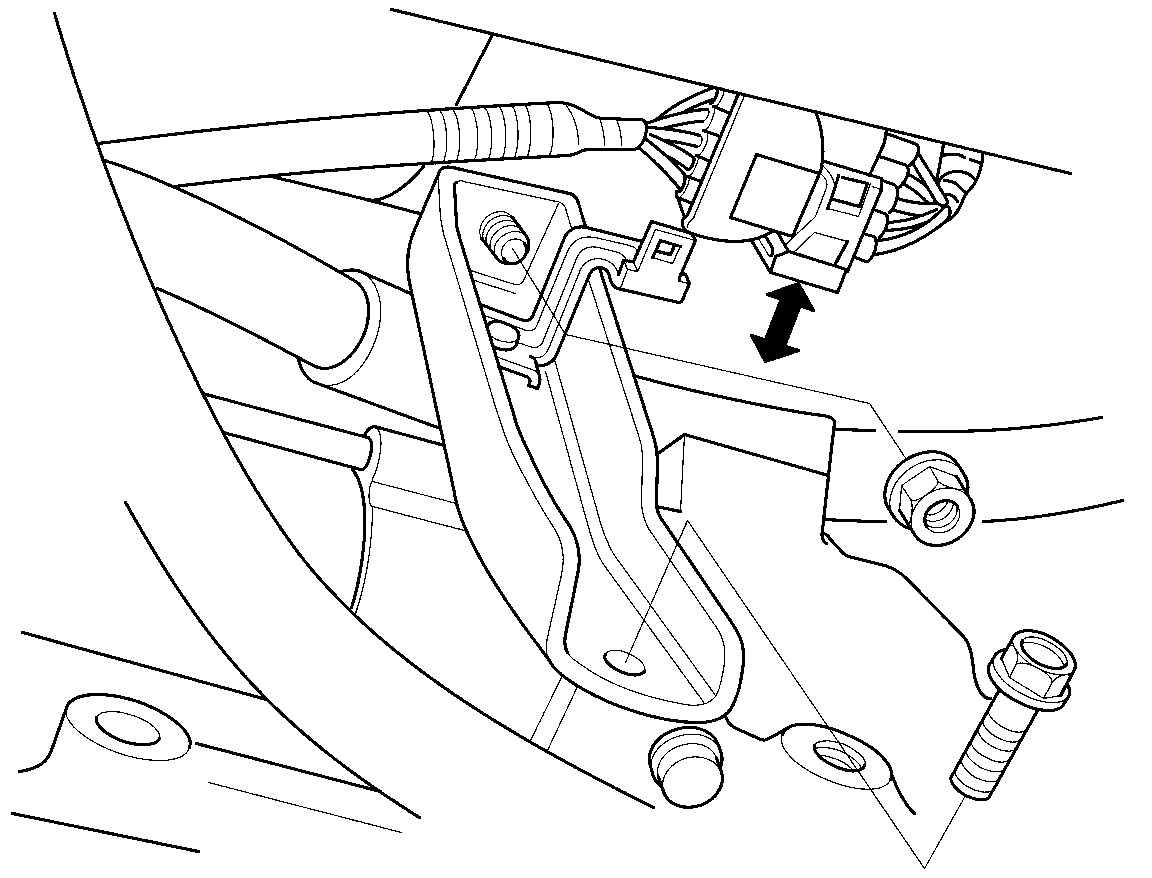
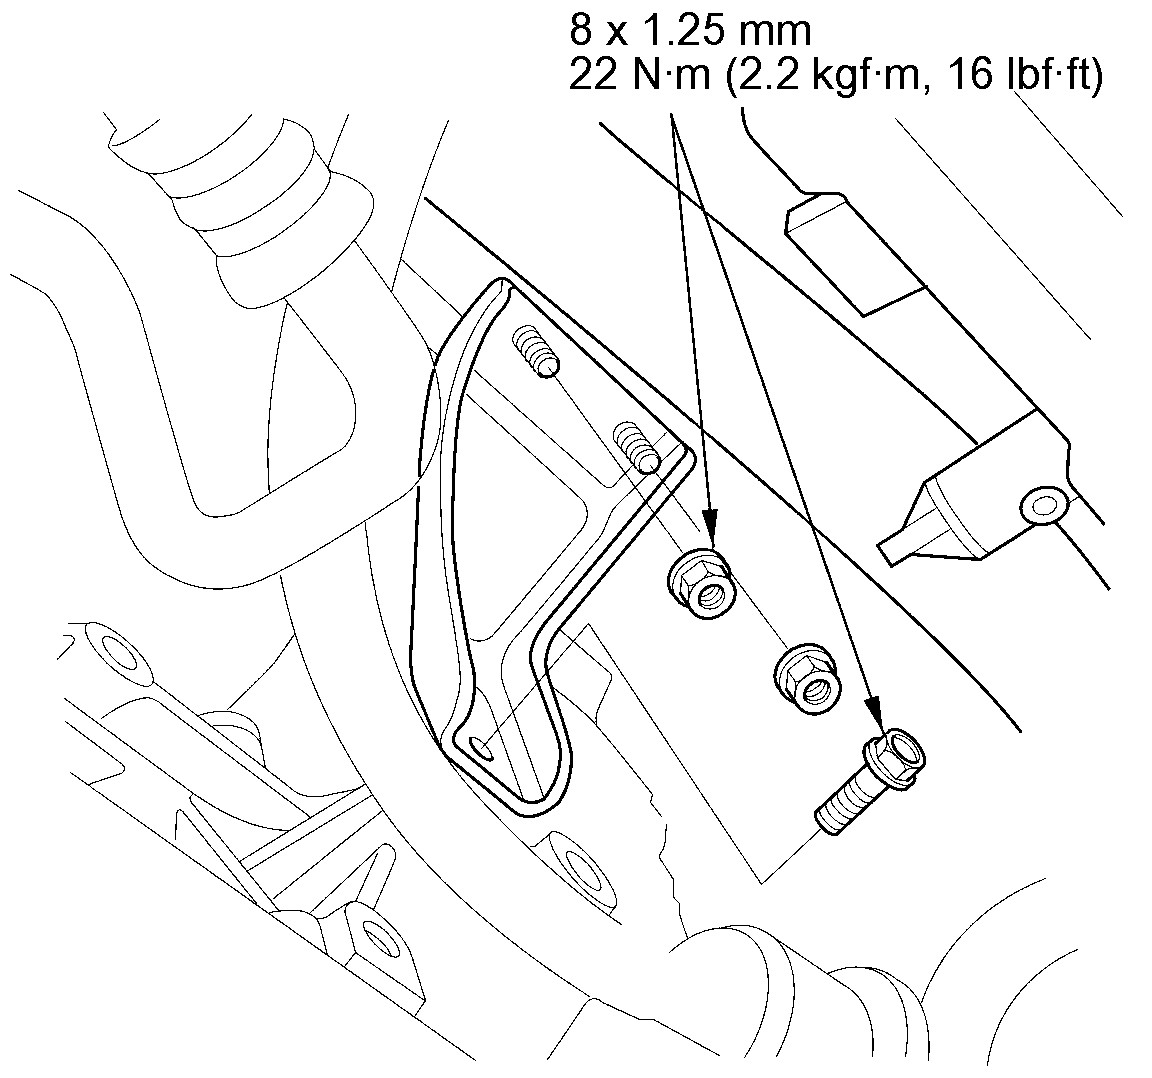
3. Remove the intake manifold bracket.
K24Z1 engine
pic 1
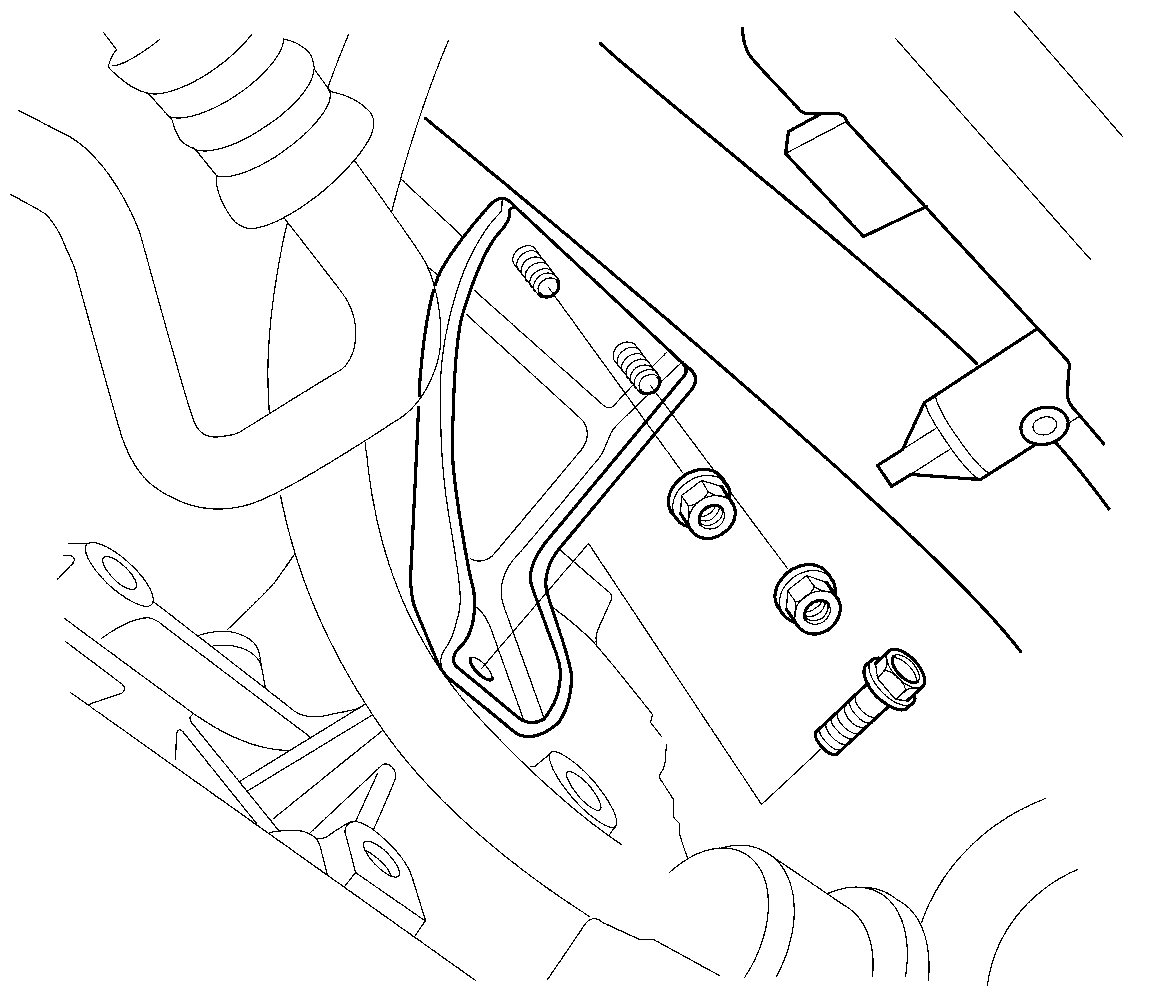
K24Z6 engine
pic 2
4. Disconnect the knock sensor connector.
- K24Z6 engine See: Knock Sensor > Removal and Replacement
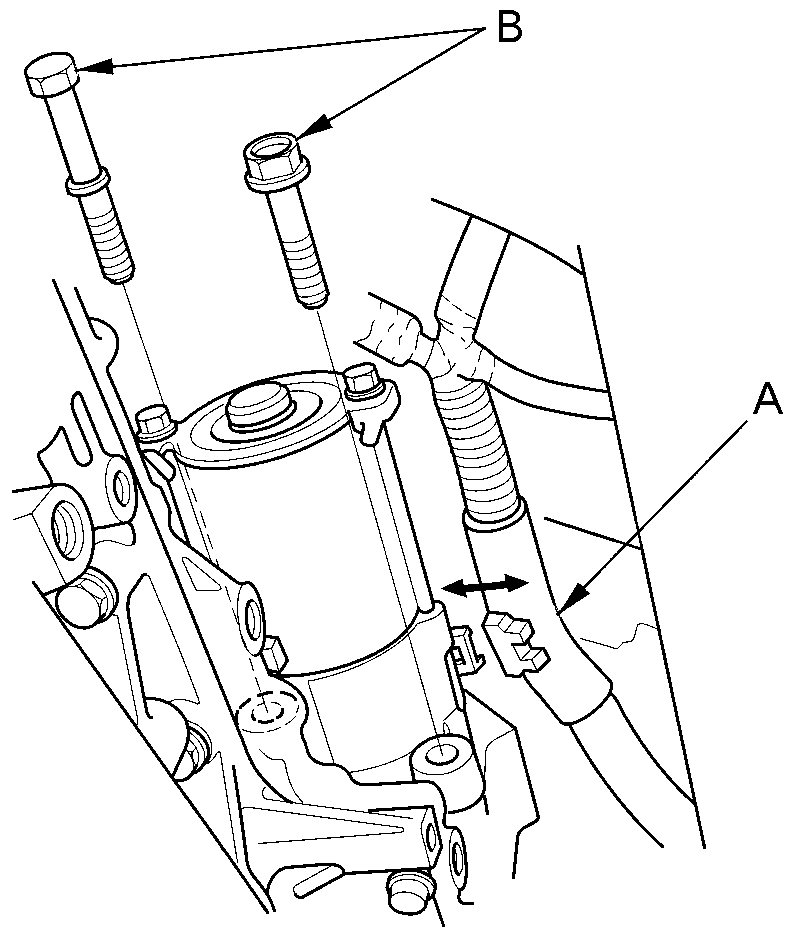
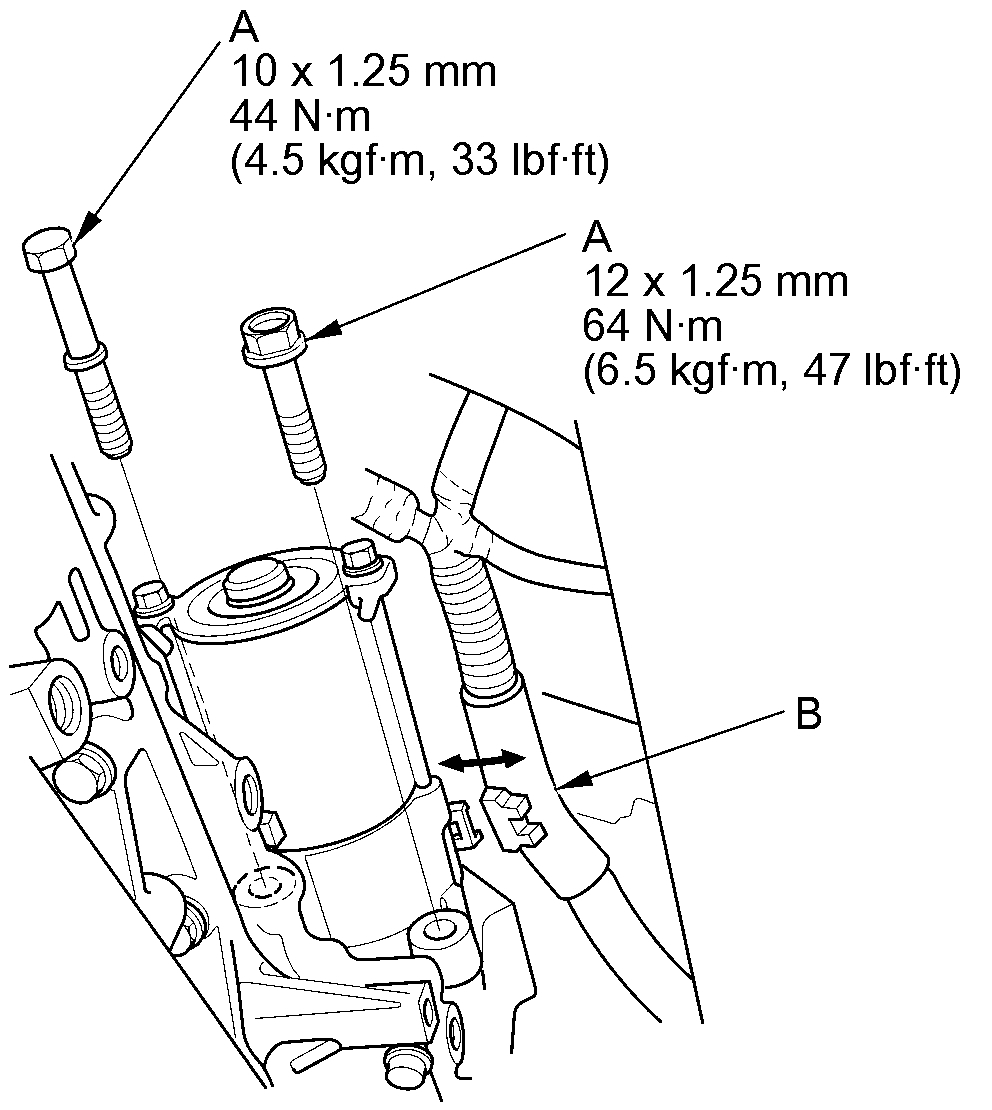
5. Remove the harness clamp (A), and remove the two bolts (B) securing the starter, then remove the starter from the engine.
pic 3
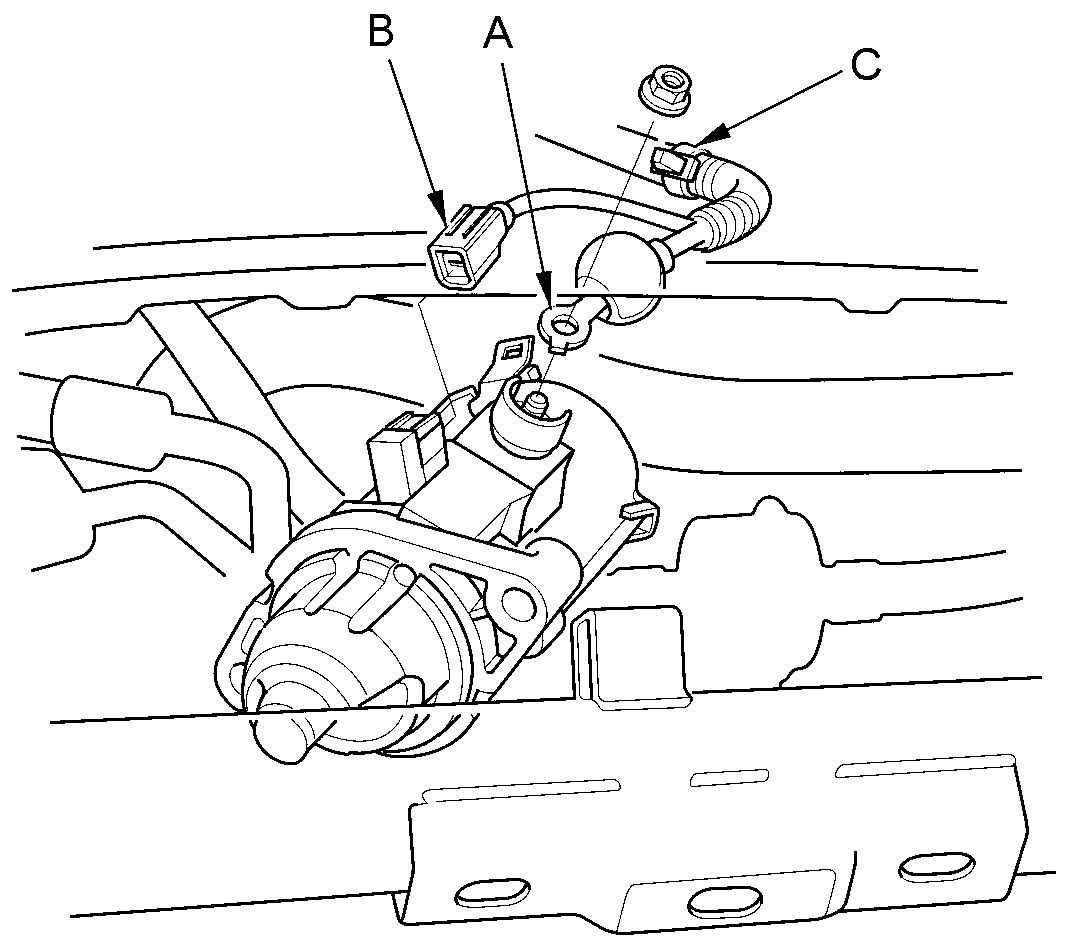
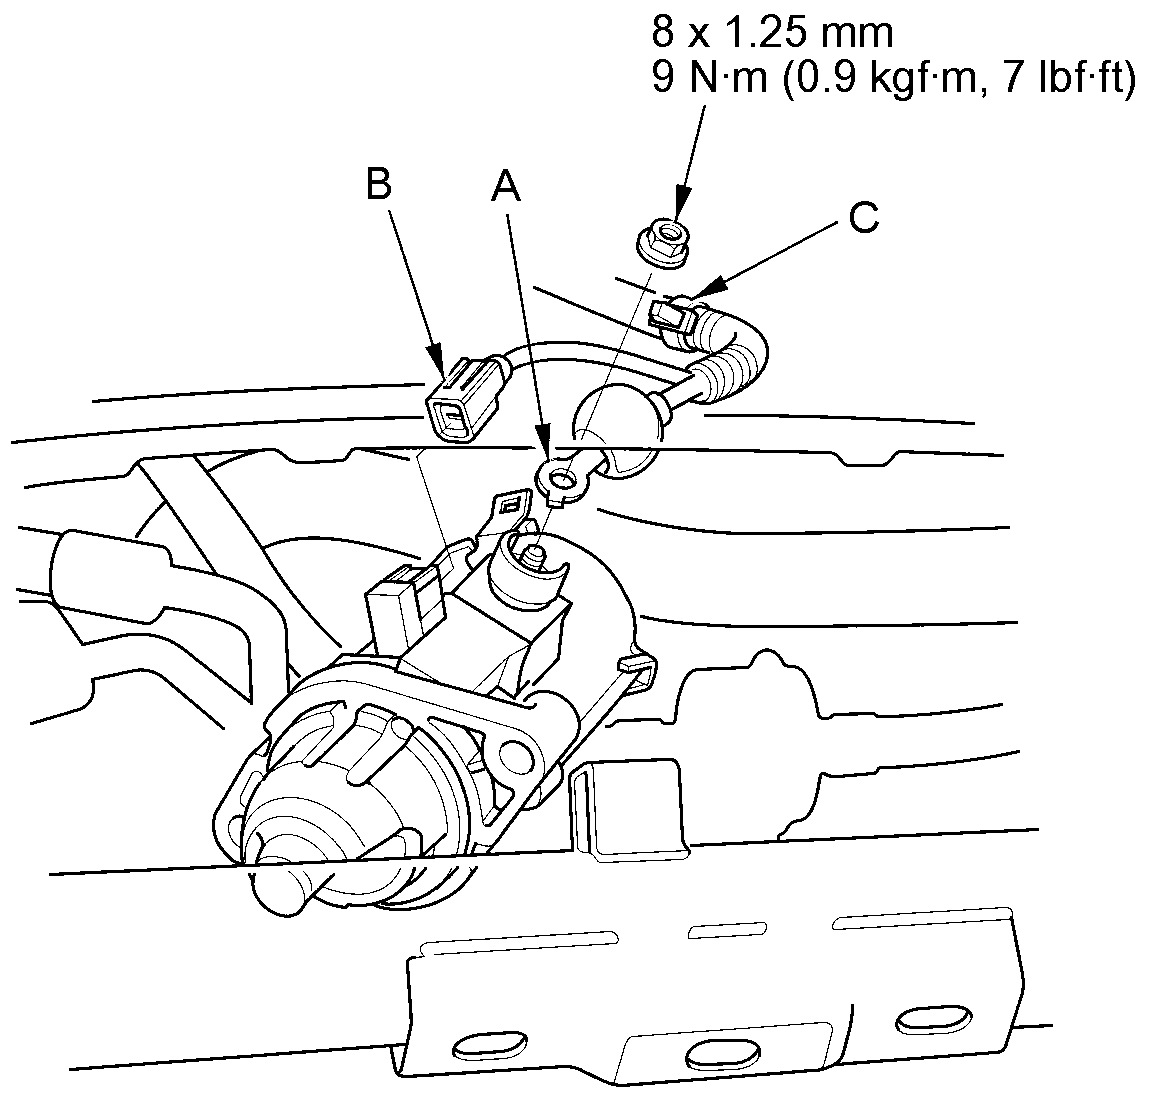
6. Disconnect the positive starter cable (A) from the B terminal, then disconnect the S terminal connector (B).
pic 4
7. Remove the harness clamp (C), then remove the starter.
Installation
1. Connect the positive starter cable (A) and the S terminal connector (B). Make sure the positive starter cable crimped side of the ring terminal faces away from the starter when you connect it.
pic 5
2. Install the harness clamp (C).
3. Install the starter, then tighten the two bolts (A), and then install the harness clamp (B).
pic 6
4. Connect the knock sensor connector.
- K24Z6 engine See: Knock Sensor > Removal and Replacement
5. Install the intake manifold bracket.
K24Z1 engine
pic 7
K24Z6 engine
pic 8
6. Install the front splash shield See: Splash Guard > Removal and Replacement > Front Splash Shield Replacement.
7. Do the battery terminal reconnection procedure See: Battery > Procedures.
8. Start the engine to make sure the starter works properly.
Let me know if this helps or if you have other questions.
Take care,
Joe
Images (Click to enlarge)
Mar 11, 2021 at 6:42 PM