Hi and thanks for using 2CarPros.com. If there is no compression, most likely one of the valves is stuck in the open position in that cylinder. You need to remove the valve cover to determine if a valve is stuck. It may have happened due to sitting.
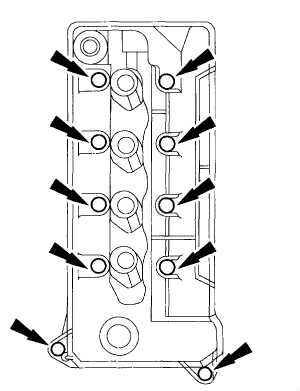
Here are directions for removal of the valve cover (left side): Pictures 1, 2, and 3 are related to this process.
Removal:
Remove the hydro boost brake booster.
Disconnect the clutch cable at the clutch pedal and position out of the way.
Remove the LH ignition coils.
Caution: Do not use metal scrapers, wire brushes, power abrasive discs or other abrasive means to clean the sealing surfaces. These tools cause scratches and gouges which make leak paths. Use a plastic scraping tool to remove all traces of old sealant.
Remove the left hand valve cover.
Remove and discard the gasket, clean and inspect the sealing surfaces.
Installation
Note: If the valve cover is not secured within four minutes, the sealant must be removed and the sealing area cleaned with Metal Surface Cleaner F4AZ-l 9A536-RA or equivalent meeting Ford specification WSE-M5B392-A. Allow to dry until there is no sign of wetness, or four minutes, whichever is longer. Failure to follow this procedure may result in future oil leakage.
To install, reverse the removal procedure.
Use Ford Silicone Gasket and Sealant F7A-Z-19554-EA or equivalent meeting Ford specification WSE-M4G323-A4.
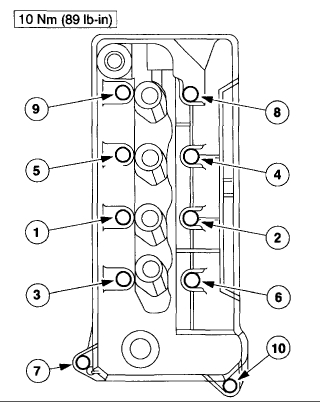
Directions for the right side valve cover: (picture 4 related to these directions)
Removal:
Remove the right hand ignition coils.
Disconnect the fuel line.
Disconnect the evaporative emissions return tube.
Remove the right hand valve cover.
Caution: Do not use metal scrapers, wire brushes, power abrasive discs or other abrasive means to dean the sealing surfaces. These tools cause scratches and gouges which make leak paths. Use a plastic scraping tool to remove all traces of old sealant.
Remove and discard the gasket, clean and inspect the sealing surfaces.
Installation:
Note: If the valve cover is not secured within four minutes, the sealant must be removed and the sealing area cleaned with Metal Surface Cleaner F4A,Z-19A536-RA or equivalent meeting Ford specification WSE-M513392-A. Allow to dry until there is no sign of wetness, or four minutes, whichever is longer. Failure to follow this procedure may result in future oil leakage.
To install, follow the removal procedure in reverse order.
Use Ford Silicone Gasket and Sealant F7AZ-19554-EA or equivalent meeting Ford specification
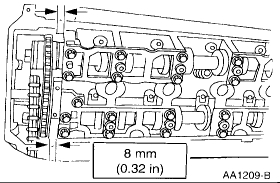
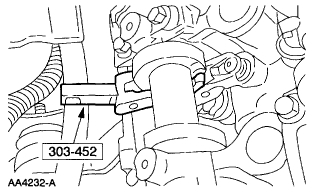
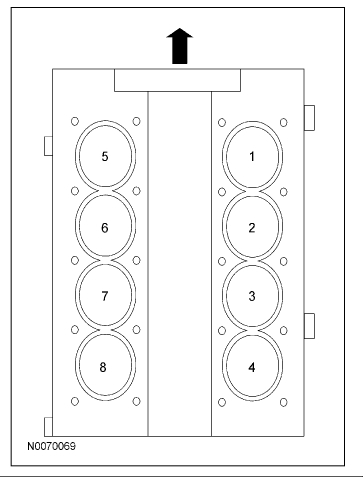
Pictures 5 and 6 are related to what you can expect to see when the cover is removed. Check to see if one of the valve tappets is stuck in the down position. The last picture is of the firing order to indicate where cylinder 3 is located.
I hope this helps. Let me know what you find or if you have other questions,.
Take care,
Joe
Images (Click to enlarge)
May 18, 2018 at 10:29 PM