Hi,
This isn't too hard to do, but it does require a scan tool that can vent the shocks on it.
Here are the directions. The attached pics correlate with the directions.
_______________________________
2007 Ford Truck Expedition 4WD V8-5.4L
Air Shock Absorber - Rear
Vehicle Steering and Suspension Suspension Suspension Control ( Automatic - Electronic ) Air Spring Service and Repair Removal and Replacement Air Shock Absorber - Rear
AIR SHOCK ABSORBER - REAR
Air Shock Absorber - Rear
Special Tool(s)
pic 1
Material
pic 2
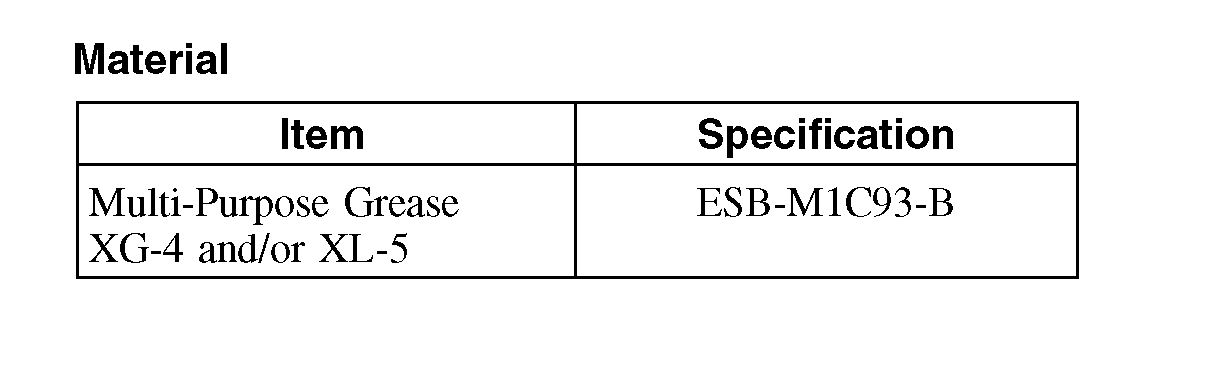
pic 3
Removal and Installation
WARNING: Do not remove an air spring under any circumstances when there is pressure in the air spring. Do not remove any components supporting an air spring without either exhausting the air or providing support for the air spring. Failure to follow these instructions may result in personal injury.
CAUTION: Suspension fasteners are critical parts because they affect performance of vital components and systems and their failure can result in major service expense. A new part with the same part number must be used if installation is necessary. Do not use a new part of lesser quality or substitute design. Torque values must be used as specified during reassembly to make sure of correct retention of these parts.
1. Using the scan tool, vent the appropriate air spring.
2. With the vehicle in NEUTRAL, position it on a hoist.
3. Remove the lower arm.
4. Disconnect the air spring solenoid valve electrical connector.
5. Disconnect the air line at the air valve.
^ Compress the orange quick connect lock ring, then pull downward on the air supply line.
6. Remove and discard the 3 shock upper nuts.
^ To install, tighten to 40 Nm (30 lb-ft).
7. Remove the air shock absorber.
8. NOTE: If the individual spring and/or shock components are not being serviced, continue with Step 14.
NOTE: Use the hex holding feature to prevent the shock rod from turning while removing the nut.
Remove and discard the shock rod nut.
^ To install, tighten to 45 Nm (33 lb-ft).
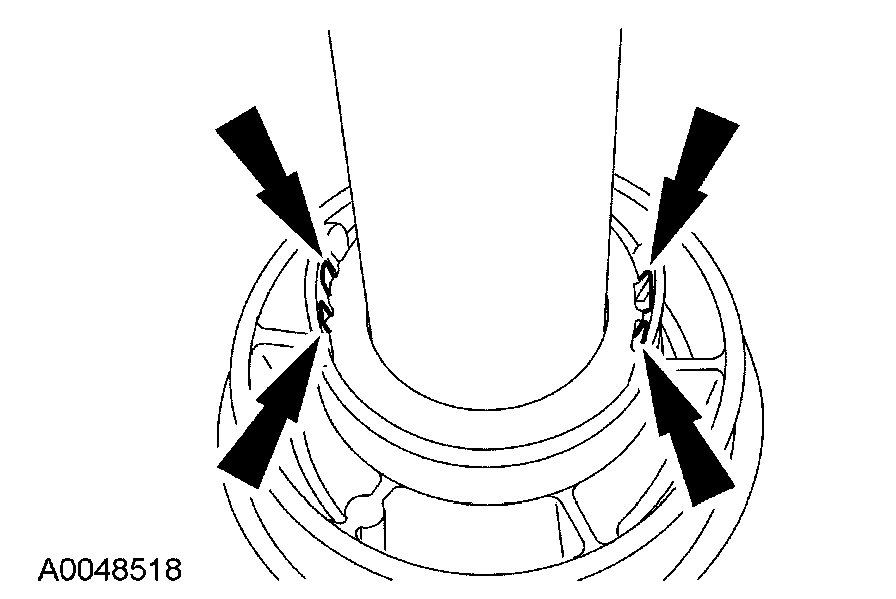
9. CAUTION: If the retainer tabs are broken, a new air spring must be installed.
NOTE: Index-mark the air spring and shock absorber for reference during the installation procedure.
Depress the retainer tabs and remove the air spring.
pic 4
10. Remove the shock rod O-ring seal, washer and jounce bumper.
^ Discard the seal and washer.
11. Remove and discard the 2 air spring lower O-ring seals.
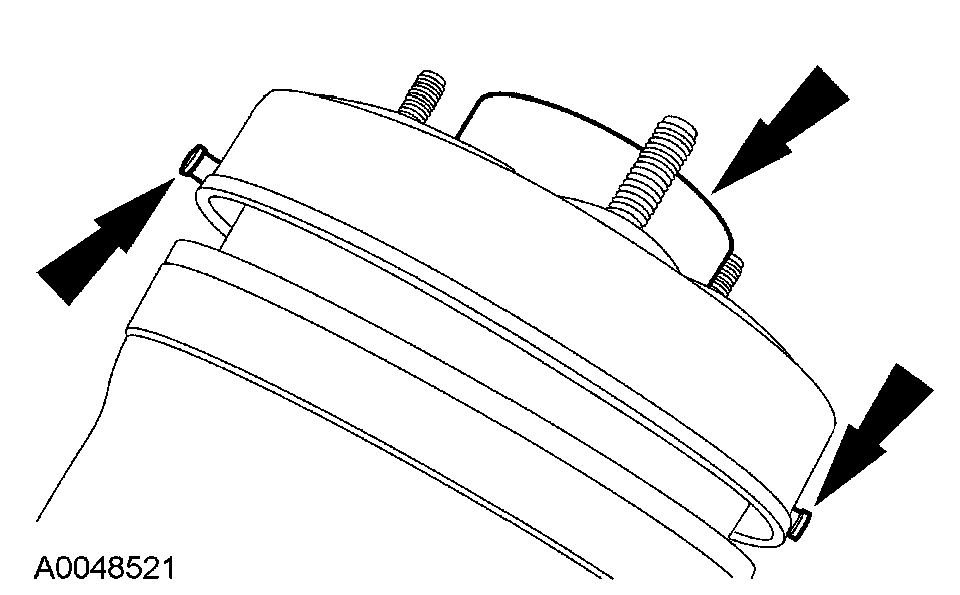
12. Remove the 2 retainer screws and the upper mount.
^ Discard the screws.
pic 5
13. Remove and discard the 2 air spring upper O-ring seals.
14. CAUTION: Use a suitable press to install the upper mount retainer pins. Do not use a hammer or damage may occur.
NOTE: Make sure that all seals are clean and free of debris.
NOTE: Apply a thin coat of grease to the new O-ring seals.
To install, reverse the removal procedure.
____________________________________________
I hope this helps. Let me know if you have other questions.
Take care and God Bless,
Joe
Images (Click to enlarge)
Feb 17, 2021 at 5:24 PM