Hi,
Front brakes aren't too hard to replace. First, take a look through this link. It explains in general how it's done. You can use it as a guide.
https://www.2carpros.com/articles/how-to-replace-front-brake-pads-and-rotors-fwd
Here are directions specific to your vehicle for both front and rear replacement. The attached pics correlate with the directions.
_________________________________________
2009 Mitsubishi Lancer L4-2.4L (4B12)
Removal and Replacement
Vehicle Brakes and Traction Control Disc Brake System Brake Pad Service and Repair Removal and Replacement
REMOVAL AND REPLACEMENT
BRAKE PAD CHECK
CAUTION
If there is a significant difference in thickness between the brake pads at right and left, check the sliding area and the runout of the brake disc.
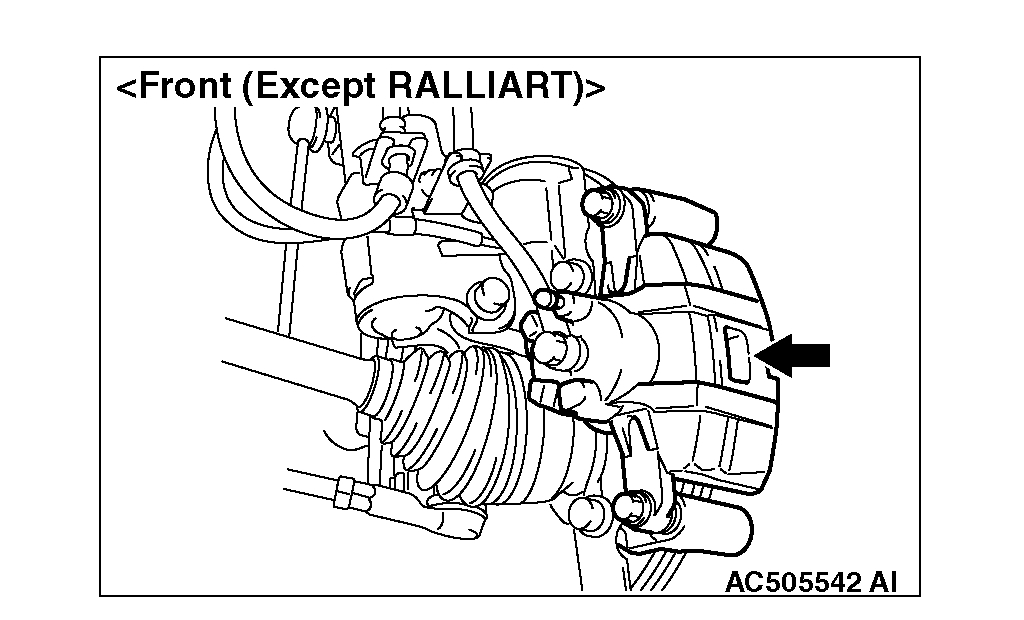
pic 1
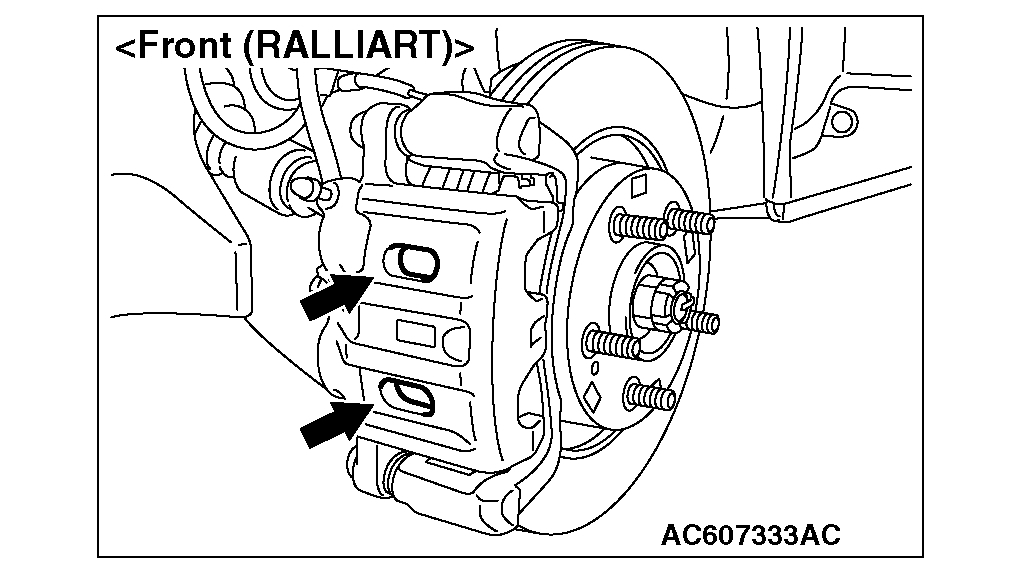
pic 2
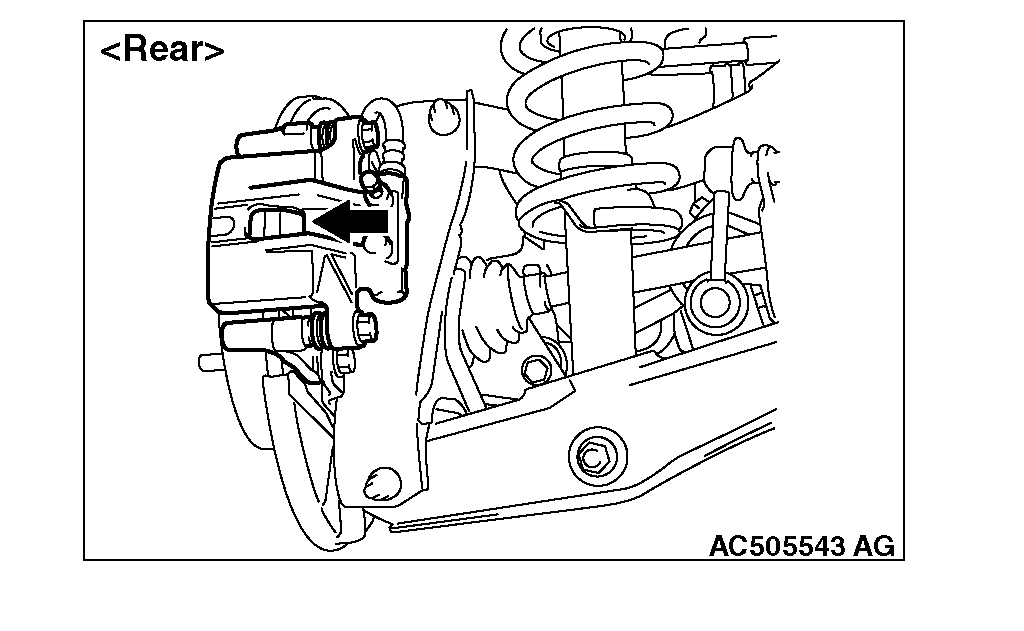
pic 3
1. Visually check the thickness of brake pad from the inspection hole of the caliper body.
Standard value: 10.0 mm (0.39 inch)
Limit: 2.0 mm (0.08 inch)
2. If the brake pad thickness is less than the limit value, replace the brake pad.
BRAKE PAD REPLACEMENT [EXCEPT RALLIART]
[FRONT]
CAUTION
When replacing, replace both brake pads (right and left) as a set.
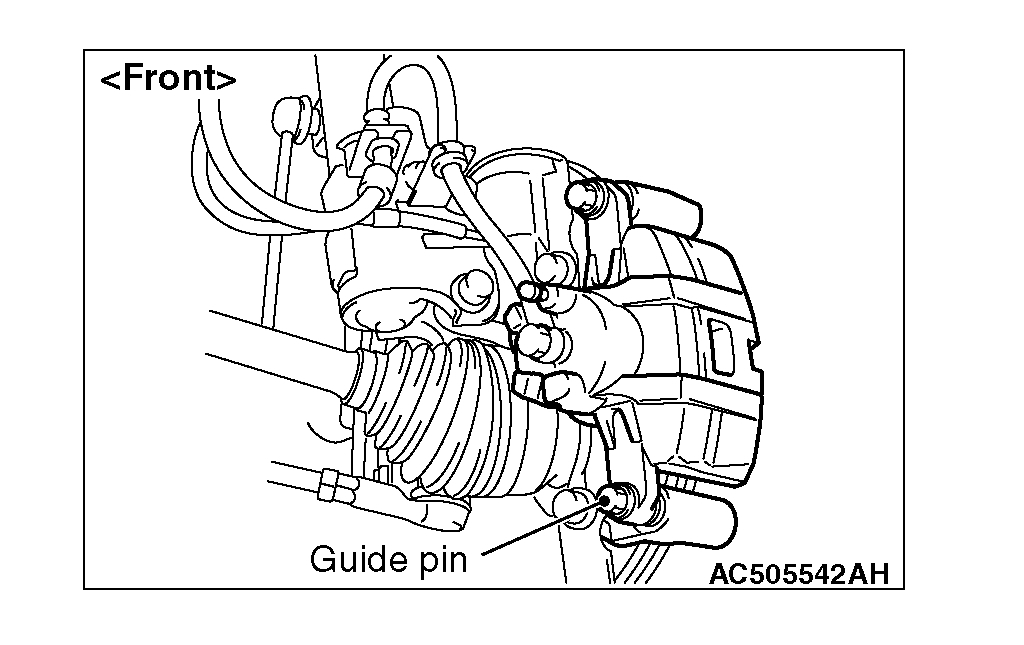
pic 4
1. Remove the parts indicated in the figure, swivel the caliper body upward and retain it with a wire or similar tool.
15-inch Front Disc Brake
pic 5
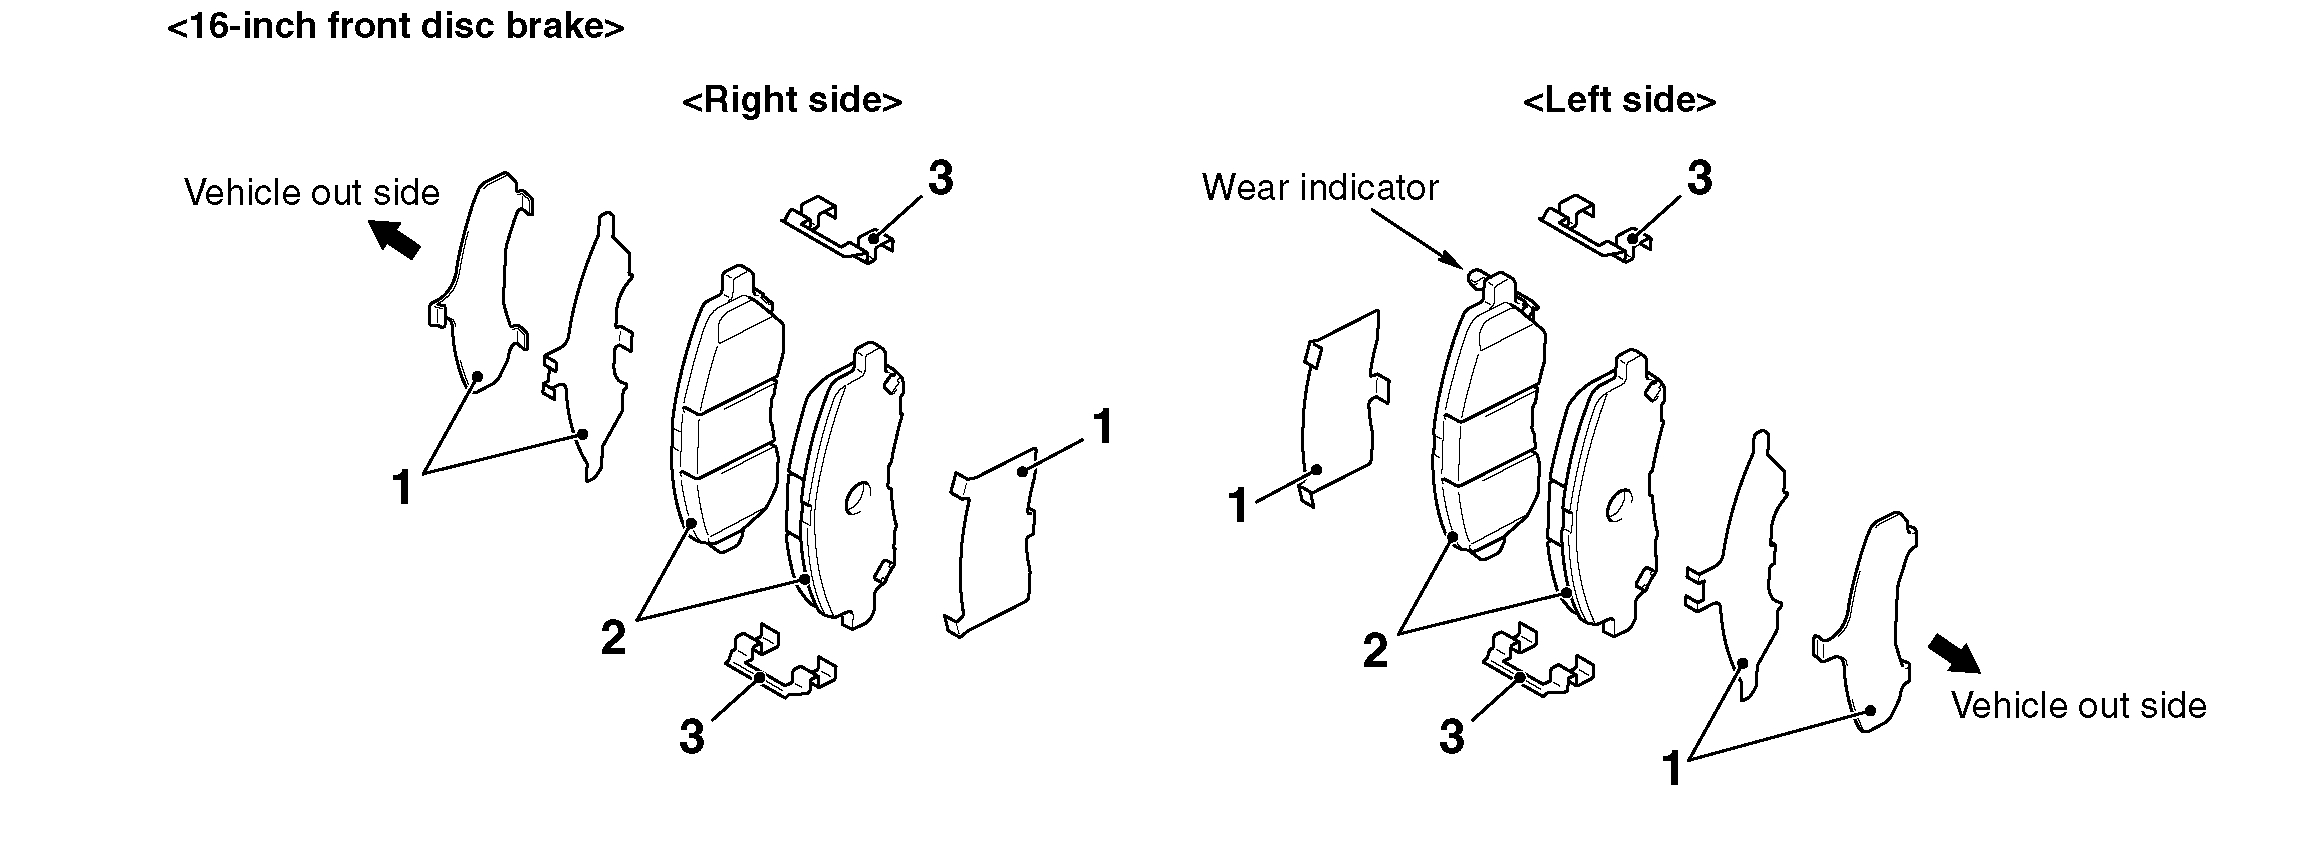
16-inch Front Disc Brake
pic 6
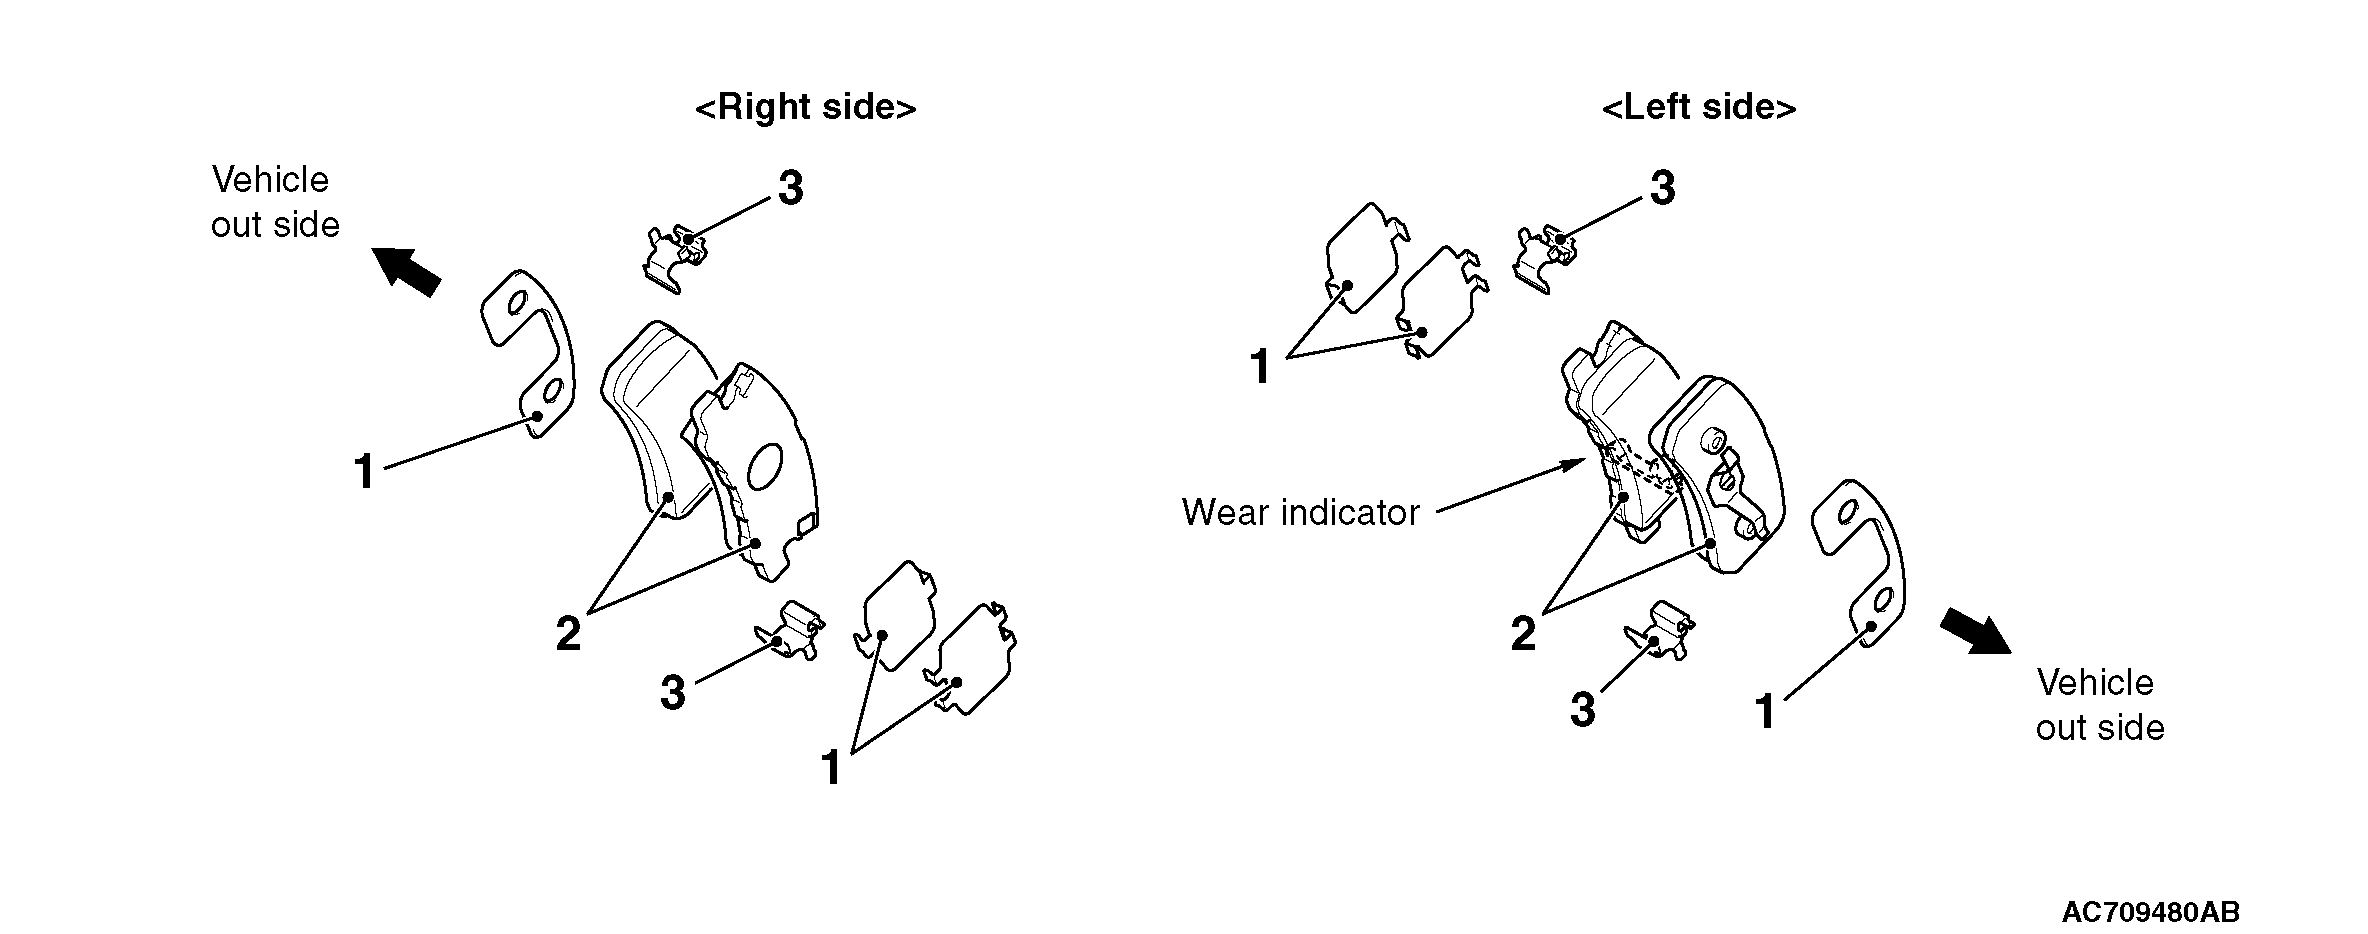
2. Remove the following parts from the caliper body.
1) Shim
2) Brake pad assembly
3) Clip
NOTE:
^ The brake pad assembly with wear indicator is installed only to the inner side of the brake disc of the left-side brake at factory.
^ As for the accessory pad set, the brake pad with wear indicator has been established to the inner side of the brake disc on both right side brake and left side brake.
CAUTION
Keep grease or other soiling off the pad and brake disc friction surfaces.
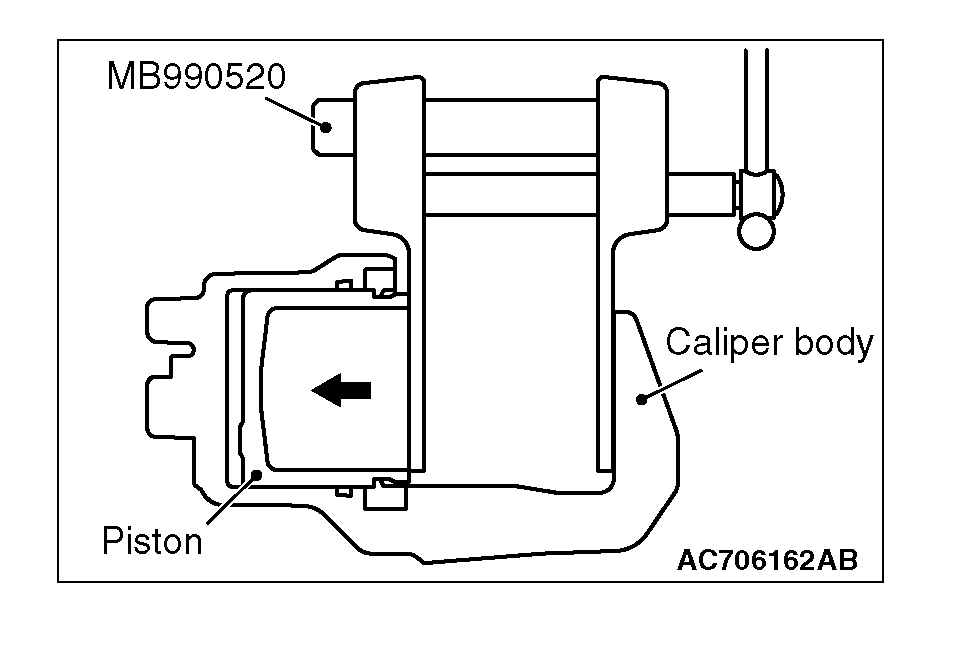
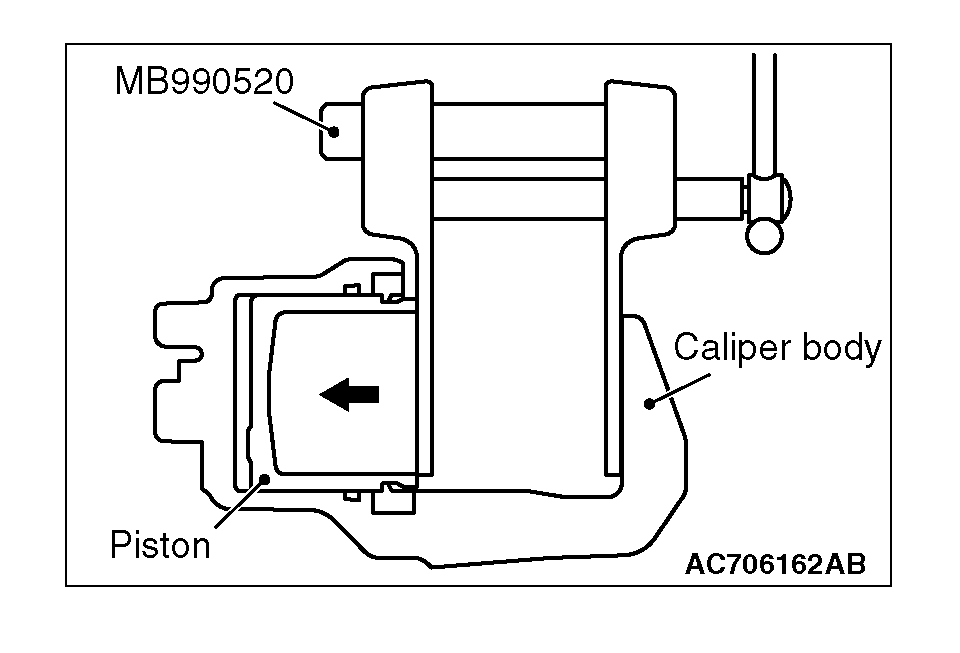
pic 7
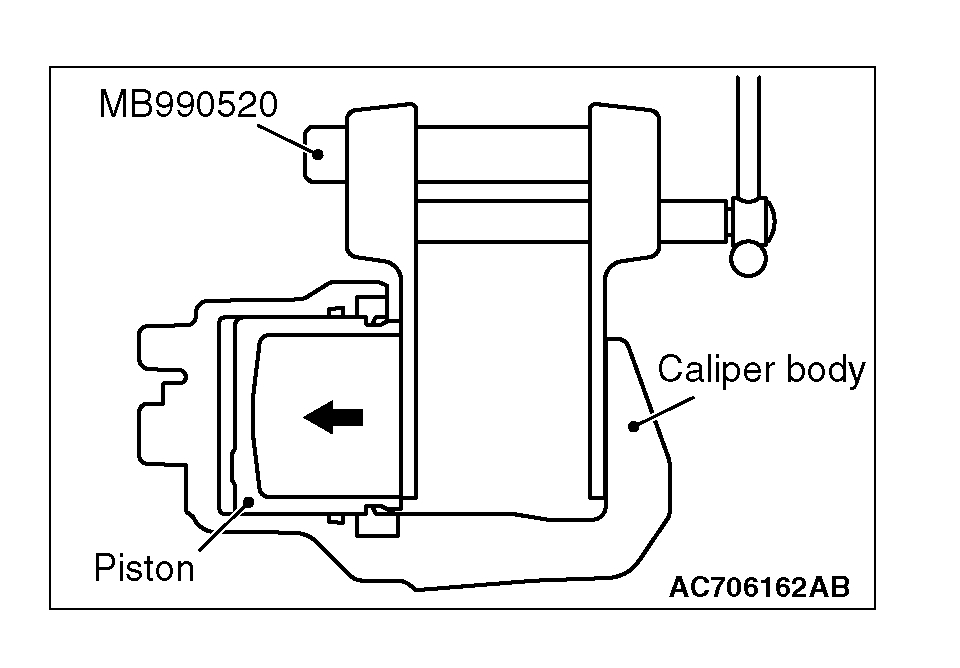
3. Clean the piston part, and press the piston into the cylinder using the special tool piston expander (MB990520).
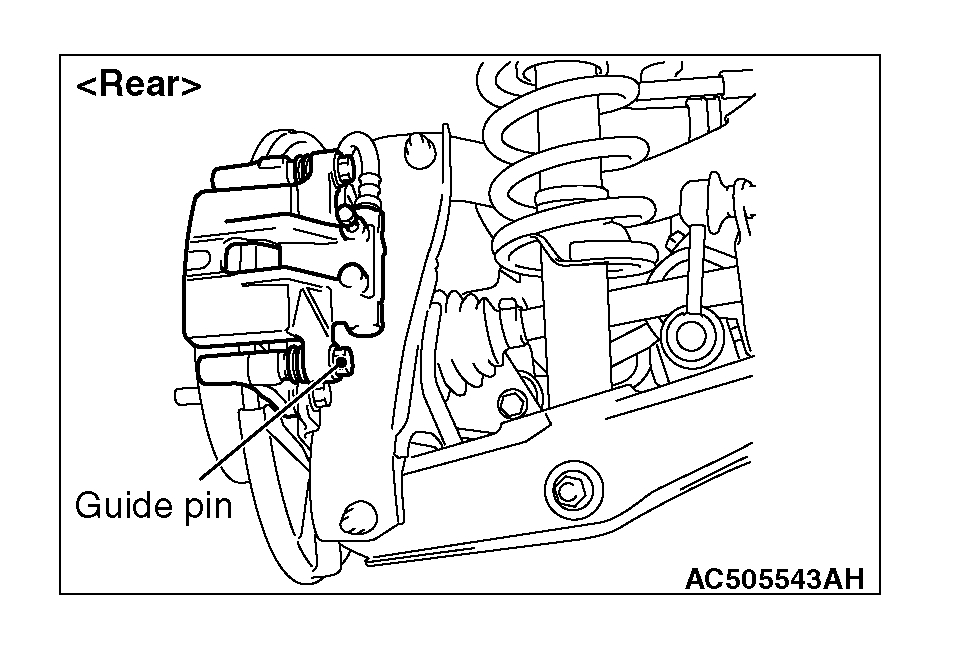
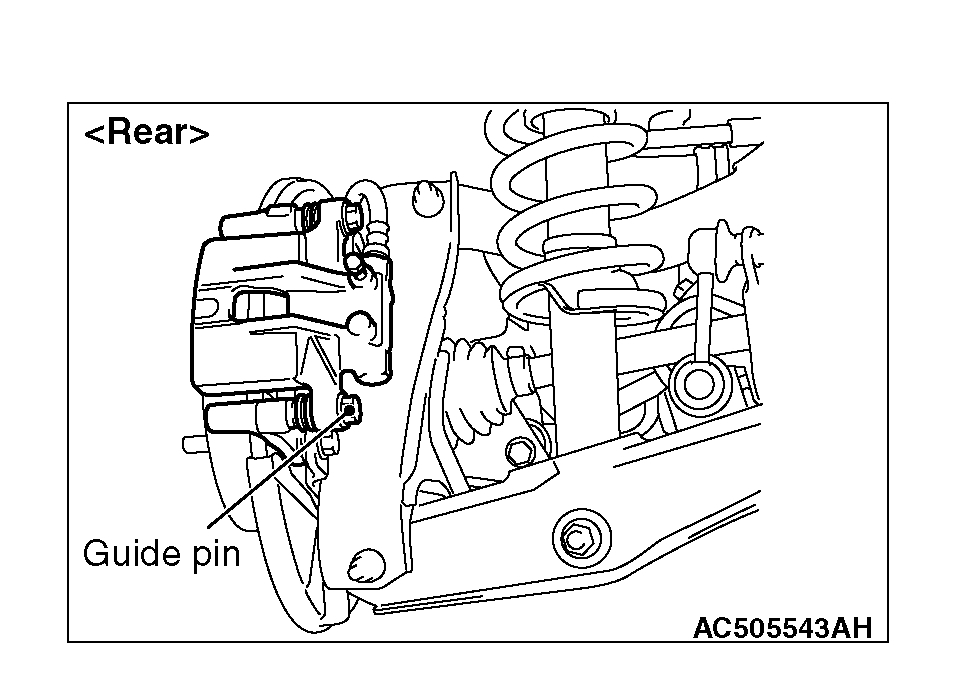
4. Assemble the shim, brake pad assembly and clip to the caliper support, and tighten the guide pin to the specified torque.
Tightening torque: 44 ± 5 Nm (32 ± 4 ft-lb)
NOTE: Install the brake pad assembly (with wear indicator) to the inner side of the brake disc, making sure that the wear indicator is located on the top.
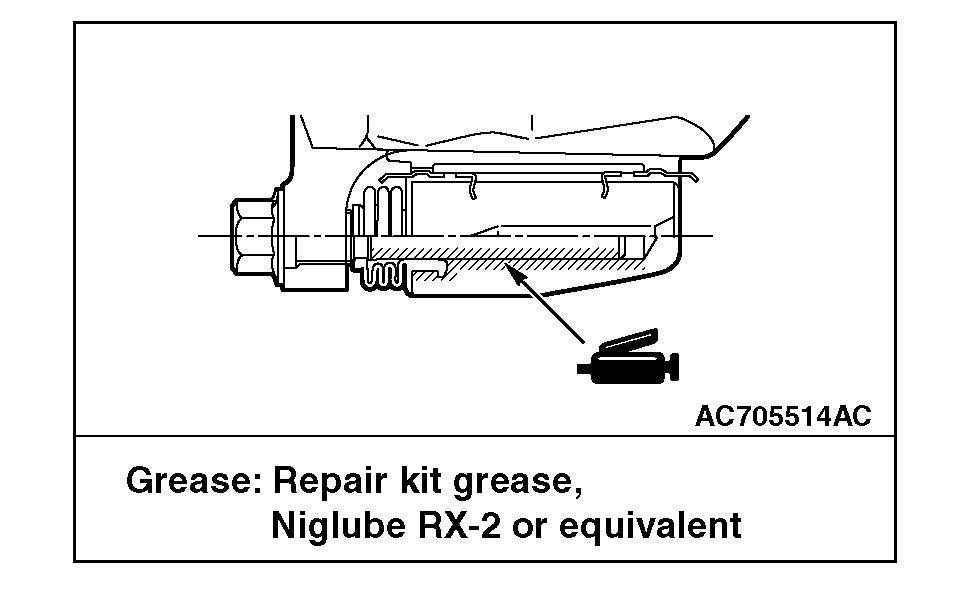
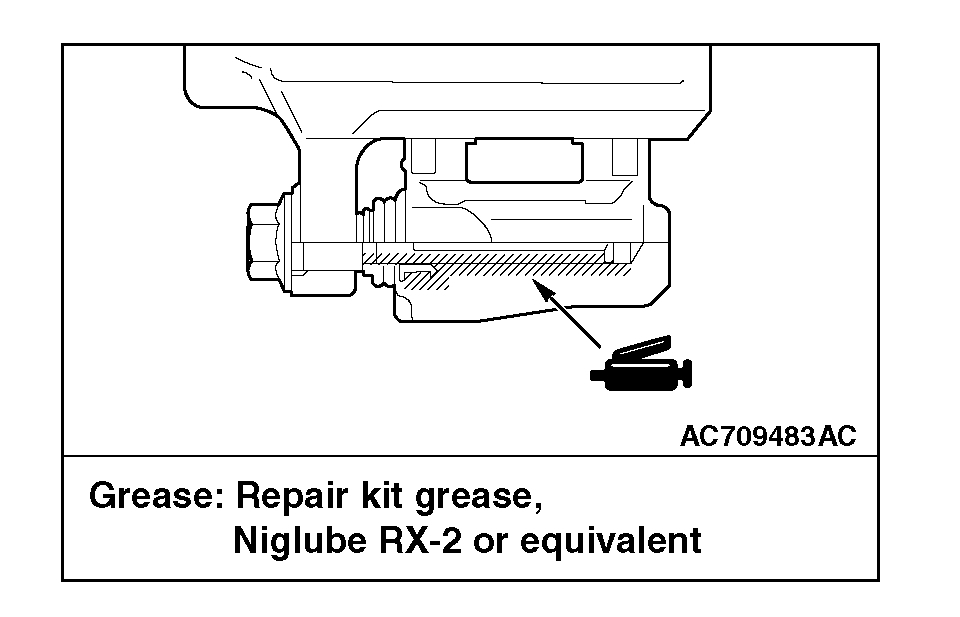
LUBRICATION POINT
pic 8
[REAR]
CAUTION
When replacing, replace both brake pads (right and left) as a set.
pic 9
1. Remove the parts indicated in the figure, swivel the caliper body upward and retain it with a wire or similar tool.
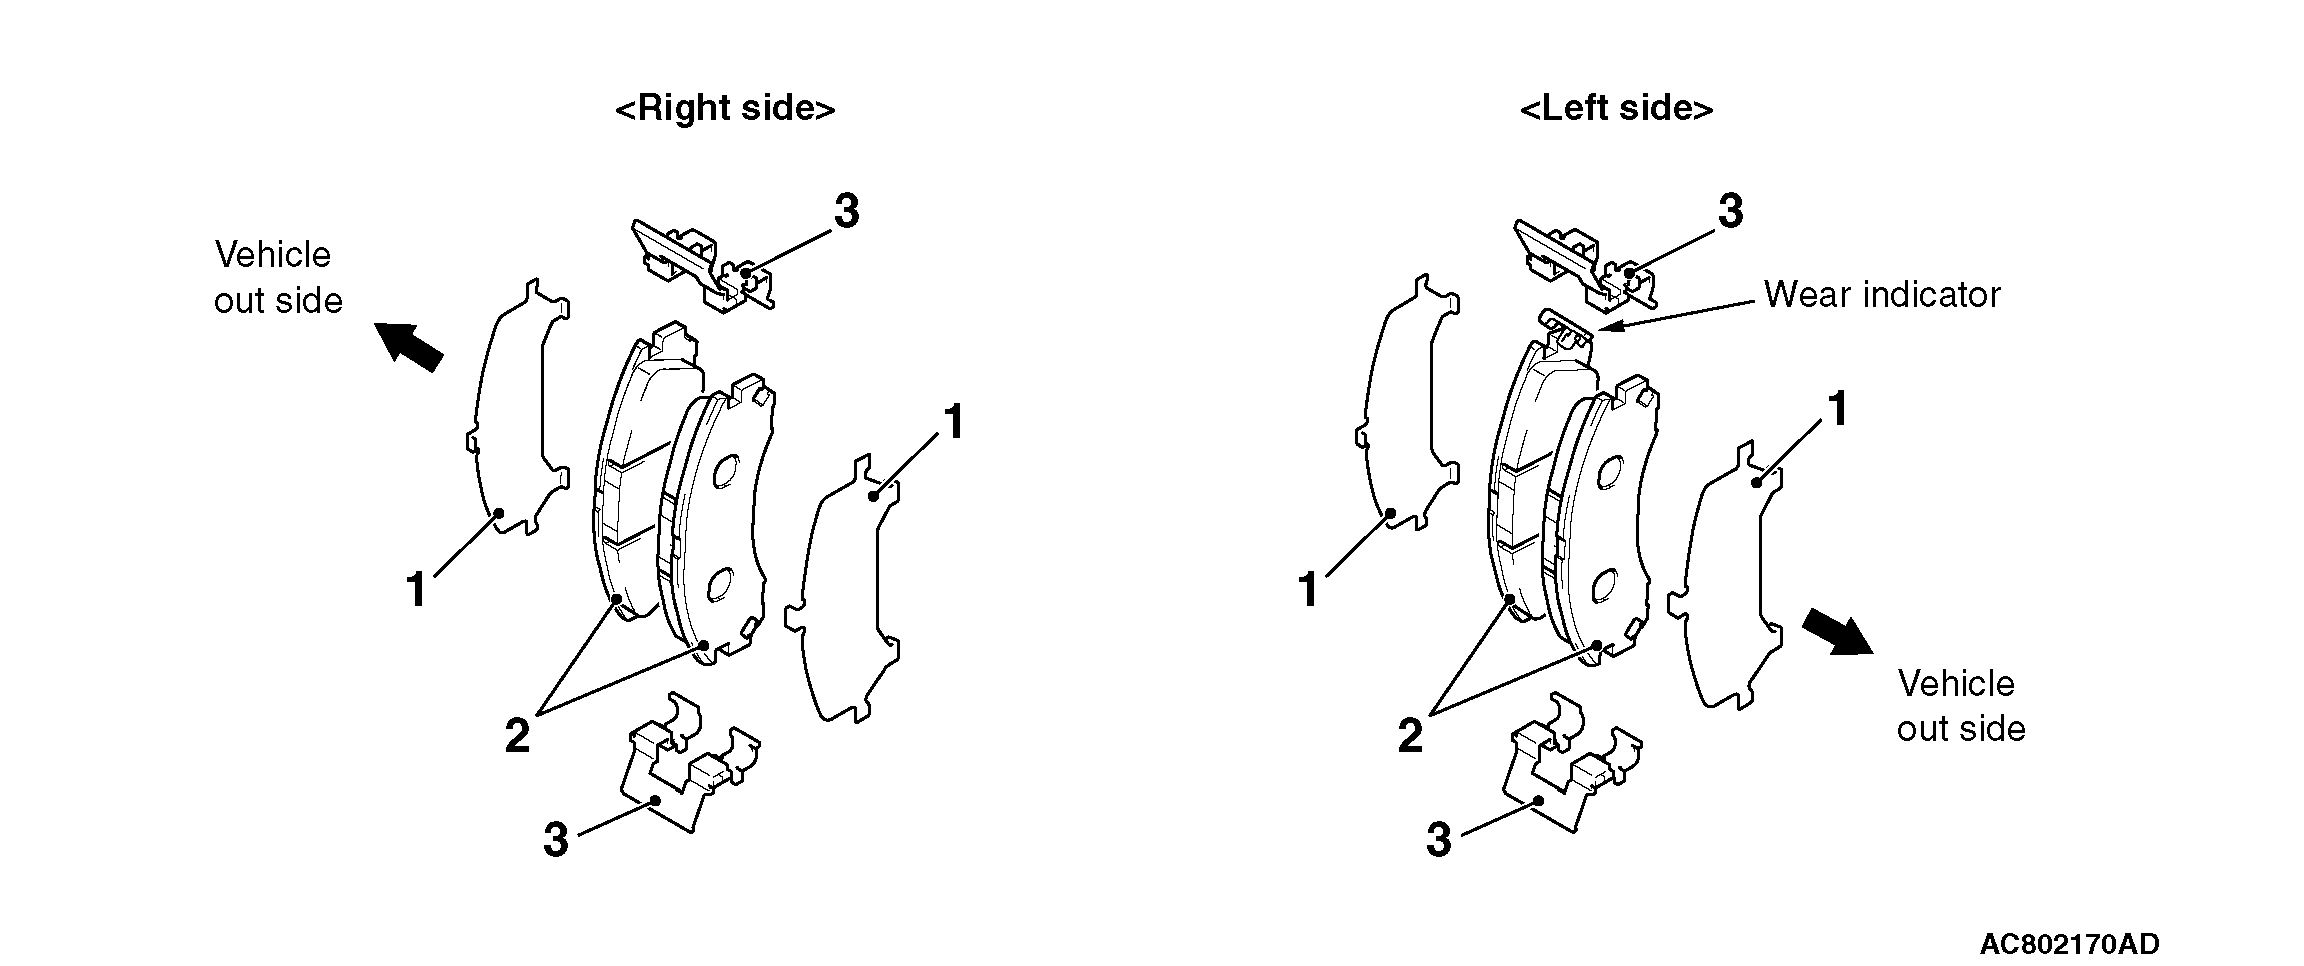
14-inch Rear Disc Brake
pic 10
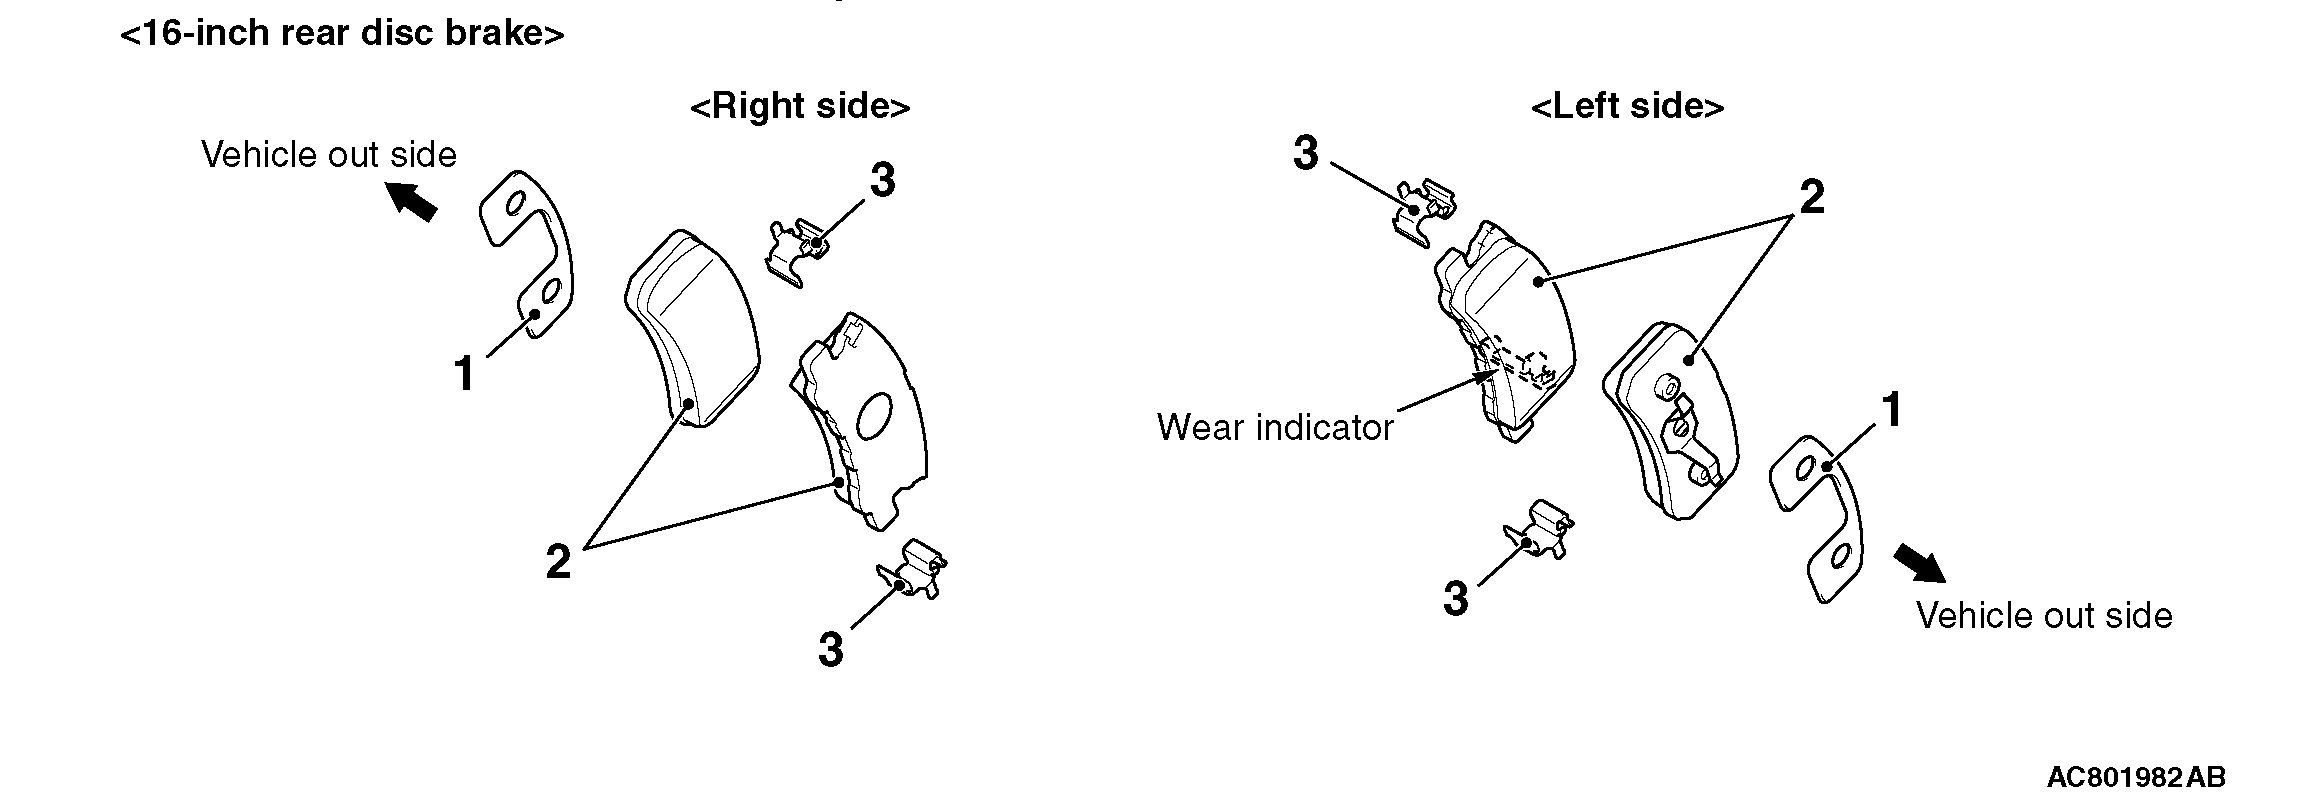
16-inch Rear Disc Brake
pic 11
2. Remove the following parts from the caliper body.
1) Shim
2) Brake pad assembly
3) Clip
NOTE:
^ The brake pad assembly with wear indicator is installed only to the inner side of the brake disc of the left-side brake at factory.
^ As for the accessory pad set, the brake pad with wear indicator has been established to the inner side of the brake disc on both right side brake and left side brake.
CAUTION
Keep grease or other soiling off the pad and brake disc friction surfaces.
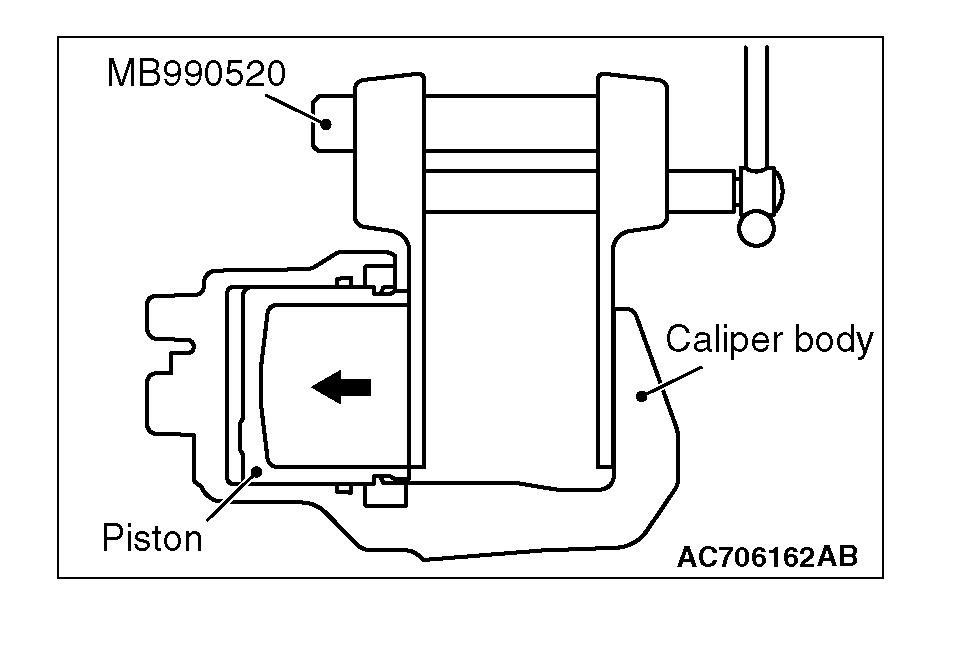
pic 12
3. Clean the piston part, and press the piston into the cylinder using the special tool piston expander (MB990520).
4. Assemble the shim, brake pad assembly and clip to the caliper support, and tighten the guide pin to the specified torque.
Tightening torque: 44 ± 5 Nm (32 ± 4 ft-lb)
NOTE: Install the brake pad assembly (with wear indicator) to the inner side of the brake disc, making sure that the wear indicator is located on the bottom.
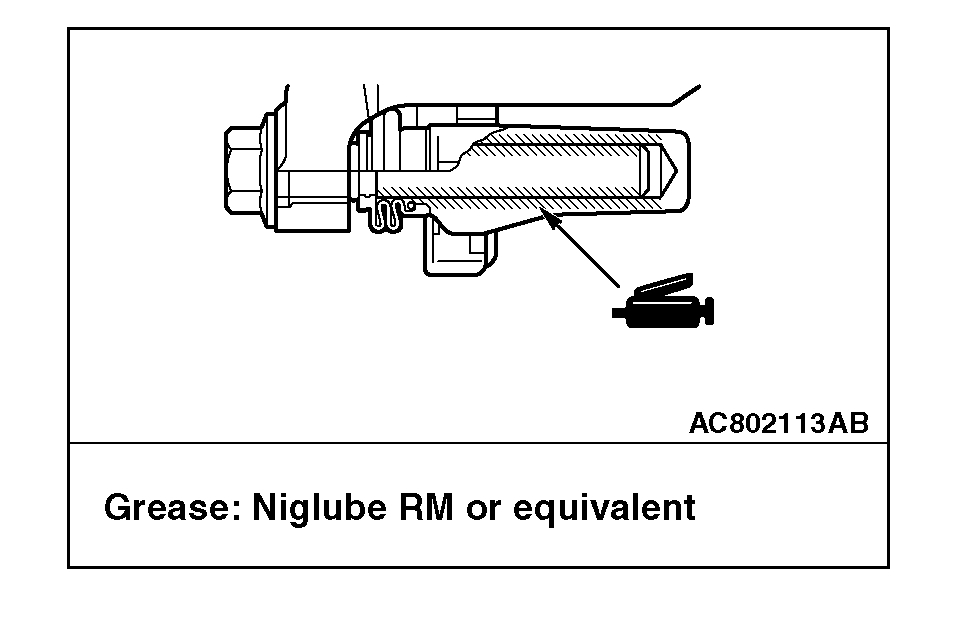
LUBRICATION POINT
BRAKE PAD REPLACEMENT [RALLIART]
pic 13
[FRONT]
CAUTION
When replacing, replace both brake pads (right and left) as a set.
pic 14
1. Remove the parts indicated in the figure, swivel the caliper body upward and retain it with a wire or similar tool.
pic 15
2. Remove the following parts from the caliper body.
1) Shim
2) Brake pad assembly
3) Clip
NOTE:
^ The brake pad assembly with wear indicator is installed only to the inner side of the brake disc of the left-side brake at factory.
^ As for the accessory pad set, the brake pad with wear indicator has been established to the inner side of the brake disc on both right side brake and left side brake.
CAUTION
Keep grease or other soiling off the pad and brake disc friction surfaces.
pic 16
3. Clean the piston part, and press the piston into the cylinder using the special tool piston expander (MB990520).
4. Assemble the shim, brake pad assembly and clip to the caliper support, and tighten the guide pin to the specified torque.
Tightening torque: 74 ± 10 Nm (55 ± 7 ft-lb)
NOTE: Install the brake pad assembly (with wear indicator) to the inner side of the brake disc, making sure that the wear indicator is located on the top.
LUBRICATION POINT
pic 17
[REAR]
CAUTION
When replacing, replace both brake pads (right and left) as a set.
pic 18
1. Remove the parts indicated in the figure, swivel the caliper body upward and retain it with a wire or similar tool.
pic 19
2. Remove the following parts from the caliper body.
1) Shim
2) Brake pad assembly
3) Clip
NOTE:
^ The brake pad assembly with wear indicator is installed only to the inner side of the brake disc of the left-side brake at factory.
^ As for the accessory pad set, the brake pad with wear indicator has been established to the inner side of the brake disc on both right side brake and left side brake.
CAUTION
Keep grease or other soiling off the pad and brake disc friction surfaces.
pic 20
3. Clean the piston part, and press the piston into the cylinder using the special tool piston expander (MB990520).
4. Assemble the shim, brake pad assembly and clip to the caliper support, and tighten the guide pin to the specified torque.
Tightening torque: 44 ± 5 Nm (32 ± 4 ft-lb)
NOTE: Install the brake pad assembly (with wear indicator) to the inner side of the brake disc, making sure that the wear indicator is located on the bottom.
_______________________________
I hope this helps. Let me know if you have other questions.
Take care and God Bless,
Joe
Images (Click to enlarge)
Feb 7, 2021 at 6:19 PM