Hello, thanks for the donation much appreciated.
You will need to remove the timing belt again and reset your timing marks correctly.
Hope this helps, let me know.
Timing belt
Removal;
Disconnect negative battery cable. Remove air cleaner assembly. Remove upper fan shroud. Remove cooling fan assembly. Remove all accessory drive belts.
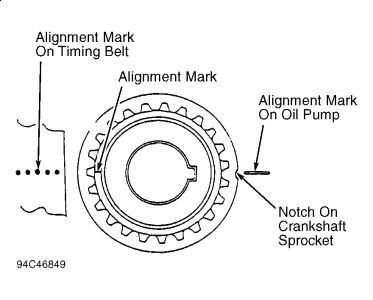
Remove fan pulley assembly. Remove crankshaft pulley bolt. Using Puller (J-8614-01) or equivalent, remove crankshaft pulley. Remove oil cooler hose from timing cover. Remove timing belt cover. Align all timing marks prior to belt removal. See Fig. 1 -Fig. 4 . Remove belt tensioner pusher and timing belt.
Fig. 1: Aligning Timing Belt Sprockets (DOHC)
Courtesy of ISUZU MOTOR CO.
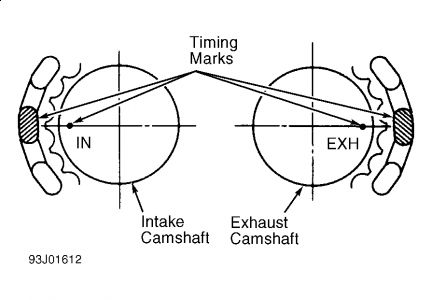
Fig. 2: Aligning Camshaft Timing Marks (DOHC)
Courtesy of ISUZU MOTOR CO.
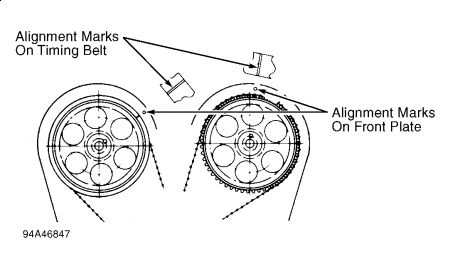
Fig. 3: Aligning Camshaft Timing Marks (SOHC)
Courtesy of ISUZU MOTOR CO.
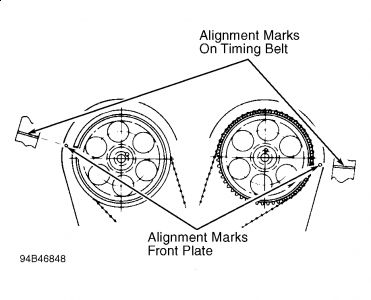
Fig. 4: Aligning Crankshaft Timing Marks (All Models)
Courtesy of ISUZU MOTOR CO.
Installation
CAUTION:To ensure correct timing belt installation, ensure direction of rotation arrows are pointing in proper direction. If timing belt is being reused, install belt in original direction of rotation.
Ensure all timing marks are aligned. Install belt over one pulley at a time starting at crankshaft sprocket and working counterclockwise. Belt should go over tensioner last. Secure belt at each pulley during installation with pinch clips.
Compress timing belt tensioner pusher and insert pin to retain pusher. Apply pressure to tensioner against belt, and install tensioner pusher. Tighten bolts to specification. See TORQUE SPECIFICATIONS .
Loosen tensioner pulley bolt. Apply pressure on belt by rotating tensioner. Tighten tensioner pulley bolt to specification.. See TORQUE SPECIFICATIONS . Remove pin from timing belt tensioner pusher.
Remove pinch clips from timing belt (if used). Install crankshaft pulley, tightening center bolt finger tight. Rotate crankshaft 2 turns clockwise. Ensure timing belt tensioner pusher rod protrudes proper amount.
If timing belt tensioner pusher rod protrusion is not within specification, remove pusher, loosen tensioner pulley bolt and readjust. Reset timing belt tensioner pusher rod and repeat step 3 . Remove crankshaft pulley and install timing belt cover. To complete installation, reverse removal procedure. Tighten nuts and bolts to specification. See TORQUE SPECIFICATIONS . Adjust drive belts to proper tension.

Jul 15, 2018 at 6:50 PM
