Hi,
If you remove the fuse that the alarm works with, the car won't run. What I feel you need to do is replace the lock that broke. Also, it can't be disarmed.
If you decide to replace the handle/lock, here are the directions. The attached pics correlate with the directions. Note, the lock assembly can be replaced without replacing the handle, but the handle must be removed.
__________________________________________
2007 Honda Accord L4-2.4L
Sedan
Vehicle Body and Frame Doors, Hood and Trunk Doors Front Door Front Door Handle Front Door Exterior Handle Service and Repair Removal and Replacement Sedan
SEDAN
Front Door Outer Handle Replacement
4-door
NOTE: Put on gloves to protect your hands.
1. Remove these items:
- Door panel
- Plastic cover, as necessary
2. Raise the glass fully.
pic 1
3. Pull the glass run channel (A) away as necessary, and remove the bolt, then remove the center lower channel (B) by pulling it downward.
pic 2
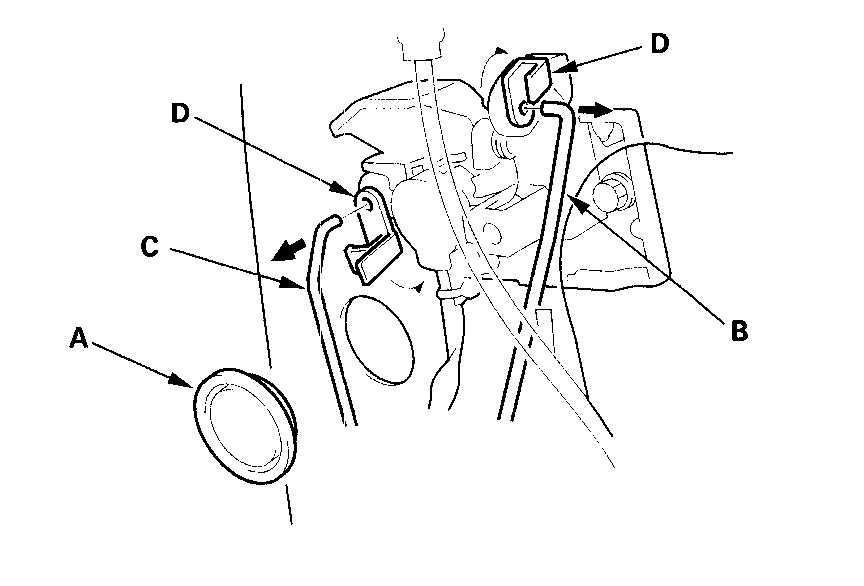
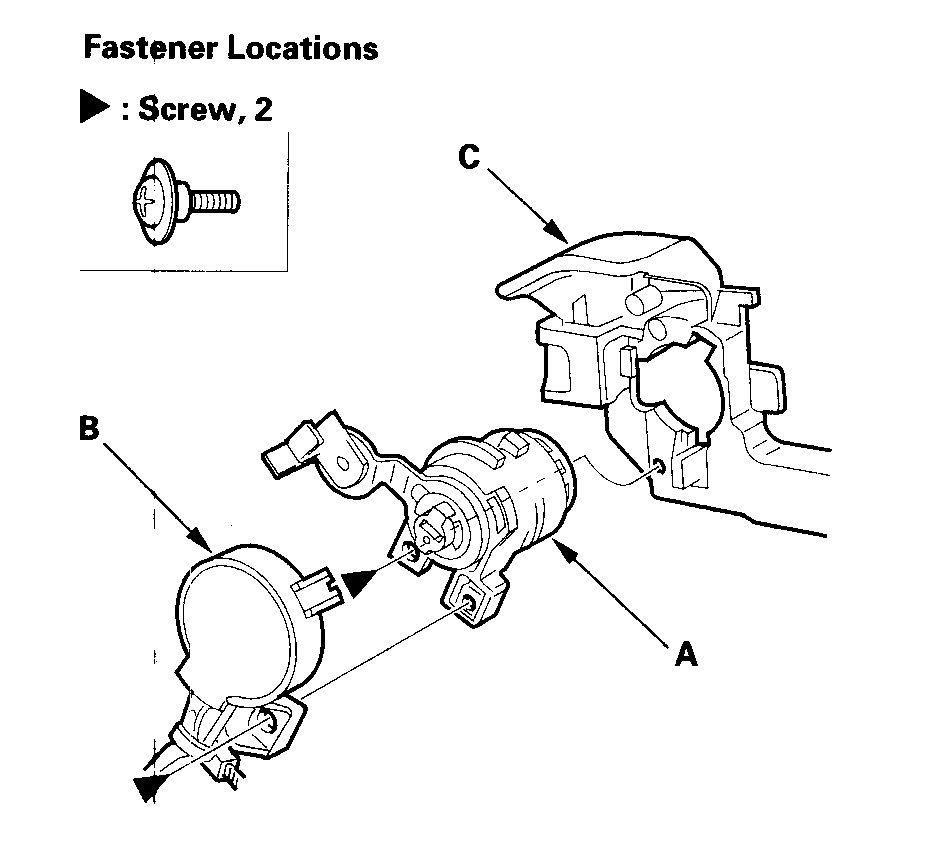
4. Remove the maintenance cap (A), then disconnect the outer handle rod (B), and cylinder rod (C) from the joint bushings (D).
NOTE: Check the joint bushing for damage and replace if necessary.
pic 3
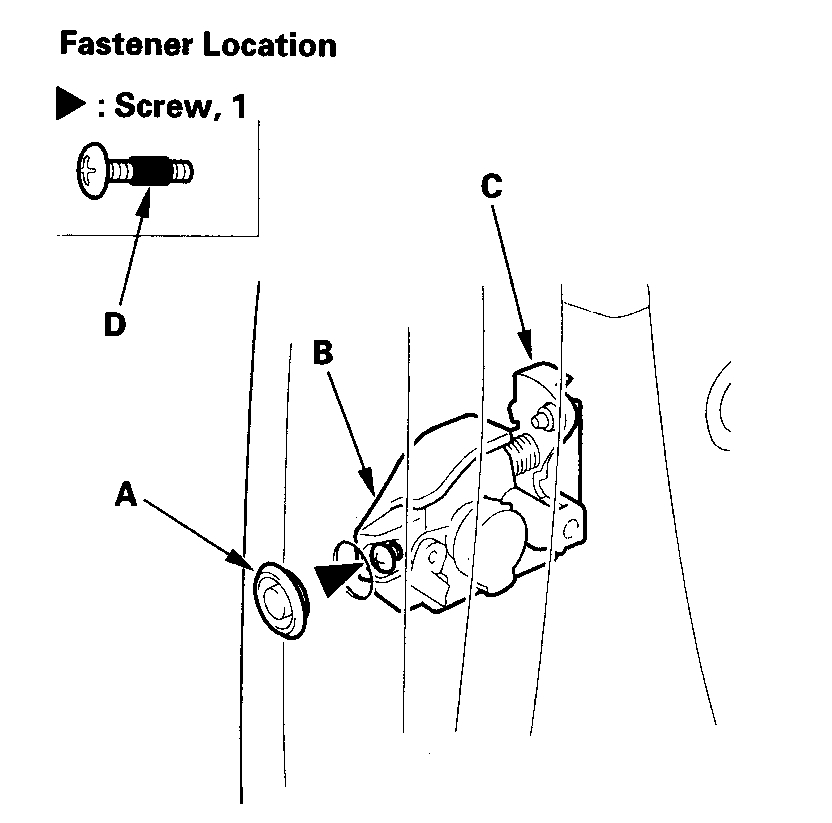
5. Driver's and some passenger's: Remove the maintenance cap (A) from the rear of the door, then loosen the screw securing the lock cylinder protector (B) and the outer handle (C).
NOTE: Because of the tape (D) on the middle of threads, the screw will stay on the protector after it is loosened.
pic 4
6. Remove the bolt, slide the lock cylinder protector (A) rearward, then remove the lock cylinder switch (for some models), lock cylinder, and lock cylinder protector as an assembly.
pic 5
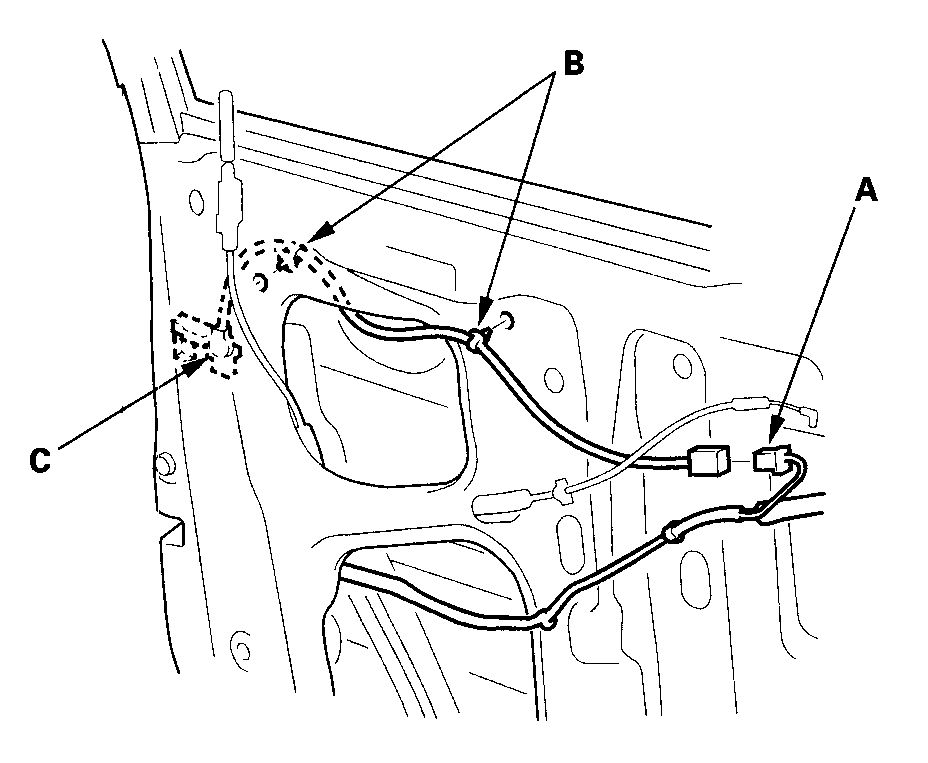
7. With lock cylinder switch: Disconnect the lock cylinder switch connector (A), and detach the harness clips (B), then remove the lock cylinder switch (C).
pic 6
8. Remove the screws, then separate the lock cylinder (A), lock cylinder switch (B) (for some models), and lock cylinder protector (C).
pic 7
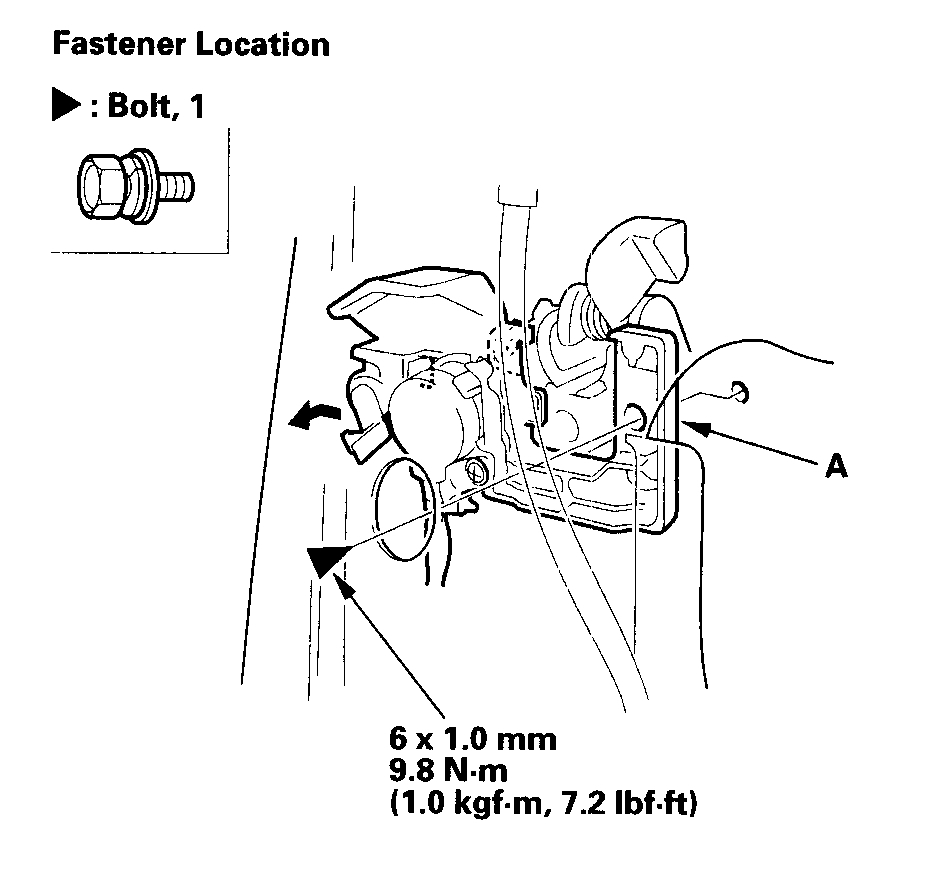
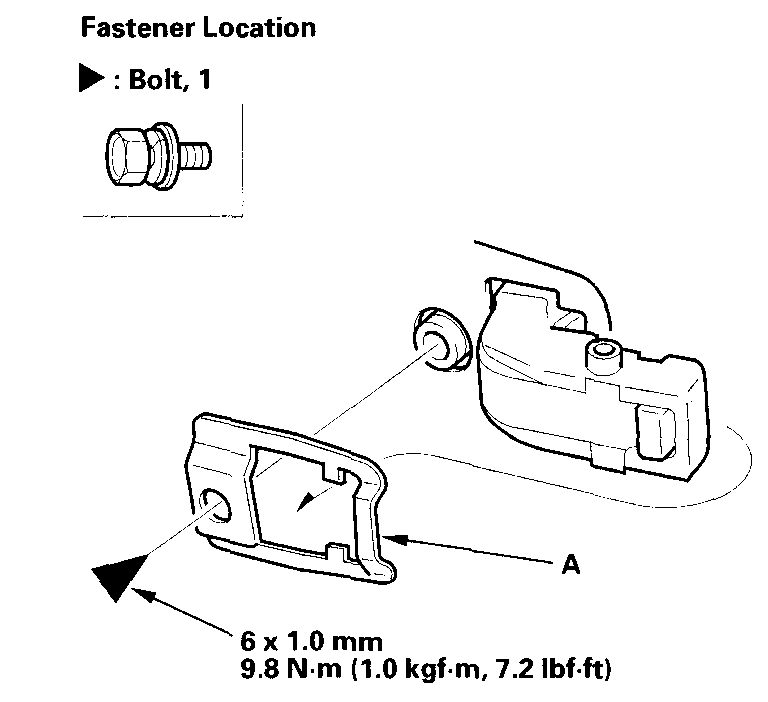
9. Remove the bolt, then remove the spacer (A).
pic 8
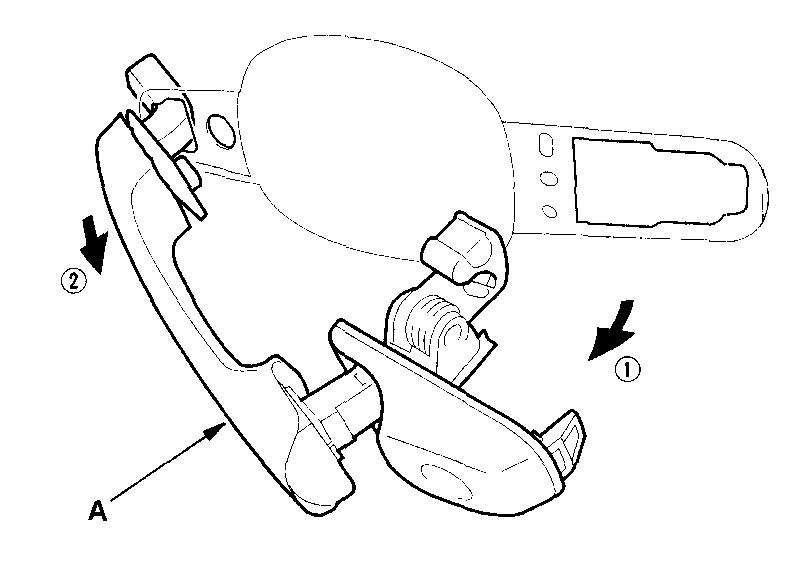
10. While pulling the outer handle (A), remove the handle from the holes in the door panel. Take care not to scratch the door.
11. Install the handle in the reverse order of removal, and note these items:
- Make sure the lock cylinder switch harness is routed properly (for some models).
- Make sure the lock cylinder switch connector is plugged in properly (for some models), and each rod is connected securely.
- Be sure that the end of the lock cylinder is engaged with the lock cylinder switch correctly.
- Make sure the door lock cylinder/door locks operate properly.
- Make sure the door handle works properly.
- Do the power window control unit reset procedure.
- When reinstalling the door panel, make sure the plastic cover is installed properly and sealed around its outside perimeter to seal out water.
- Check for water leaks.
________________________________________
I hope this helps. Let me know if you have other questions.
Take care and God Bless,
Joe
Images (Click to enlarge)
Feb 4, 2021 at 4:30 PM