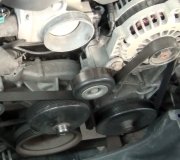
Here is are a couple guides to help you see whats going on when doing the job.
https://www.2carpros.com/articles/replace-serpentine-belt
This is what is like for your car
https://www.2carpros.com/diagrams/hyundai/sonata/2004
The serpentine belt is what drives the alternator power steering pump etc. Its probably what they meant because you cant see the timing belt unless covers are removed.
There is a pulley tensioner assembly that acts as a tensioner for the serpentine belt. You can find it by looking for a pulley that doesn't drive a pump, is on a short bracket with a spring that applies tension toward the belt and is not the pulley on the crankshaft. It pivots to loosen the belt when pressure is applied to the center bolt through the pulley.
Draw a diagram of how the belt turns around all the pulley BEFORE you remove the belt and look for a sticker on the underside of the hood or on the radiator support for a drawing of the belt route.
Use extreme caution, when tension is on the wrench, turning the belt tensioner assembly , that the wrench doesn't slip catching a finger between the belt and pulley.
Use a long wrench or a combination of wrenches for leverage to apply pressure to the tensioner pulley assembly bolt, in the direction that releases the tension off the belt, until the belt is loose, about a 1/4 turn. hold tension while slipping the belt off one of the pulleys then release the pressure off the wrench, letting the tension off of the pulley tensioner assembly.
Assemble in reverse, wrapping belt around all pulleys except the tensioner pulley, or most convenient pulley, until tensioner is sprung back enough to accept belt.
This is a very simple repair but must be done safely and correctly to make sure all belt ribs of the belt are in the grooves of the pulleys correctly.
It may take someone 45 min to 1 hour the first time, but the second time probably only 15 min. It sounds a lot more complicated than it really is.
Please let us know if you need anything else to get the problem fixed.
Cheers, Ken
Thursday, October 12th, 2017 AT 6:17 PM


