Welcome to 2CarPros.
When air flow directions is not working, chances are it is the mode door actuator. That actuator is responsible for where the air comes out from the vehicle.
Here are the directions for replacing that actuator. I am giving the directions for replacement, but the pictures should help you locate the actuator and confirm it isn't working. The pictures attached correlate with the directions.
__________________
2004 Chevy Truck TrailBlazer 2WD L6-4.2L VIN S
Mode Actuator Replacement
Removal Procedure
1. Remove the left side sound insulator screws.
2. Remove the left hand floor duct. Refer to Floor Air Outlet Duct Replacement - Left Side See: Air Duct > Procedures.
pic 1
3. Disconnect the electrical connector from the mode actuator.
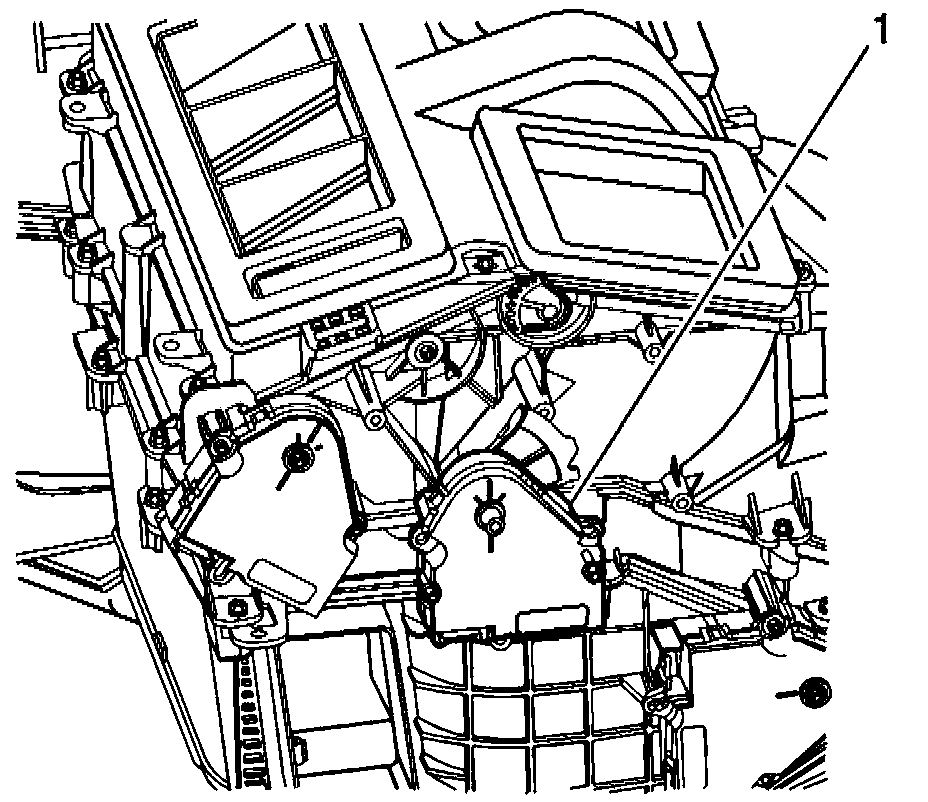
4. Remove the screws from the mode actuator (1).
5. Remove the mode actuator.
Installation Procedure
pic 2
Important: The new actuator is in Bi-Level mode. Place the door in the middle of the travel position before you install the actuator.
1. Install the mode actuator (1).
Notice:
2. Install the screws to the mode actuator (1).
Tighten
Tighten the screws to 1.9 Nm (18 lb in).
3. Install the left hand floor duct. Refer to Floor Air Outlet Duct Replacement - Left Side See: Air Duct > Procedures.
4. Install the left side sound insulator screws.
5. Recalibrate the mode actuator. Refer to Actuator Recalibration See: Heating and Air Conditioning > Programming and Relearning.
________________________________________
If you replace the actuator, here are the directions for recalibration. The manual recommends the use of a scan tool to do this, but it can be done without. I will supply the directions without the tool.
Alternate Method (w/o Scan Tool)
1. Clear all DTCs.
2. Place the ignition switch to the OFF position.
3. Install the HVAC actuator.
4. Connect all previously disconnected components.
5. Remove the HVAC B fuse for a minimum of 10 seconds.
6. Install the HVAC B fuse.
7. Start the vehicle.
8. Wait 40 seconds for the HVAC control module to self-calibrate.
9. Verify that no DTCs have set as current DTCs.
___________________________
Let me know if this helps or if you have other questions.
Take care,
Joe
Images (Click to enlarge)
Aug 24, 2019 at 9:16 PM