Good morning,
This is a major repair. The transmission must be removed to access the rear main oil seal.
If you do not trust this tech, then you need to go to someone you can trust.
Roy
Removal Procedure
1. Remove the engine flywheel. Refer to Engine Flywheel Replacement (See: Flex Plate > Removal and Replacement > Engine Flywheel Replacement).
2. Remove the crankshaft rear oil seal. Refer to Crankshaft Rear Oil Seal Removal (See: Engine > Overhaul).
Installation Procedure
1. Install the crankshaft rear oil seal. Refer to Crankshaft Rear Oil Seal Installation (See: Engine > Overhaul).
2. Install the engine flywheel. Refer to Engine Flywheel Replacement (See: Flex Plate > Removal and Replacement > Engine Flywheel Replacement).
Transmission removal
Removal Procedure
1. Remove battery tray. Refer to Battery Tray Replacement (See: Battery Tray > Removal and Replacement > Battery Tray Replacement).
imageOpen In New TabZoom/Print
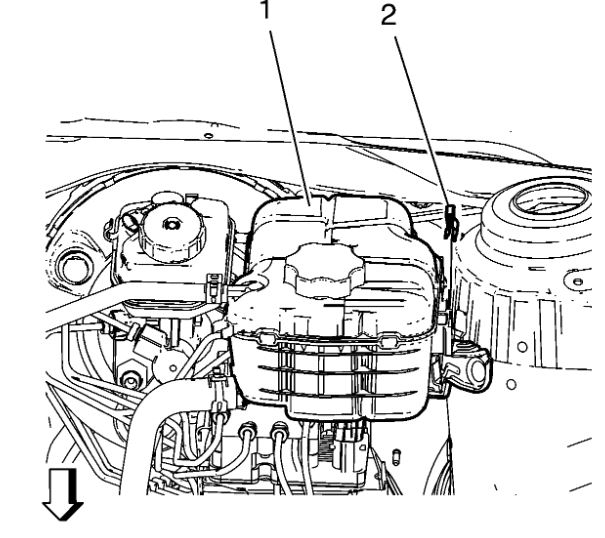
Note: Do NOT disconnect engine coolant hoses.
2. Remove the radiator surge tank clip (2).
3. Remove the radiator surge tank (1).
4. Remove the transmission shift lever cable from transmission. Refer to Manual Transmission Shift Lever and Selector Lever Cable Replacement (See: Shifter M/T > Removal and Replacement > Manual Transmission Shift Lever and Selector Lever Cable Replacement).
imageOpen In New TabZoom/Print
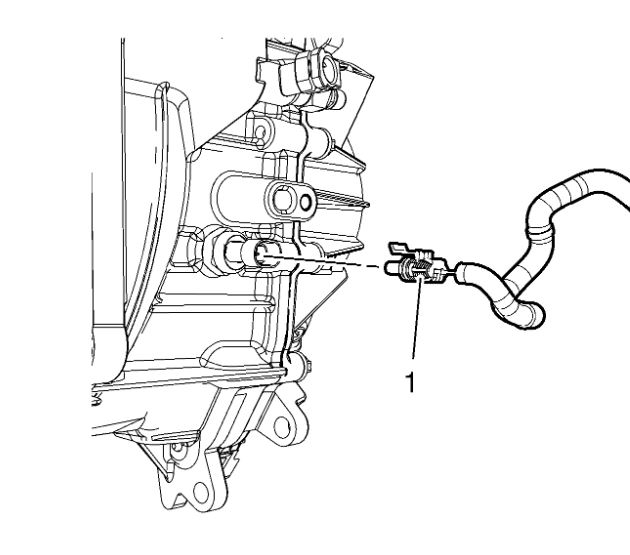
5. Disconnect the electrical connector (1) from the backup lamp switch.
imageOpen In New TabZoom/Print
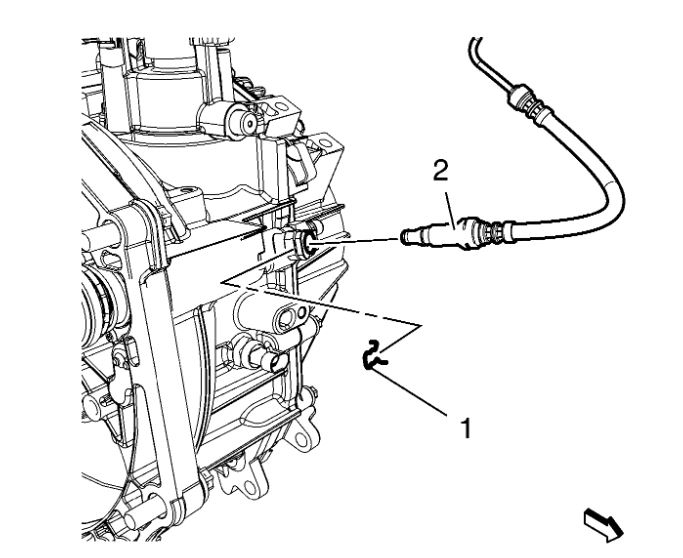
Note: Before disconnecting the clutch actuator cylinder front pipe, remove the clutch/brake fluid from the reservoir tank.
6. Remove the clutch actuator cylinder front pipe retainer (1).
7. Disconnect the clutch actuator cylinder front pipe (2) from the clutch actuator cylinder pipe elbow.
imageOpen In New TabZoom/Print
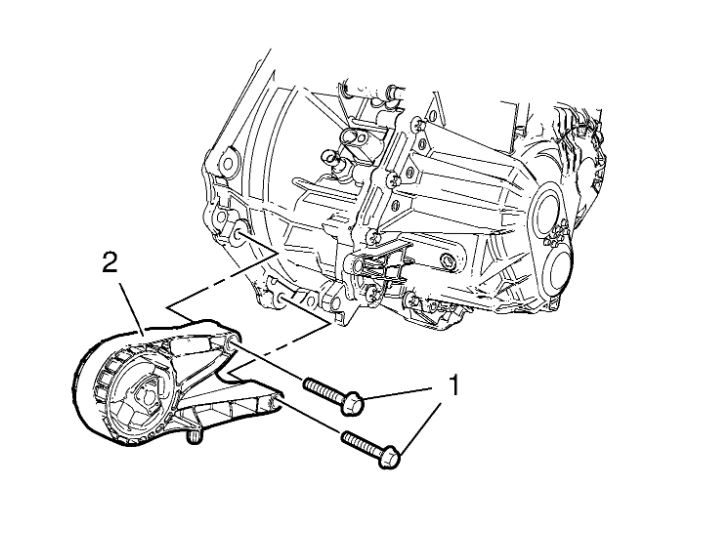
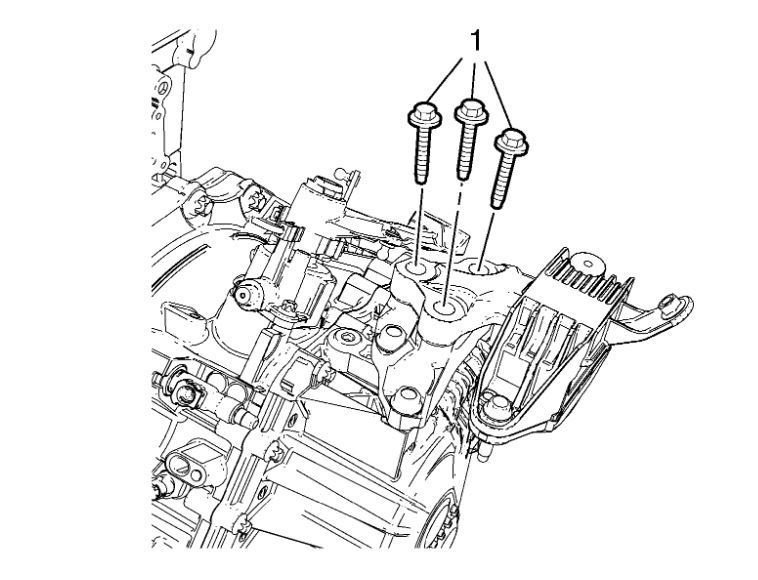
8. Remove the 3 upper transmission bolts from engine (1).
9. Raise and support the vehicle. Refer to Lifting and Jacking the Vehicle (See: Vehicle Lifting > Procedures > Lifting and Jacking the Vehicle).
10. Remove the drivetrain and front suspension frame. Refer to Drivetrain and Front Suspension Frame Replacement (See: Front Subframe > Removal and Replacement > Drivetrain and Front Suspension Frame Replacement).
imageOpen In New TabZoom/Print
11. Remove transmission front mount from transmission (2). Remove 2 bolts (1).
imageOpen In New TabZoom/Print
12. Remove the transmission mount bracket bolts (1) and the rear transmission mount bracket (2).
13. Drain transmission fluid. Refer to Transmission Fluid Level Inspection (See: Manual Transmission/Transaxle > Overhaul > Transmission Fluid Level Inspection).
14. Disconnect the left front wheel drive shaft from the transmission. Refer to Front Wheel Drive Shaft Replacement - Left Side (See: Axle Shaft Assembly > Removal and Replacement > Front Wheel Drive Shaft Replacement - Left Side).
15. Remove the front wheel drive intermediate shaft. Refer to Front Wheel Drive Intermediate Shaft Replacement (See: Axle Shaft Assembly > Removal and Replacement > Front Wheel Drive Intermediate Shaft Replacement).
16. Lower the vehicle.
17. Install the engine support fixture. For the 1.4L engine, refer to Engine Support Fixture (See: Engine > Overhaul).
For the 1.8L engine, refer to Engine Support Fixture (See: Engine > Overhaul).
imageOpen In New TabZoom/Print
18. Remove and DISCARD the transmission mount bolts (1) from transmission mount bracket.
19. Lower the engine and the transmission on the left hand side with the engine support fixture.
imageOpen In New TabZoom/Print
20. Remove transmission mount bracket - left side from transmission (2). Remove 3 transmission mount bracket bolts (1).
21. Raise the vehicle.
imageOpen In New TabZoom/Print
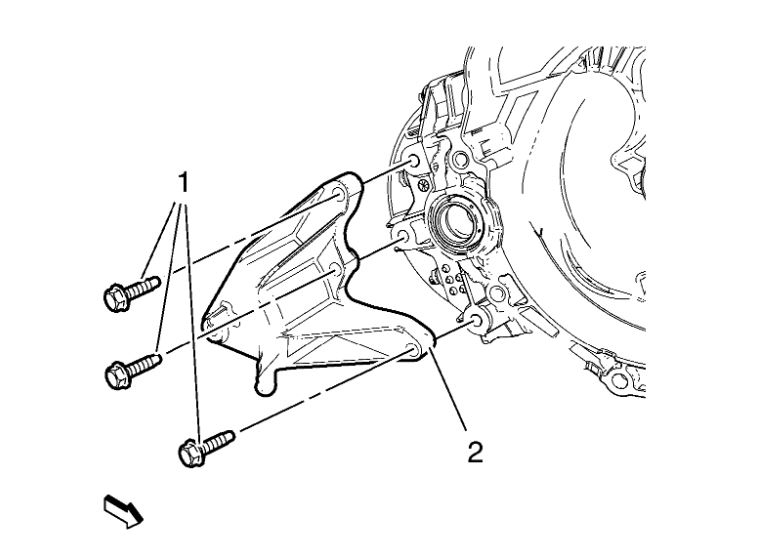
22. Remove 4 transmission lower bolts (1)
23. Remove transmission lower bolt and nut (2)
Caution: Refer to Fastener Caution (See: Vehicle > Vehicle Damage Warnings > Fastener Caution).
24. Install NEW oil drain plug and tighten to 20Nm15 (lb ft).
25. Using a suitable straps or chains, secure the transmission to a suitable transmission jack.
imageOpen In New TabZoom/Print
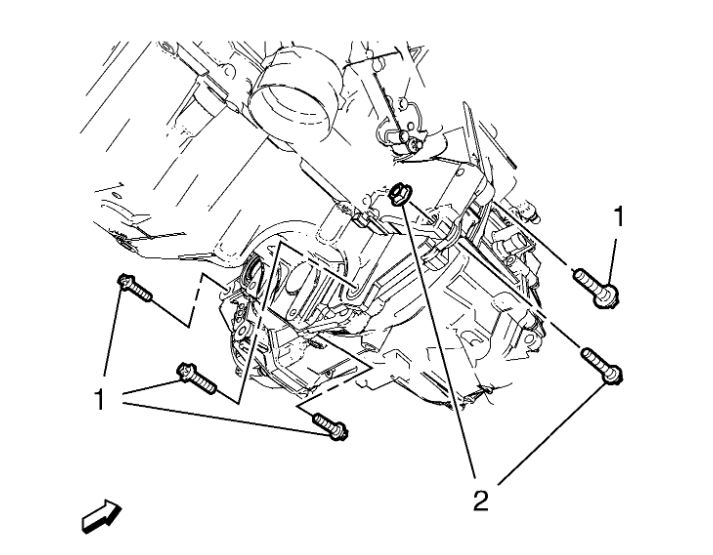
26. Remove the remaining lower transmission bolts (1).
27. Separate the transmission from the engine.
28. Lower the transmission from the vehicle.
Images (Click to enlarge)
Mar 5, 2019 at 11:44 PM