Hi and thanks for using 2CarPros.
Here is a link that shows in general how to perform a tune up. I thought it may be helpful.
https://www.2carpros.com/articles/how-to-tune-up-a-car-engine
Here is a link that shows in general how to replace spark plugs:
https://www.2carpros.com/articles/how-to-change-spark-plugs
Here are the directions specific to your vehicle for replacing spark plugs:
REMOVAL AND INSTALLATION
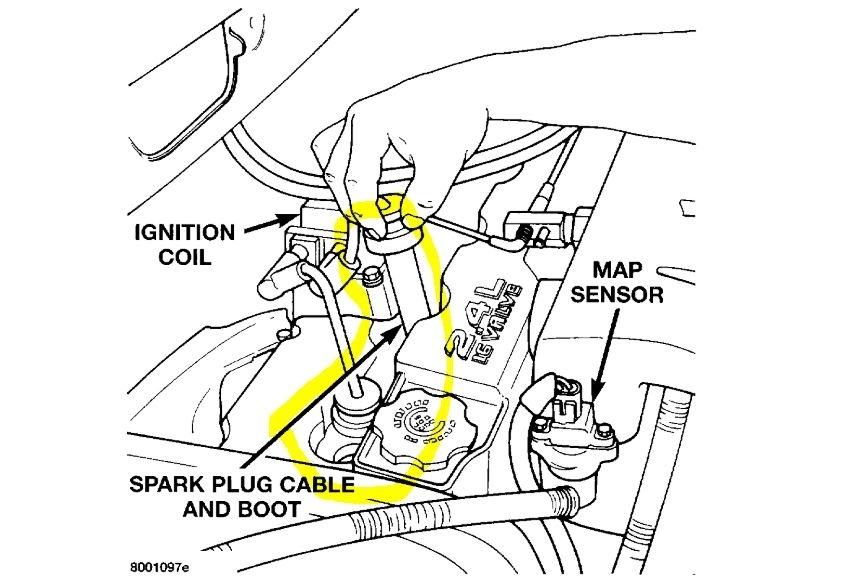
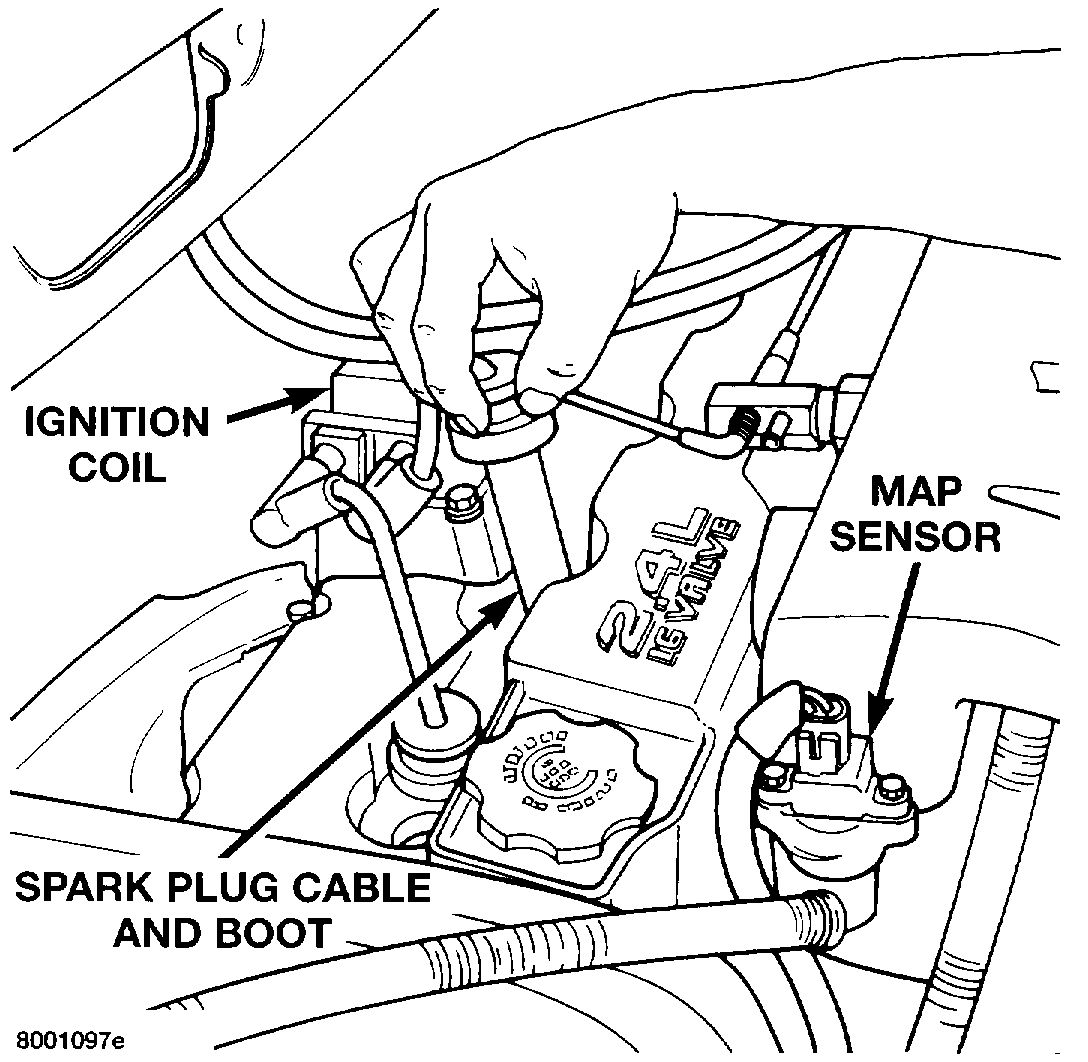
Fig 6 Spark Plug Cables
See picture 1
CAUTION: Note routing of secondary ignition cables before removing.
- Failure to route cables properly may result in radio interference, ignition cross fire, or ignition short to ground.
NOTE: Keep plugs in order removed.
- A plug, that looks different from the rest, could be a problem indicator.
CAUTION: Never Wire Brush Spark Plugs.
- The spark plug insulator tip is harder than the bristles of wire brushes.
- Bristles of wire brushes can leave a conductive, metallic film on the insulator which could lead to conductive deposits.
- Conductive deposits can cause spark plug failure and engine misfire.
- Use a jewelers file to remove deposits from the electrode gap or use a spark plug cleaning machine to clean spark plugs.
Always remove cables by grasping at the boot, rotating the boot 1/2 turn, and pulling straight back in a steady motion.
REMOVAL
1. Spray compressed air around spark plug to prevent foreign material from entering combustion chamber.
2. Remove spark plug wire by grasping boot and turning 1/2 turn while pulling boot back in a steady motion.
3. Remove spark plug using socket with foam insert.
INSPECT FOR:
- Color of Deposits
- Excessive Deposits
- Electrode wear
- Cracked Porcelain
- Damaged Threads Or Insulator
- Worn, Burned or Bent Electrodes
- Damaged Gasket
CAUTION: Special care should be used when installing spark plugs in the cylinder head spark plug wells. Be sure the plugs do not drop into the wells, damage to the electrodes can occur.
INSTALLATION
1. Start plug in cylinder head by hand, to prevent cross threading.
CAUTION: Do not over-tighten plugs, over-tightening can distort plugs resulting in a changed gap.
2. Tighten spark plugs to 28 Nm (20 ft lb) torque.
CAUTION: Always tighten spark plugs to the specified torque. Over tightening can cause distortion resulting in a change in the spark plug gap. Over-tightening can also damage the cylinder head.
3. Install secondary ignition cables on spark plugs, (be sure connectors are pushed onto plug completely).
- A click will be heard and felt when the cable properly attaches to the spark plug.
CAUTION: When replacing spark plugs because of a high speed miss condition; wide open throttle operation should be avoided for approximately 80 km (50 miles) after installation of new plugs. this will allow deposit shifting in the combustion chamber to take place gradually and avoid plug destroying splash fouling shortly after the plug change.
___________________________________________
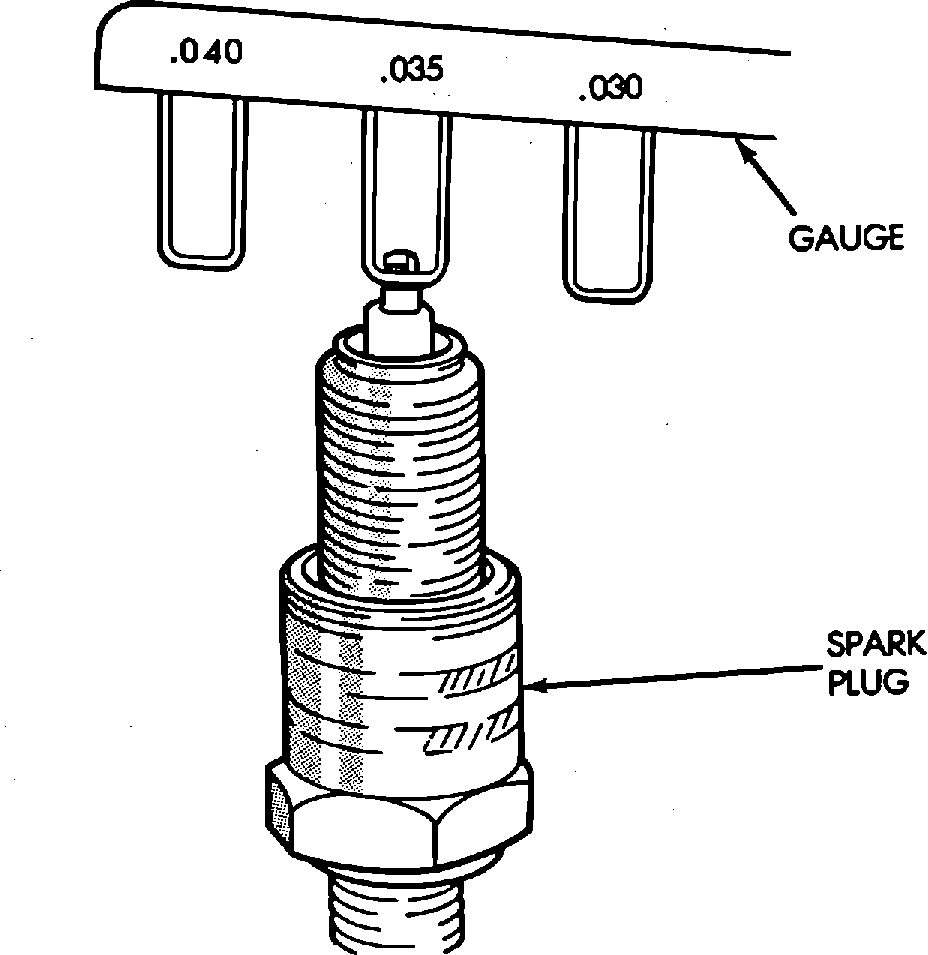
You will need to confirm the new plugs are properly gaped. See pic 2 which shows how the gap is checked. You will need a feeler gauge to do this. Here are the gap specifications for your vehicle.
Gap .................... 1.2 - 1.3 mm (0.047 - 0.051 in)
__________________________________________________
Let me know if this helps or if you have other questions.
Take care,
Joe
Images (Click to enlarge)
Jan 13, 2019 at 11:49 AM