Welcome to 2CarPros.
This is a somewhat involved job. However, other than a slid hammer and a bearing setter (which most parts stores will lend you) no major tools are needed. The axle shaft needs to be removed from the axle housing which does require the vehicle to be lifted, safely supported, in this case, the right tire to be removed, the brakes and rotor to be removed, and then the differential cover needs removed, which will cause the fluid to drain.
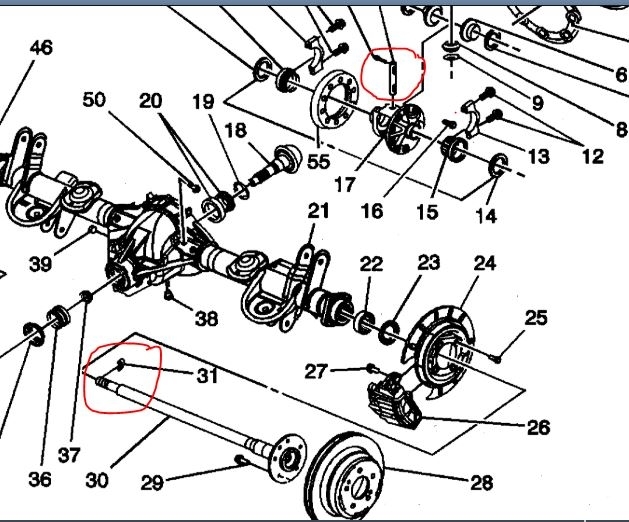
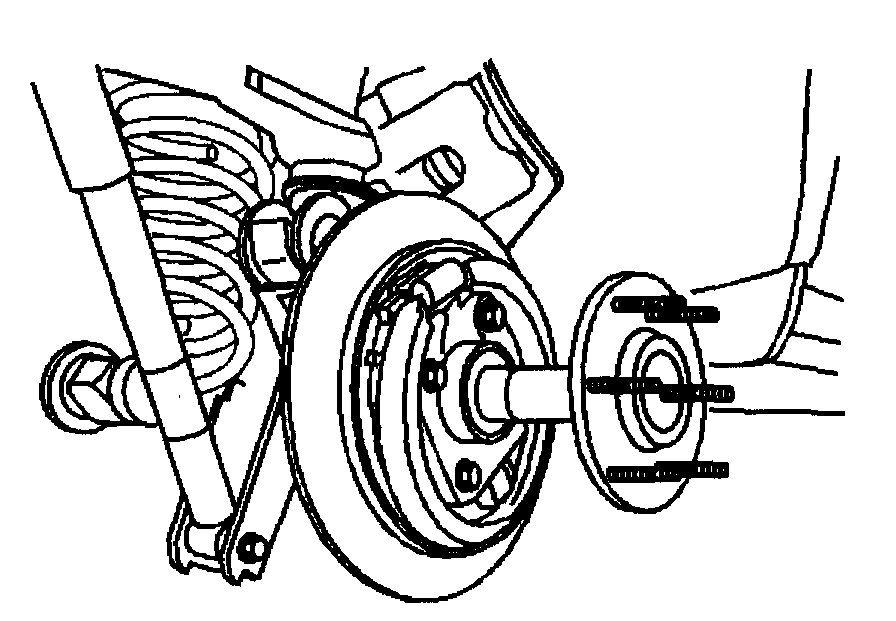
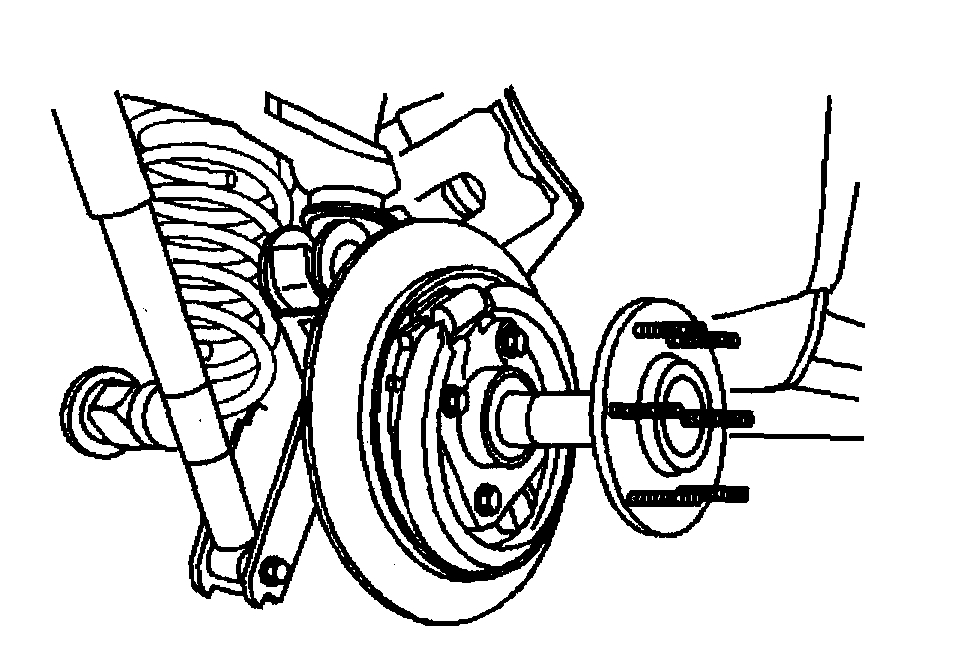
If you look at the first picture I attached, I circled two things. One is the axle itself but more importantly a C clip, and the second is the (toward the top of the pic) is the pinion gear shaft and bolt. Once the cover is removed, you first have to remove the pinion shaft bolt which will allow the pinion shaft to drop out of the pinion. At that point, you will need to gently push in on the axle (wheel side where you removed the tire, brakes and so on) and remove that C clip. Once that clip is removed, the axle will come out.
Okay, I had to try and explain that as best as I could because the directions for removal of the axle shaft are somewhat vague. They are basically what I already explained, but a bit vague. However, the pictures correlate with the directions, so that should help. Once the axle is out of the leaking side, then seal replacement is possible which I will provide after the axle information.
__________________________________________
Rear Axle Shaft Replacement
Removal Procedure
pic 2
1. Raise the vehicle.
2. Remove the tire and wheel assembly.
3. Remove the brake caliper.
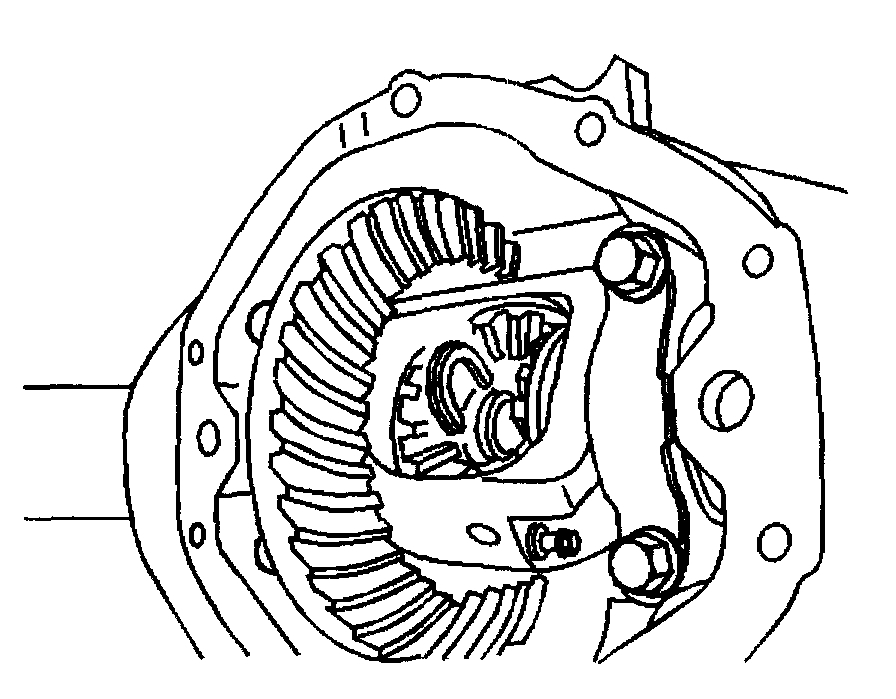
4. Remove the rear axle housing cover and the gasket.
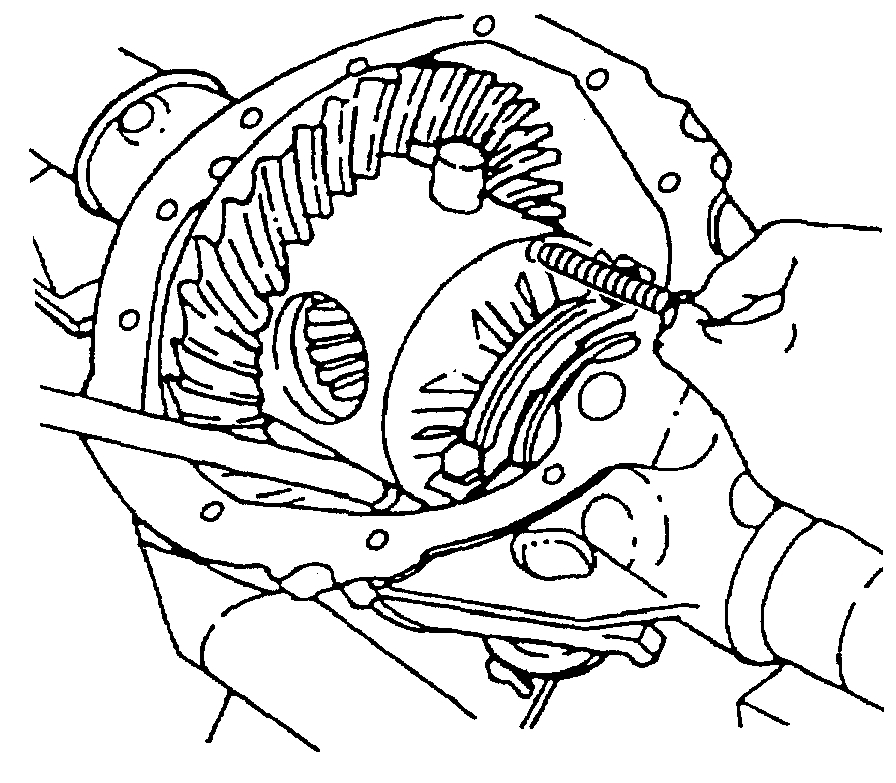
5. Remove the pinion shaft locking bolt.
pic 3
6. On axles without a locking differential, remove the pinion shaft.
pic 4
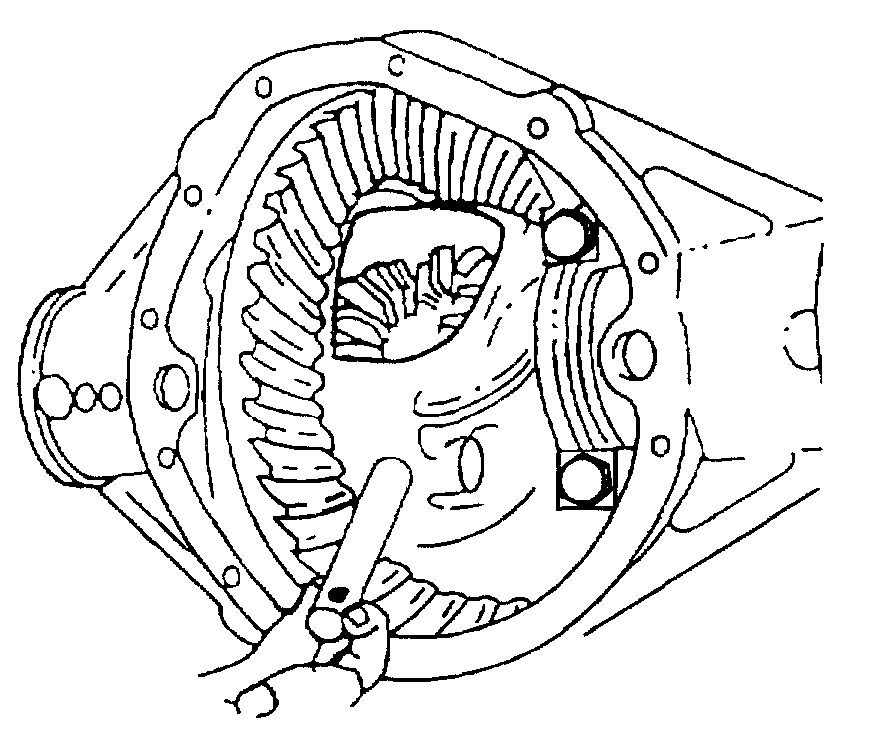
7. On axles with a locking differential, remove the shaft part way. Rotate the case until the pinion shaft touches the housing.
pic 5
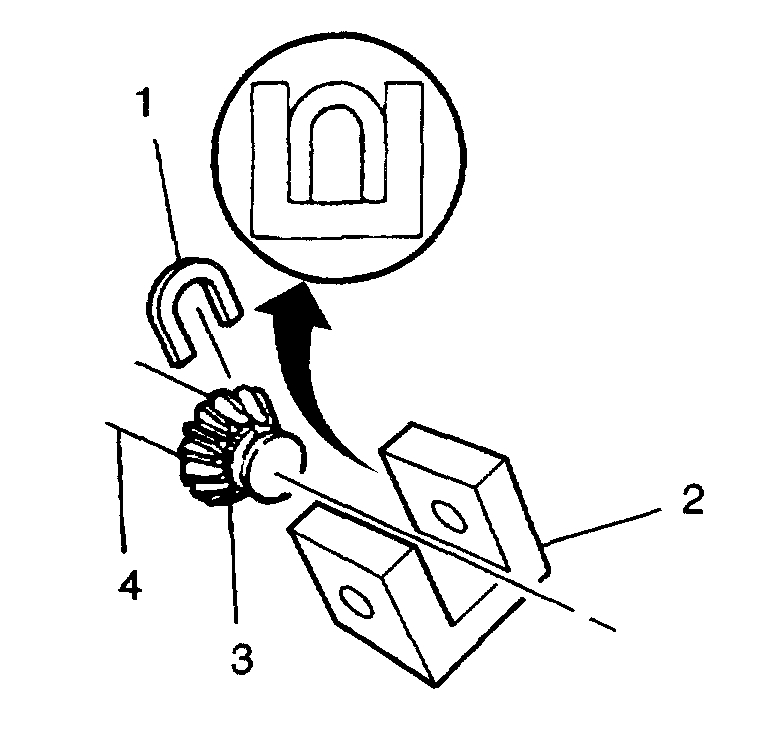
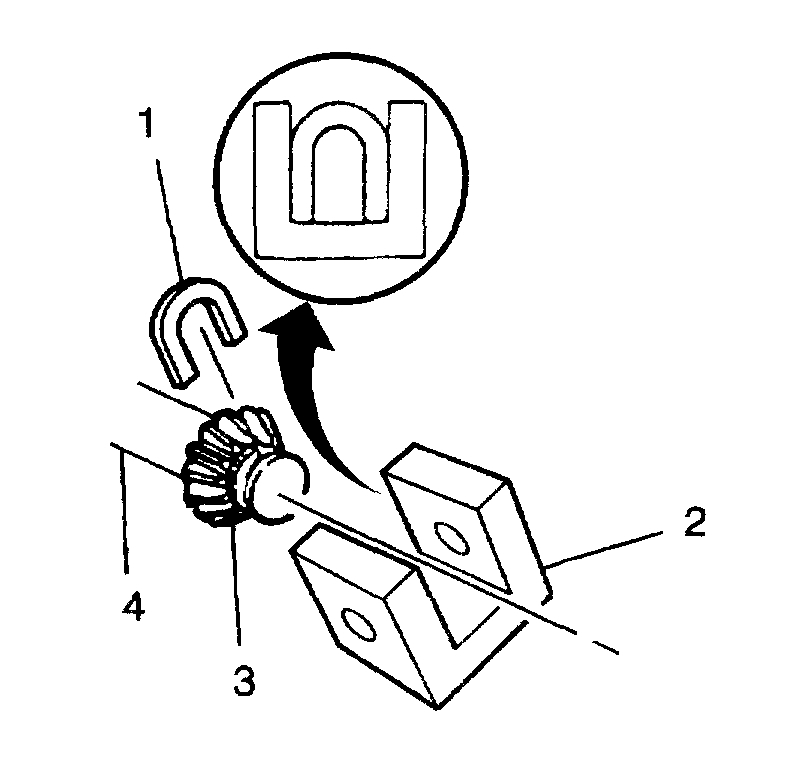
8. On axles with a locking differential, use a screwdriver, or a similar tool, in order to enter the differential case and rotate the C-lock (1) until the C-lock aligns with the thrust block (2).
9. Push the flange of the axle shaft (1) toward the differential.
pic 6
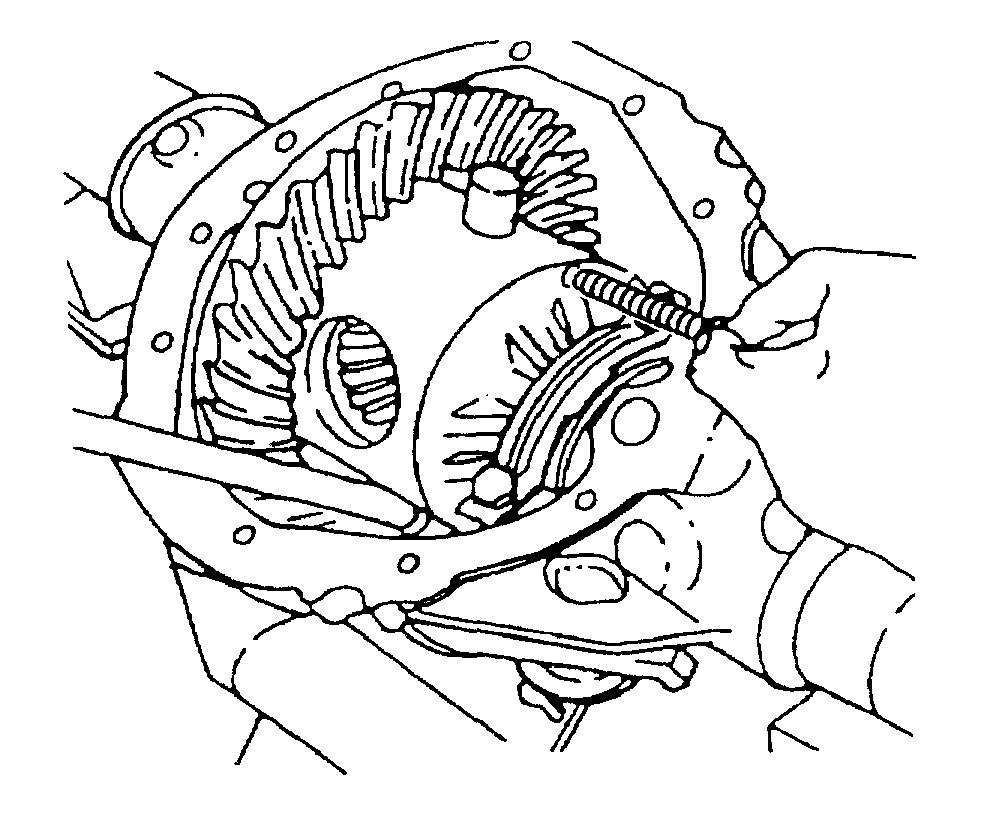
10. Remove the C-lock from the button end of the axle shaft.
pic 7
Important: When removing the axle shaft, do not rotate the shaft. Rotating the shaft will misalign the gears. Misaligning the gears will make the installing of the axle shaft difficult.
11. Remove the axle shaft from the housing.
Installation Procedure
Important: Carefully insert the axle shaft in order to not damage the seal.
pic 8
1. Install the axle shaft into the rear axle housing.
2. Slide the axle shaft into place allowing the splines to engage the differential side gear.
pic 9
3. On axles without a locking differential, place the C-lock on the button end of the axle shaft.
4. On axles with a locking differential, keep the pinion shaft partially withdrawn.
pic 10
5. On axles with a locking differential, place the C-lock (1) on the axle shaft (3) so that the ends are flush with the thrust block (2).
6. Pull the shaft flange outward in order to seat the C-lock in the differential gear.
pic 11
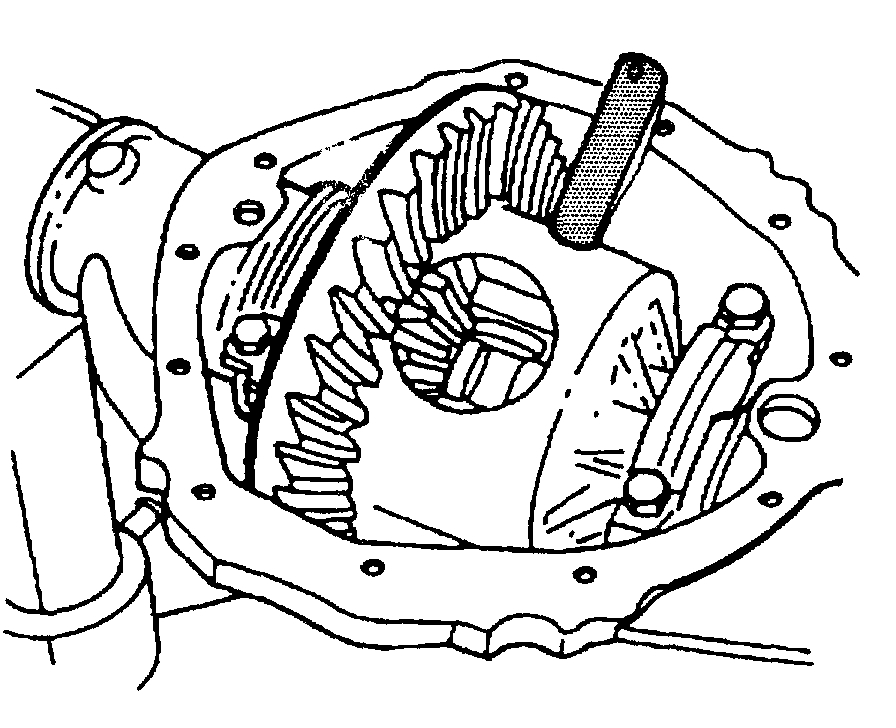
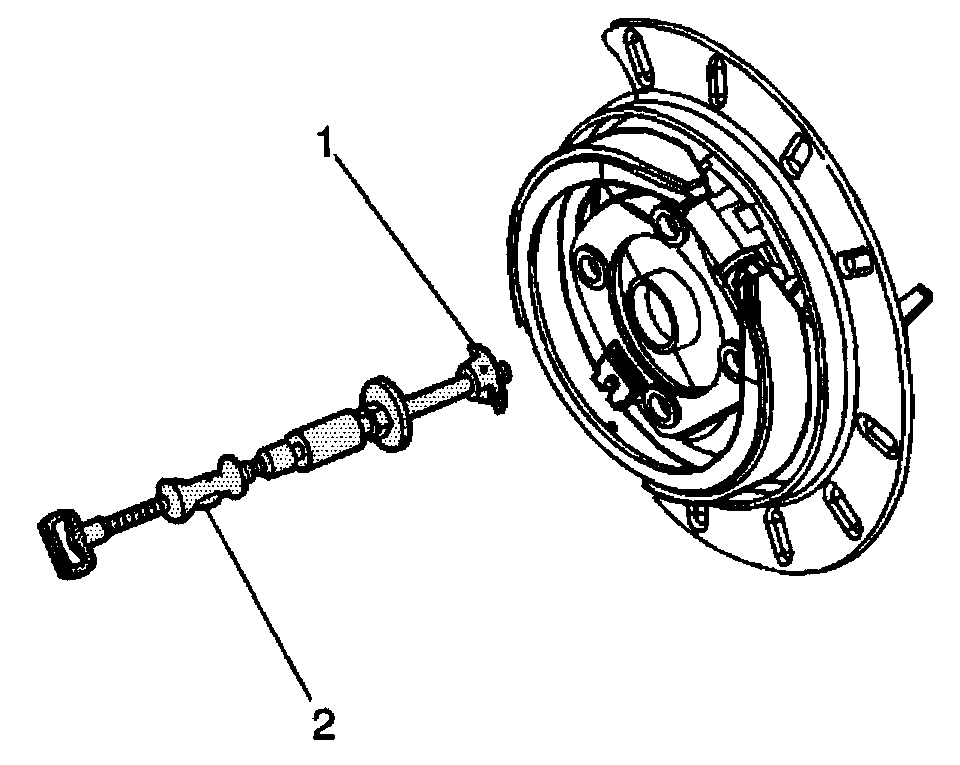
7. Align the hole in the pinion shaft with the bolt hole in the differential case.
Notice: Refer to Fastener Notice in Cautions and Notices.
8. Install the new pinion shaft locking bolt.
^ Tighten the pinion shaft locking bolt to 36 Nm (27 ft. lbs.).
9. Install the rear axle housing cover and the gasket.
10. Install the brake caliper.
11. Install the tire and wheel assembly.
12. Fill the rear axle with axle lubricant. Use the proper fluid.
13. Lower the vehicle.
__________________________________
Once the axle is out, follow these directions for seal and bearing replacement. I have to be honest, since it is this far, replace the bearing at the same time. Often times, a bad bearing will be the cause of seal failure.
These directions start at the point when the axle shaft is removed. The tools being used are basic tools in a shop, but not the type everyone has at home. If you don't have them, most nationally recognized parts stores will lend them to you. The remaining pics correlate with these directions.
____________________________________
Rear Axle Shaft Seal and/or Bearing Replacement
Vehicle Transmission and Drivetrain Differential Assembly Seals and Gaskets Service and Repair Procedures Rear Drive Axle Rear Axle Shaft Seal and/or Bearing Replacement
REAR AXLE SHAFT SEAL AND/OR BEARING REPLACEMENT
Rear Axle Shaft Seal and/or Bearing Replacement
^ Tools Required
- J 8092 Universal Driver Handle- 3/4 in - 10
- J 21128 Axle Pinion Oil Seal Installer
- J 23690 Bearing Installer
- J 02619-1 Slide Hammer
- J 44685 Rear Axle Seal and Bearing Remover
Removal Procedure
pic 12
1. Raise the vehicle.
2. Remove the tire and wheel assembly.
3. Remove the rear axle housing cover and the gasket.
4. Remove the axle shaft.
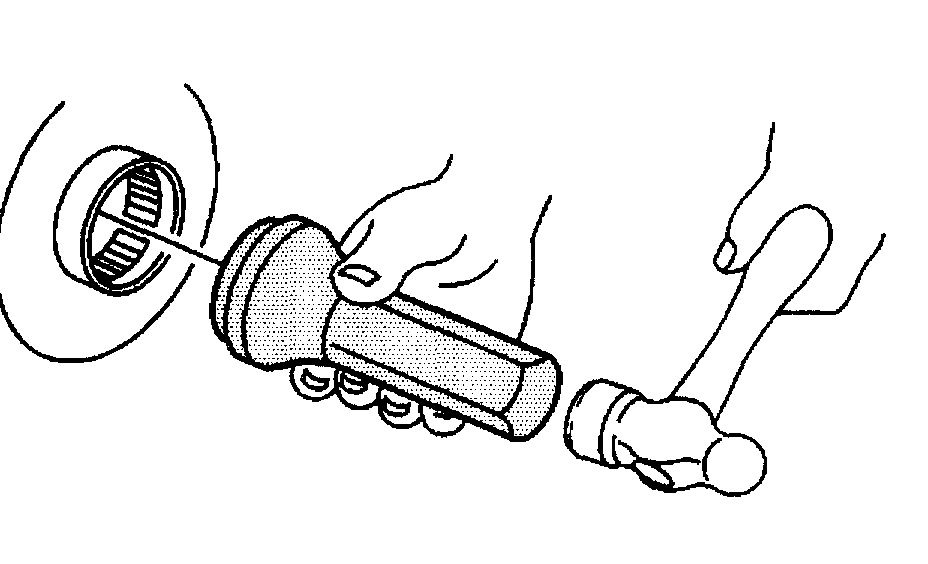
5. Remove the axle shaft seal and/or the bearing from the axle housing using the J 44685 (1) and the J 02619-1 (2).
Installation Procedure
pic 13
1. Install the axle shaft bearing using the J23690 (1) and the J 8092 (2).
2. Drive the axle shaft bearing into the axle housing until the tool bottoms against the tube.
pic 14
3. Install the axle shaft seal using the J 21128.
4. Drive the tool into the bore until the axle shaft seal bottoms flush with the tube.
5. Install the axle shaft.
6. Install the rear axle housing cover and the gasket.
7. Install the tire and wheel assembly.
8. Fill the rear axle with axle lubricant.
9. Lower the vehicle.
________________________
Once the new seal or seal and bearing are installed, refer to the first set of directions for putting it back together.
I hope this helps. Let me know if you have questions and how it works out for you.
Take care,
Joe
Images (Click to enlarge)
Jun 16, 2019 at 10:05 PM