1996 Honda Civic Sedan L4-1.6L SOHC (16 Valve)
Vehicle Level Steering and Suspension Steering Steering Gear Service and Repair Power Steering Removal
Removal
TOOL REQUIRED
* 07MAC-SL00200 Ball Joint Remover, 28 mm
NOTE: Using solvent and a brush, wash any oil and dirt off the valve body unit its lines, and the end if the gearbox. Blow dry with compressed air.
1. Drain the power steering fluid.
2. Raise the front of vehicle, and support it on safety stands in the proper locations.
3. Remove the front wheels.
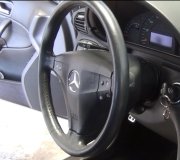
4. Remove the driver's airbag assembly, and steering wheel.
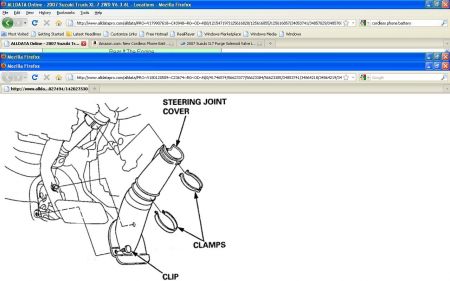
5. Remove the steering joint cover.
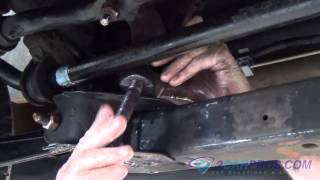
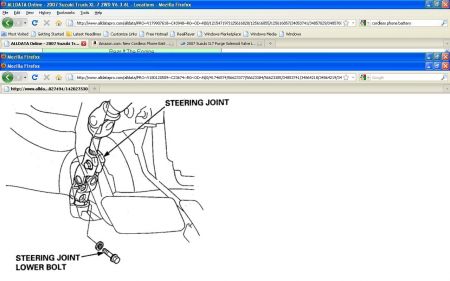
6. Remove the steering joint lower bolt, and disconnect the steering joint by moving the joint toward the column.
7. Remove the cotter pin from the castle nut and remove the nut.
8. Install the 10 mm hex nut on the ball joint. Be sure that the 10 mm hex nut is flush with the ball joint pin end, or the threaded section of the ball joint pin might be damaged by the special tool.
NOTE: Remove the ball joint using the special tool.
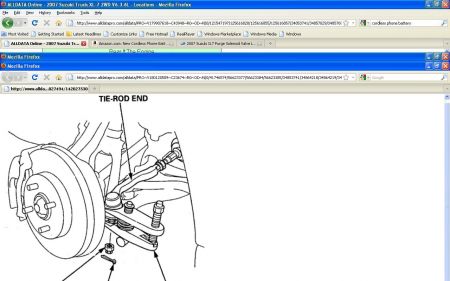
9. Separate the tie-rod ball joint and knuckle using the special tool.
CAUTION: Avoid damaging the ball joint boot.
10. Remove the left tie-rod end, then slide the rack all the way to the right.
11. Separate the exhaust pipe A or TWC.
12. Disconnect the shift linkage.
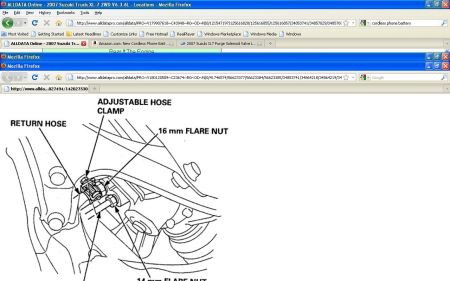
13. Loosen the 14 mm flare nut and disconnect the feed line.
14. Loosen the adjustable hose clamp and disconnect the return hose.
15. Loosen the 16 mm flare nut and remove the return hose joint from the valve body unit.
CAUTION: After disconnecting the hose and line, plug or seal the hose and line with a piece of tape or equivalent to prevent foreign Materials from entering the valve body unit.
NOTE: Do not loosen the cylinder line A and B between the valve body unit and cylinder.
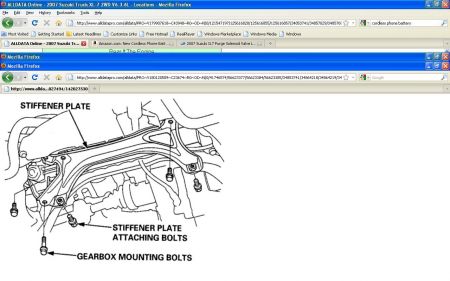
16. Remove the stiffener plate.
NOTE: Some stiffener plate attaching bolts are also used as gearbox mounting bolts. The gearbox will tilt to side when these bolts are removed.
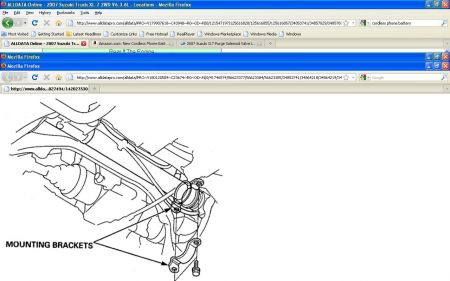
17. Remove the mounting brackets.
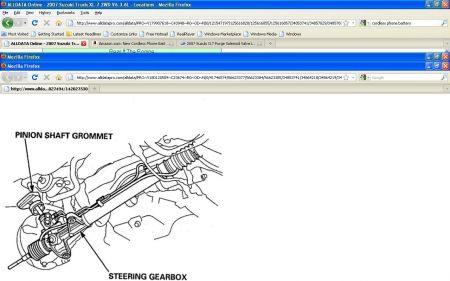
18. Pull the steering gearbox all the way down to clear the pinion shaft from the bulkhead, then remove the pinion shaft grommet.
19. Move the steering gearbox to right so the left rack end clears the rear beam, then tilt the left side down to remove it from the vehicle.
CAUTION: Be careful not to bend or damage the feed line and cylinder lines when removing the gearbox.
There you go.
Saturday, September 11th, 2010 AT 11:13 AM