Here are the directions for replacement of the intake manifold gasket. I will include intake removal and replacement second. Check out the diagrams (Below). Please let us know what happens.
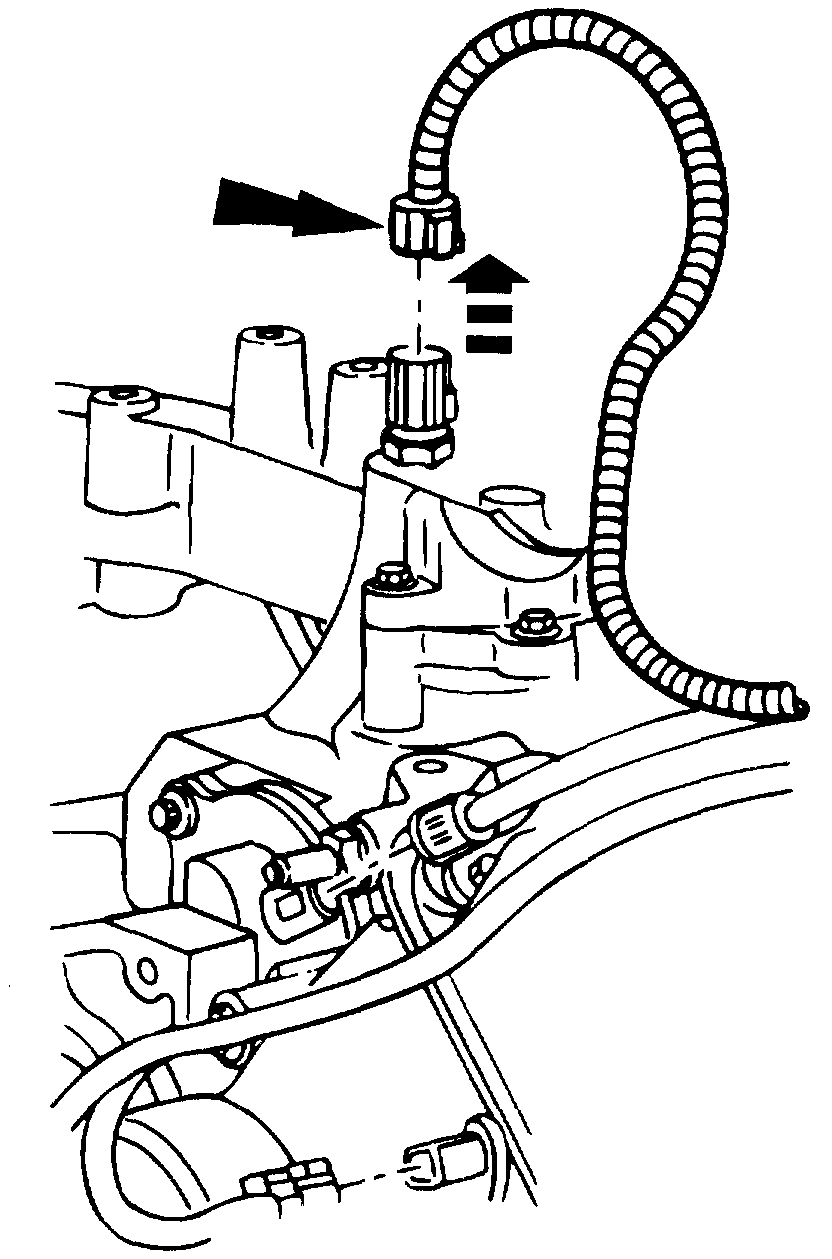
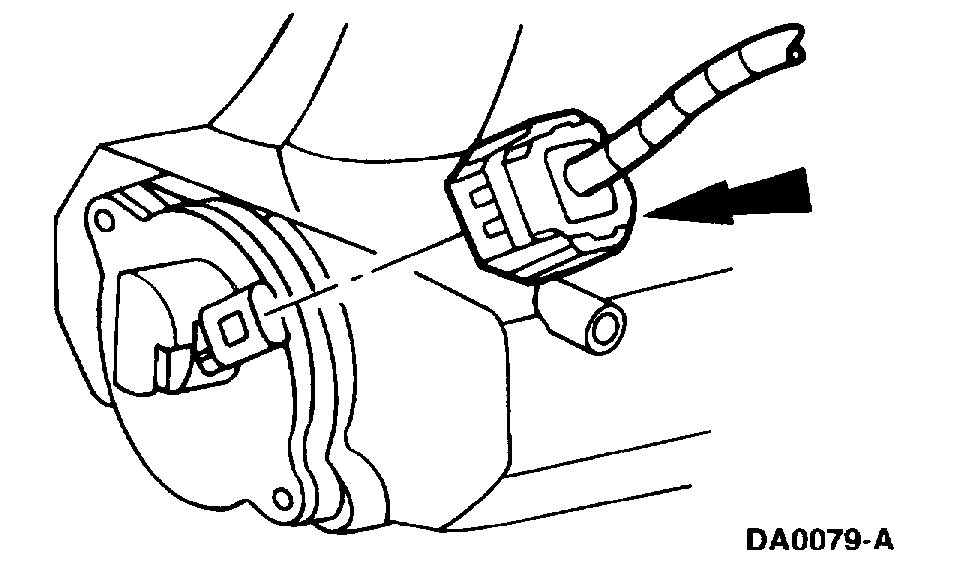
1 Disconnect the electrical connector.
2 Remove the sensor.
3. Drain the cooling system.
4. Compress and slide the hose clamp and disconnect the upper radiator hose.
5. Remove the engine Air Cleaner (ACL) and air cleaner outlet tube.
6. Remove the accelerator control splash shield.
1 Remove the bolts.
2 Remove the accelerator control splash shield.
7. Disconnect the accelerator cable from the accelerator cable bracket.
1 Remove the bolt.
2 Slide the accelerator cable up to remove it from the accelerator cable bracket.
8. Disconnect the accelerator cable from the throttle body cam.
1 Roll the throttle body cam forward.
2 Slide the accelerator cable end from the throttle body cam.
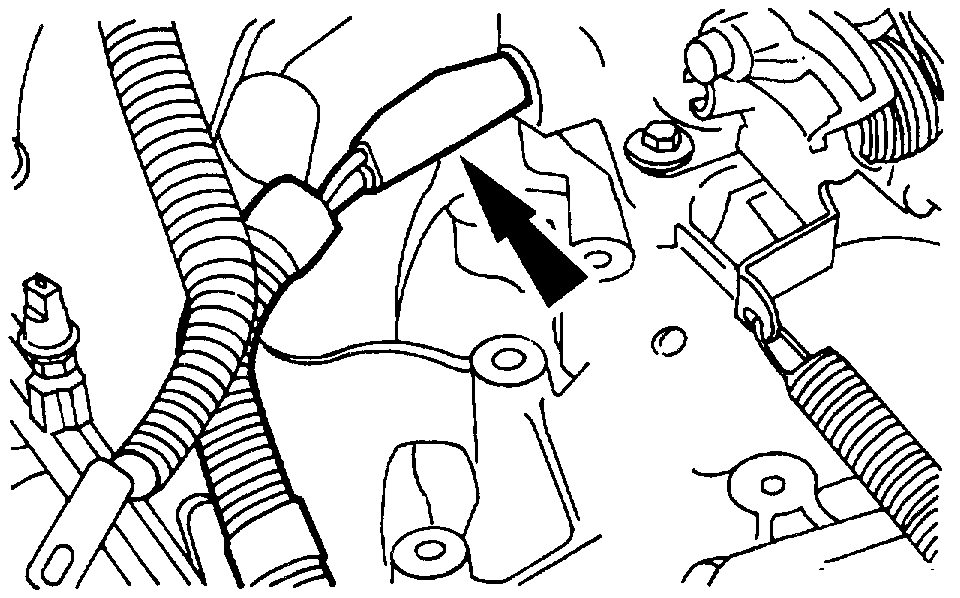
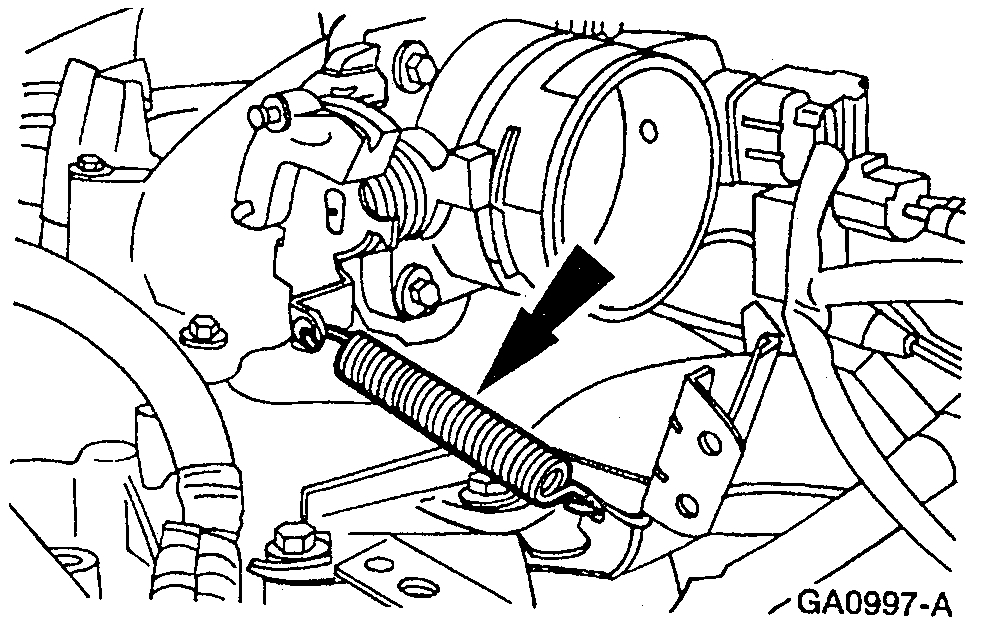
9. Remove the throttle return spring.
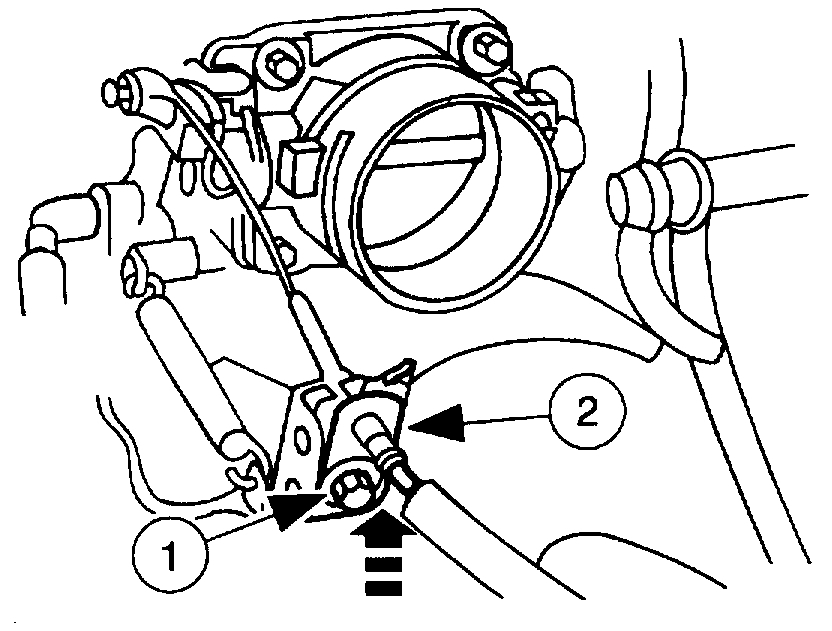
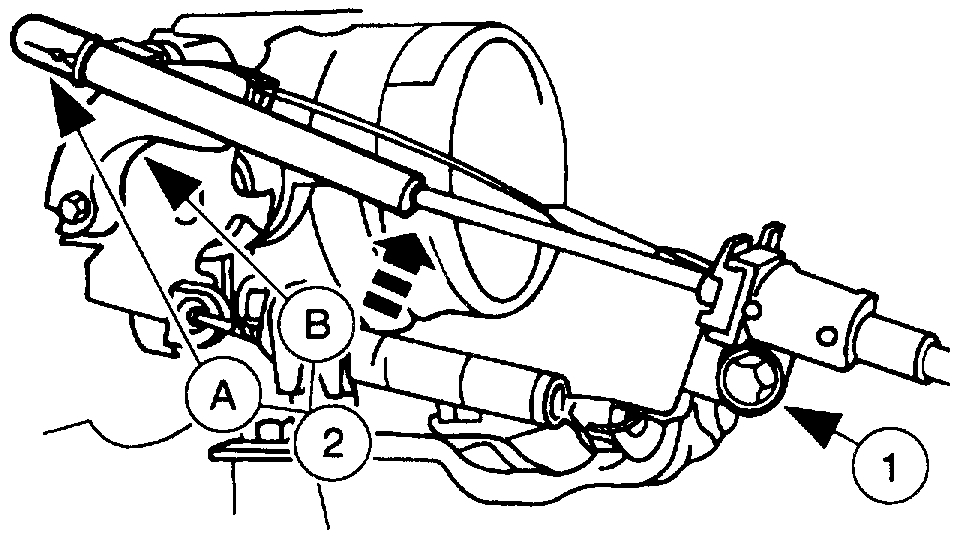
10. If equipped, disconnect the speed control actuator cable from the throttle body.
1 Remove the speed control actuator cable to accelerator cable bracket bolt.
2 Disconnect the (A) speed control actuator cable from the (B) throttle body cam and position aside.
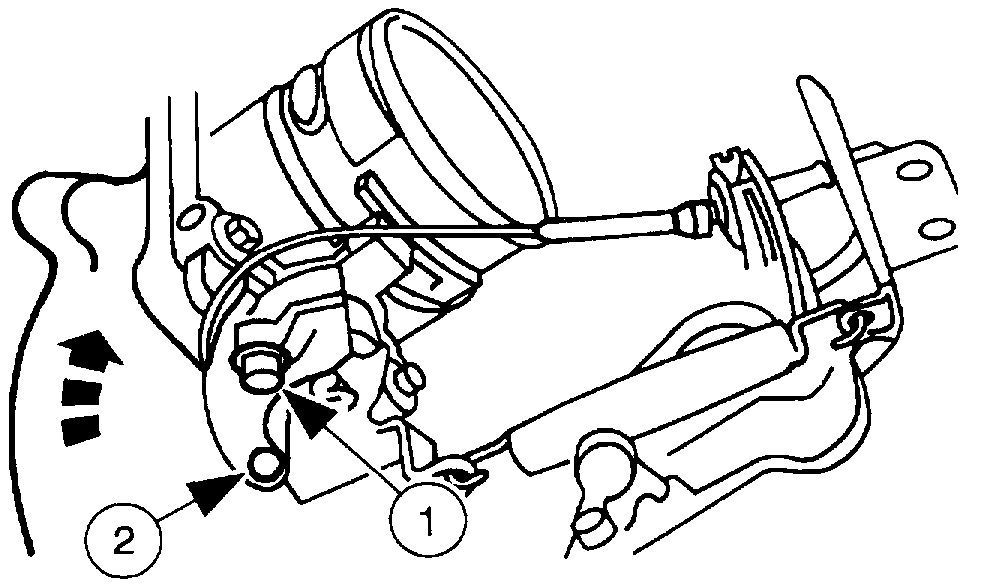
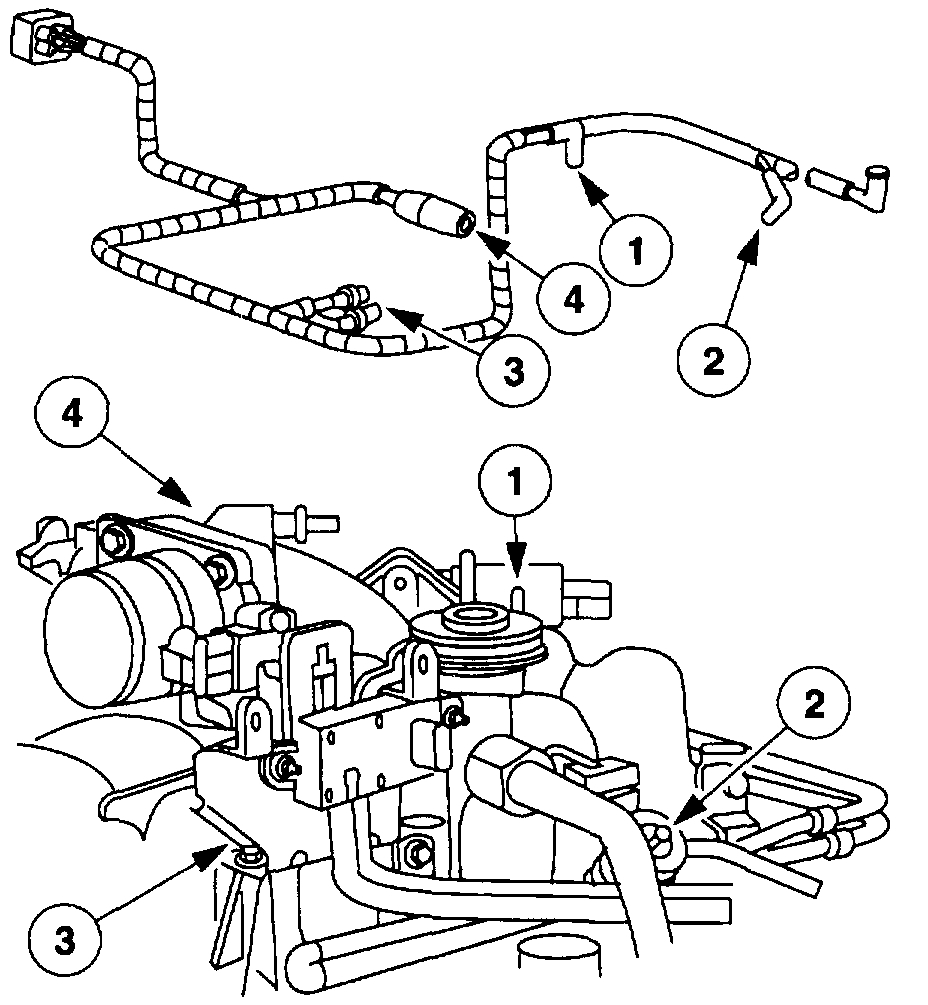
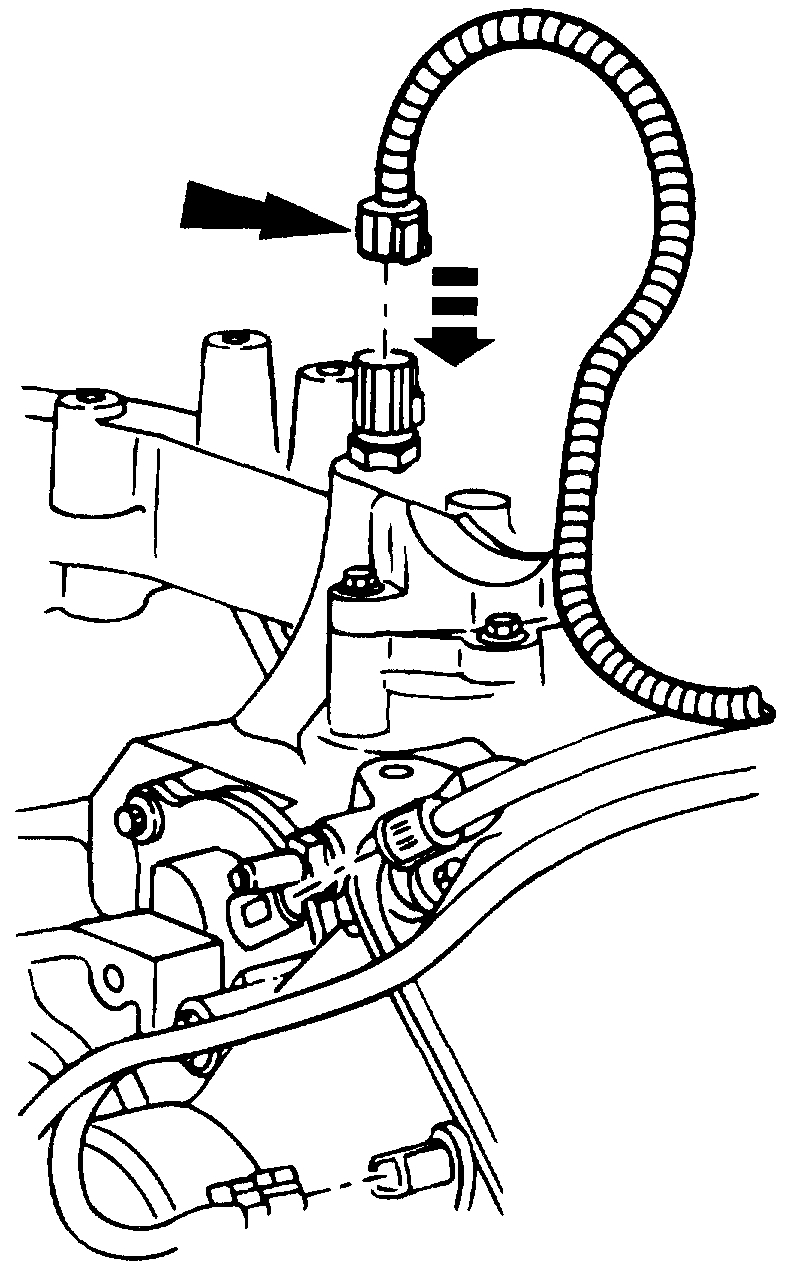
11. Disconnect the engine vacuum reservoir hose.
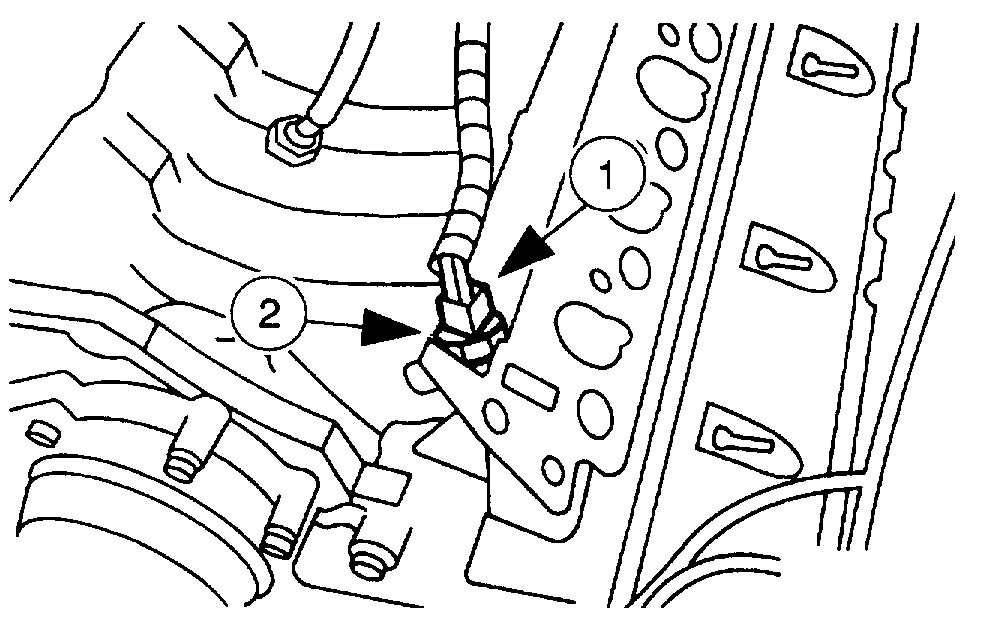
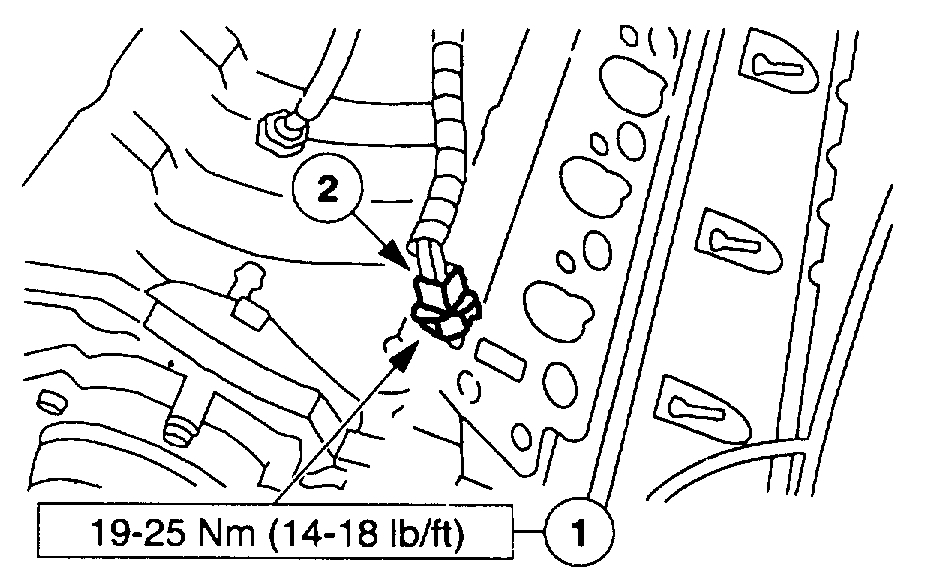
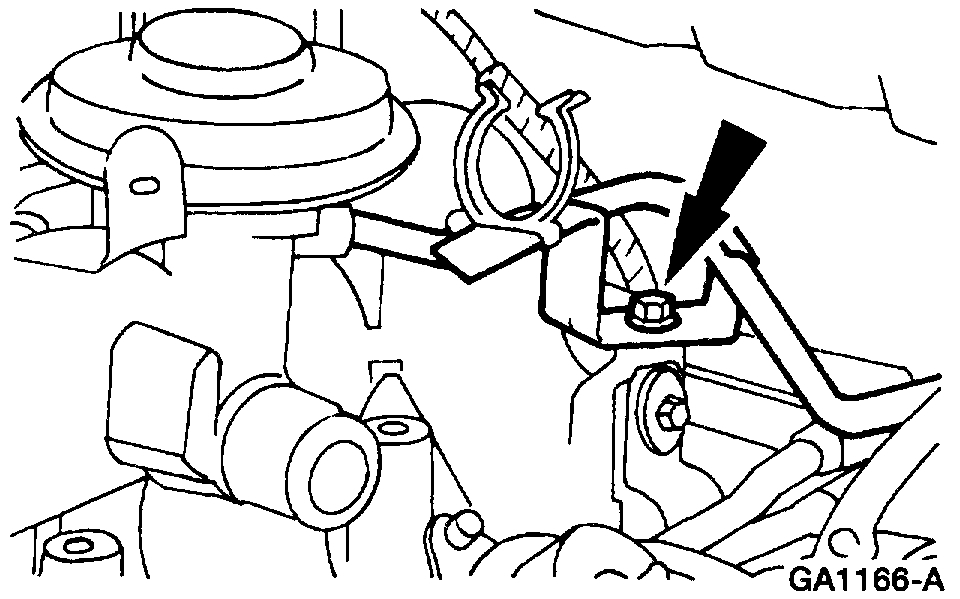
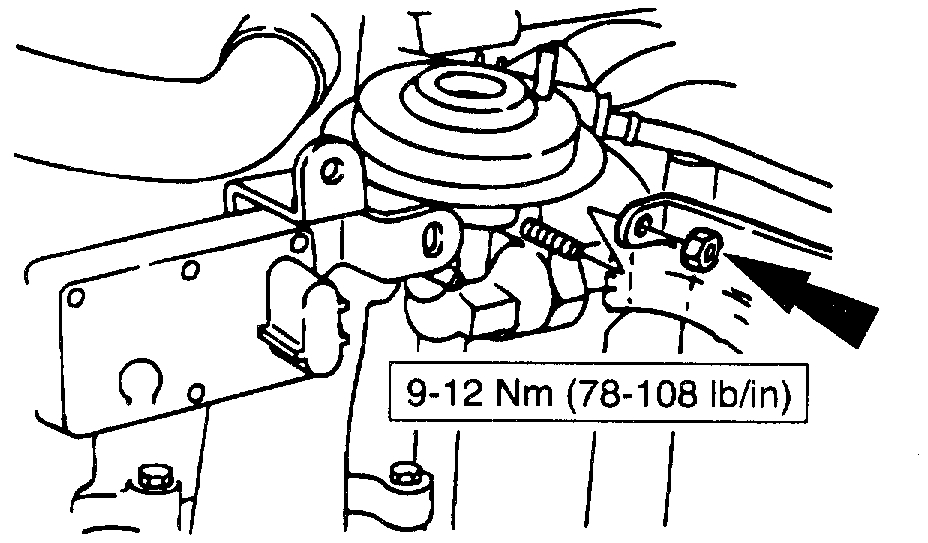
12. Remove the bolt and the brake booster vacuum hose and bracket.
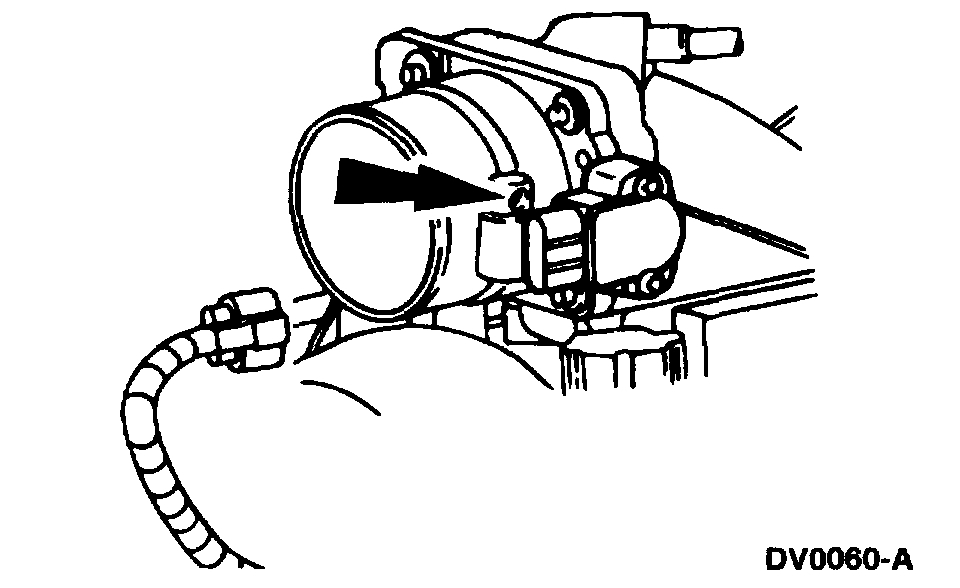
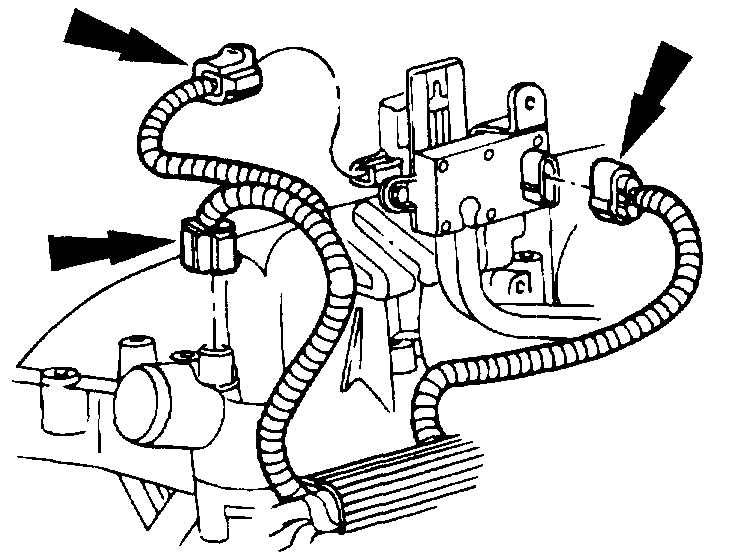
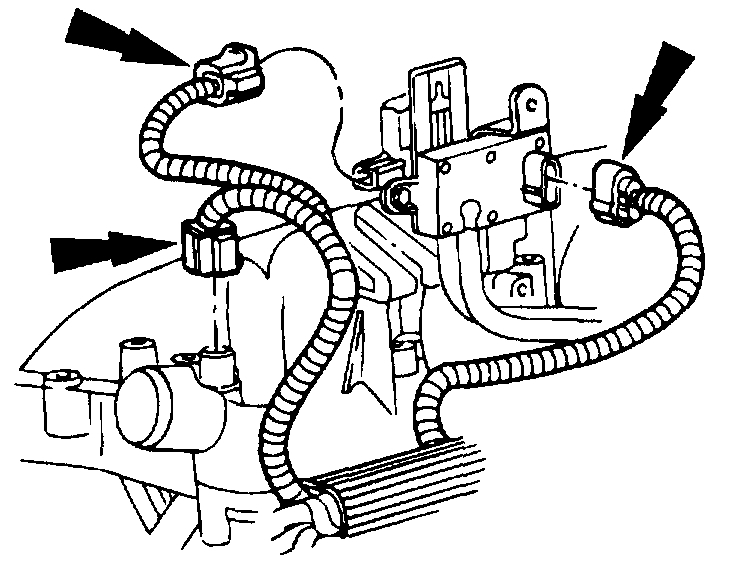
13. Disconnect the connector from the throttle position sensor (TP sensor).
14. Disconnect the following throttle body hose connections:
vapor management hose (A)
engine vacuum regulator (B)
Positive Crankcase Ventilation valve (PCV valve) (C)
power brake booster (D)
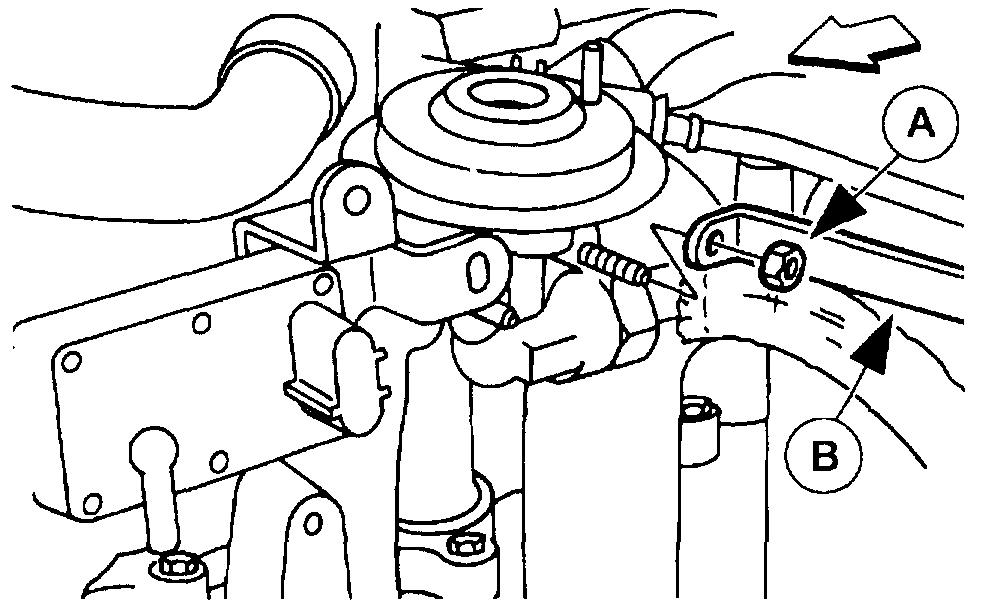
15. Remove the (A) brake booster vacuum hose bracket nut from the (B) brake booster vacuum hose bracket.
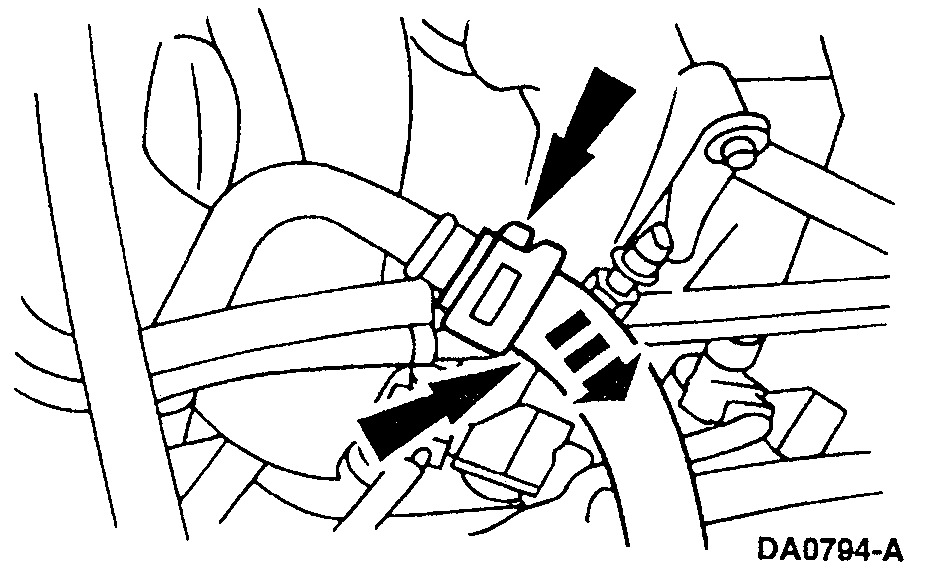
16. Disconnect the fuel lines.
17. Disconnect the following electrical connectors:
idle Air Control (IAC) valve
Differential Pressure Feedback (DPFE) transducer
Engine Vacuum Regulator (EVR) sensor
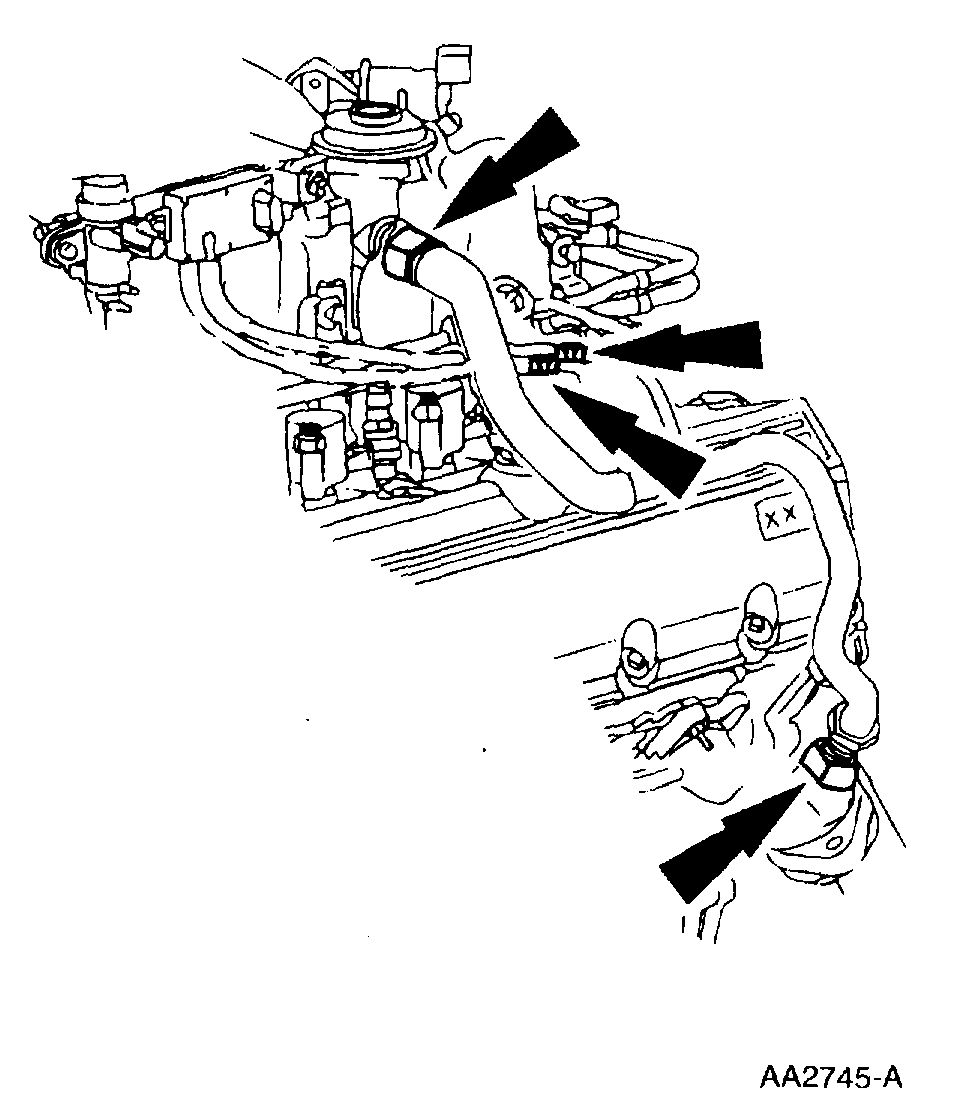
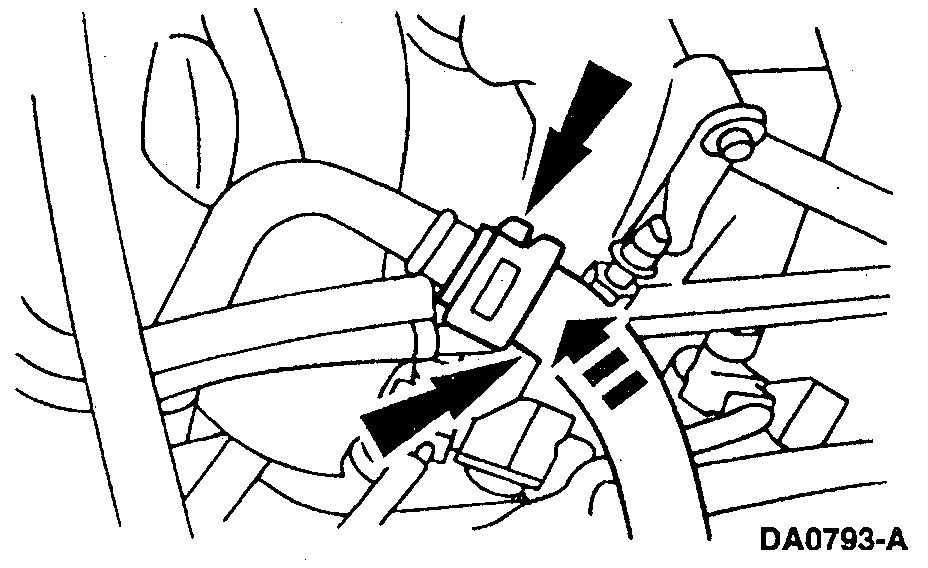
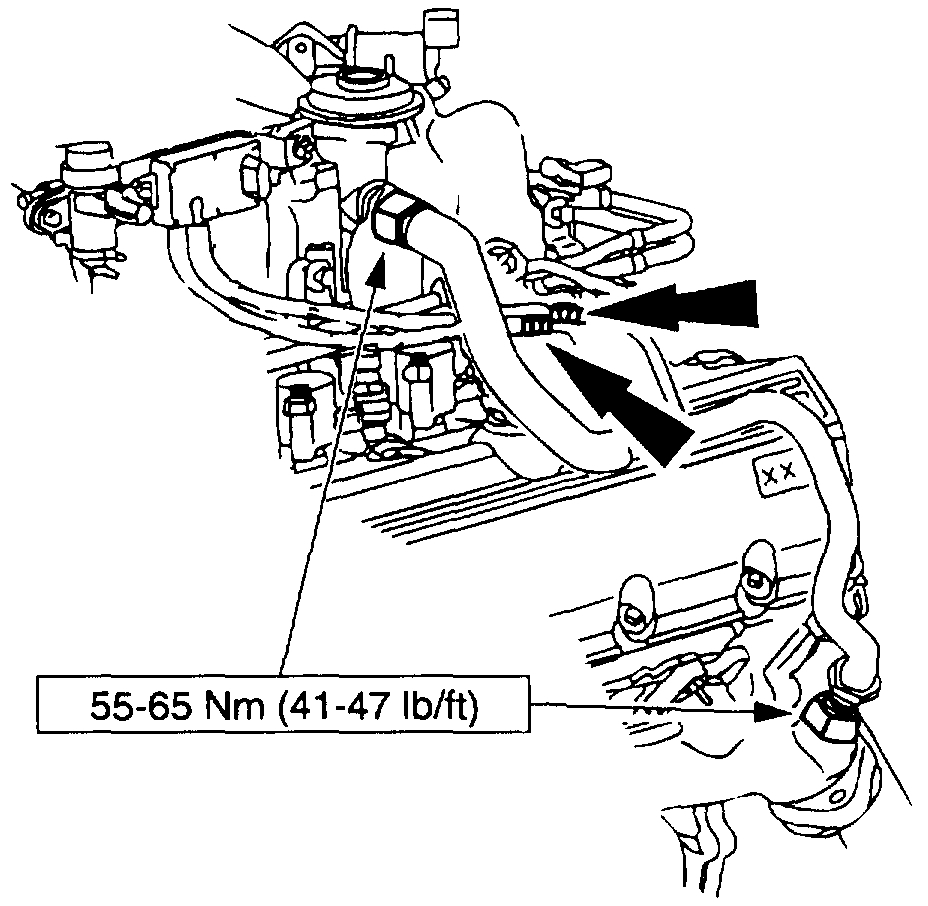
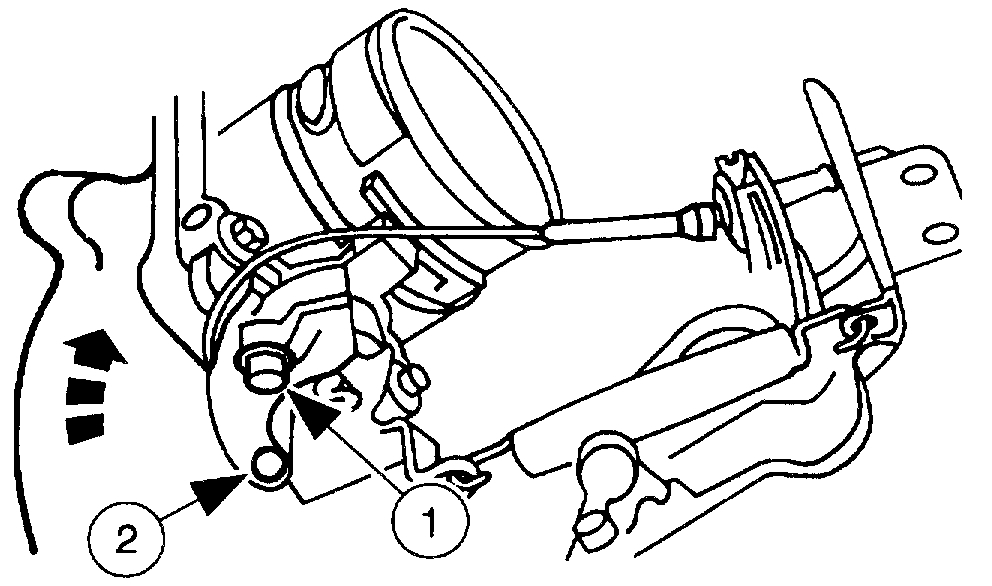
18. Remove the EGR valve to exhaust manifold tube
Disconnect the upper and lower EGR valve to exhaust manifold tube fittings.
Disconnect the two DPFE hoses.
19. Disconnect the following vacuum connections:
1 fuel pressure regulator vacuum hose
2 Engine Vacuum Regulator (EVR) hose
3 EGR vacuum hose
4 vapor management valve vacuum hose
20. Disconnect the RH fuel injector electrical connectors.
21. Disconnect the LH fuel injector electrical connectors.
22. Disconnect the water temperature indicator sender wiring.
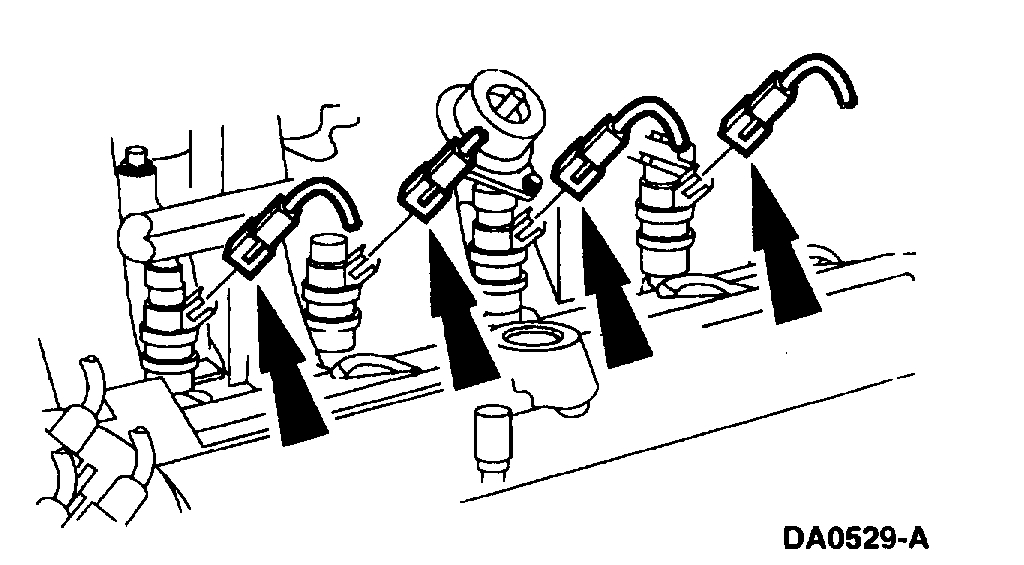
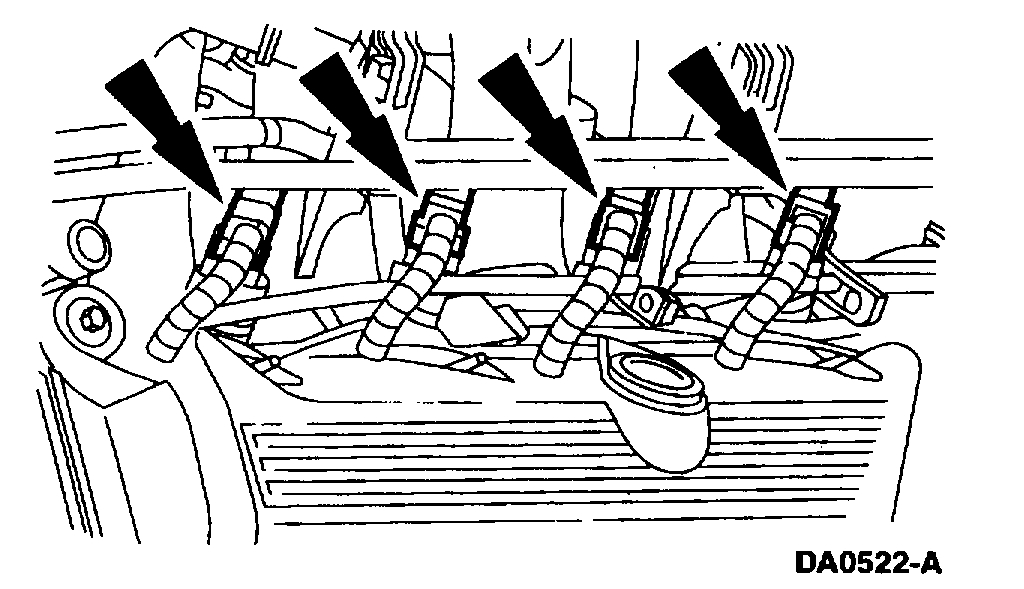
23. Disconnect and remove the eight ignition coils.
24. Remove the drive belt.
25. Remove the Generator (GEN).
26. Remove the bolts and the throttle body.
27. Disconnect the hose clamp and remove the heater water hose.
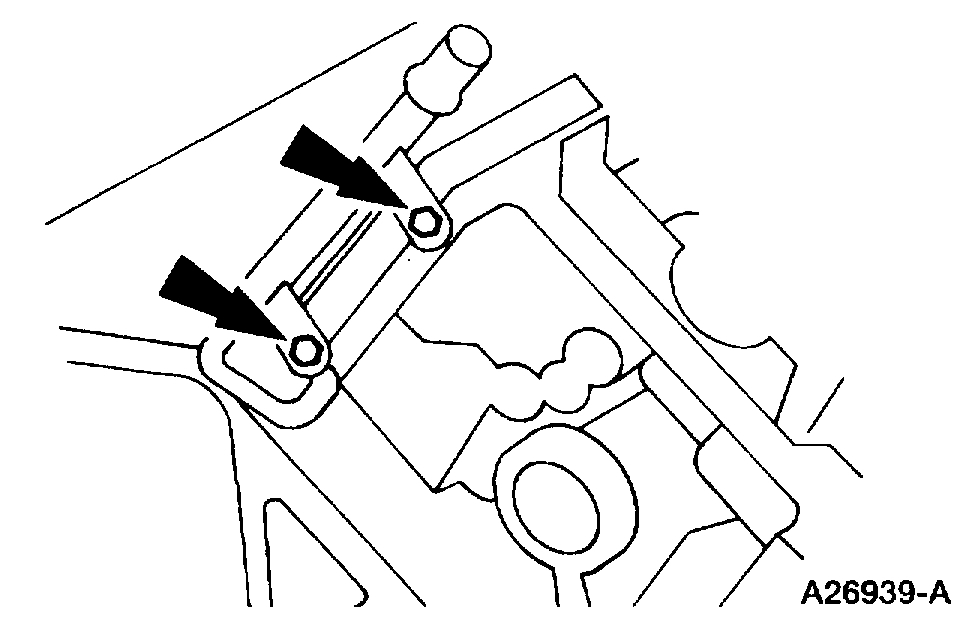
28. Remove the studs.
29. Remove the water thermostat.
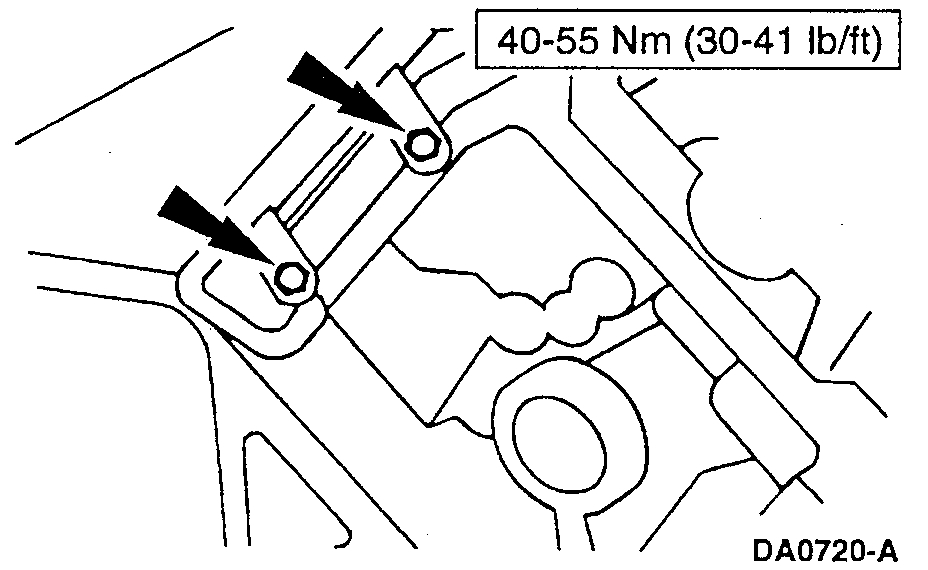
30. Remove the nine bolts.
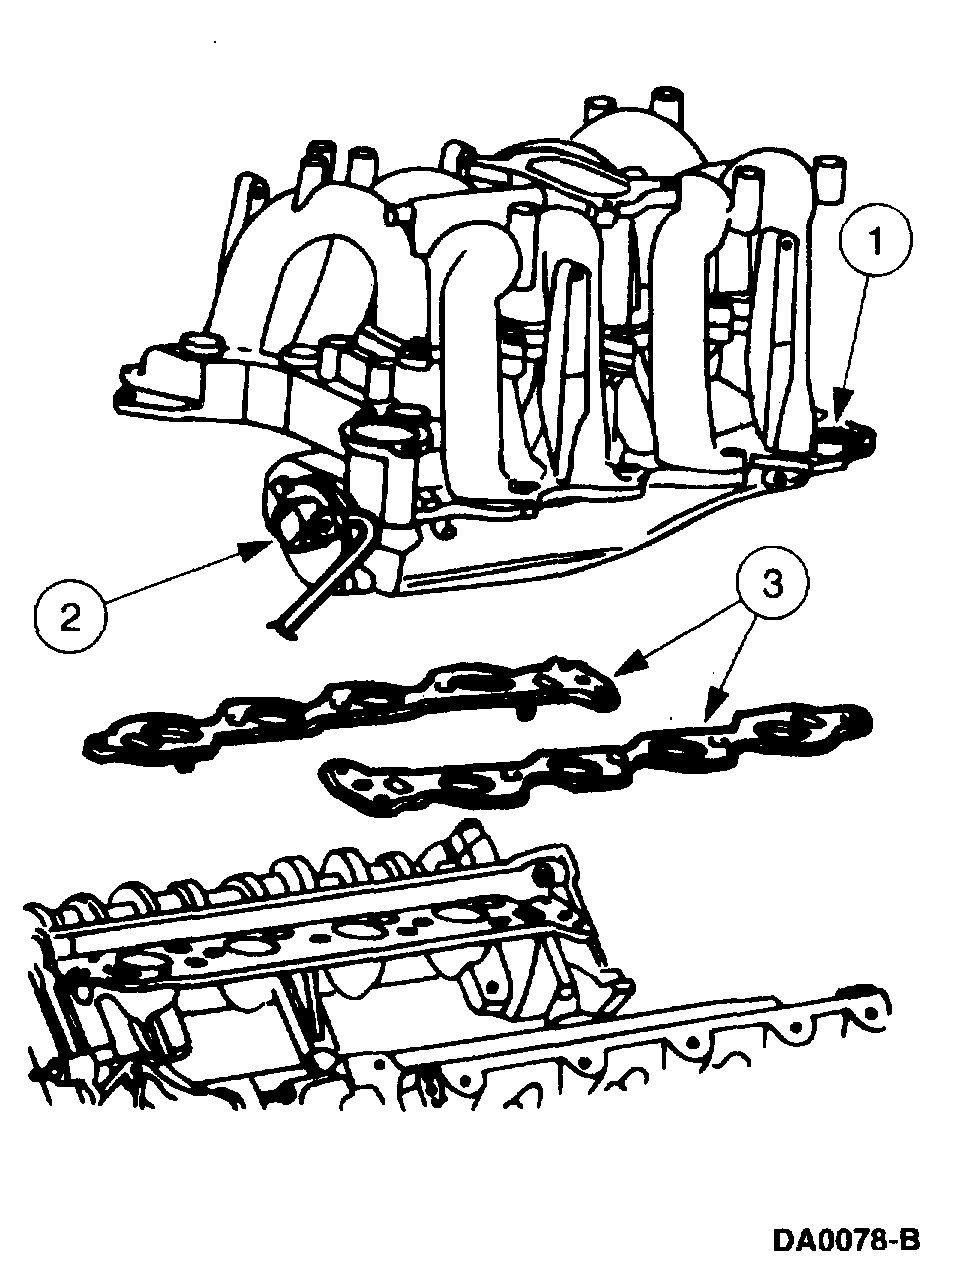
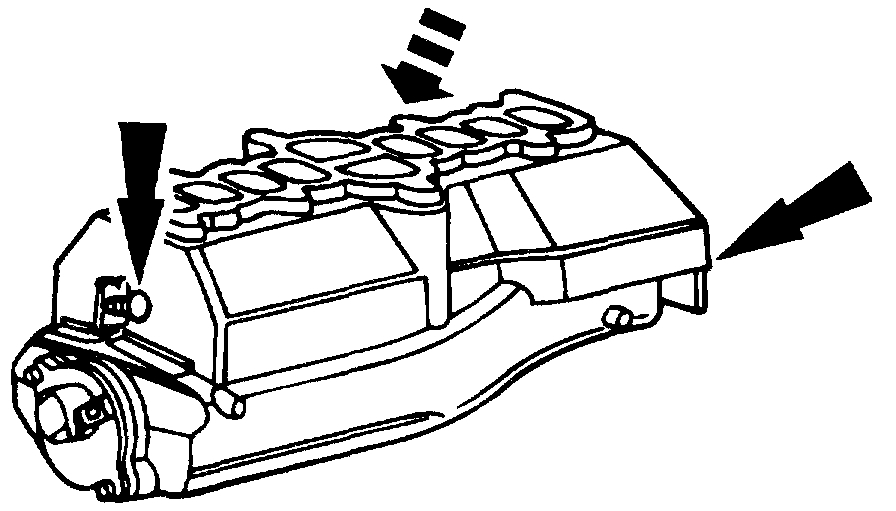
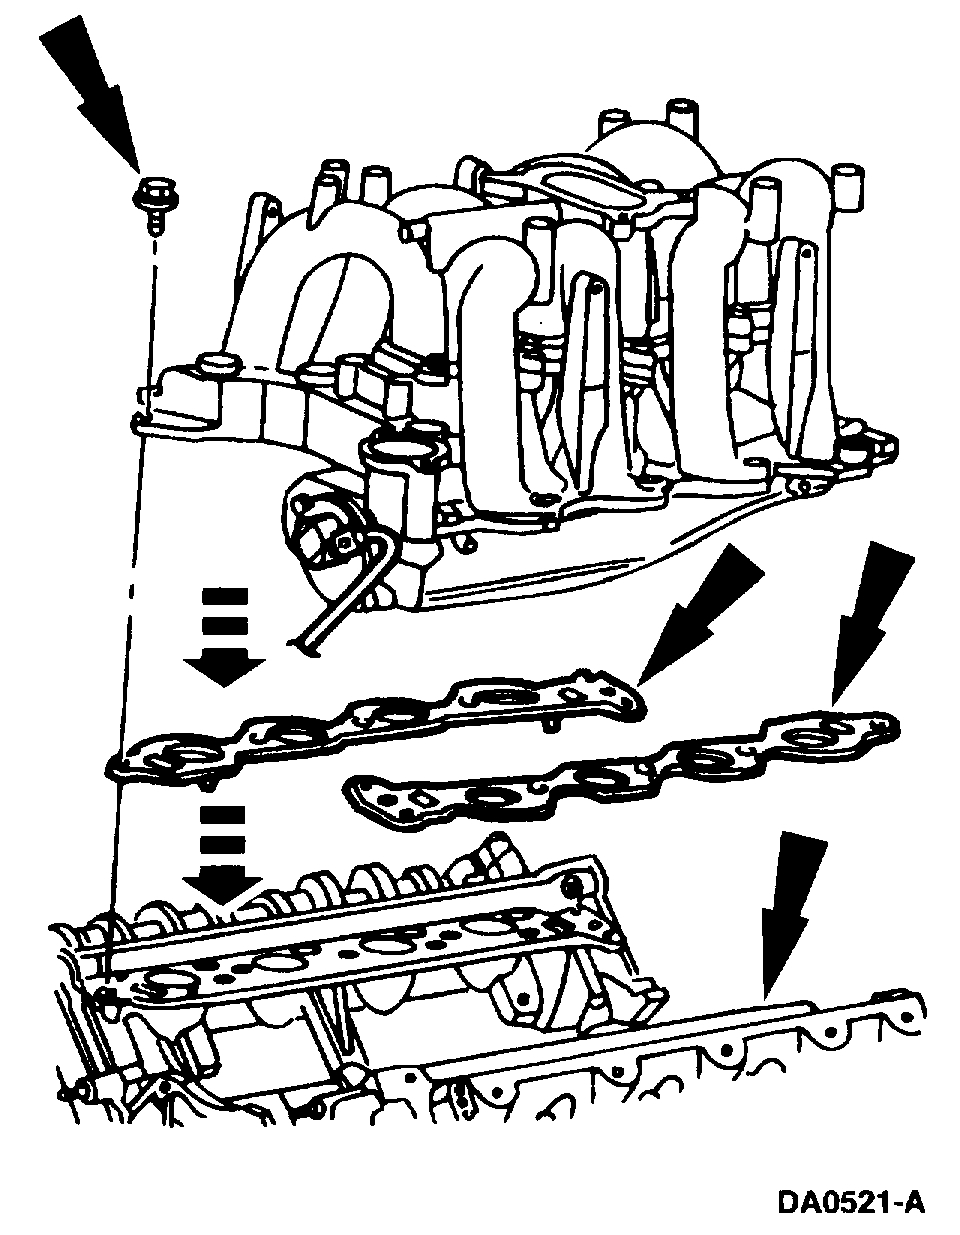
31. Remove the upper intake manifold.
1 Lift the intake manifold.
2 Disconnect the Intake Manifold Tuning Valve (IMTV) connector.
3 Remove and discard the upper intake manifold gaskets.
32. Remove the bolts.
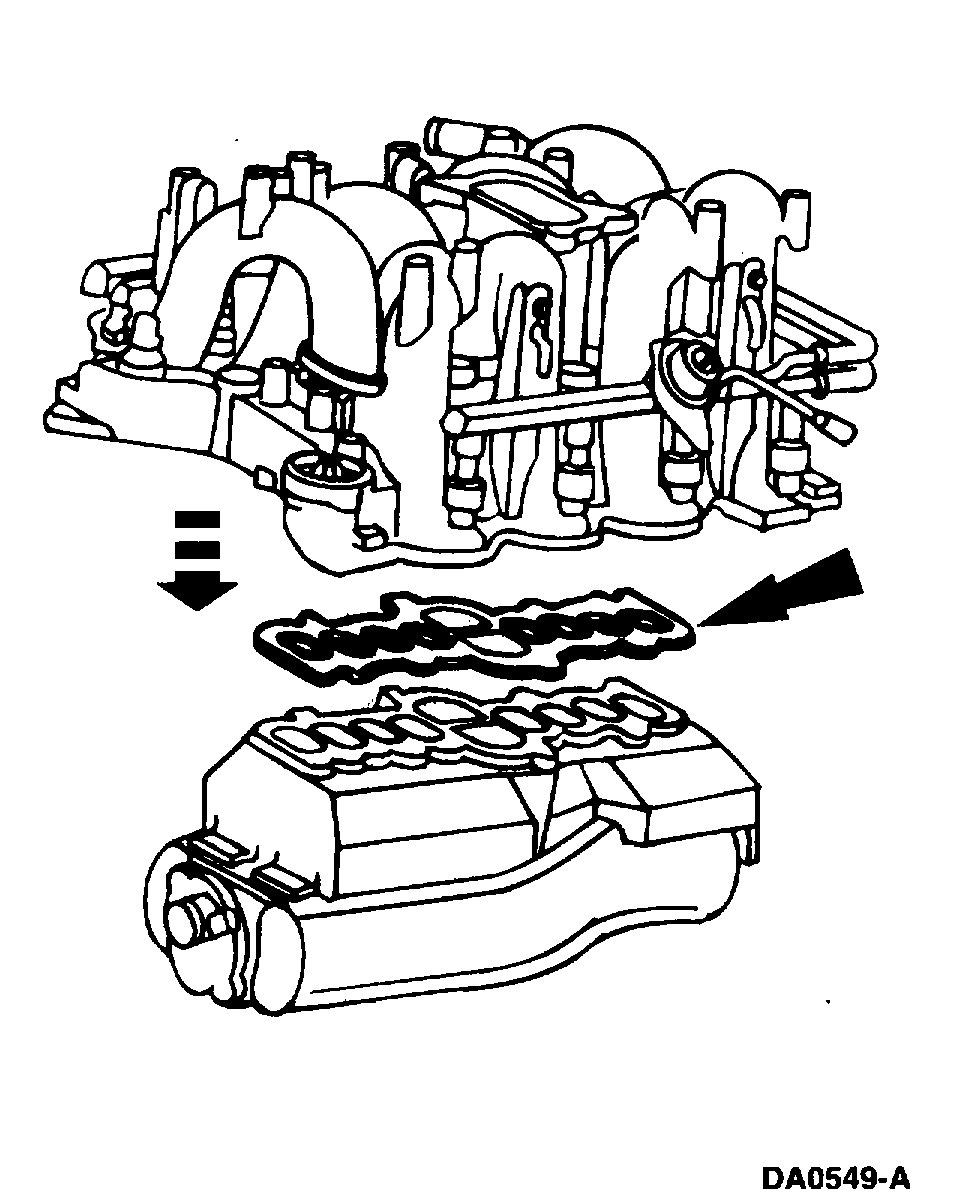
33. Separate the upper intake manifold from the lower intake manifold and discard the lower intake manifold gasket.
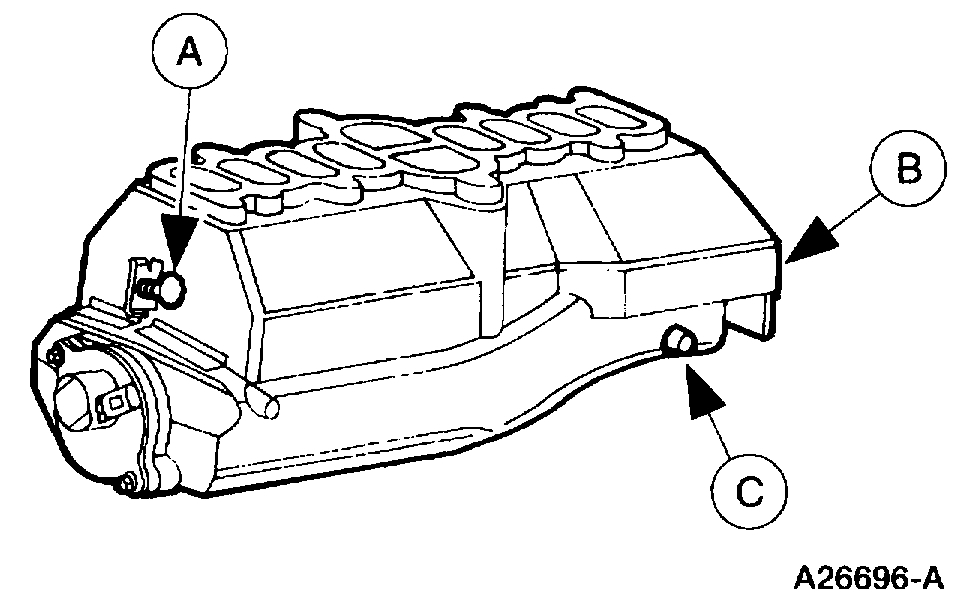
34. Remove the (A) pushpin from the (B) intake manifold insulator and remove from the (C) lower intake manifold.
35. Remove the (A) bolts from the (B) intake manifold tuning valve and remove the intake manifold tuning valve.
INSTALLATION
1. Position the intake manifold tuning valve and install the bolts.
2. Install the intake manifold insulator on the lower intake manifold and install the pushpin.
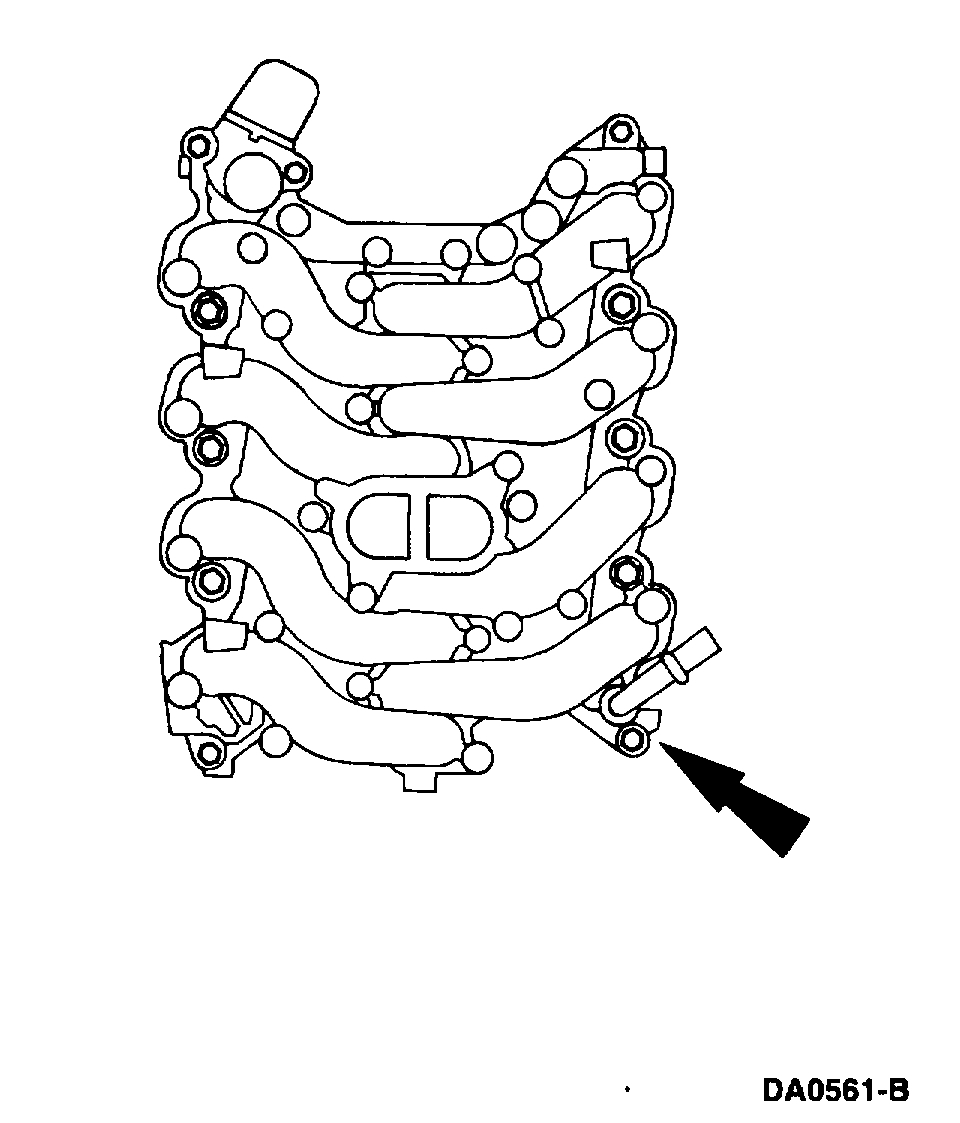
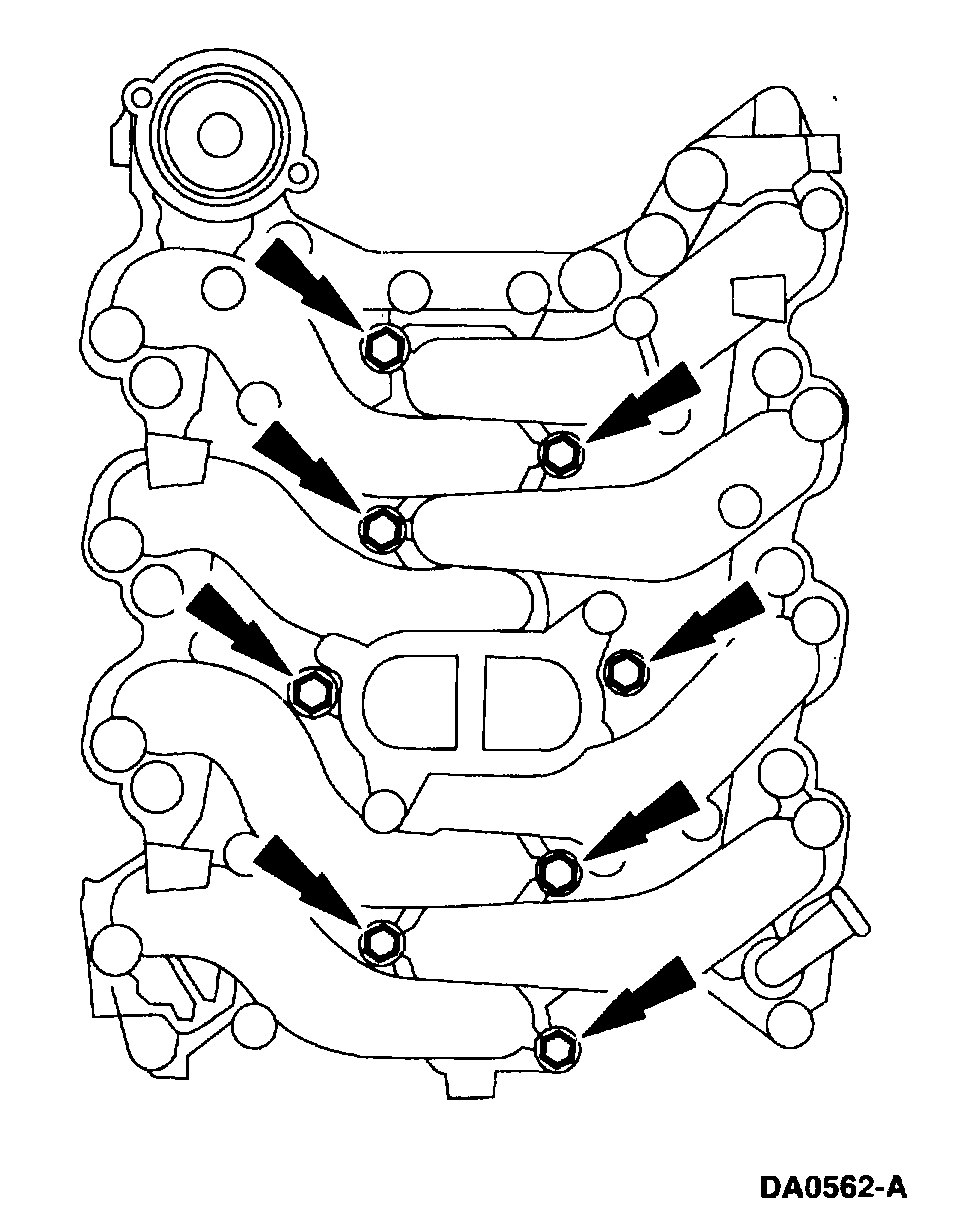
3. Position the lower intake manifold gasket and the upper intake manifold on the lower intake manifold and loosely install the eight bolts.
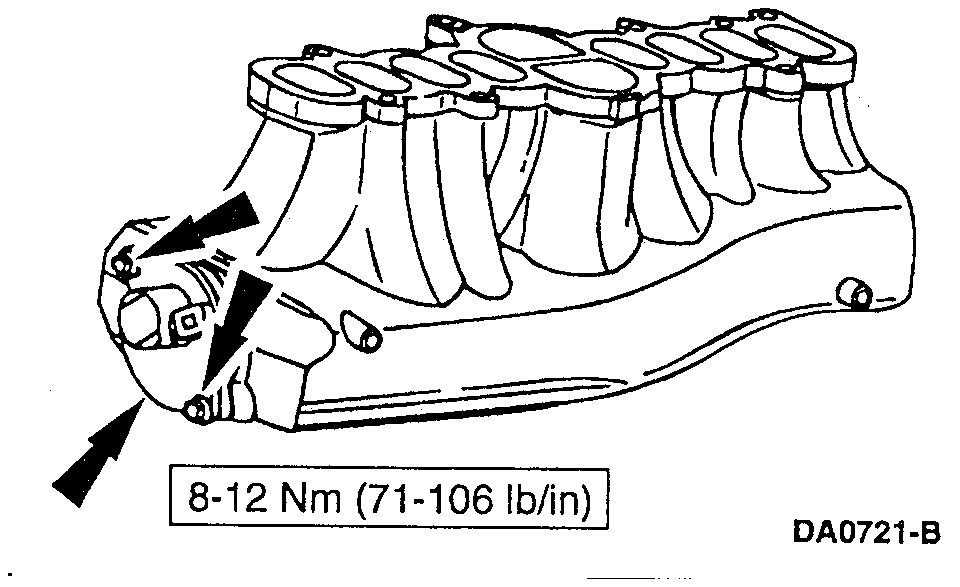
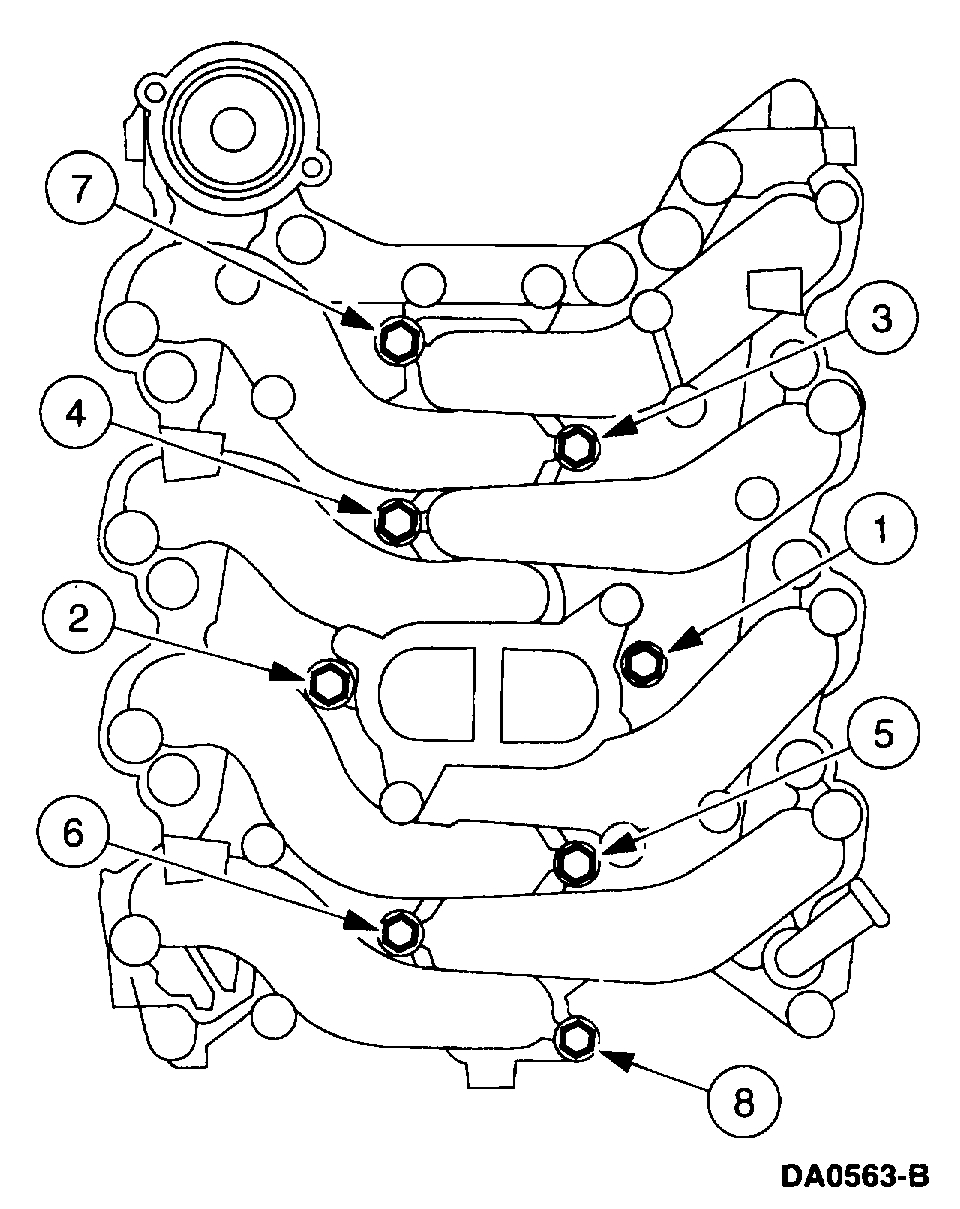
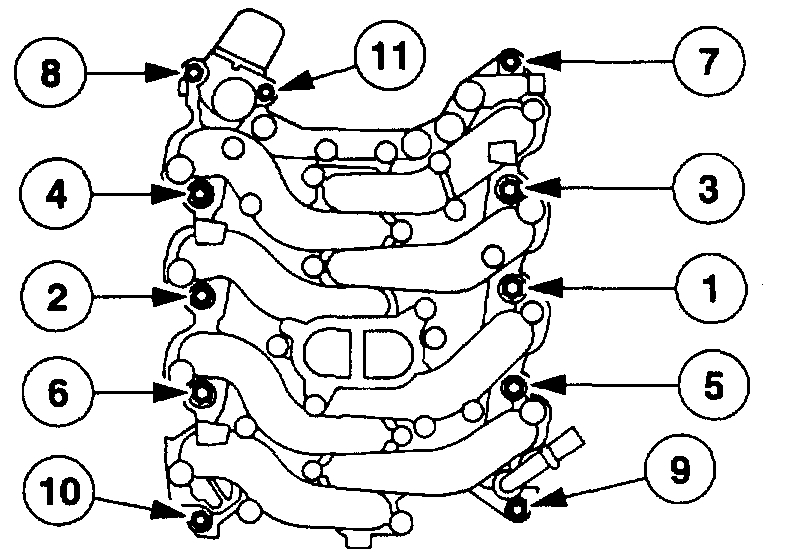
4. Tighten the bolts in two steps, in the sequence shown.
Step 1: 2 Nm (18 inch lb)
Step 2: 8-12 Nm (71-106 inch lb)
5. Install the studs.
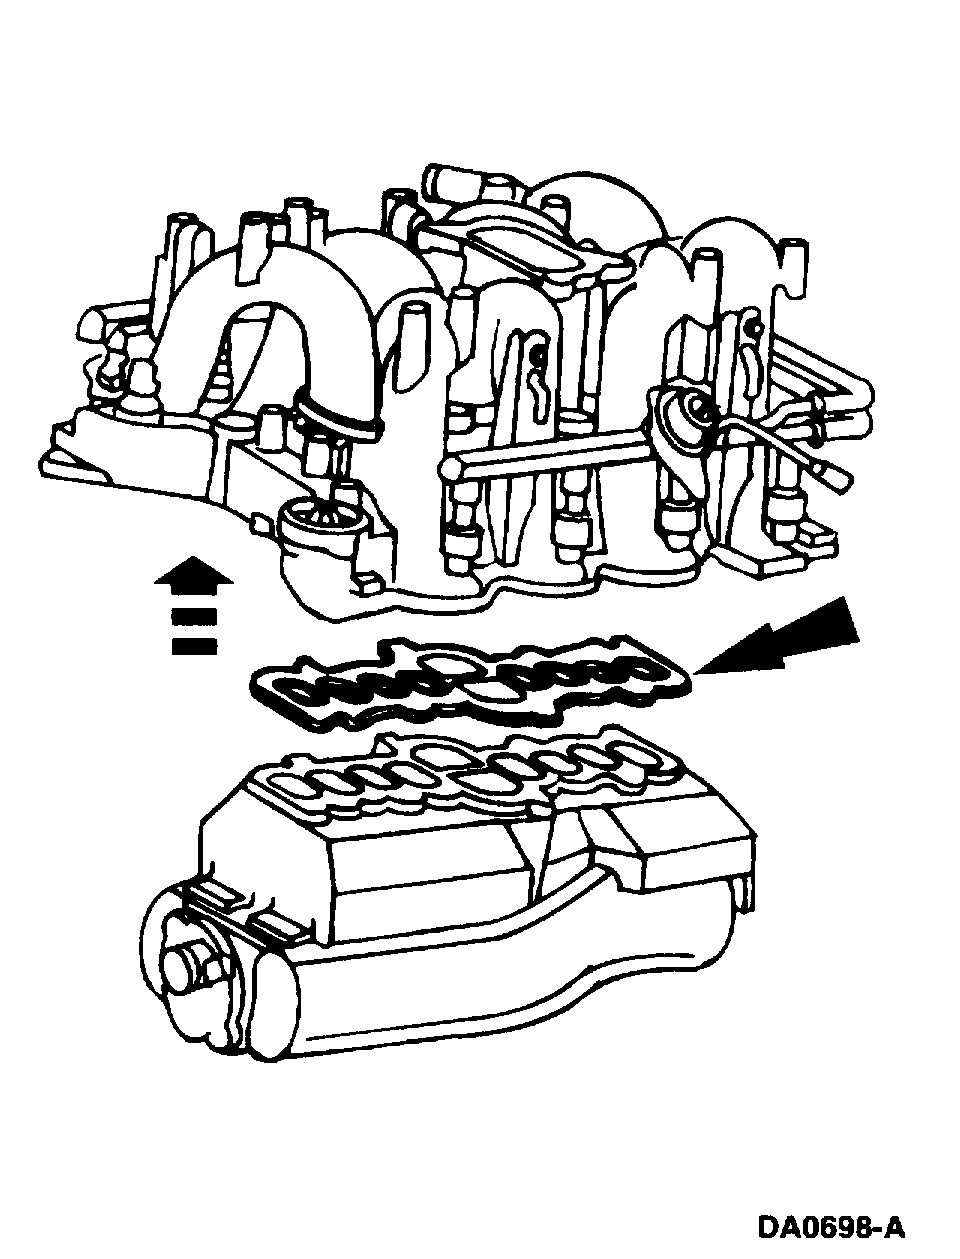
6. Install the upper intake manifold.
Position the upper intake manifold gaskets.
Position the upper intake manifold.
Loosely install the nine bolts.
7. Connect the intake manifold tuning valve connector.
8. Install the water thermostat.
9. Tighten the bolts in two steps, in the sequence shown.
Step 1: 2 Nm (18 inch lb)
Step 2: 20-30 Nm (15-22 ft. Lbs.)
10. Position the throttle body onto the upper intake manifold and install the bolts.
11. Install the heater water hose and position the clamp.
12. Connect the water temperature indicator sender wiring.
13. Install the generator.
14. Install the drive belt.
15. On 5.4L engines, install the eight ignition coils.
16. Connect the LH fuel injector electrical connectors.
17. Connect the RH fuel injector electrical connectors.
18. Connect the following vacuum connections:
1 Fuel pressure regulator vacuum connector
2 Engine vacuum regulator vacuum connector
3 EGR vacuum connector
4 Vapor management valve vacuum connector
19. Connect the EGR valve to exhaust manifold fittings, and tighten to specification.
20. Connect the following electrical connectors:
Idle Air Control Valve (IAC valve)
DPFE transducer
Engine vacuum regulator sensor
21. Connect the fuel lines.
22. Position the brake booster vacuum hose bracket and install the nut.
23. Install the throttle return spring.
24. Connect the accelerator cable to throttle body cam.
1 Rotate the throttle body cam forward.
2 Slide the accelerator cable into the throttle body cam.
25. Connect the accelerator cable to accelerator cable bracket.
1 Slide the accelerator cable into the accelerator cable bracket.
2 Install the bolt.
26. Install the accelerator control splash shield.
27. Install the air cleaner outlet tube and the engine air cleaner.
28. Install the upper radiator hose and reposition the clamp.
29. Fill the cooling system.
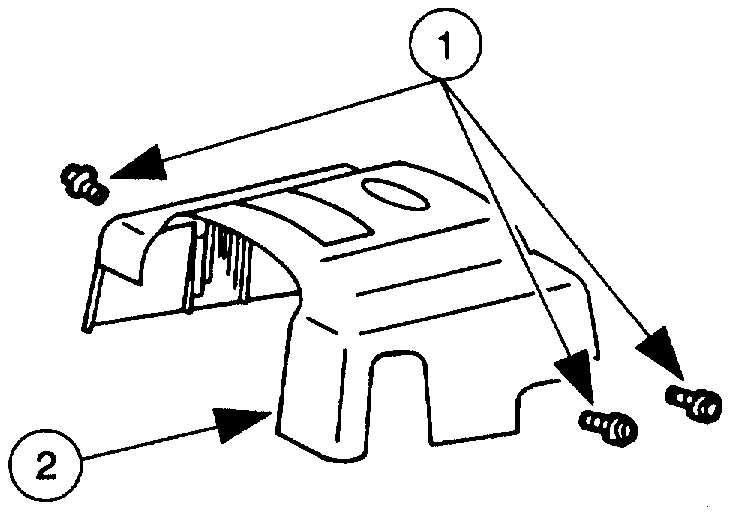
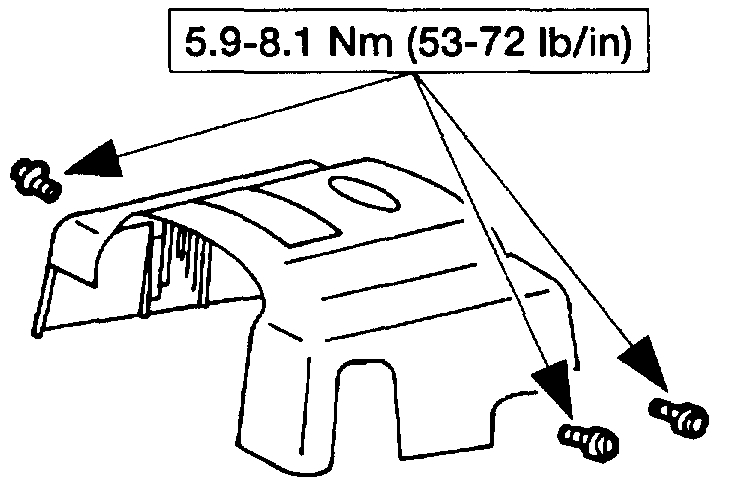
30. Install the engine cover.
31. Connect the battery ground cable.
Check out the diagrams (Below). Please let us know what happens.
Images (Click to make bigger)
Wednesday, November 20th, 2019 AT 8:12 PM