Hi and welcome to 2CarPros. There was a bulletin for this issue if the connector is burnt. Here is the bulletin and directions on replacing the connector:
Collision
� 10
2008 GMC Truck Sierra 1500 2WD
�
V6-4.3L
�
�
Lighting - Low Beam Headlamp Bulb Diagnostics/Replacement
Vehicle� Lighting and Horns� Headlamp� Technical Service Bulletins� Lighting - Low Beam Headlamp Bulb Diagnostics/Replacement
LIGHTING - LOW BEAM HEADLAMP BULB DIAGNOSTICS/REPLACEMENT
# 10-08-42-001E: Low Beam� Headlamp Bulb� Diagnosis/Replacement (Inspect Bulb and Connector) - (May 15, 2015)
Subject: Low Beam� Headlamp� Bulb Diagnosis/Replacement (Inspect Bulb and Connector) Models: 2011-2014 Buick Regal 2008-2013 Cadillac CTS 2010-2011 Cadillac CTS Sport Wagon 2010-2013 Cadillac SRX 2014 Cadillac CTS-V (Fog Lamps� Only) 2006-2015 Chevrolet Impala (Limited) 2007-2013 Chevrolet Avalanche, Silverado 1500 2007-2014 Chevrolet Silverado 2500/3500, Suburban, Tahoe 2008-2013 Chevrolet Express 2008-2015 Chevrolet Malibu 2009-2012 Chevrolet Traverse 2010-2015 Chevrolet Equinox 2012-2014 Chevrolet Sonic 2007-2012 GMC Acadia 2007-2013 GMC Sierra 1500 2007-2014 GMC Sierra 2500/3500, Yukon Models 2008-2013 GMC Savana 2010-2015 GMC Terrain 2006-2010 Pontiac G6 2007-2010 Saturn AURA, OUTLOOK Attention: This bulletin DOES NOT apply to vehicles equipped with High Intensity Discharge (HID) lamps. This Bulletin also applies to any of the above models that may be Export vehicles.
This Bulletin has been revised to update the Models section for Impala. Please discard Corporate Bulletin Number 10-08-42-001D.
Condition
Some customers may comment that the low beam headlamp is inoperative.
Correction
Important:
� � DO NOT replace the entire� headlamp assembly� for this condition.
Replace the bulb and inspect the connector following the procedure below.
1. Remove the headlamp bulb. Refer to Headlamp Bulb Replacement procedure in SI.
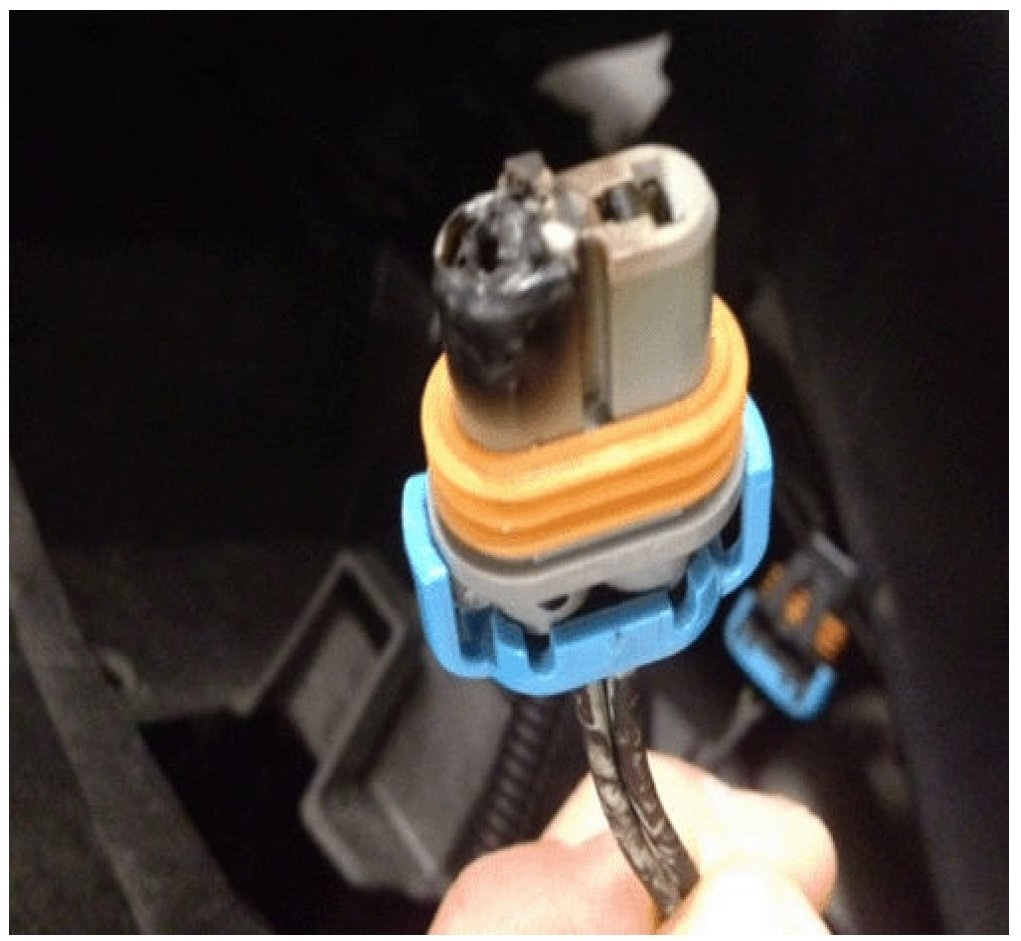
2. Inspect the connector.
� � � � If the connector is NOT discolored or damaged, replace the bulb only. For bulb part numbers, see Headlamp Bulb (Low Beam) in Group 02.727 of the appropriate PartsCatalog.
Open In New TabZoom/Print
� � � � If the connector is discolored at the bulb interface, replace the connector (service pigtail listed below) and bulb.
3. Cut the wires of the connector approximately 45mm (1 3/4in) from the connector and splice in the service pigtail connector. Ensure that the splices are not above the connector when reinstalling.
� � EXTERNAL WIRE SPLICES
4. Use Duraseal splice sleeves (salmon, P/N 19300089) for wires spliced external to the lamp. Refer to Splicing Copper Wire Using Splice Sleeves in SI for splicing procedures.
5. Replace the headlamp bulb. Refer to Headlamp Bulb Replacement in SI.
6. Verify that the headlamp is fully functional.
� � INTERNAL WIRE SPLICES
7. For wires spliced internal to the lamp, use splice clips (P/N 05297428) and heat shrink (P/N 12355010). Other splice sleeves and heat shrink tube may not protect the splice from moisture or contain an adhesive that will cause headlamp gassing.
8. Fold the wire ends in half and overlay the ends of exposed copper wires over each other and crimp the splice clip over the wires using Special Tool J-38125-8, crimp nest F, to complete the repair.
� � Note:
� � � � � Inspect the crimp quality.
� � Caution:
� � � � � Keep the heat shrink above the splice when soldering the splice to ensure that the heat shrink is not prematurely shrunk and closed down over the wire or the splice area due to the heat from the soldering iron.
9. Solder the crimp and the splice clip.
10. Center the heat shrink tube over the crimp and use the Ultratorch, part numbers 12085116, J-38125-5A, to shrink and seal the heat shrink tube properly over the splice crimp and the insulated wires.
11. Replace the headlamp bulb. Refer to Headlamp Bulb Replacement procedure in SI.
12. Verify that the headlamp is fully functional.
Let us know if this is the issue and also upload an image of your connector to see how it looks. Thank you.
Image (Click to make bigger)
Friday, September 13th, 2019 AT 9:14 PM