Hi,
You should be able to replace the tube assembly without removing the tank. Here are the directions I have for the procedure. There are only two pics. One is an exploded view of the system and the other which shows working from the rear wheel well. You will need to remove the right rear tire to do this, so make sure the vehicle is on a level surface and safely and properly supported. And yes, the entire tube gets replaced.
________________________________
2010 Ford Focus L4-2.0L
Fuel Vapor Tube Assembly
Vehicle Powertrain Management Emission Control Systems Evaporative Emissions System Evaporative Emissions Hose Service and Repair Removal and Replacement Fuel Vapor Tube Assembly
FUEL VAPOR TUBE ASSEMBLY
303-13 Evaporative Emissions 2010 Focus
REMOVAL AND INSTALLATION
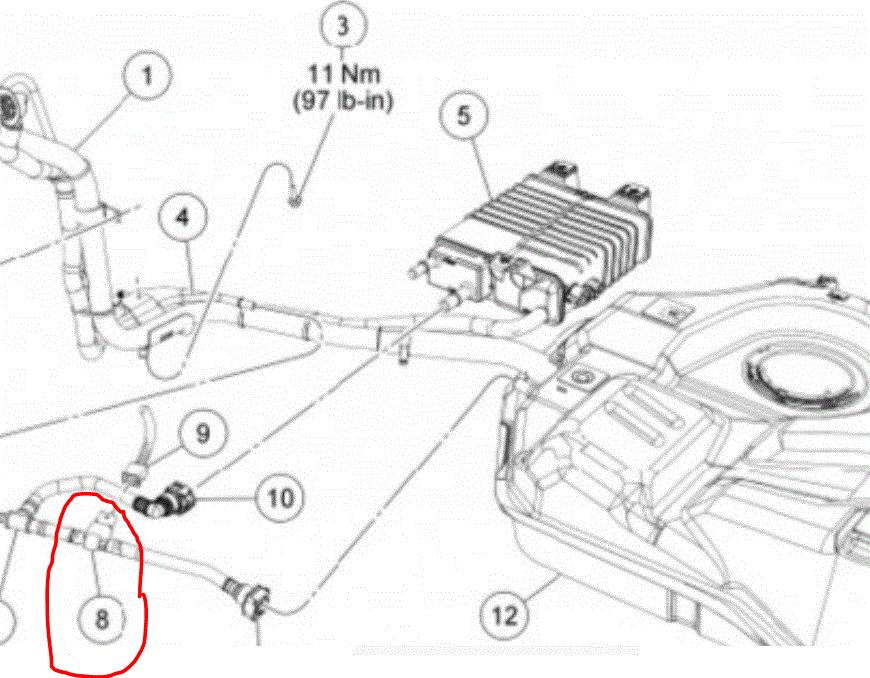
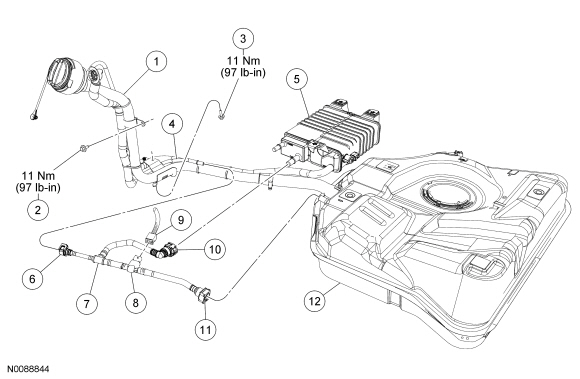
Fuel Vapor Tube Assembly
pic 1
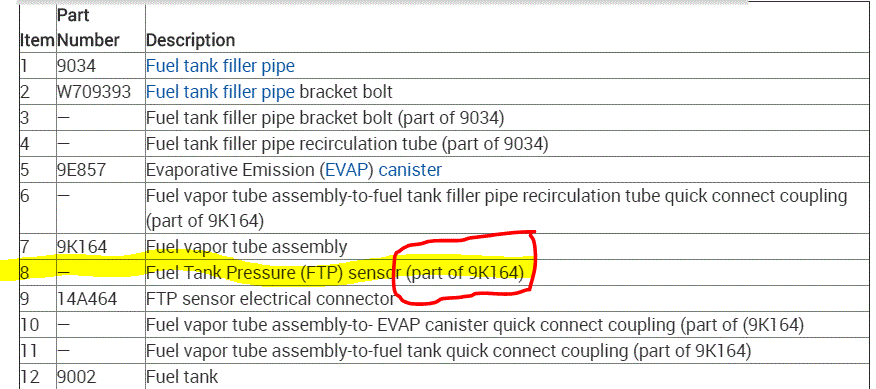
Item Part Number Description
1 9034 Fuel tank filler pipe
2 W709393 Fuel tank filler pipe bracket bolt
3 — Fuel tank filler pipe bracket bolt (part of 9034)
4 — Fuel tank filler pipe recirculation tube (part of 9034)
5 9E857 Evaporative Emission (EVAP) canister
6 — Fuel vapor tube assembly-to-fuel tank filler pipe recirculation tube quick connect coupling (part of 9K164)
7 9K164 Fuel vapor tube assembly
8 — Fuel Tank Pressure (FTP) sensor (part of 9K164)
9 14A464 FTP sensor electrical connector
10 — Fuel vapor tube assembly-to- EVAP canister quick connect coupling (part of (9K164)
11 — Fuel vapor tube assembly-to-fuel tank quick connect coupling (part of 9K164)
12 9002 Fuel tank
Removal and Installation
image WARNING: Do not smoke, carry lighted tobacco or have an open flame of any type when working on or near any fuel-related component. Highly flammable mixtures are always present and may be ignited. Failure to follow these instructions may result in serious personal injury.
image WARNING: Do not carry personal electronic devices such as cell phones, pagers or audio equipment of any type when working on or near any fuel-related component. Highly flammable mixtures are always present and may be ignited. Failure to follow these instructions may result in serious personal injury.
image WARNING: Always disconnect the battery ground cable at the battery when working on an evaporative emission (EVAP) system or fuel-related component. Highly flammable mixtures are always present and may be ignited. Failure to follow these instructions may result in serious personal injury.
With the vehicle in NEUTRAL, position it on a hoist. For additional information, refer to Section 100-02 .
Disconnect the battery ground cable. For additional information, refer to Section 414-01 .
Disconnect the Fuel Tank Pressure (FTP) sensor electrical connector.
Remove the RH rear wheel and tire. For additional information, refer to Section 204-04 .
Remove the retainers and the RH rear splash shield.
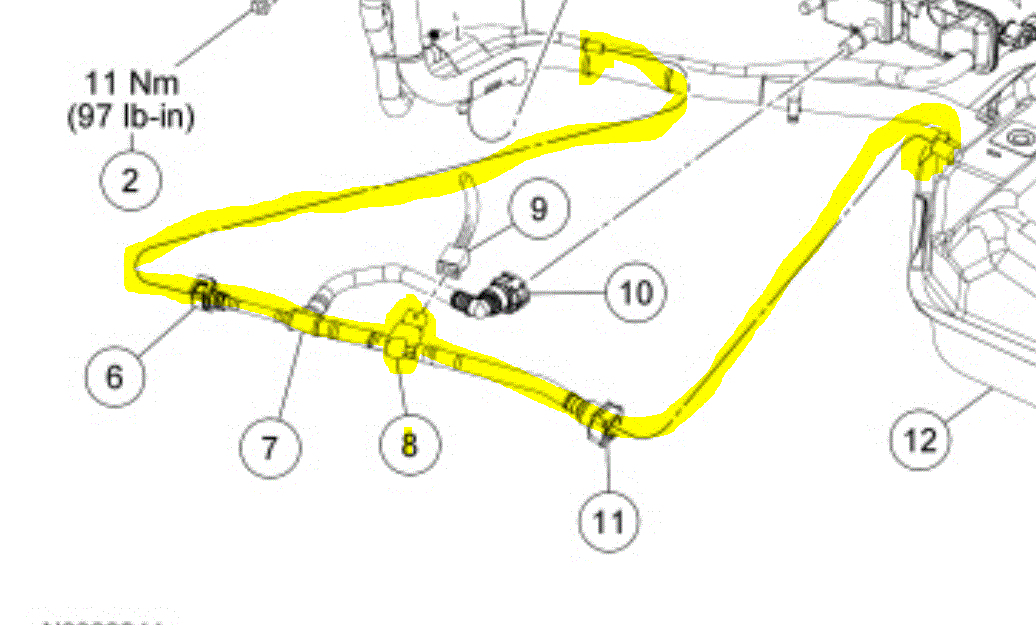
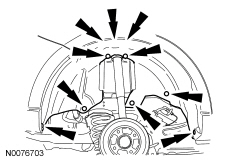
pic 2
Remove the 2 bolts from the fuel tank filler pipe brackets.
To install, tighten to 11 Nm (97 lb-in).
Disconnect the fuel vapor tube assembly-to-fuel tank filler pipe recirculation tube quick connect coupling. For additional information, refer to Section 310-00 .
Disconnect the fuel vapor tube assembly-to-Evaporative Emission (EVAP) canister quick connect coupling. For additional information, refer to Section 310-00 .
Disconnect the fuel vapor tube assembly-to-fuel tank quick connect coupling. For additional information, refer to Section 310-00 .
Remove the fuel vapor tube assembly.
To install, reverse the removal procedure.
___________________________
Let me know if this helps.
Joe
Images (Click to enlarge)
Feb 19, 2020 at 7:40 PM