Hi and thanks for using 2CarPros.com
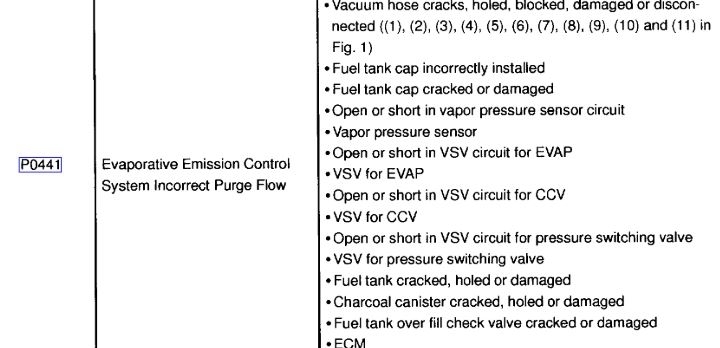
The sensor could be the issue; however, there are many other things which can cause this code. Look at picture 1 that I attached. It lists all the things which can lead to this problem. Yes, one is the pressure sensor, but to arbitrarily replace it can be a waste of money. Basically, for this code to set, there has to be no pressure change in the fuel tank or the charcoal canister. I know this may sound confusing, but when the pressure sensor opens, pressure should drop and that isn't happening.
With all that being said, yes, the sensor could be bad. However, it is one of many things that can cause this code. Take a look through the image I attached.
___________________________________
I do not want to confuse things more, but if you have a live data OBD2 scanner, I have all the directions and flow charts to pinpoint where the problem is coming from. I would be happy to provide them, but the flow charts will be in picture form. There are many of them. However, if you would like to test the vapor pressure sensor itself, here are the directions. You will need a basic understanding of using a multi-meter and a cheap hand held vacuum pump. Most parts stores will lend or rent this to you.
Here is a link that shows how to use a multi-meter:
https://www.2carpros.com/articles/how-to-use-a-voltmeter
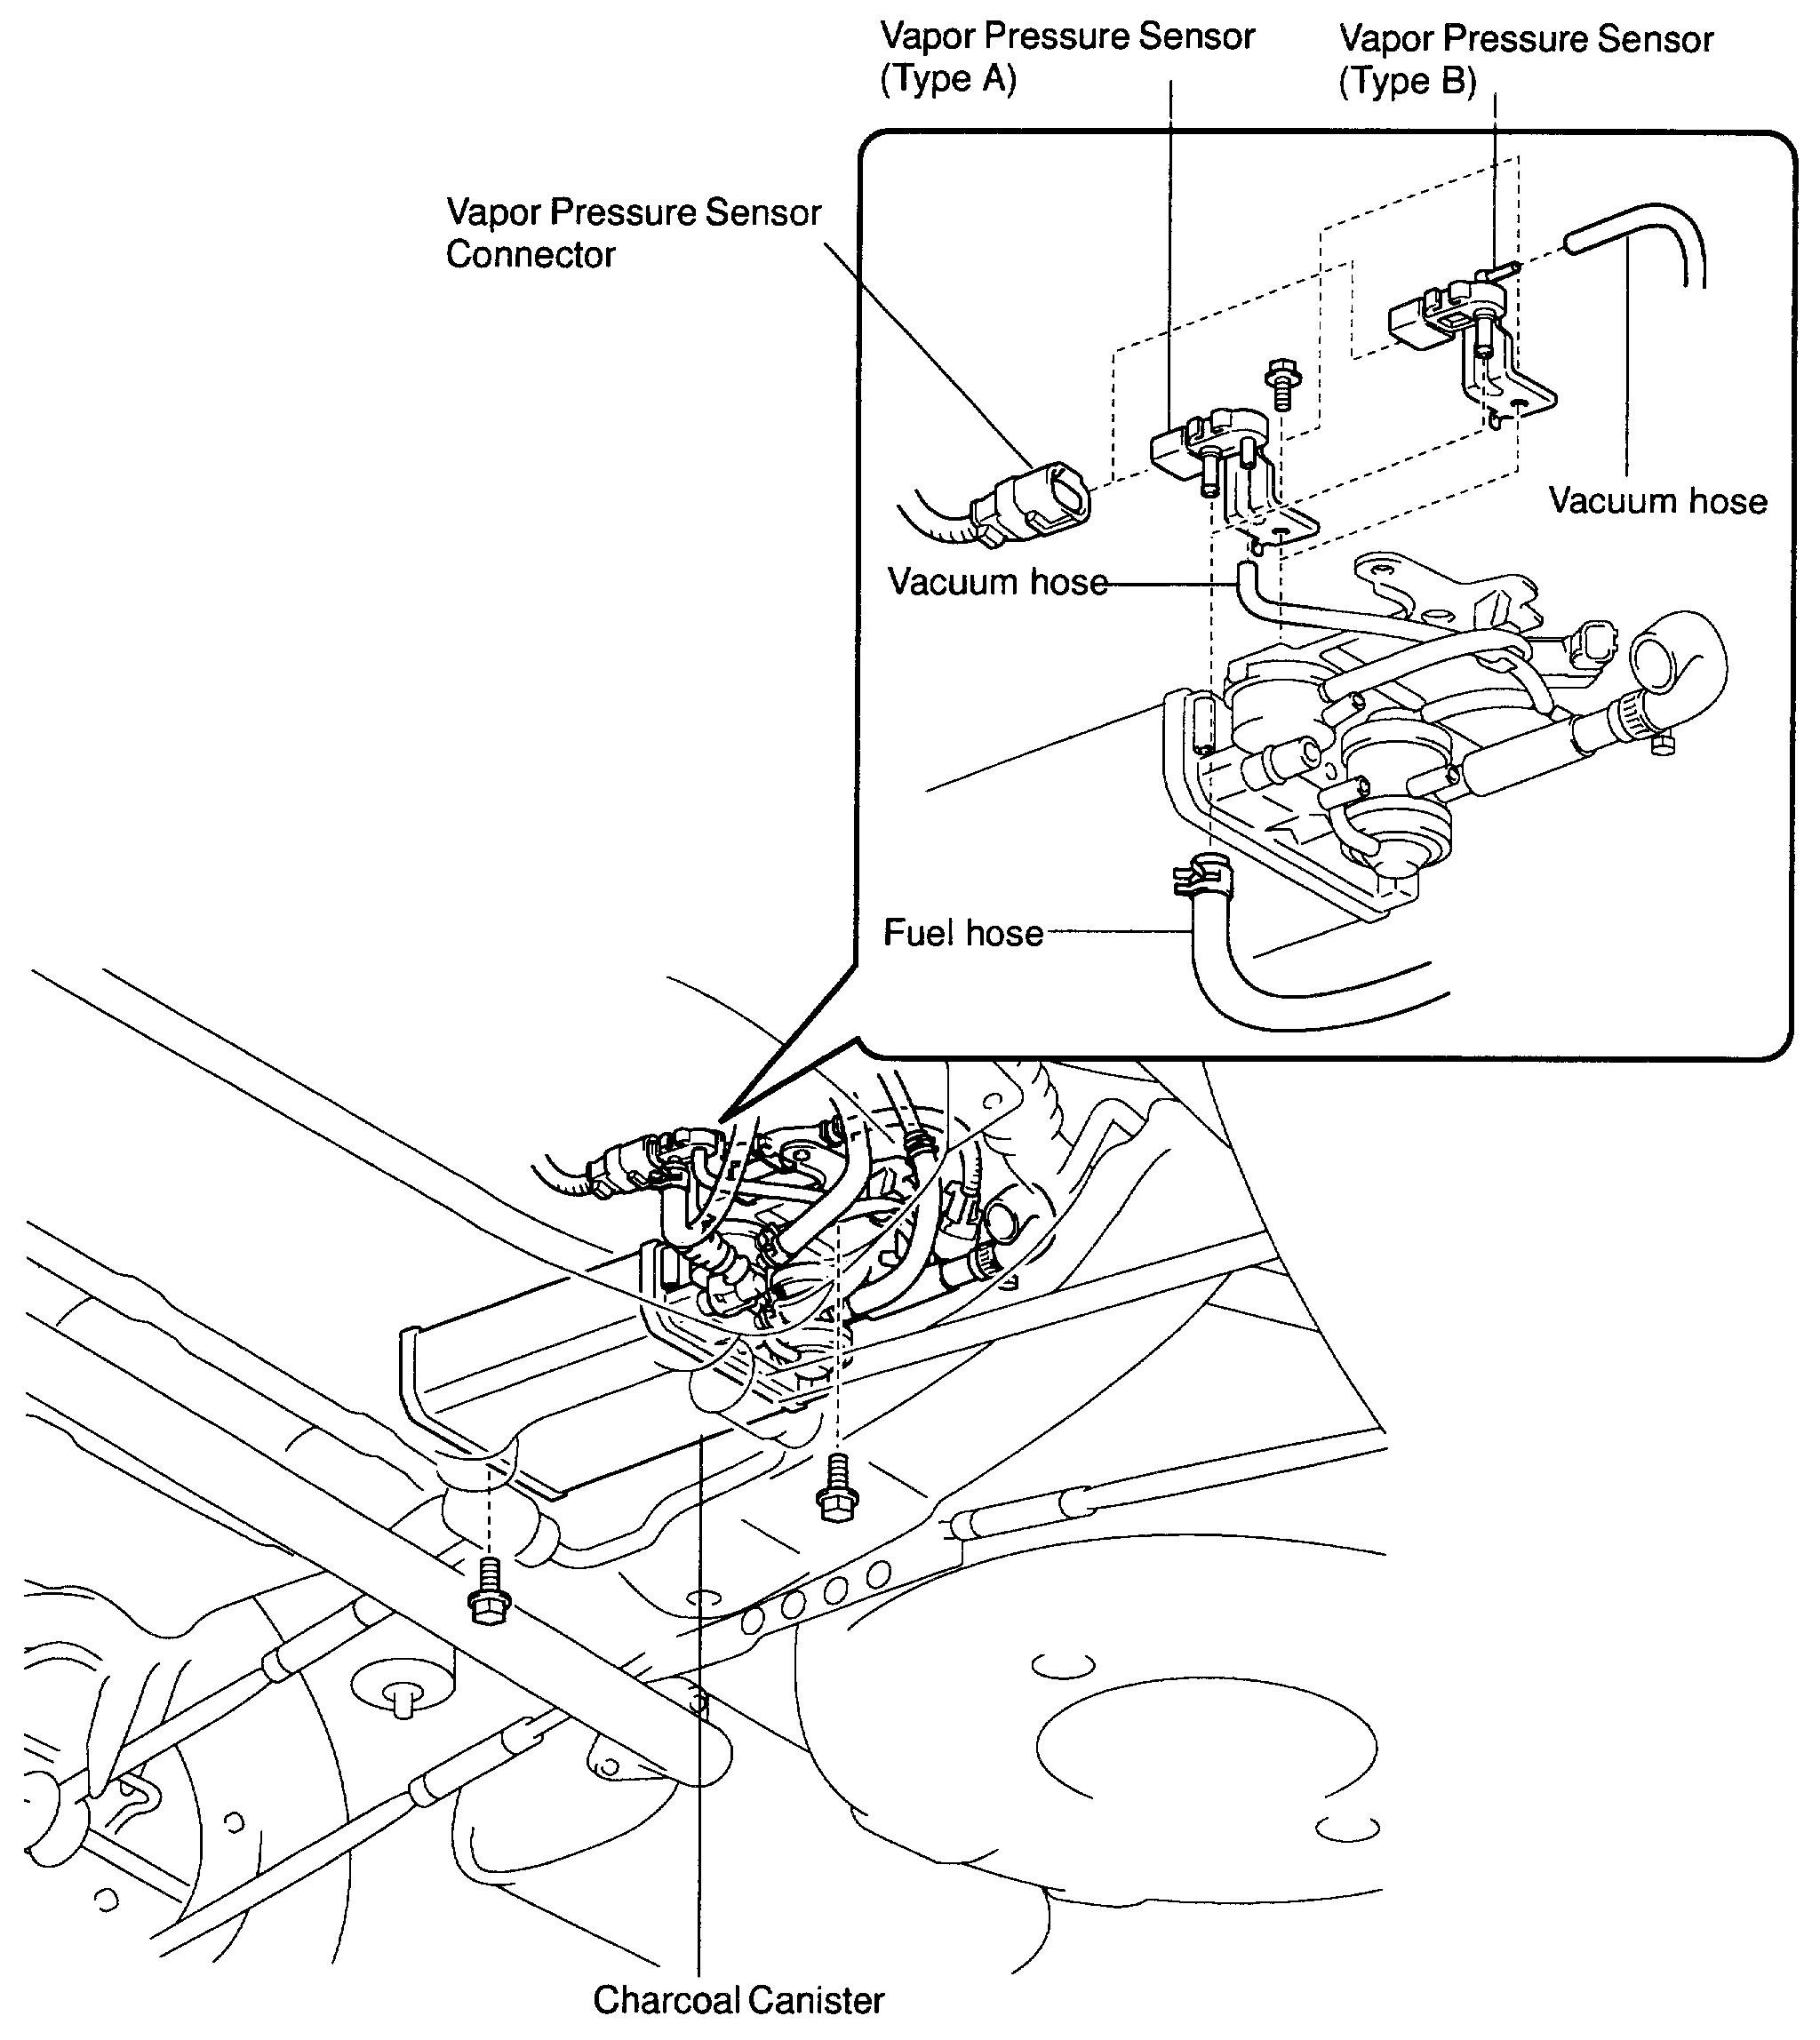
Here are the directions for testing the sensor. All remaining pictures correlate with these directions. The component is located under the vehicle near the fuel tank.
VAPOR PRESSURE SENSOR
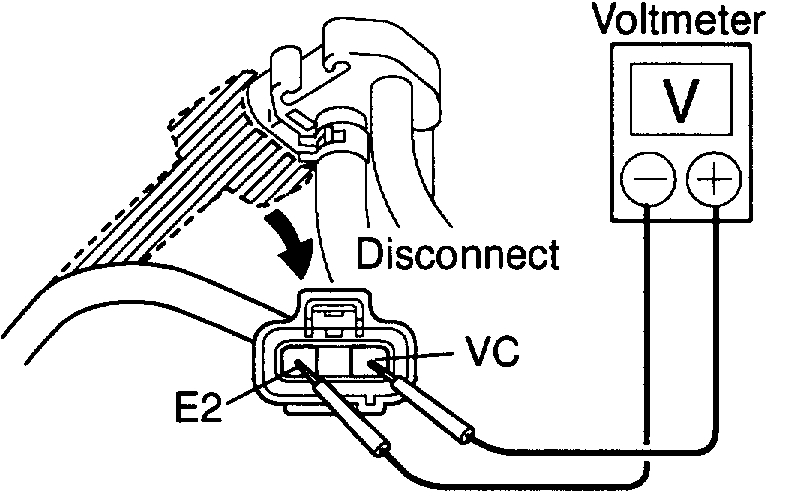
1. INSPECT POWER SOURCE VOLTAGE OF VAPOR PRESSURE SENSOR
a. Disconnect the vapor pressure sensor connector.
b. Turn the ignition switch ON.
c. Using a voltmeter, measure the voltage between connector terminals VC and E2 of the wiring harness side.
Voltage: 4.5 - 5.5 V
d. Turn the ignition switch OFF.
e. Reconnect the vapor pressure sensor connector.
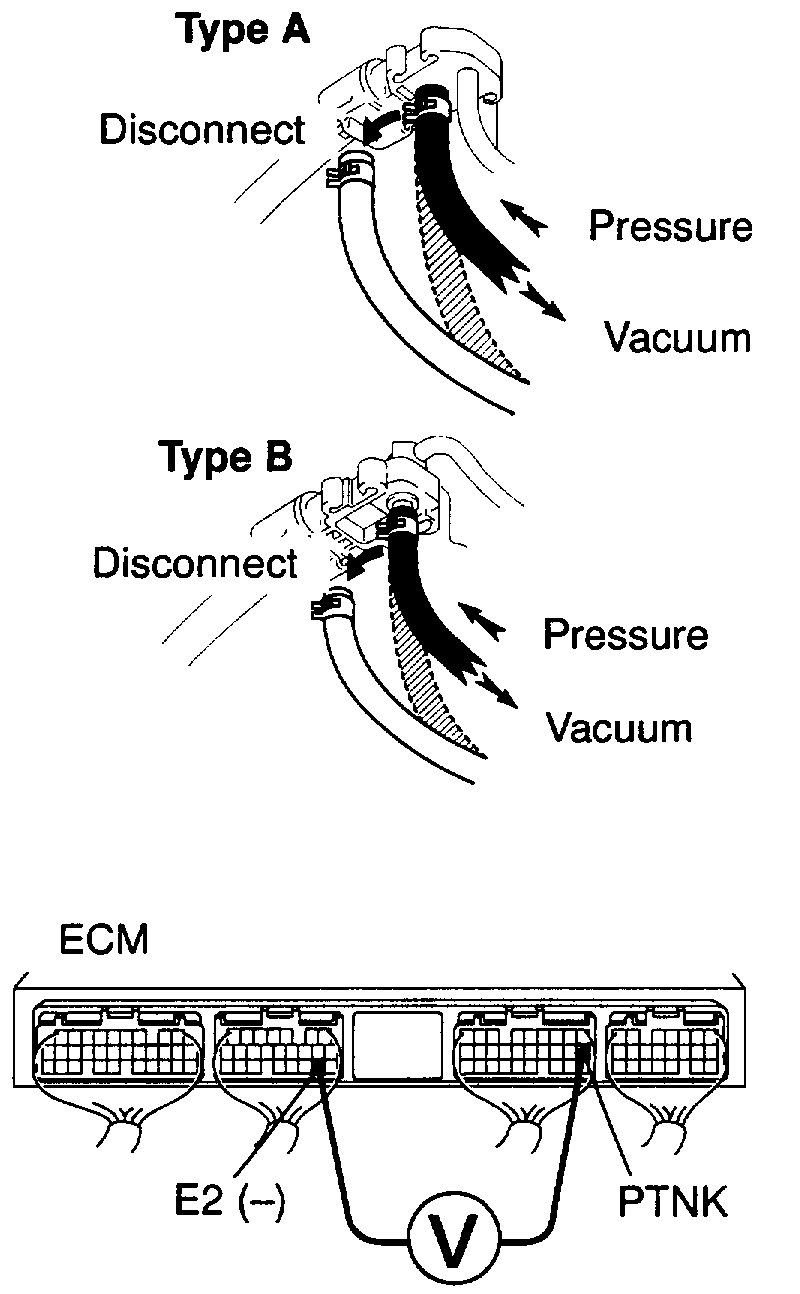
2. INSPECT POWER OUTPUT OF VAPOR PRESSURE SENSOR
a. Turn the ignition switch ON.
b. Disconnect the vacuum hose from the vapor pressure sensor.
c. Connect a voltmeter to terminals PTNK and E2 of the ECM, and measure the output
voltage under the following conditions:
1. Apply vacuum (2.0 kPa (15 mmHg, 0.59 in.Hg)) to the vapor pressure sensor.
Voltage: 1.3 - 2.1 V
2. Release the vacuum from the vapor pressure sensor.
Voltage: 3.0 - 3.6 V
3. Apply pressure (1.5 kPa (15 g/sq.cm, 0.22 psi)) to the vapor pressure sensor.
Voltage: 4.2 - 4.8 V
d. Turn the ignition switch OFF.
e. Reconnect the vacuum hose to the vapor pressure sensor.
Do not be intimidated with the directions. It is actually not hard to do. If you determine the part is bad, all that is required to replace it is to disconnect the wiring/ plug, remove vacuum hoses, and one bolt mounts it. It would take thirty minutes maximum to replace. Make sure none of the rubber vacuum hoses are damaged, disconnected, split, or dry rotted.
I hope this helps. Please feel free to ask any questions you may have or let me know if you need help.
Take care,
Joe
Images (Click to enlarge)
Nov 7, 2018 at 6:34 PM