Welcome to 2CarPros.
If you fill the tank, does the gauge change? Also, did you replace only the pump or the entire unit including the level sensor?
I'm not sure if it was the entire module or only the pump. Here are the directions for the fuel gauge sender if only the pump itself was replaced. Look through the directions and see if there is anything you missed. If the entire module was replaced, then you need to fill the tank and see if the gauge is accurate. The float in the tank is attached to a rheostat which is what sends the signal. It is possible that the float arm was bent, is stuck, or the rheostat itself is bad.
The attached pictures correlate with the directions.
_________________________________
2002 Chrysler Truck Voyager V6-3.3L VIN R
PROCEDURES
FUEL LEVEL SENDING UNIT / SENSOR
REMOVAL
Remove fuel pump module. See: Fuel Pump > Procedures
Fig. 2 Fuel Pump/Level Sensor Electrical Connector
pic 1
1. Depress retaining tab and remove the fuel pump/level sensor connector from the BOTTOM of the fuel pump module electrical connector (Fig. 2)
NOTE: The pump module harness on TOP of flange is not serviceable or removable.
2. Pull off the locking wedge.
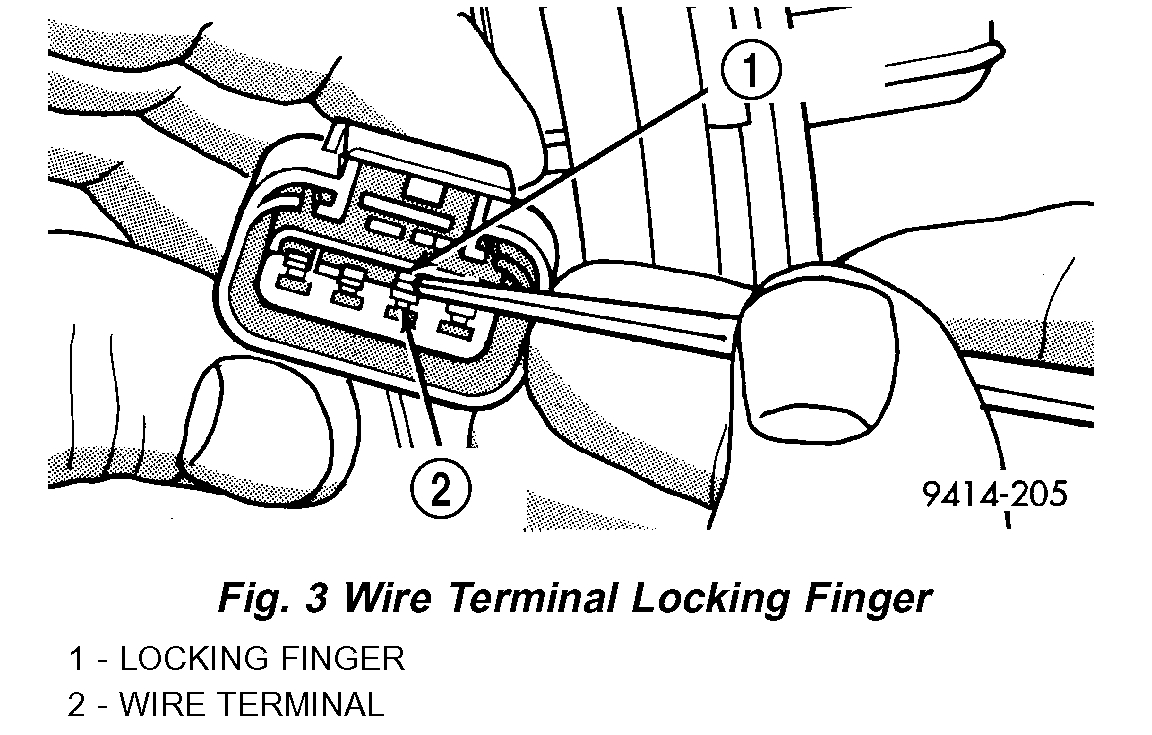
Fig. 3 Wire Terminal Locking Finger
pic 2
3. Using a small screwdriver lift locking finger away from terminal and push terminal out of connector (Fig. 3).
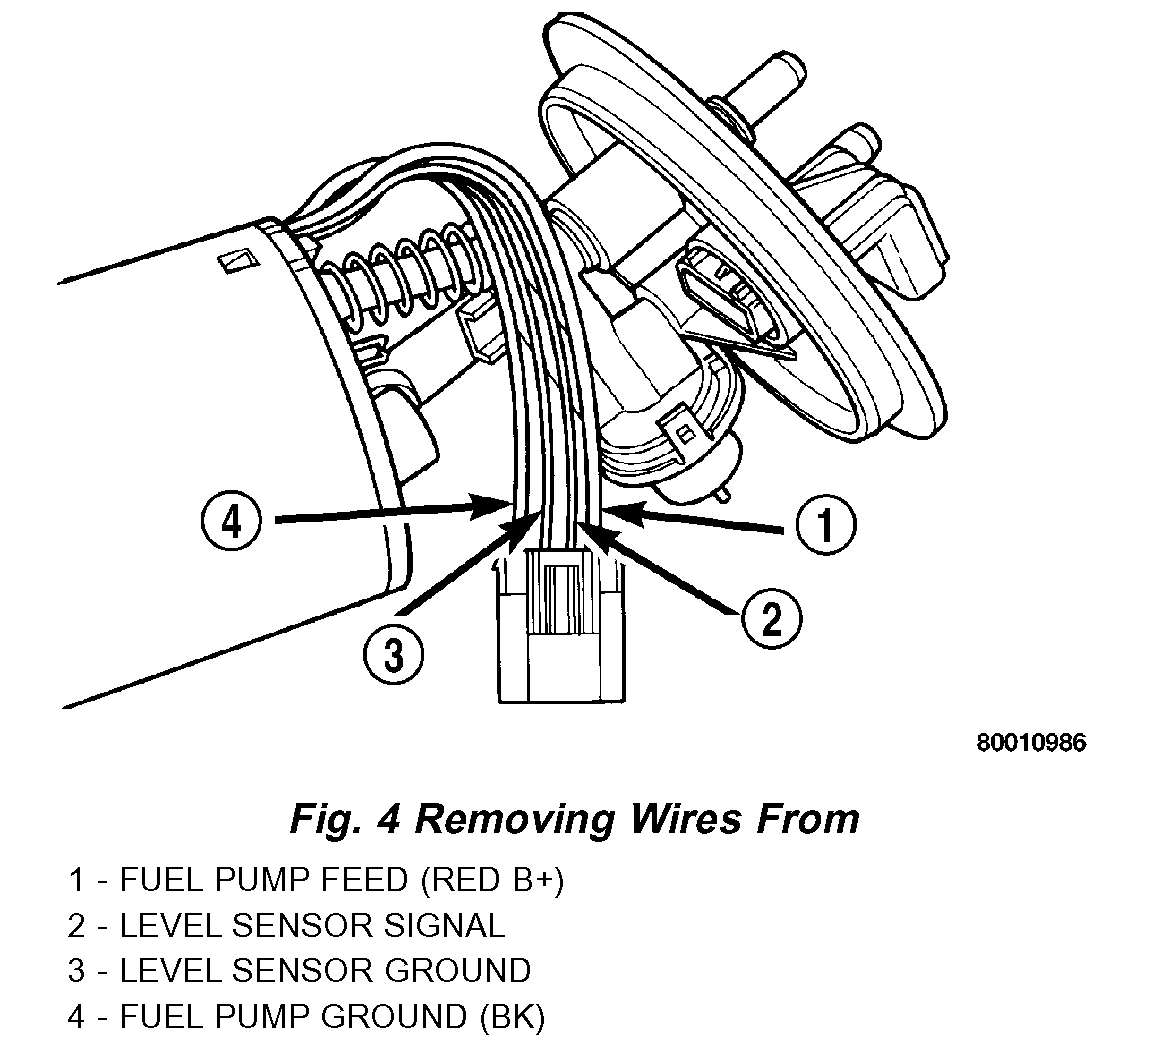
Fig. 4 Removing Wires From
pic 3
4. Push level sensor signal and ground terminals out of the connector (Fig. 4).
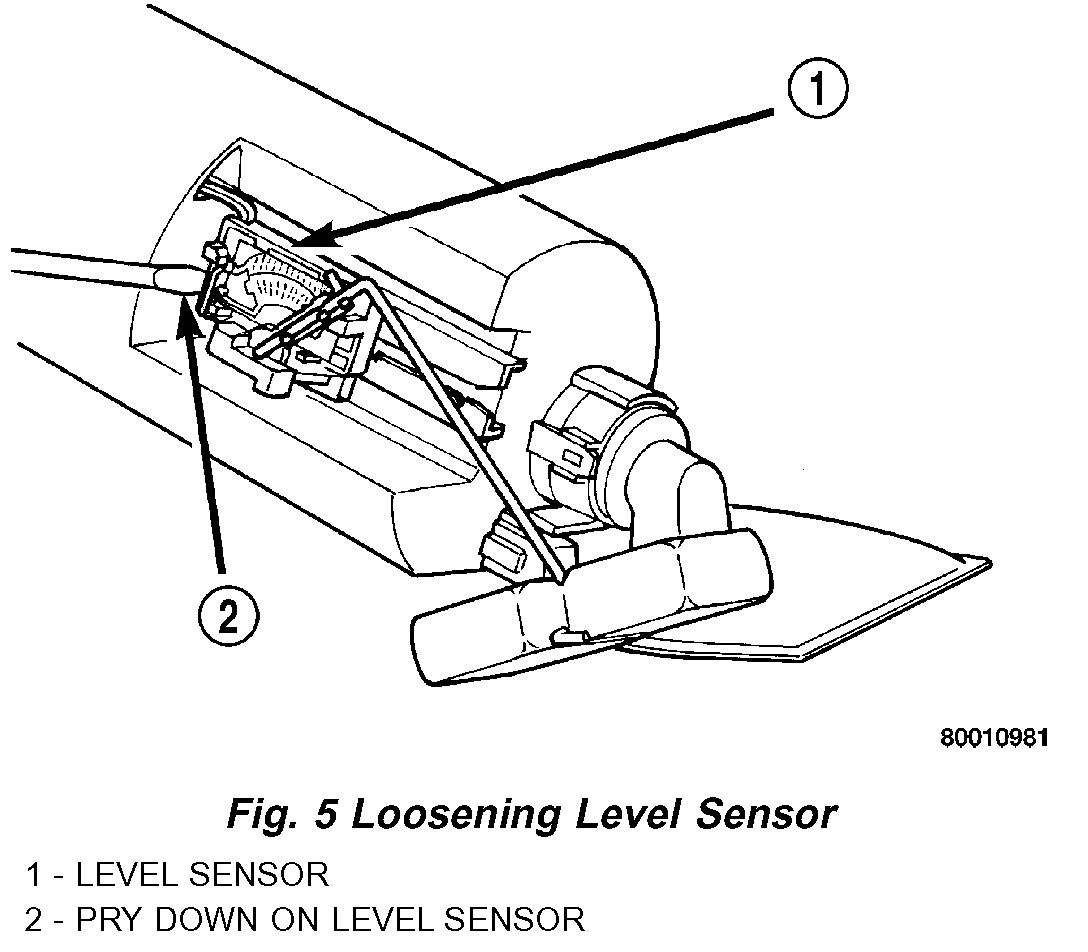
Fig. 5 Loosening Level Sensor
pic 4
5. Insert a screwdriver between the fuel pump module and the top of the level sensor housing (Fig. 5). Push level sensor down slightly.
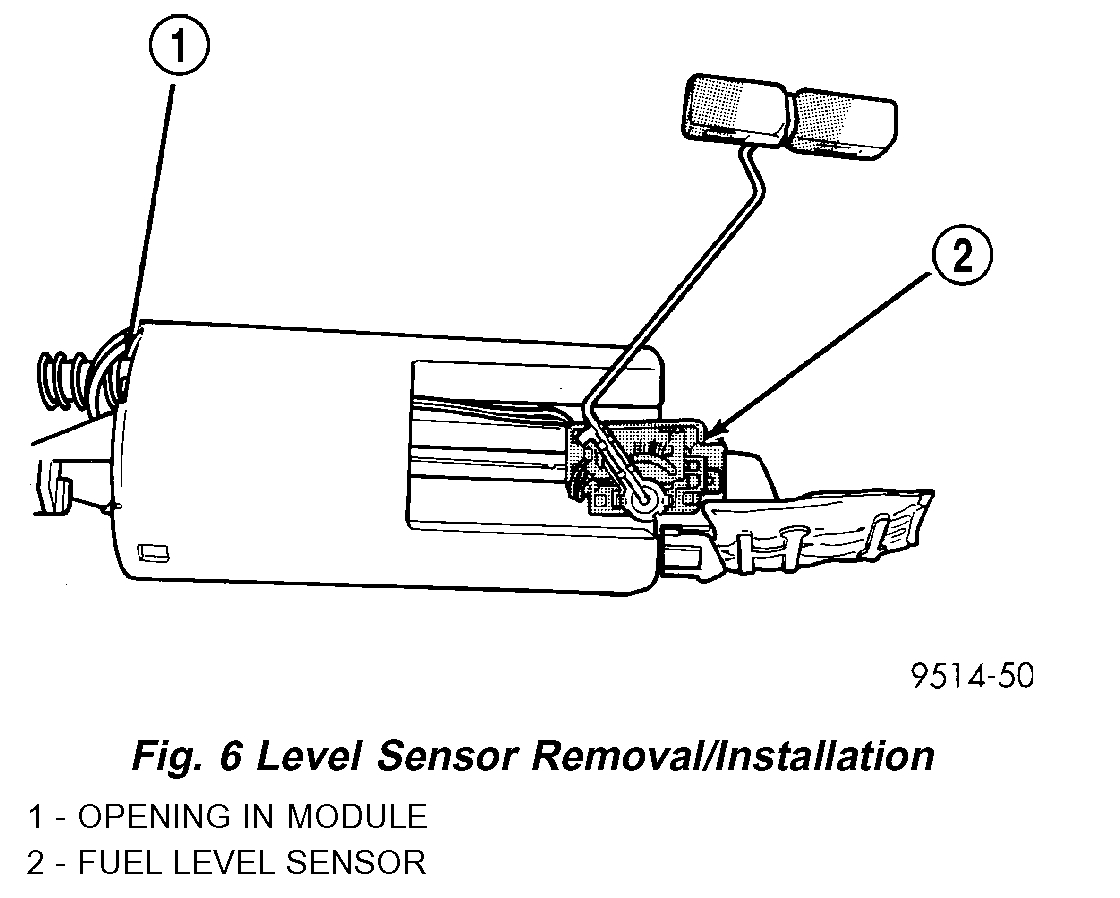
Fig. 6 Level Sensor Removal/Installation
pic 5
6. Slide level sensor wires through opening fuel pump module (Fig. 6).
7. Slide level sensor out of installation channel in module.
INSTALLATION
1. Insert level sensor wires into bottom of opening in module.
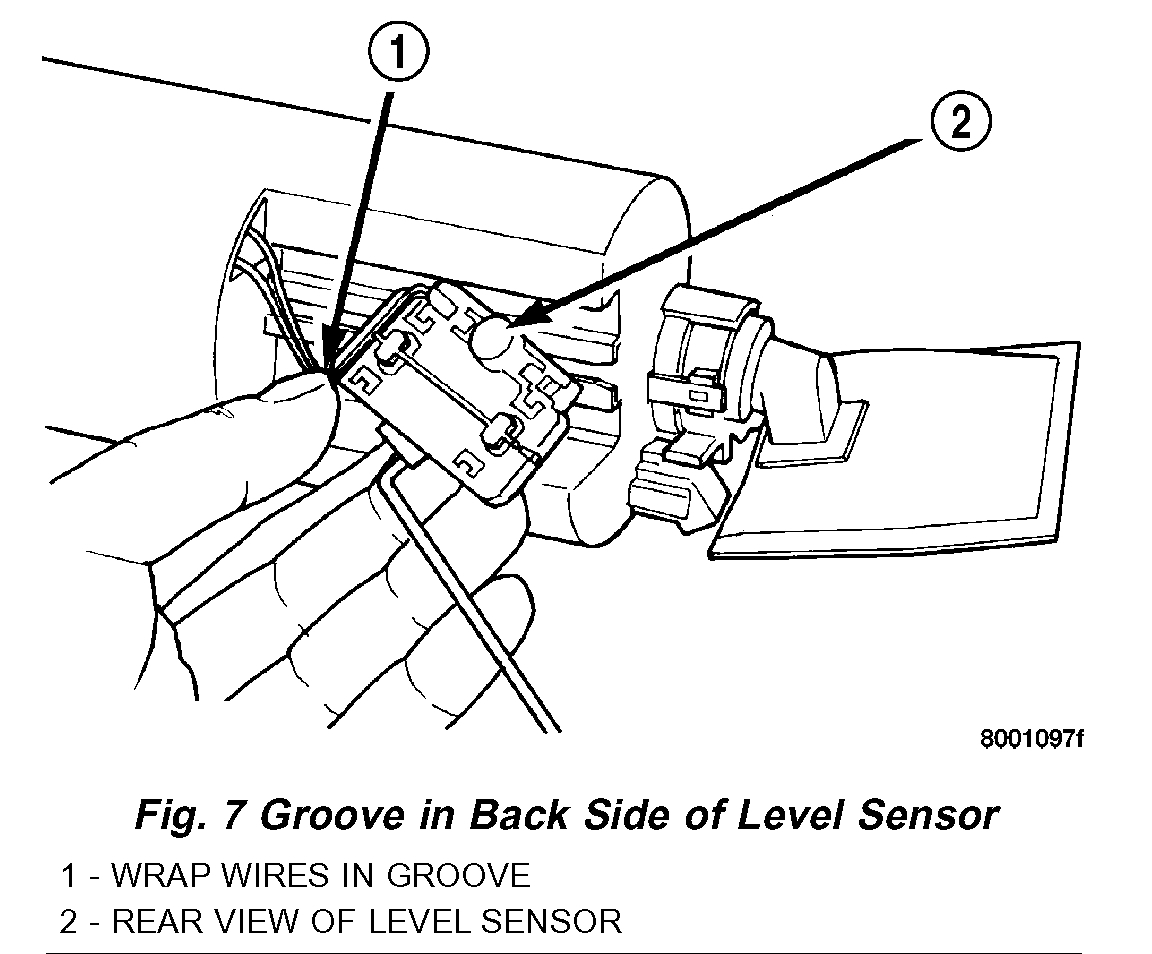
Fig. 7 Groove In Back Side Of Level Sensor
pic 6
2. Wrap wires into groove in back of level sensor (Fig. 7).
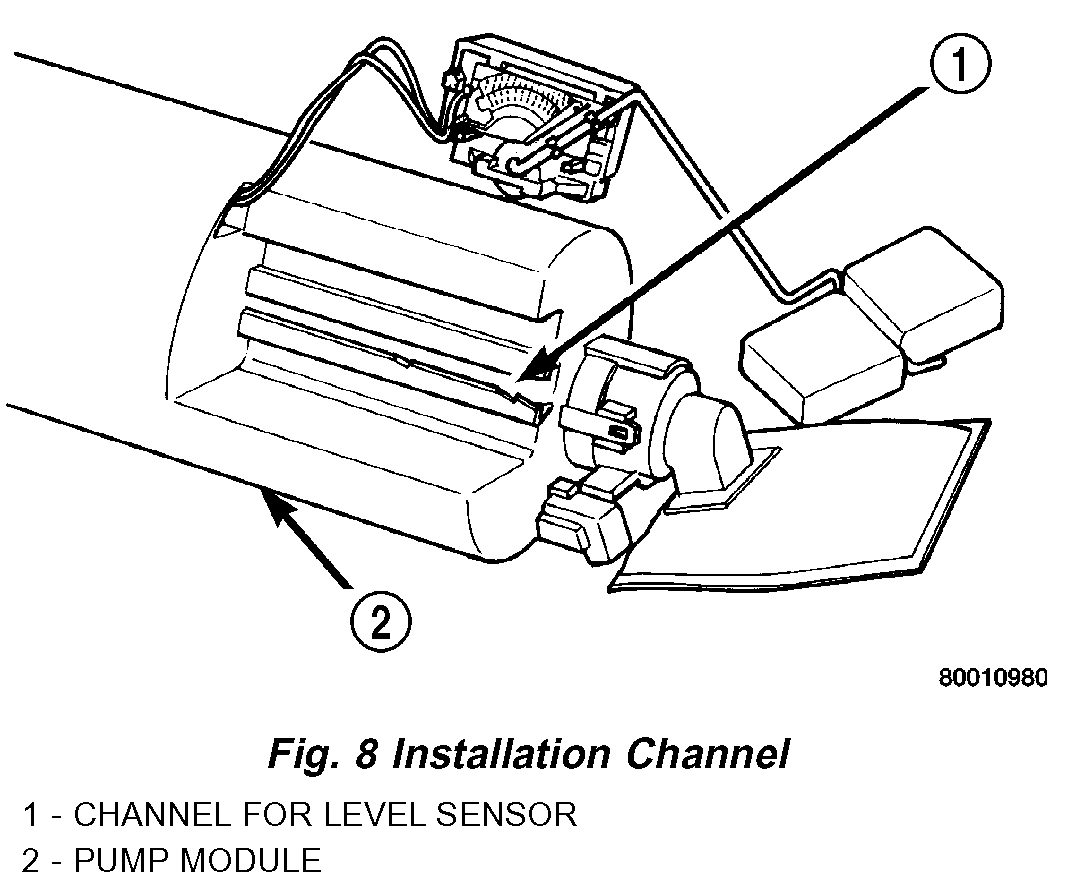
Fig. 8 Installation Channel
pic 7
3. While feeding wires into guide grooves, slide level sensor up into channel until it snaps into place (Fig. 8). Ensure tab at bottom of sensor locks in place.
4. Install level sensor wires in connector. Push the wires up through the connector and then pull them down until they lock in place. Ensure signal and ground wires are installed in the correct position.
5. Install locking wedge on connector.
6. Push connector up into bottom of fuel pump module electrical connector.
7. Install fuel pump module.
___________________
Let me know if this helps or if you have other questions.
Take care,
Joe
Images (Click to make bigger)
Sunday, August 18th, 2019 AT 7:24 PM