Fuel gauge issues?

2006 TOYOTA TACOMA
188,000 MILES • 2.5L • 4 CYL • 2WD • AUTOMATIC
Avatar
FLOATR925@YAHOO.COM
  • MEMBER
  • 132 POSTS
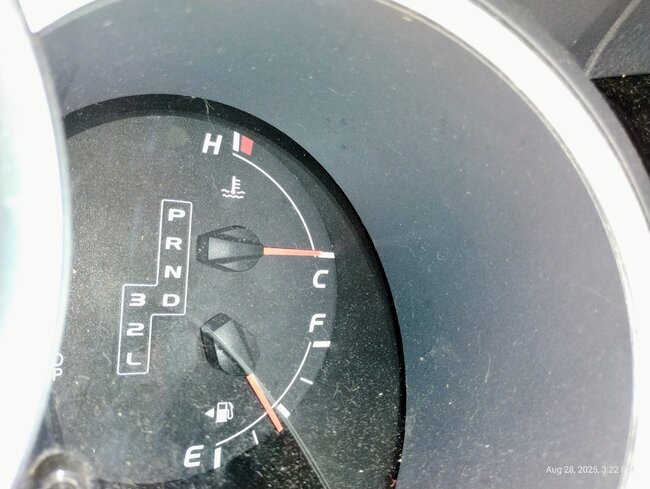
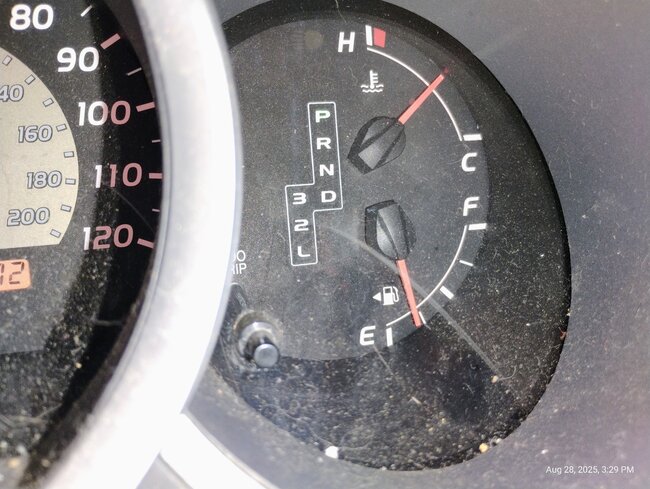
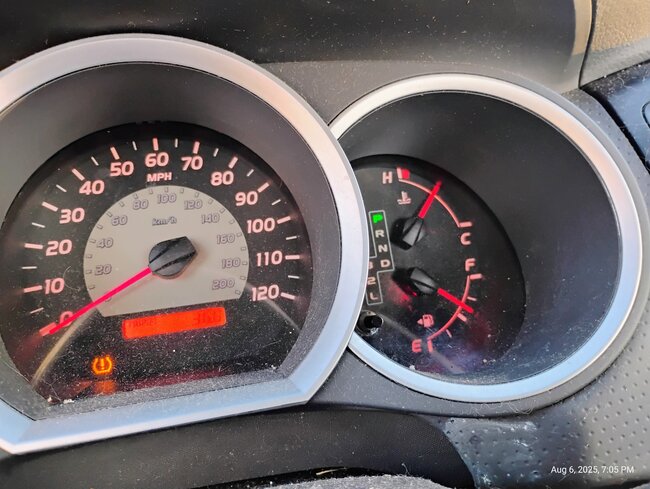
Once again, the gauge has started acting very eradicate. I went 9 months with a new pump and no problems though I reset the gauge to stay where it should after fill up an always refilled after half tank...
The gauge dropped to e ..I used some marvel mystery oil an filled up an it worked ok a few days then a few days ago it dropped to e as I was in park with it running an it was showing almost 3/4 ....it stayed on e after restart an drive.

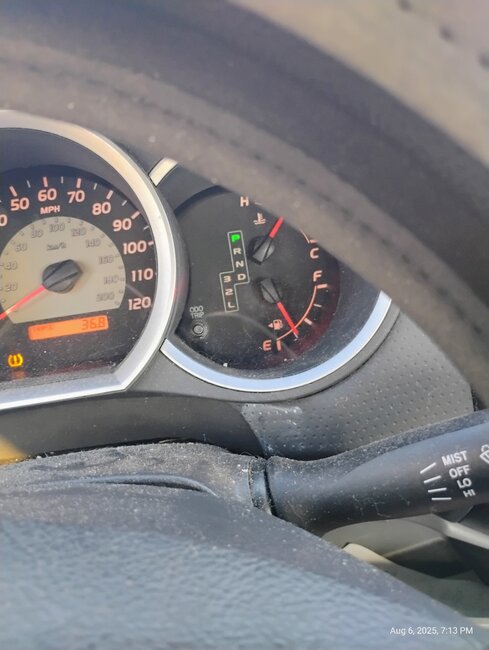
Next morning I added some marvel mystery oil not much. Started it up an gauge worked fine .later on in day as I started it an running an in park it dropped slowly BK to e..an withing 10 minutes not turning it off it started going BK up ..to over half mark...then it went BK to E and stayed there. I restarted an ran it home an it stayed on e.
Really crazy to change that way as in park an not accurate as it was moving...What should I look at.
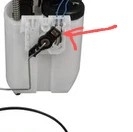
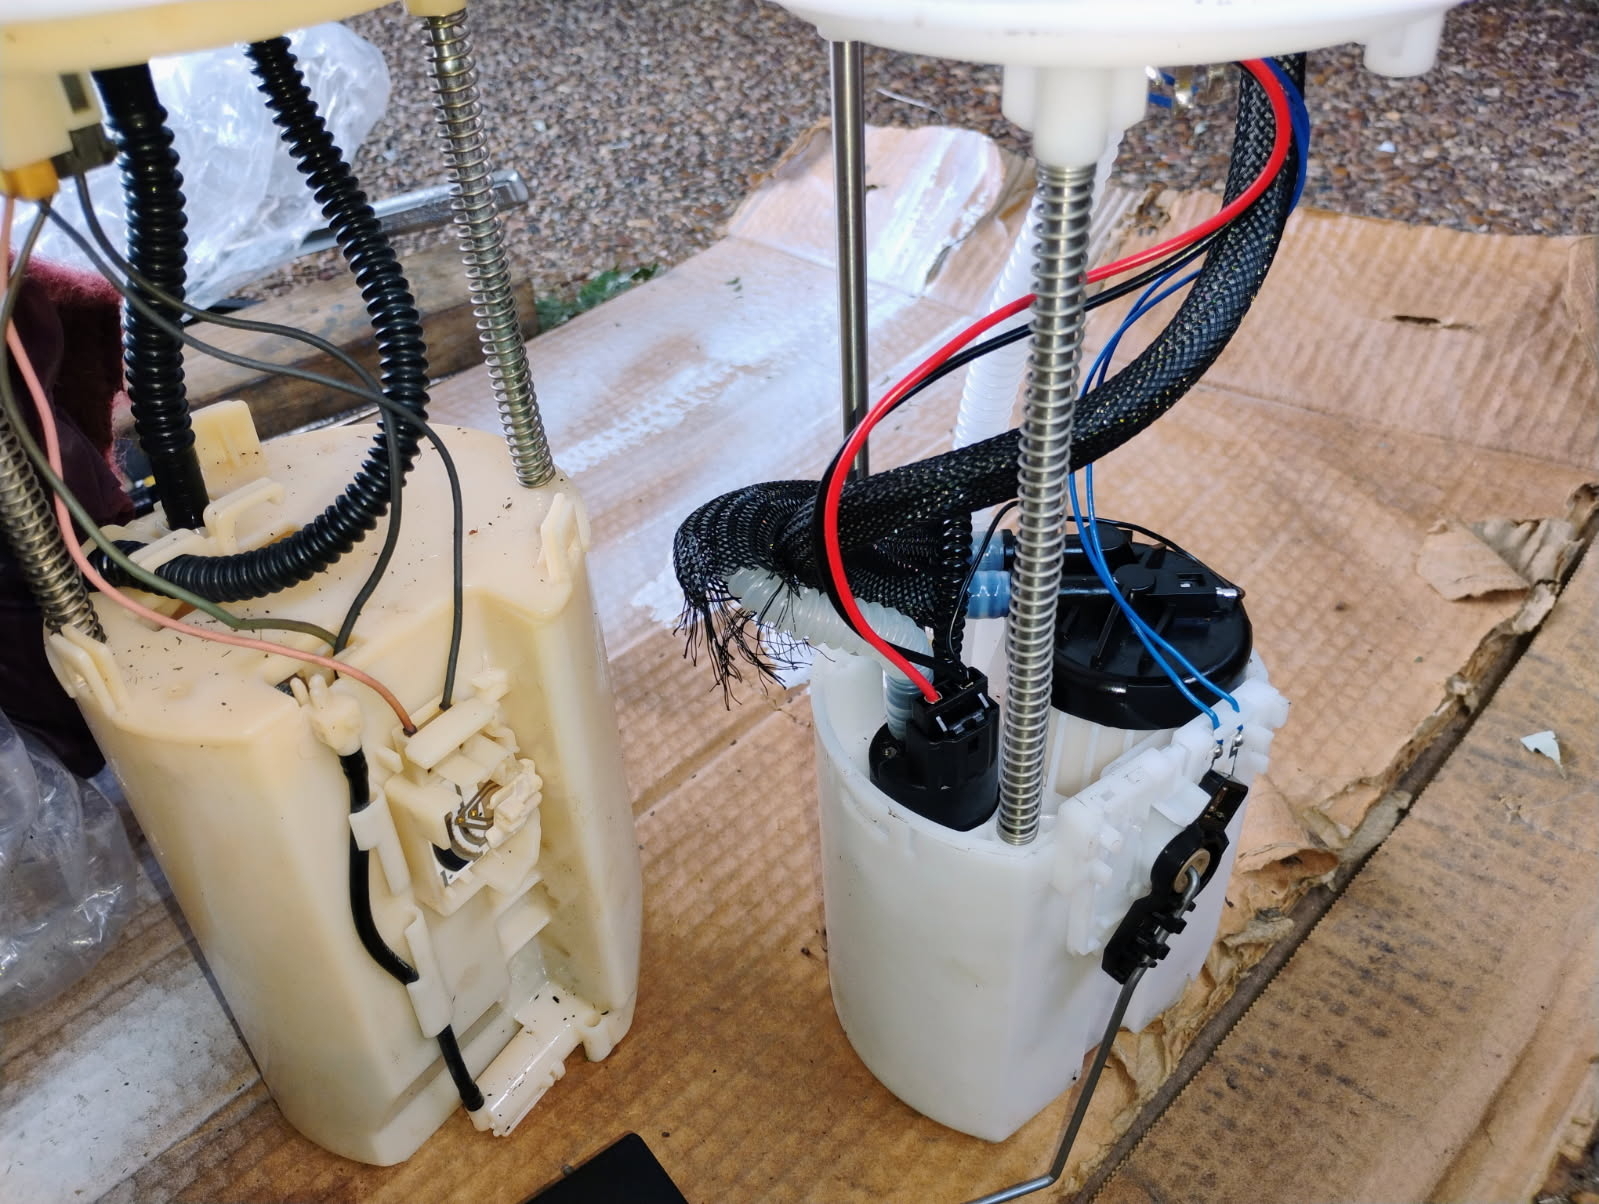
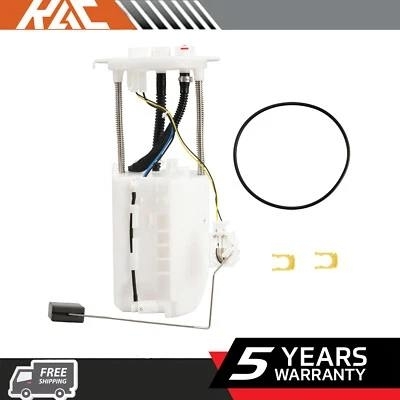
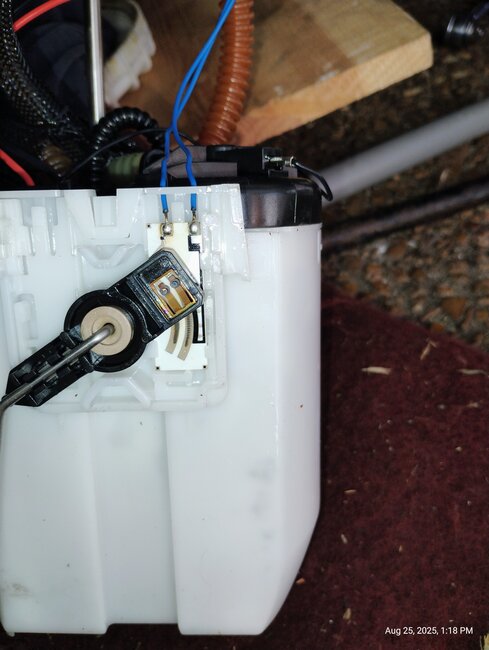
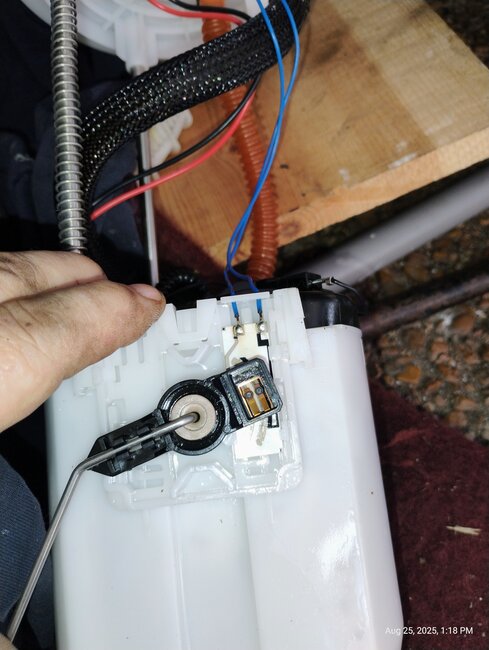
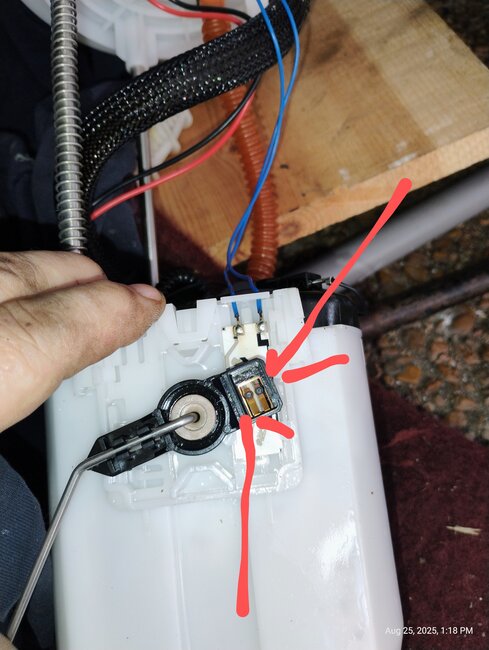
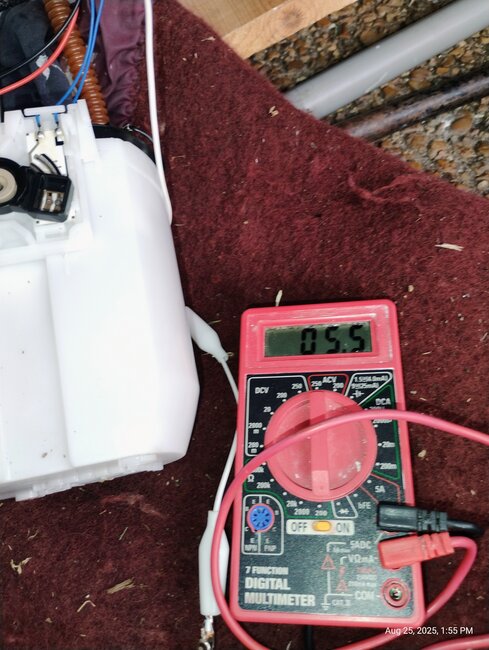
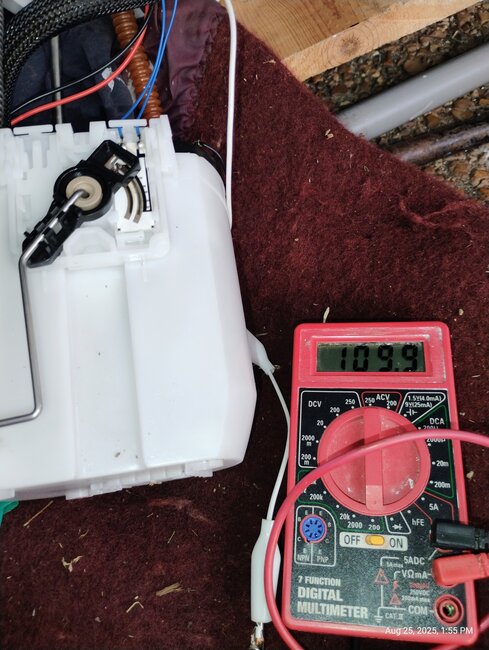
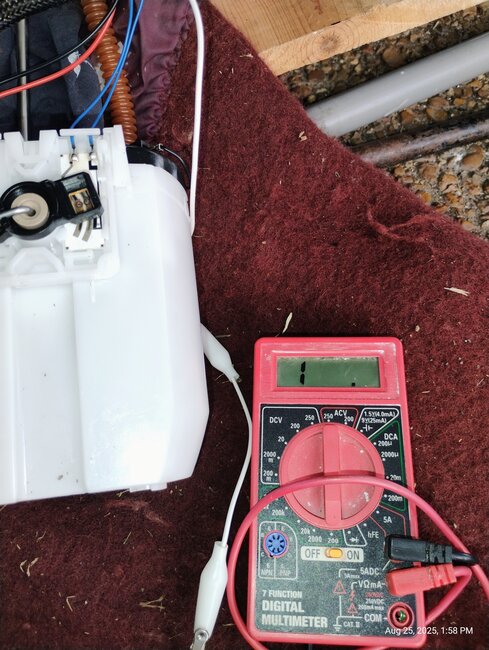
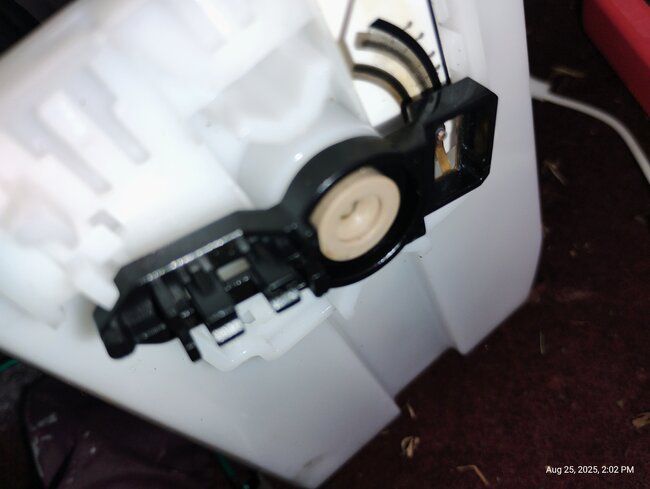
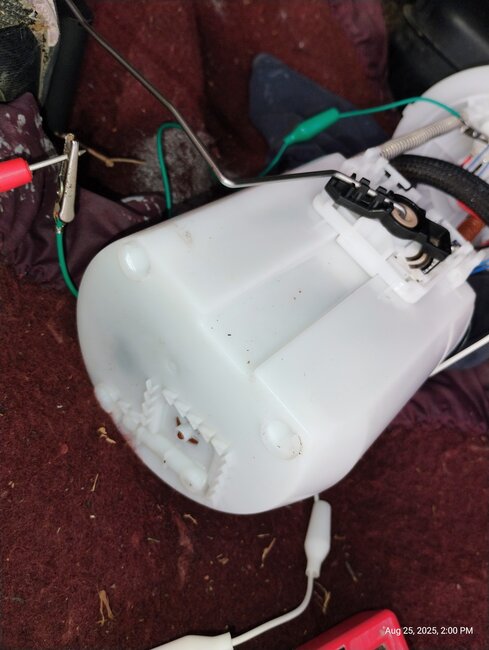
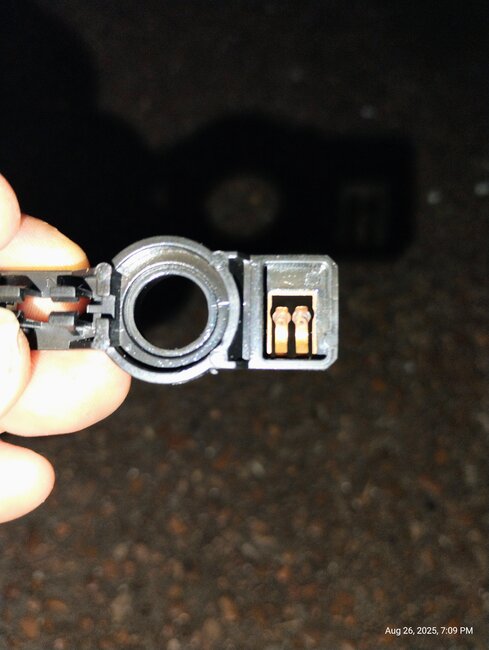
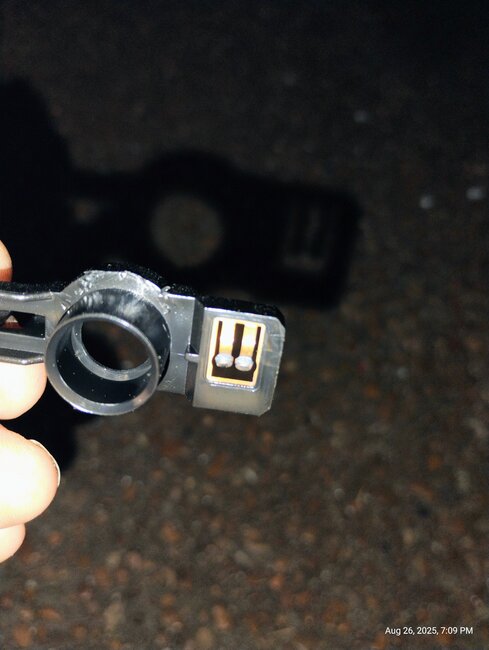
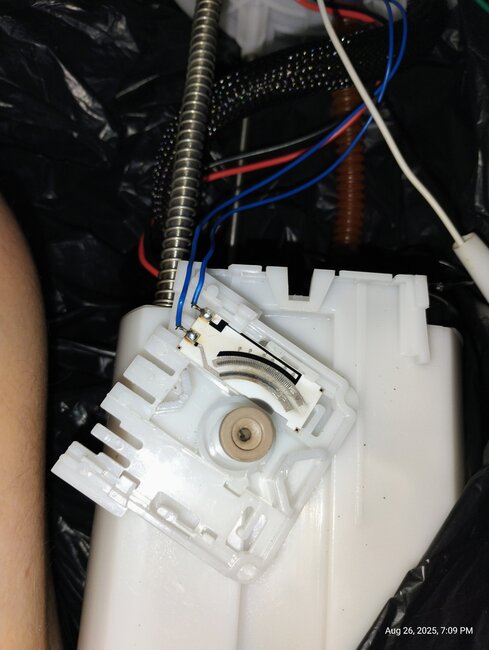
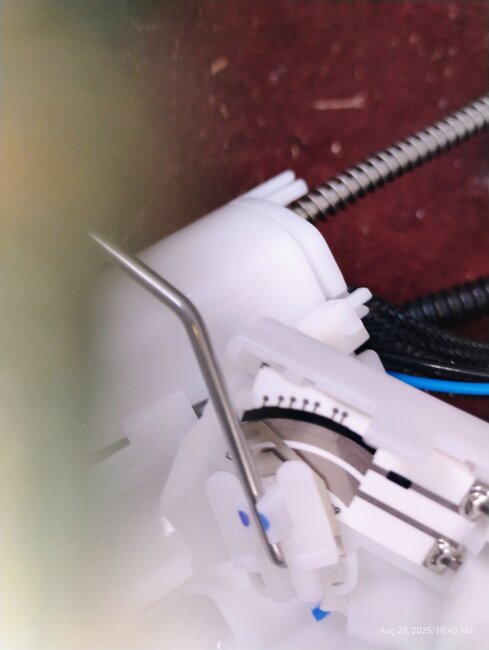
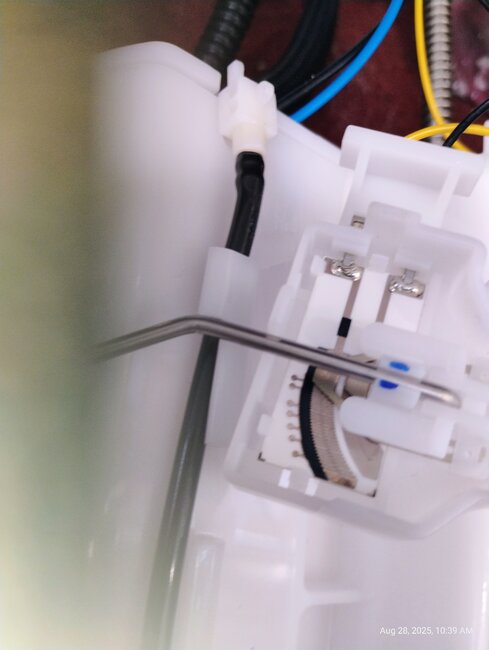
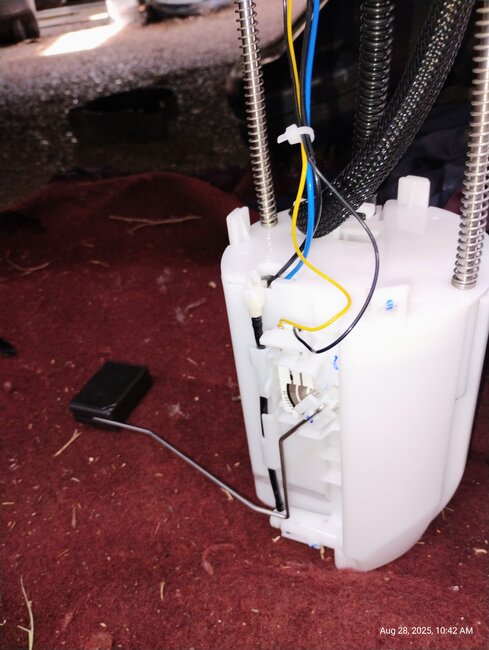
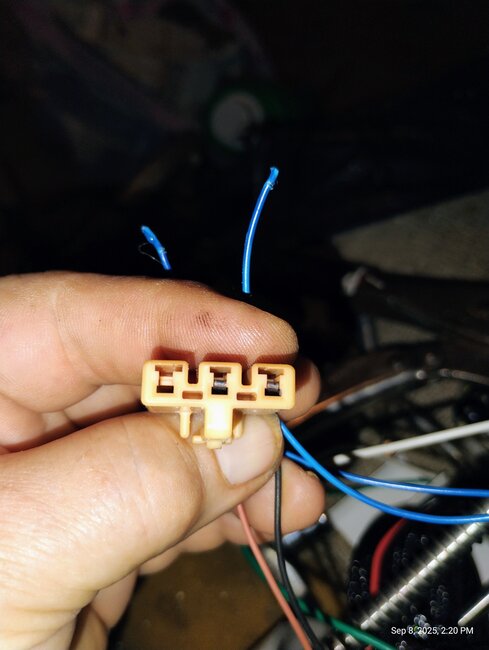
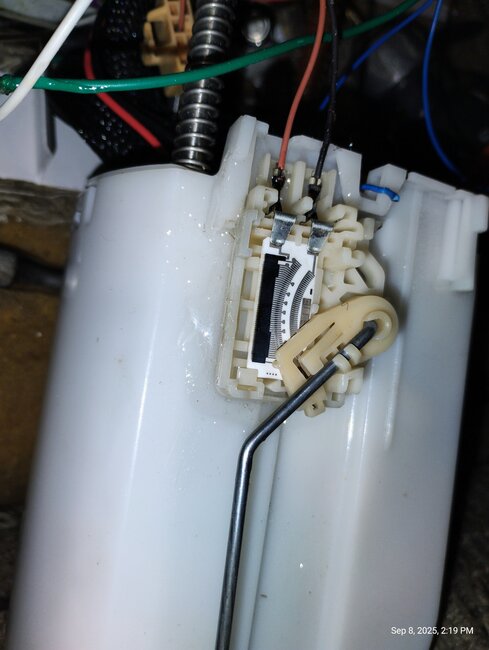
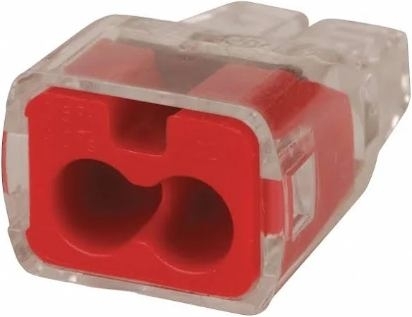
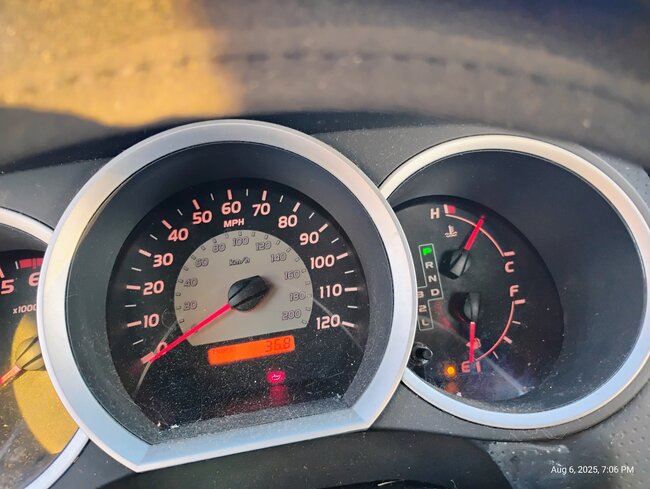
Aug 6, 2025 at 6:12 PM
Advertisement
Avatar
CARADIODOC
  • CERTIFIED EXPERT
  • 34,306 POSTS
What you're describing is typical when the movable contact on the float arm has a weak connection. The clue is the gauge usually reads correctly anytime the tank is between half and full, and the gauge acts up when the tank is between half and empty. Adding oil to the gas won't fix anything. At least once when you did that, you also filled the tank with gas. That put the float in the range where it's still working okay.

The fuel pump assembly has to be removed to do the fix. Once out of the tank, the float arm can be snapped off the housing. Look on the back side for the little metal arm / contact. Bend that out just a little so it always makes contact with the sensor, then snap the arm back on and reinstall the assembly.
Aug 6, 2025 at 6:53 PM
Avatar
FLOATR925@YAHOO.COM
  • MEMBER
  • 132 POSTS
You got a picture of it.
Aug 6, 2025 at 6:55 PM
Advertisement
Avatar
FLOATR925@YAHOO.COM
  • MEMBER
  • 132 POSTS
Will it hurt anything to run as much out of tank as low as I can maybe 1/4 tank? Before doing that?
Aug 6, 2025 at 6:59 PM
Avatar
CARADIODOC
  • CERTIFIED EXPERT
  • 34,306 POSTS
Funny you should ask. It seems every time we schedule a job that we know involves removing the fuel pump, the vehicles show up with a full tank. The answer is "yes'. you know your approximate fuel mileage. As you use up the gas, note the gauge reading just before it drops to "empty", then calculate how much further you can drive so you use up as much as possible without risking running out. As I recall, water weighs around seven pounds per gallon, and gasoline is slightly lighter, so you can guesstimate how much weight you'll be lowering down. That is unless your car has an access hole in the trunk floor.

If you're going to test the results of your repair before completely assembling everything, keep in mind the pump motor will run for approximately one second every time you turn the ignition switch to "run". A lot of arcing takes place at the brushes in the motor, and that can cause gas fumes to explode. When the pump is assembled in the tank, there's no danger because those arcing brushes are either flooded in gas, or, when the level is way down, the air mixture is so extremely rich, it can't ignite.

The safest thing to do is fully install the pump housing back into the tank, then you can connect the wiring harness and turn the ignition switch on to test the gauge. If it's reading correctly now, reinstall the tank, then you can leave the ignition switch on when you slowly fill the tank. The gauge should not drop to "E" at any time as the tank is filled.

On a lot of cars, the gauge reading is "buffered", meaning some type of computer circuitry overlooks the sloshing in the tank, and it smooths out the reading. For that reason, it can take a while for the gauge reading to go up as you fill the tank.
Aug 6, 2025 at 7:21 PM
Avatar
FLOATR925@YAHOO.COM
  • MEMBER
  • 132 POSTS
Is there a picture of what to bend or adjust?
Aug 6, 2025 at 7:26 PM
Avatar
FLOATR925@YAHOO.COM
  • MEMBER
  • 132 POSTS
Is this the spot that needs bending ..arrow.. black plastic.
Aug 6, 2025 at 7:34 PM
Avatar
CARADIODOC
  • CERTIFIED EXPERT
  • 34,306 POSTS
Yes. Just a little below the tip of your arrow you can see the black sensor. It's just part of a variable resistor, similar to what was used on much older TV volume controls. The movable contact touches that sensing element, but it doesn't have enough springiness or tension to keep it in contact. I fixed a lot of these on older Caravans, but yours looks quite similar. You have to pop that arm off so you can bend the contact. It only takes an extra 1/16" or so to put enough pressure on it.

I'll be back tomorrow to see how you're doing.
Aug 6, 2025 at 8:14 PM
Avatar
FLOATR925@YAHOO.COM
  • MEMBER
  • 132 POSTS
I'm still running out the fuel .oddly I've gone 100 miles an it hasn't acted up ..but that additive may be lubricating it...I'm still going to run out another 12 gallons( I had reset the miles at fill up last week)
About how much in miles will it take 375? At a 21 gallon tank .
I'll leave a few gallons in it .
Aug 9, 2025 at 9:52 AM
Avatar
CARADIODOC
  • CERTIFIED EXPERT
  • 34,306 POSTS
Can't tell you the miles. I've never owned this model.
Aug 9, 2025 at 4:12 PM
Avatar
FLOATR925@YAHOO.COM
  • MEMBER
  • 132 POSTS
I found some new pumps with 5 year warranty an a far better looking sensor than mine..40 bucks..I think I'll do a replacement for all the trouble to pull it an that price...here's a pic of one I have ...an new one .
White one on right..in 1st picture is one currently in it ...looks like a cheap float sensor .
Aug 24, 2025 at 8:12 AM
Avatar
CARADIODOC
  • CERTIFIED EXPERT
  • 34,306 POSTS
I don't see the float arm on the left one. If that is separate, look for the metal tab on the back side.

If both of these are for the same application, they are from different suppliers. There will be many more retailers for this assembly than there are manufacturers making them. The parts stores buy them from the same few suppliers. Regardless, they all have the potential to develop this problem. Bending the metal tab to make better contact is an easy task once the assembly is out of the tank. Replacing the entire pump assembly is an expensive alternative, and there's nothing saying the new one can't develop the same problem. My vote is to try to fix the old one first. It's a permanent solution to an intermittent fuel gauge.
Aug 24, 2025 at 4:48 PM
Avatar
FLOATR925@YAHOO.COM
  • MEMBER
  • 132 POSTS
The left one has arm off it...I can try doing it..bend tab.. an if I continue w issue I'll have a replacement then .some cheap manufactures look to had made low grade sensors on some ..a few look solid an others look really thin an brittle
Aug 24, 2025 at 5:07 PM
Avatar
CARADIODOC
  • CERTIFIED EXPERT
  • 34,306 POSTS
Those don't have to be very strong. There's no forces acting on them other than the gas sloshing around. Most of this type of sensor is just a resistive paste that has been painted onto a small circuit board. Those boards are really tough, regardless what they look like. A lot of other sensors, like throttle position sensors, are built the same way.

Let me know how this turns out.
Aug 24, 2025 at 5:59 PM
Avatar
FLOATR925@YAHOO.COM
  • MEMBER
  • 132 POSTS
Ok..I'll send pic after I pull it
Aug 24, 2025 at 7:16 PM
Avatar
FLOATR925@YAHOO.COM
  • MEMBER
  • 132 POSTS
Is it these 2 soldier points inside the black square .red arrows.. that I push in...I'll do a ohms test too..
Aug 25, 2025 at 11:23 AM
Avatar
FLOATR925@YAHOO.COM
  • MEMBER
  • 132 POSTS
It changes on ohms like a short ..but at lowest point 110... highest point is 6.2...but a lot of short circuiting like no reading last pic an black part seems a bit loose
Aug 25, 2025 at 11:54 AM
Avatar
FLOATR925@YAHOO.COM
  • MEMBER
  • 132 POSTS
I even held my hand to the contacts an slowly moved it up an down a a few points went dead...at a few points ..on ohms where it shows no contact.
How does this come off? I see top 3 clips ..

Float working worse now it seems

Does this dead spot imply weak or dead point in that GUAGE on pump...meaning bad GUAGE..?
Aug 25, 2025 at 12:48 PM
Avatar
CARADIODOC
  • CERTIFIED EXPERT
  • 34,306 POSTS
Not a bad gauge. A weak sensor. This is rather different from what I'm used to seeing. I see you have the arm snapped off already. On the Chryslers, the weak moving contact is on the back side of that arm, and takes just a few seconds to pull the contacts out a little.

Where are you measuring the resistance; is that between the two blue wires? On much older vehicles, I would guess the blue wire on the right goes to the resistor element for the gauge, and the left wire goes to a contact that turns on the "Low Fuel" warning light. They used to use two independent circuits. By around the mid '90s, they used just the gauge circuit, then, based on the signal voltage, a Body Computer, or something similar, turned the warning light on. If you follow those two wires into the connector, do they go to an orange wire and a yellow / black wire? If so, those are for the sensor element and the piece rotating over them has the contacts. That piece has to come off normally to give room to bend the contacts, otherwise you'll have to risk bending it without breaking it to allow room to stretch the contacts.

The only other thing I can guess is the copper-colored strips are the springs of the contacts and maybe there's a way to put more pressure on them. If that rotating arm can't be removed, is there way to push it in further so the contacts have more pressure on them?
Aug 25, 2025 at 1:47 PM
Avatar
FLOATR925@YAHOO.COM
  • MEMBER
  • 132 POSTS
think my bending the 2 little copper points may have done something..On u tube videos I saw a few who had a weak point in that GUAGE as they raised it...I'm thinking maybe I do..
How do I get those clips to release the black piece or GUAGE?
I will be getting a new pump Friday..
Yes this is not OEM so maybe that's a factor...I tried pushing in the 2 copper points but it seems to make it short out more on GUAGE ..now I can barely keep a ohm reading..it's on 1 mostly now ( no full circuit) ...maybe that GUAGE on sensor has dead areas?

I'm getting another one Friday..
I did see replacement fuel level sensors on eBay though..

Aug 25, 2025 at 4:43 PM
Avatar
CARADIODOC
  • CERTIFIED EXPERT
  • 34,306 POSTS
More than likely a replacement fuel level sensor on eBay will be to replace the factory original one. That might not work on an aftermarket pump housing.

I don't see a common ground wire for the two curved strips on the sensor, so it looks to me like those two copper contacts are tied together. That would agree with the wiring diagram. Those copper strips provide the pressure to keep the contacts touching the curved carbon strips. Those are what need to be bent just a little so they provide more pressure. That would be easy to do if you could pop the assembly off its pivot peg, but often those are made to go on and never come off without breaking something.

The next thing to consider is to see if you can pull the end of the black piece away enough to give room to bend the copper strips down a little more. This is a place where you have to use caution because if you can't lift the black piece up, if you bend the copper strips next to where they're anchored, they'll bend the other way between the contacts and where you're pressing. That can actually reduce the pressure on the contacts and / or move them away from the carbon strips.

My next suggestions are a little radical, and I'd save them for a last resort when nothing else works. One is to pull the end of the black piece up enough to let the copper strips relax, then run a bead of solder on each strip. You'll need to shine them up first with very fine sandpaper so the solder will adhere. Once cooled and you let the black piece go back to its normal shape, the solder will try to hold the copper strips with more pressure on the contacts.

My last thought is to place a light coil spring over the copper strips, then use a piece of wire to hold it in place while putting pressure on the contacts. That would require some experimentation. For this type of project, I tear as many strands of wire as I need for the job from an old power cord. Those are easy to work with, and if necessary, you can solder to them. Heating them next to plastic will cause the plastic to melt and embed the wires, holding them in place. One word of warning here. If you use a soldering iron to melt plastic, set it to its lowest temperature, (if you have an adjustable iron), then clean the tip as soon as it cools. A lot of soldering tips today are iron-coated copper to make them last longer, but plastic residue eats that iron coating off, then the tip will burn away rather quickly. When I want to embed a wire in a plastic piece, I put a strip of copper over the wire, then heat that and let it transfer through the copper. That keeps the soldering iron tip clean.

If you don't mind the extra work, look for a similar model in a pick-your-own-parts salvage yard. See if you can pop the contacts off without breaking anything. If you can do that, bending the copper strips should be an easy solution. Often you'll find someone already removed the pump housing to get the pump, and they left the rest behind for you.
Aug 26, 2025 at 3:00 PM
Avatar
FLOATR925@YAHOO.COM
  • MEMBER
  • 132 POSTS
Yea I'm waiting till sat when new one comes but want to experiment with this one as a back up ..I'll try to unclip it off the pump ..does this type plastic handle epoxy with the gas an all ..if I need to re fix any clip. I'll take pics after I get it off ...WILL OTHER TOYOTA FULE LEVEL SENDERS BE COMPATABLE ..LIKE OFF CAMARY .. JUNKYARD HAS PLENTY BUT FEW TACOMAS OR TUNDRAS ..
I DONT REALLY WANT TO SOLDER OR FOOL W CHANGING ELECTRIC IF I CAN AVOID IT BUT IF I GET IT OFF I CAN TRY ..
THANKS
Aug 26, 2025 at 4:54 PM
Avatar
FLOATR925@YAHOO.COM
  • MEMBER
  • 132 POSTS
Got the part off .here's pic
Aug 26, 2025 at 5:10 PM
Avatar
FLOATR925@YAHOO.COM
  • MEMBER
  • 132 POSTS
Pics
Aug 26, 2025 at 5:16 PM
Avatar
FLOATR925@YAHOO.COM
  • MEMBER
  • 132 POSTS
I might trim down the plastic before install....here is part
Aug 26, 2025 at 5:27 PM
Avatar
CARADIODOC
  • CERTIFIED EXPERT
  • 34,306 POSTS
Wonderful. Just bend the two copper strips so the contacts sit roughly 1/16" closer to the sensing element. Don't go too much more than that as the added pressure might cause the piece to unsnap on its own. Too much pressure can also cause the contacts to wear away the resistive sensing material.
Aug 26, 2025 at 5:41 PM
Avatar
FLOATR925@YAHOO.COM
  • MEMBER
  • 132 POSTS
I tried for a hour an couldn't get it set right..scraping an just won't ride smoothly an bent so much ...can i use a GUAGE off other Toyotas an wire it to this pump ? An which are similar ? Toyota SUVs? Or can I use Camry one?
Aug 26, 2025 at 7:24 PM
Avatar
FLOATR925@YAHOO.COM
  • MEMBER
  • 132 POSTS
Does the tank size matter .? I'm gonna look at some Highlanders an sequoias but a Camry will be easiest to get to an plenty to choose from
Aug 27, 2025 at 8:48 AM
Avatar
FLOATR925@YAHOO.COM
  • MEMBER
  • 132 POSTS
I pulled one off Lexus SUV had a similar style pump...
Aug 27, 2025 at 2:40 PM
Avatar
FLOATR925@YAHOO.COM
  • MEMBER
  • 132 POSTS
What's the best method for changing the wires over ...? The one I pulled has shorter wires ..would a all metal crimp sleeve be the best ?
Does tank size matter on one it came off of?
I'll get pic
Aug 27, 2025 at 2:49 PM
Avatar
FLOATR925@YAHOO.COM
  • MEMBER
  • 132 POSTS
I'll hook it all up an test it..other one should be here today or tomorrow....
Aug 27, 2025 at 2:55 PM
Avatar
CARADIODOC
  • CERTIFIED EXPERT
  • 34,306 POSTS
You'd have to ask a mechanic at a Toyota dealership as to what uses the same part. My only reference is the Rock Auto site where I look up part numbers. They don't list just the sending unit, just the entire pump and housing. If you have a donor car in mind, you can look up that one and see if it uses the same housing. If it does, the sending unit should be the same. If the pump number is different, it could still have the same sending unit on it. I can't tell that by their photos because even if two look the same, they might have different resistance values, different mounting clips, or be mounted at a different angle.

I did find a part number on AllData, our online service manual provider. With that number, you might consider visiting a salvage yard to look in their "Hollander Interchange Guides". Those are large books where you look up the part for your year and model, then it gets assigned a code number. You look that code number up in the back of the book and it will list every vehicle model and year that could have used that part. That can give you a wider range of vehicles to dig through, and it can verify a car in the yard is worth pulling the part from.

I also found some updated information as for the models that use this part. An older version was 8332004020. You have a newer version, 8332004021. This one was used from 2005 - 2013. There's a still newer replacement, number 8332004031 that is a replacement for 2005 - 2016 models. New, or "superseded" part numbers mean a significant change was made. That could be anywhere from a total redesign or a different supplier, to a slight change to improve reliability or to address some other issue. No other models are listed as using this part, but it can explain why you see sending units that look different but are both listed for your model. In all cases it doesn't matter which engine you have.
Aug 27, 2025 at 3:04 PM
Avatar
CARADIODOC
  • CERTIFIED EXPERT
  • 34,306 POSTS
I can't find the resistance value of the sending unit. Three-wire sensors, like throttle position sensors, are not critical, but two-wire sensors have to be precise to read correctly, so the place to start with a sensor from a different model is with the resistance test between the two wires. Even if that is the same, that doesn't guarantee the change in resistance will be linear, or the same as the old one. For example, if the shape of the tank is such that there's more gallons in the top half than in the bottom half, the wrong sending unit could show you still have half a tank when really you're down to the last few gallons. My mother had a vehicle that read "full" until about half the tank was used up, then the gauge quickly went to empty on the last half of the fuel. We figured out that was "the nature of the beast", and the same model did that over a three-year period. When she needed a new fuel pump, we put in the entire housing assembly with the new pump and sending unit, and the fuel gauge read the same way. That's what I mean by "non-linear". To say that a different way, the gauge goes down faster or slower than the fuel is used up.

For splicing wires, I never trust any splice that doesn't involve soldering. I really dislike crimp-style butt connectors because they don't guarantee a solid joint and they don't seal out moisture. Obviously, these wires and exposed connections survive just fine in a gas tank environment, but I still would only trust splicing wires by soldering them. While logic dictates the joint doesn't need to be sealed, I would still feel better covering it with moisture-proof hear-shrink tubing.
Aug 27, 2025 at 3:29 PM
Avatar
FLOATR925@YAHOO.COM
  • MEMBER
  • 132 POSTS
Thanks...got it in an shows almost half tank though it felt like less...
In 5 min it lowered to this reading
..quite a bit different..

The set up on this resistor is a bit better made it looks by pics
An a taller body for the pump .
Sent from Japan..

How much fluctuation an difference is normal for it..on GUAGE reading


Aug 28, 2025 at 1:25 PM
Avatar
CARADIODOC
  • CERTIFIED EXPERT
  • 34,306 POSTS
Gauges from the 1960s through some of the '80s were thermal gauges that used a heating element. Chrysler and Ford used those because temperature changes in that heating element took a long time to affect the gauge reading. That meant sloshing levels in the gas tank had no effect. GM used the more common electromagnetic gauges. With those, the pointers would bounce wildly all over as you drove, so they had to add an "anti-slosh" module to the back side of the instrument cluster. Today all vehicles use computer circuitry to run the gauges. Built into that circuitry is a means of smoothing out the wild pulsations from sensor readings so the gauge needles remain steady. As a result, a rapid change in where you put the float arm translates into a slowly moving gauge. On many cars, if you leave the ignition switch on while filling the gas tank, you'll reach a full tank while the gauge reading is still down near a quarter or half tank. It can take a minute or two to catch up.
Aug 28, 2025 at 8:30 PM
Avatar
FLOATR925@YAHOO.COM
  • MEMBER
  • 132 POSTS
What type connectors can I use for the open wire into that plug? Is there a metal flat part that can slide into that harness?
An will the 5 min epoxy used to hold GUAGE part withstand gas ?
Sep 8, 2025 at 12:25 PM
Avatar
CARADIODOC
  • CERTIFIED EXPERT
  • 34,306 POSTS
I'm not sure what you're doing with the plug. Do you have to remove terminals to install the new assembly? If so, there are special tools to release the tiny locking tabs on each terminal. You might be able to do that with a stretched-out paper clip or a thin pick.

From what I can see in your first photo, it looks like there's a small plastic finger just above the metal terminal, that has to be lifted up, then the terminal is pulled out by the wire. A small pick works well for that style. Often there's a small barb on the metal terminal that has to be pressed down, then the terminal is pulled out.

Epoxy should hold up to gasoline.
Sep 8, 2025 at 5:13 PM
Avatar
FLOATR925@YAHOO.COM
  • MEMBER
  • 132 POSTS
That plug was on the replacement GUAGE ..Id like to keep the plug end on since that side of the wires are secure an make a piece to put on the end of the 2 wires to slide into the plug opening..( would be ideal if I had a male end to fit it but I don't..)...
Sep 9, 2025 at 8:43 AM
Avatar
CARADIODOC
  • CERTIFIED EXPERT
  • 34,306 POSTS
The gauge is in the instrument cluster / dash. You aren't working up there, are you? Your photos are of the sending unit, or sensor. Normally, if the terminals in the connector don't match, it's the wrong sending unit. It is also possible they used the same sensor on multiple models, but with different connectors. In that case it is acceptable to switch wires or connectors.

If you just need matching terminals, there's a number of sources to consider. Start by looking at the universal terminals at any auto parts store or hardware store. Next, if you don't mind rummaging through a lot of vehicles, look in a pick-your-own-parts salvage yard. "Pull-A-Part" is one chain I'm very familiar with. Their yards are very clean and well-organized. There's a lot more like them all over the country. You will need to remove the terminals from the connector bodies. Take enough wire with each one so you can splice and solder them.

You can also check at some new-car dealership parts departments. GM and Chrysler, for example, have large kits with every style of terminal used in their vehicles. I would assume all other manufacturers have something similar. The Toyota dealer might even have the right connector. Auto parts stores also have multiple very large books that show the connectors that are available for almost every application, but be warned, they tend to be horribly expensive.

If you have to poke in each terminal individually, consider using nylon zip ties so they can't vibrate out.
Sep 9, 2025 at 3:55 PM
Avatar
FLOATR925@YAHOO.COM
  • MEMBER
  • 132 POSTS
Yes it's the old fuel pump that has a bad level sensor ..this is one of another Toyota...I can cut off the connector part an solder the set of wires but was hoping there would be a metal SLEVE like piece I could slide in to connector..

Can I use those electrical push in connectors? In pic
Sep 9, 2025 at 5:16 PM
Avatar
CARADIODOC
  • CERTIFIED EXPERT
  • 34,306 POSTS
They make a piece of clear heat-shrink tubing that has a ring of solder inside, but you have to buy a whole pack of them. That's why I prefer to twist the wires together, then solder the joint and slide a piece of heat-shrink tubing over it with hot-melt glue inside. Those seal out moisture.
Sep 9, 2025 at 5:27 PM