Hi and thanks for using 2CarPros.com.
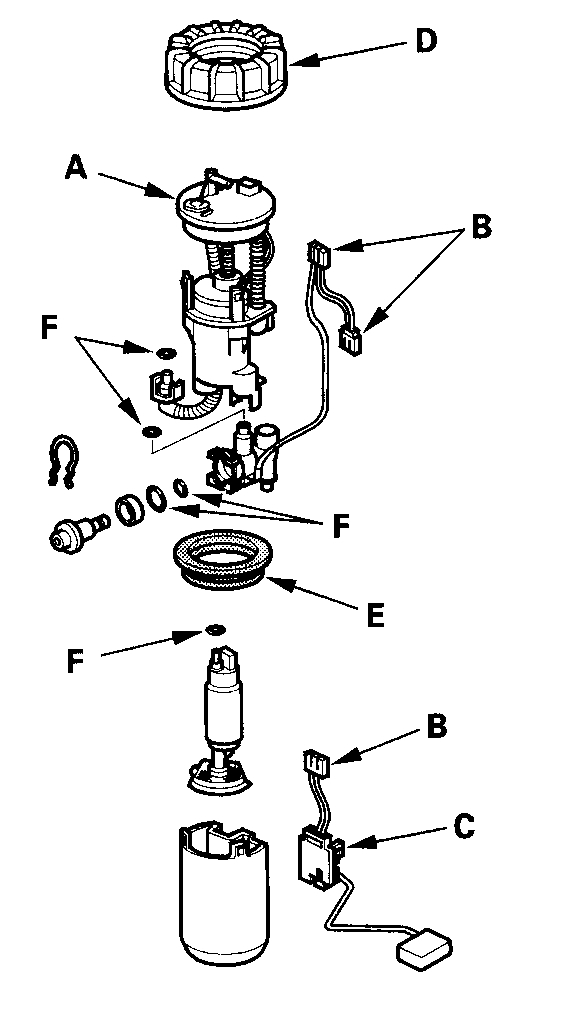
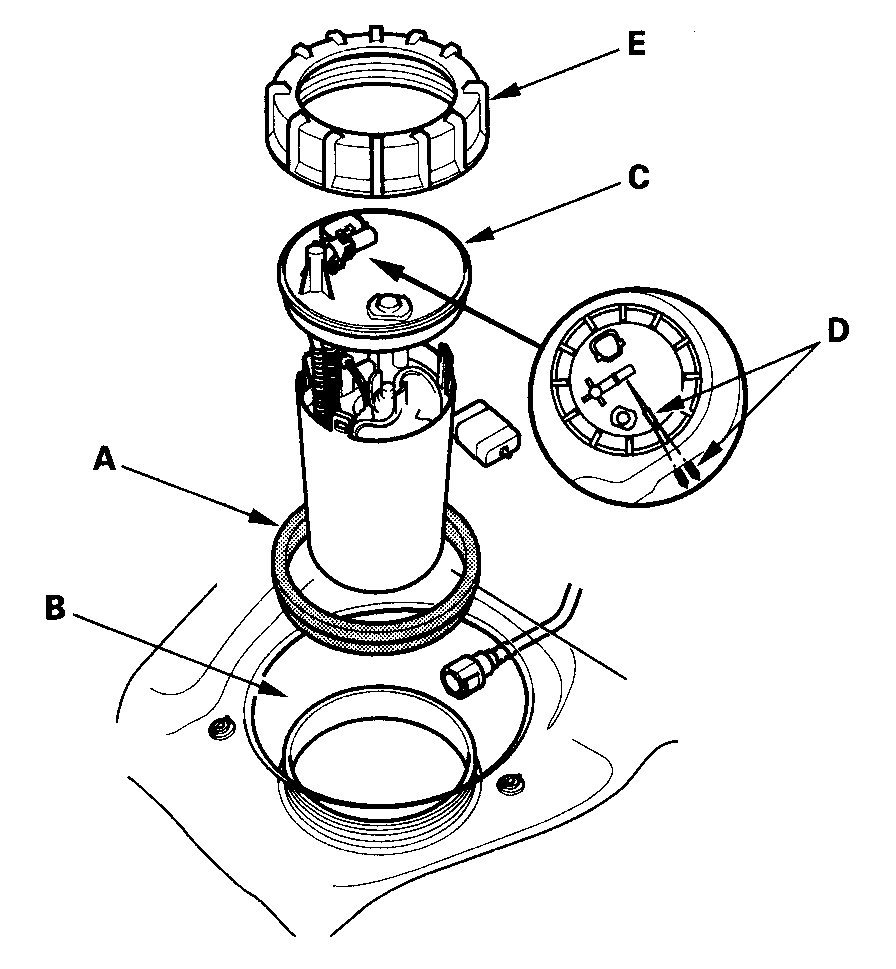
You are not going to be happy. The fuel tank sending unit needs removed to access the filter. It is part of the sending unit. Here are the directions as well as the picture of the pump assembly components.
____________________
REMOVAL AND REPLACEMENT
Fuel Filter Replacement
The fuel filter should be replaced whenever the fuel pressure drops below the specified value, after making sure that the fuel pump and the fuel pressure regulator are OK.
1. Remove the fuel tank unit.
2. Remove the fuel filter set (A).
3. Check these items before installing the fuel tank unit:
- When connecting the wire harness, make sure the connection is secure and the connectors (B) are firmly locked into place.
- When installing the fuel gauge sending unit (C), make sure the connection is secure and the connector (B) is firmly locked into place. Be careful not to bend or twist it excessively.
4. Install the parts in the reverse order of removal with a new locknut (D) a new base gasket (E), and new O-rings (F). When installing the fuel tank unit, align the marks on the unit and the fuel tank.
_________________________________________
Here are the directions I for removal of the tank unit. The access port should be under the rear seat. The remaining pictures correlate with these directions.
FUEL TANK UNIT REMOVAL/INSTALLATION
Fuel Tank Unit Removal/Installation
Special Tools Required
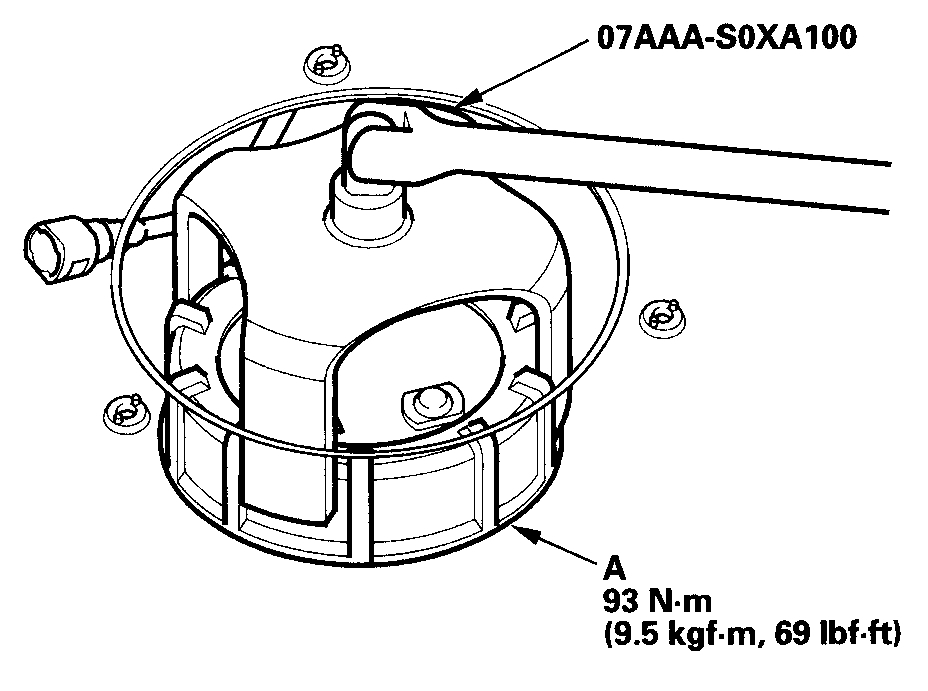
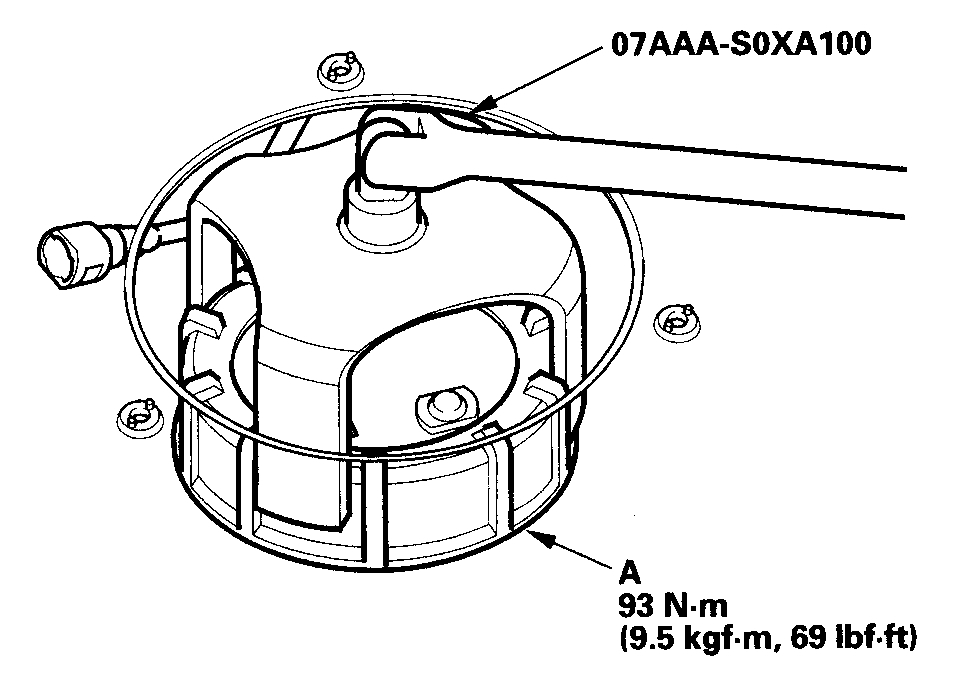
Fuel sender wrench 07AAA-S0XA100
Removal
1. Relieve the fuel pressure.
2. Remove the fuel fill cap.
3. Remove trunk floor trim panel.
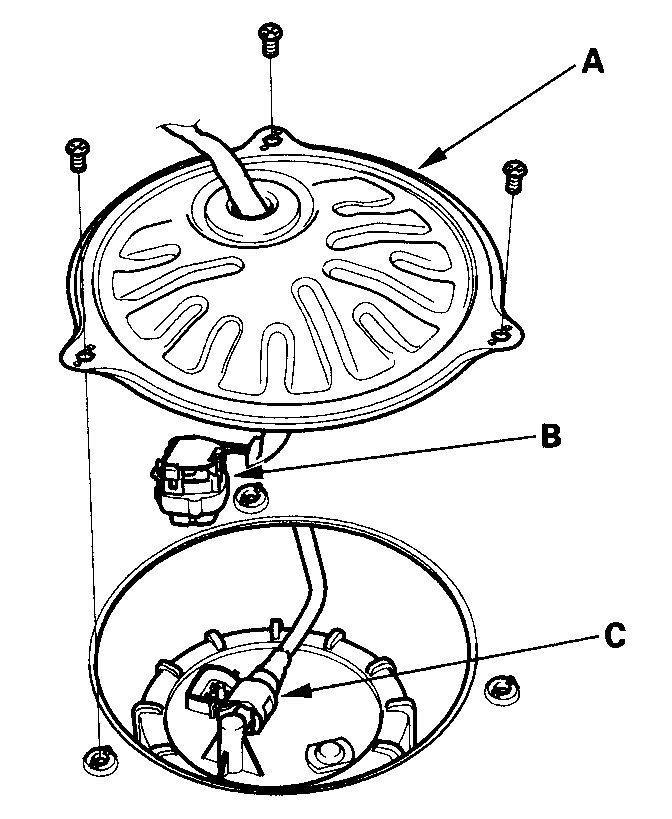
4. Remove the access panel (A) from the floor.
5. Disconnect the fuel tank unit 5P connector (B).
6. Disconnect the quick-connect fittings (C) from the fuel tank unit.
7. Using the special tool, loosen the locknut (A).
8. Remove the locknut (A) and the fuel tank unit (B).
Installation
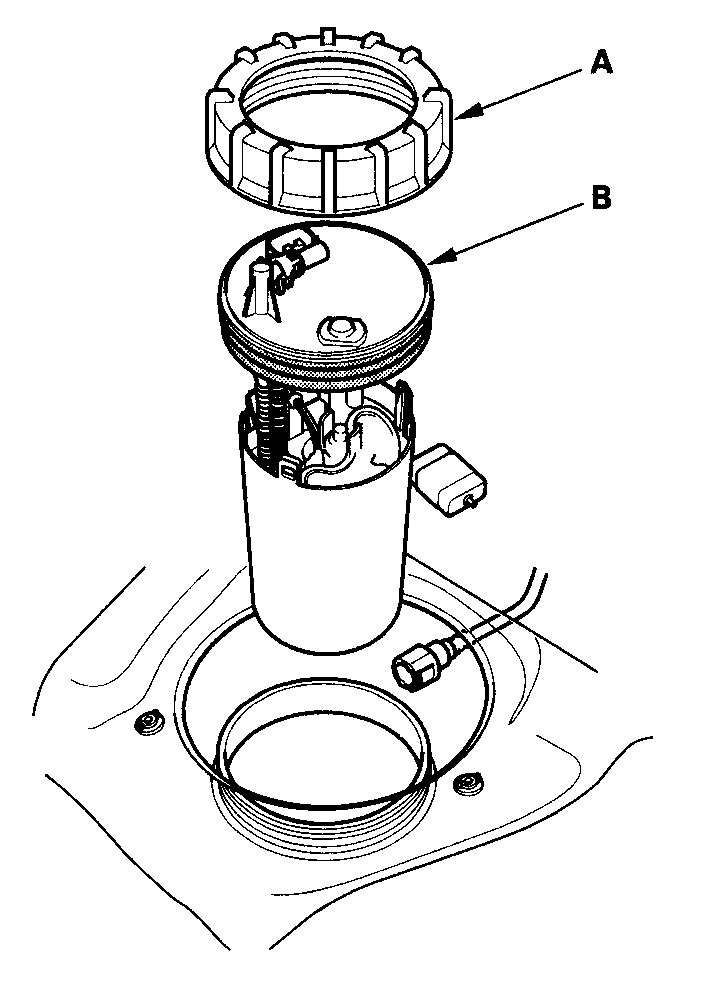
1. Install a new base gasket (A) on the fuel tank (B).
2. Insert the fuel tank unit (C) into the fuel tank. Be careful not to bend the fuel gauge sending unit.
3. Align the marks (D) on the fuel tank and the fuel tank unit, then tighten a new locknut (E) by hand.
NOTE:
- After tightening, make sure the marks are aligned. Check circumference of the base gasket visually or by hand and be sure that the gasket is not pinched.
- Do not coat the base gasket with the engine oil.
4. Using the tool, tighten the fuel tank unit locknut (A).
NOTE: After installation, check the base gasket visually or by hand to be sure the gasket is not pinched.
____________________________________
Let me know if this helps or if you have other questions.
Take care,
Joe
Images (Click to enlarge)
Oct 31, 2018 at 8:15 PM