Hi and thanks for using 2CarPros.
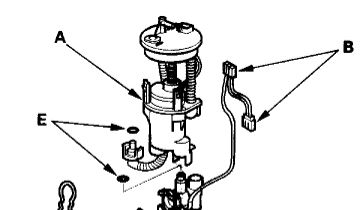
You are not going to like this. It is in the fuel tank. Here are the directions for replacement. Picture 1 shows the unit. In picture 2, letter A points to the filter.
______________________
Fuel Filter Replacement
The fuel filter should be replaced whenever the fuel pressure drops below the specified value, after making sure that the fuel pump and the fuel pressure regulator are OK.
1. Remove the fuel tank unit.
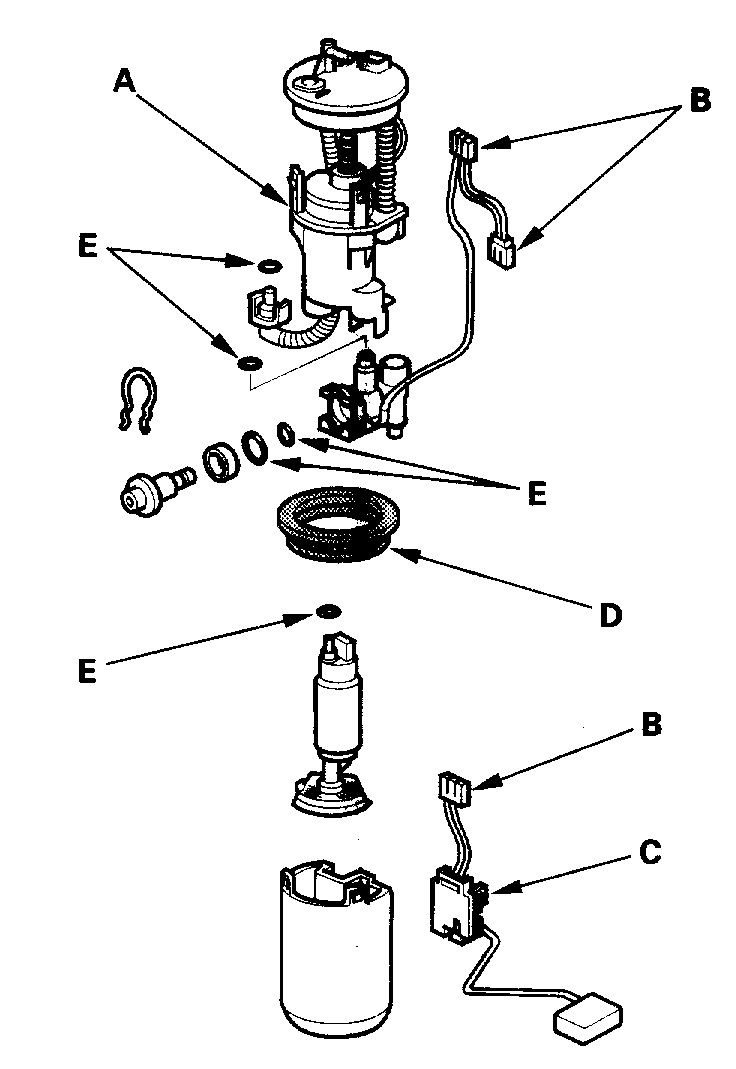
2. Remove the fuel filter set (A).
3. Check these items before installing the fuel tank unit:
- When connecting the wire harness, make sure the connection is secure and the connectors (B) are firmly locked into place.
- When installing the fuel gauge sending unit (C), make sure the connection is secure and the connectors is firmly locked into place. Be careful not to bend or twist it excessively.
4. Install the parts in the reverse order of removal with a new base gasket (D) and new O-rings (E). When installing the fuel tank unit, align the marks on the unit and the fuel tank.
_______________________________________________
Now, you are lucky because to remove the fuel pump assembly, there is an access panel. A bit of a pain to access, but at least the tank doesn't need removed. Pictures 3, 4, and 5 correlate with these directions.
______________________________________________
These directions refer to fuel pump replacement. However, you need to remove it to get the filter.
REMOVAL AND REPLACEMENT
Fuel Pump/Fuel Gauge Sending Unit Replacement
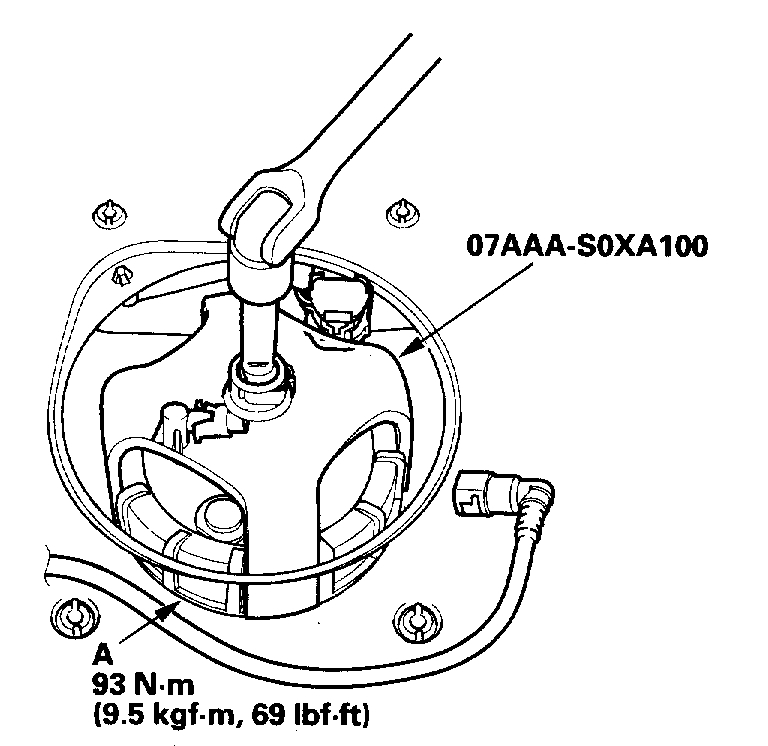
Special Tools Required
Fuel sender wrench 07AAA-SOXA100
1. Relieve the fuel pressure.
2. Remove the fuel fill cap.
3. Remove the center console, both track floor coverings, and both sill trims.
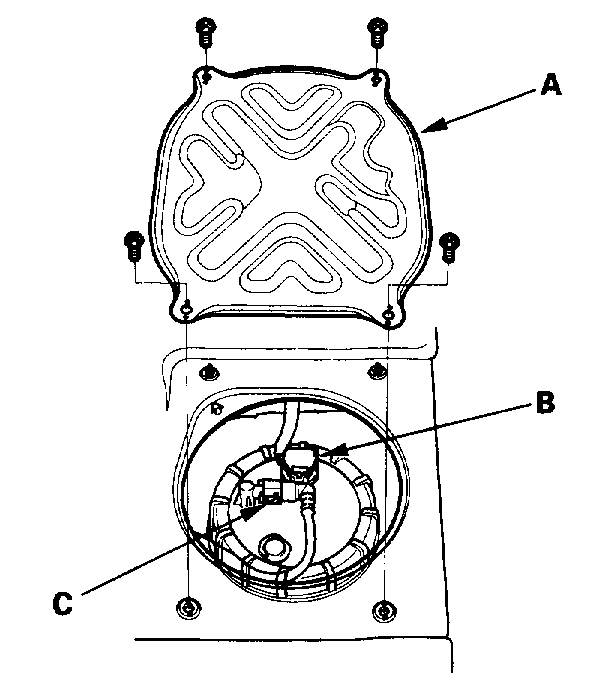
4. Fold back the floor mat until the access panel is accessible. Remove the access panel (A) from the floor.
5. Disconnect the fuel pump 5P connector (B).
6. Disconnect the quick-connect fitting (C) from the fuel tank unit.
7. Using the special tool, loosen the fuel tank unit locknut (A).
8. Remove the locknut (A) and the fuel tank unit.
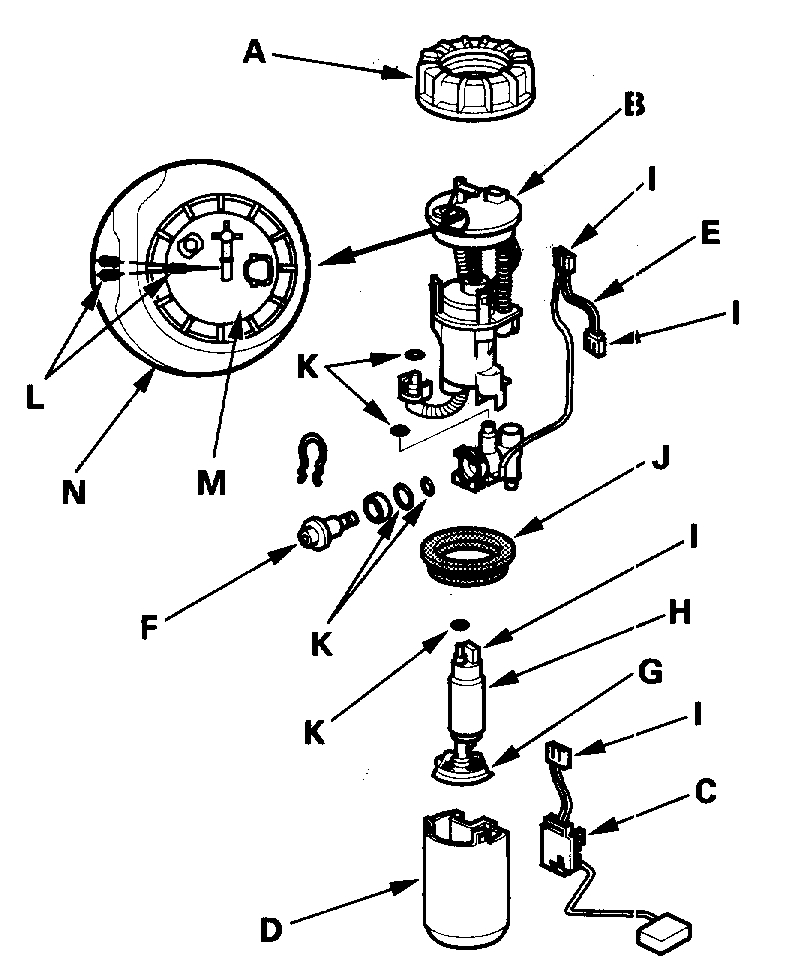
9. Remove the fuel filter (B), the fuel gauge sending unit (C), the case (D), the wire harness (E), and the fuel pressure regulator (F).
10. Check these items before installing the fuel tank unit:
- Make sure the connection is secure and the suction filter (G) is firmly connected to the fuel pump (H).
- When connecting the wire harness, make sure the connection is secure and the connectors (I) are firmly locked into place.
- When installing the fuel gauge sending unit, make sure the connection is secure and the connector is firmly locked into place. Be careful not to bend or twist it excessively.
11. Install the parts in the reverse order of removal with a new base gasket (J), new locknut (A), and new O-rings (K). When installing the fuel tank unit, align the marks (L) on the unit (M) and the fuel tank (N).
__________________________________
I hope this helps. Let me know if you have other questions.
Take care,
Joe
Images (Click to enlarge)
Dec 2, 2018 at 6:31 PM