Welcome to 2CarPros.
If you are referring to the bumper cover, it is held on with a few plastic retaining clips and a few screws. They are inexpensive and you can get them at most any parts store. I can't recommend tape. I have seen people use plastic zip ties which are strong if there is one area, but not the entire bumper cover.
Can you tell me exactly where it is loose?
Also, here are the directions for removal and replacement of the cover. I'm including these directions so you can see everywhere it is attached and what type of retainer is used. The attached pictures correlate with the directions.
______________________________
2006 Toyota Prius L4-1.5L (1NZ-FXE) Hybrid
Removal and Replacement
Vehicle Body and Frame Bumper Front Bumper Service and Repair Removal and Replacement
REMOVAL AND REPLACEMENT
REMOVAL
1. DISCONNECT CABLE FROM NEGATIVE BATTERY TERMINAL
CAUTION: Wait at least 90 seconds after disconnecting the cable from the negative (-) battery terminal to prevent airbag and seat belt pretensioner activation.
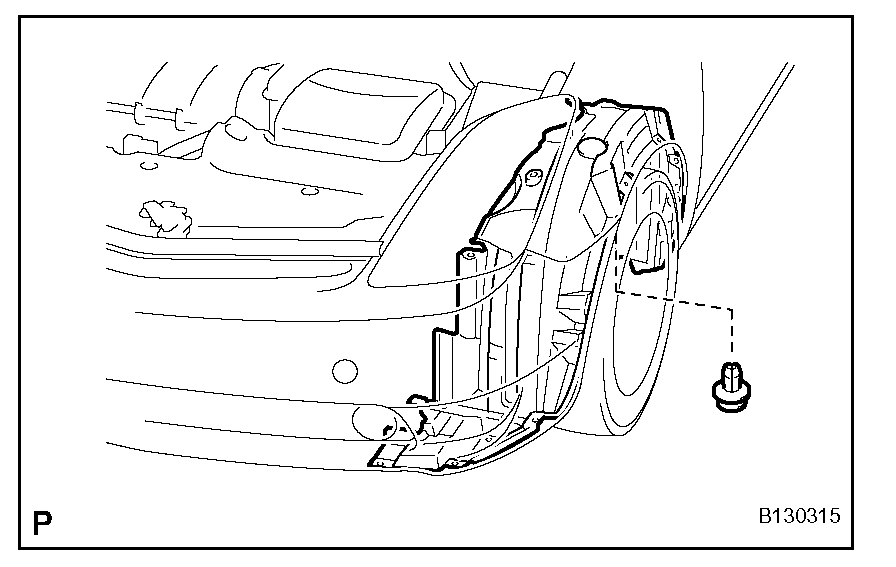
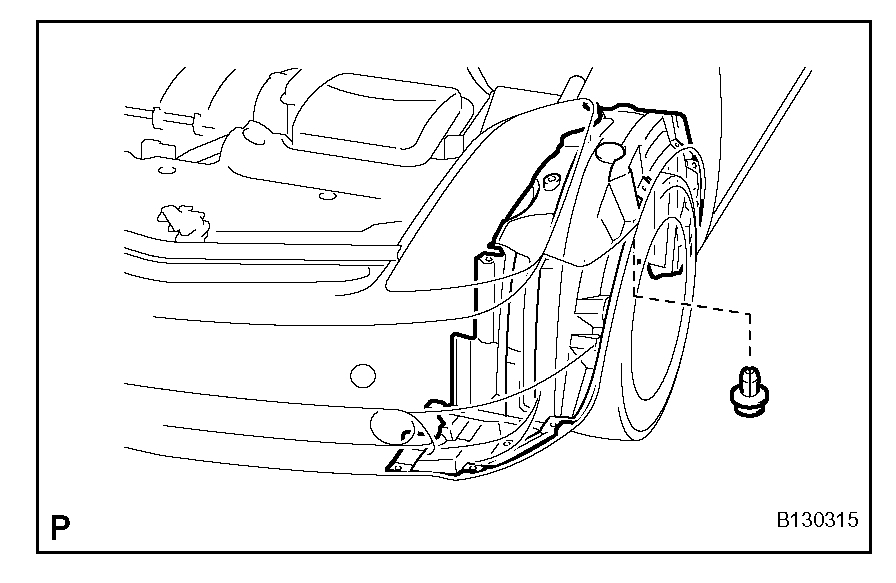
2. REMOVE FRONT FENDER LINER LH
pic 1
a. Using a clip remover, remove the clip.
b. Partially remove the fender liner.
HINT: It is not necessary to fully remove the fender liner. Partially remove it so that the bumper cover can be removed in a later step.
3. REMOVE FRONT FENDER LINER RH
HINT: Use the same procedure described for the LH side.
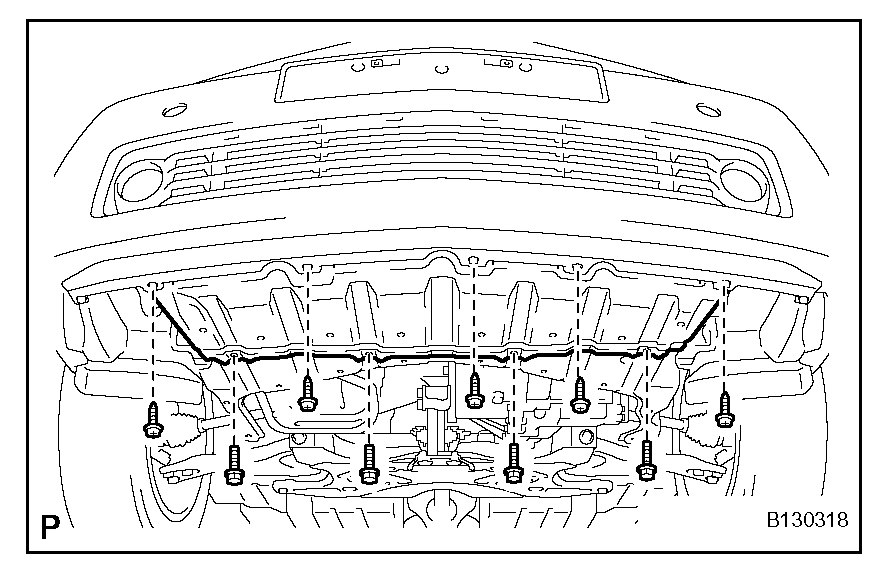
4. REMOVE CENTER NO. 4 ENGINE UNDER COVER
pic 2
a. Remove the 5 screws, 4 bolts and under cover.
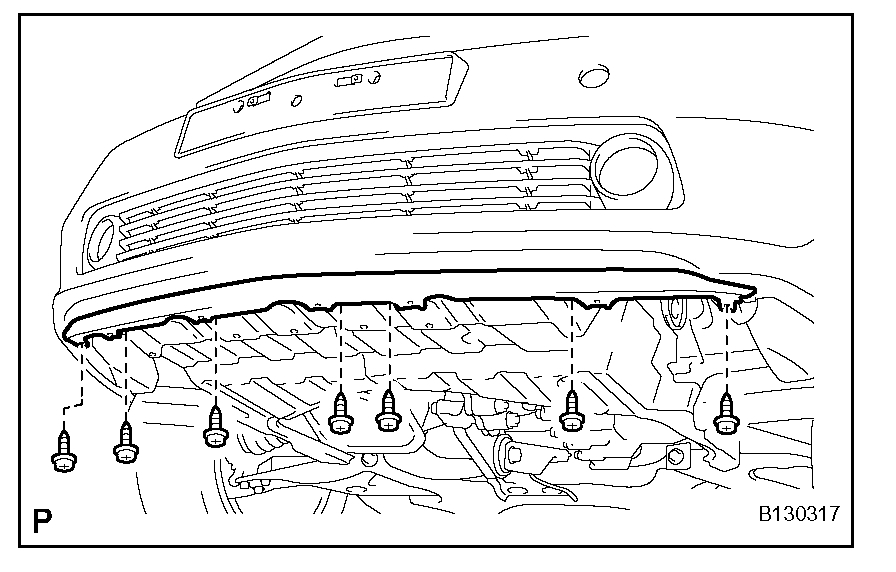
5. REMOVE FRONT SPOILER COVER
pic 3
a. Remove the 7 screws and spoiler cover.
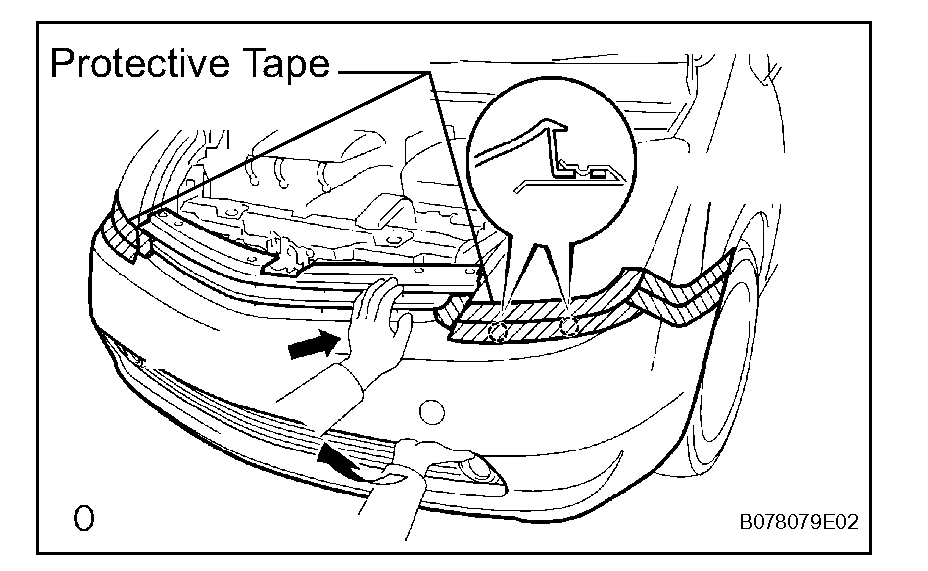
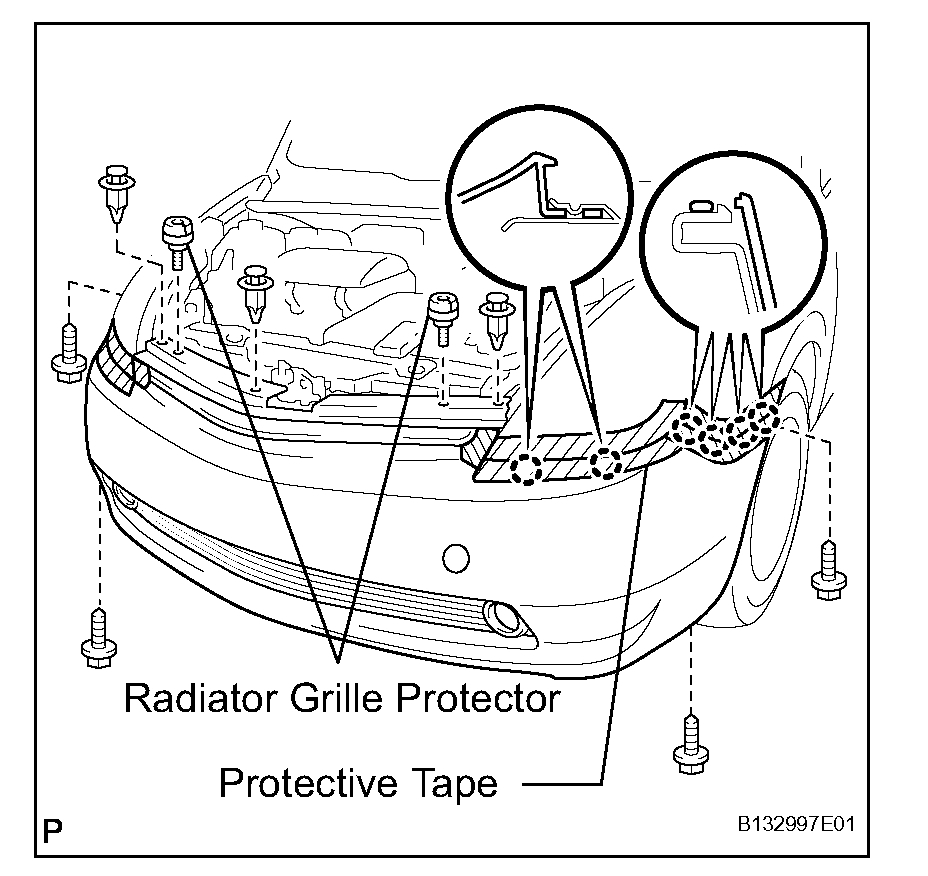
6. REMOVE FRONT BUMPER COVER
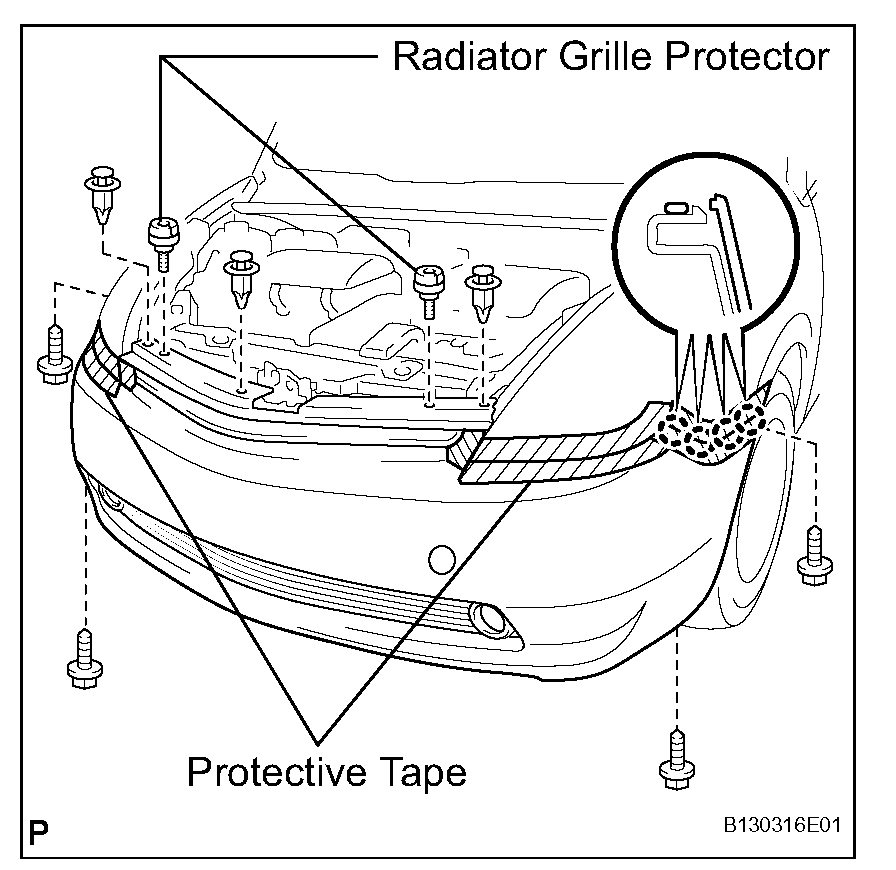
pic 4
a. Put protective tape under the front fender.
b. Using a clip remover, remove the 3 clips.
c. Remove the 2 radiator grille protectors and 4 screws.
d. Detach the 8 claws.
pic 5
e. Detach the 4 claws and remove the bumper cover.
1. Hold the front bumper cover on its upper and lower parts with your hands as shown in the illustration.
2. Pull up the front bumper cover's lower part while holding its upper part securely.
NOTE:
- The claw will not disengage unless the front bumper cover's upper part is securely held.
- Do not forcibly pull up the front bumper. This will deform the claw.
f. w/ Fog light:
Disconnect the 2 fog light connectors.
7. REMOVE FRONT BUMPER ENERGY ABSORBER
8. REMOVE FRONT BUMPER REINFORCEMENT
a. Using a screwdriver, remove the 4 wire harness clamps.
HINT: Tape the screwdriver tip before use.
b. Remove the 4 nuts and reinforcement.
9. REMOVE FRONT BUMPER SIDE SUPPORT LH
a. Remove the 2 screws and side support.
10. REMOVE FRONT BUMPER SIDE SUPPORT RH
a. Remove the 2 screws and side support.
INSTALLATION
HINT: A bolt without a torque specification is shown in the standard bolt chart.
1. INSTALL FRONT BUMPER SIDE SUPPORT LH
a. Install the side support with 2 screws.
2. INSTALL FRONT BUMPER SIDE SUPPORT RH
a. Install the side support with 2 screws.
3. INSTALL FRONT BUMPER REINFORCEMENT
a. Install the reinforcement with the 4 nuts.
Torque: 67 N.m (683 kgf.cm, 49 ft.lbf)
b. Install the 4 wire harness clamps.
4. INSTALL FRONT BUMPER ENERGY ABSORBER
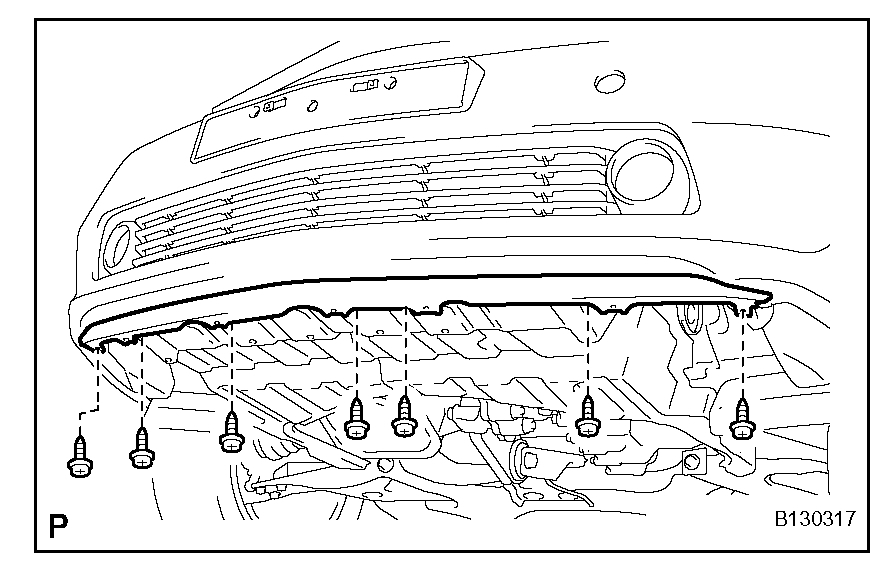
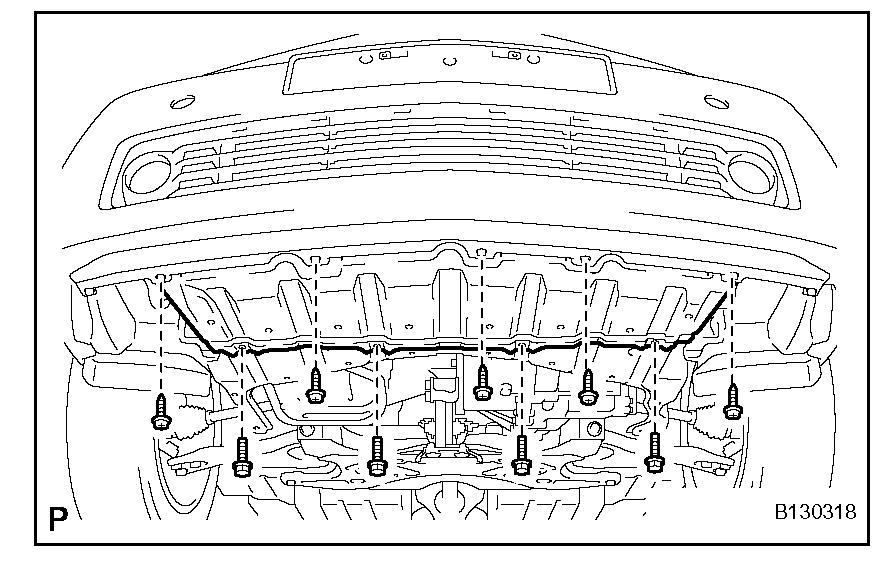
5. INSTALL FRONT BUMPER COVER
pic 6
a. Put protective tape under the front fender.
b. w/ Fog light:
Connect the 2 fog light connectors.
c. Attach the 12 claws to install the bumper cover.
d. Install the 4 screws and 3 clips.
e. Install the 2 radiator grille protectors.
Torque: 5.0 N.m (51 kgf.cm, 44 in.lbf)
6. INSTALL FRONT SPOILER COVER
pic 7
a. Install the spoiler cover with the 7 screws.
7. INSTALL CENTER NO. 4 ENGINE UNDER COVER
pic 8
a. Install the under cover with the 5 screws and 4 bolts.
8. INSTALL FRONT FENDER LINER LH
pic 9
a. Install the fender liner with the clip.
9. INSTALL FRONT FENDER LINER RH
HINT: Use the same procedure described for the LH side.
10. CONNECT CABLE TO NEGATIVE BATTERY TERMINAL
11. PERFORM INITIALIZATION
a. Perform initialization.
NOTE: Certain systems need to be initialized after disconnecting and reconnecting the cable from the negative (-) battery terminal.
_________________
Let me know if you have questions.
Take care,
Joe
Images (Click to enlarge)
Aug 17, 2019 at 8:36 PM