Canister vent solenoid replacement, check engine light on

Tiny
DIGDARX
  • MEMBER
  • 2010 FORD ESCAPE
  • 2.5L
  • 4 CYL
  • 2WD
  • AUTOMATIC
  • 59,000 MILES
XLT model FI DOHC.

No symptoms as of yet other than the fact the check engine light came on.

After checking with Pep Boys was told it was the purge valve.

So initially attempted replacing the canister purge valve with this part: Duralast PV691.

No change in check engine light after a few weeks. And still no symptoms other than the check engine light still being on.

Went back to Pep Boys and am being told it is the canister valve solenoid.

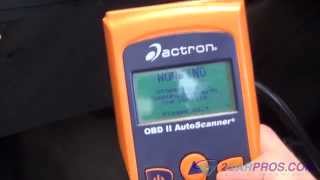
I asked about the engine code this time and the reading showed: P0446.

I also asked for a specific part number this time and was told CVS20.

After doing some searching I found the part they mentioned: Standard Motor Products CVS20 (roughly $50.00).

After doing a little more searching I believe this is another equivalent: Duralast PV516 (roughly $100.00).

I believe either of these parts would fit my vehicle and do not see any difference other than the manufacturer.

I find it interesting that the Duralast is pretty much double the cost of the Standard Motor Products.

I went ahead and purchased the CVS20 part by Standard Motor Products.

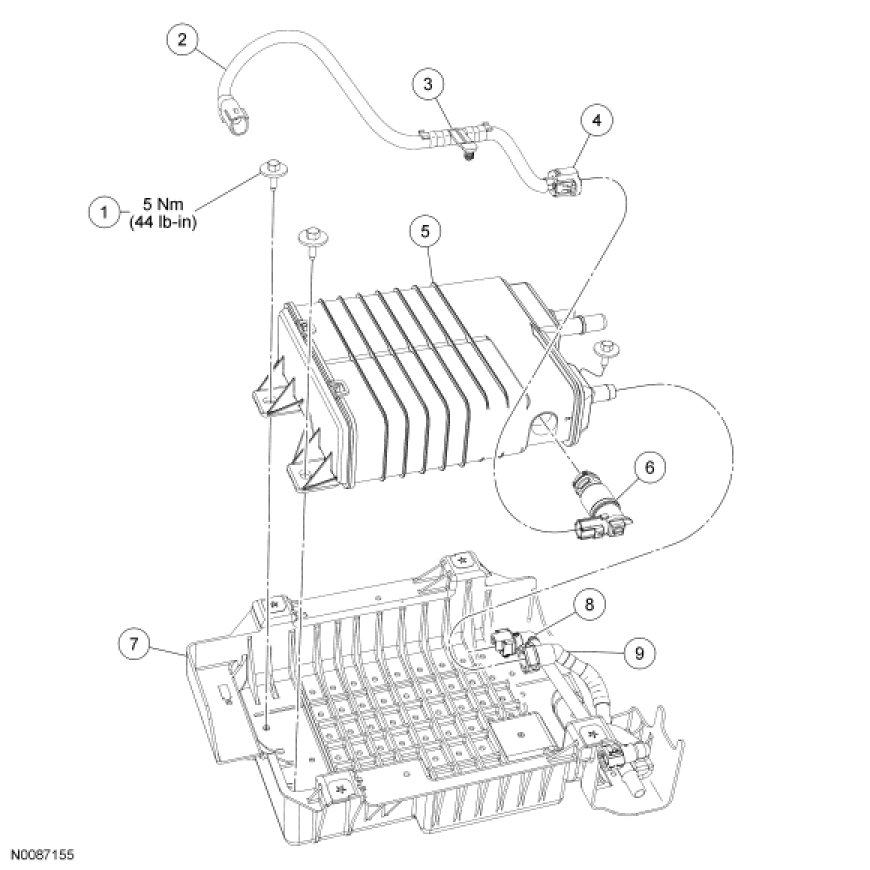
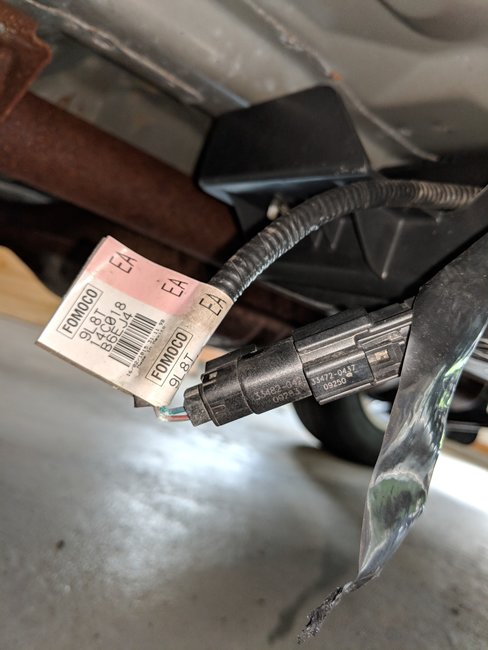
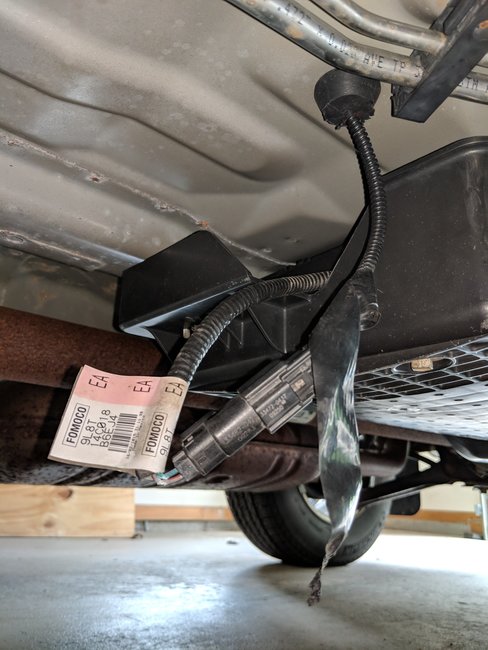
I got under my vehicle and after much searching I believe I found the part. I was able to remove the electrical plug. I then was able to rotate the canister purge valve but any attempt to pull it up was unsuccessful so I am not sure how to remove it. My vehicle is not lifted so I do not have much headroom to work with and cannot even see the part as I am attempting to remove it. I confirmed it was the right part before doing anything by taking a video on my cellphone and positively identifying the part. Also, this video proved helpful in also confirming I found the correct part as it is in the exact location described in the video:

https://www.youtube.com/watch?v=g1uBZXtYy0Q

Please let me know if you recommend having it done by a professional mechanic or if you could let me know how the part is removed so that I could continue my DIY attempt.

Also, any other tips or suggestions would be more than welcome. Thanks in advance!
Wednesday, September 19th, 2018 AT 4:06 PM

11 Replies

Tiny
JACOBANDNICKOLAS
  • MECHANIC
  • 108,300 POSTS
Hi and thanks for using 2CarPros. Com.

Here are the directions for replacement. The attached pictures correlate with these directions.
________________________

Evaporative Emission Canister Vent Solenoid

Removal and Installation

WARNING: Do not smoke, carry lighted tobacco or have an open flame of any type when working on or near any fuel-related component. Highly flammable mixtures are always present and may be ignited. Failure to follow these instructions may result in serious personal injury.

WARNING: Do not carry personal electronic devices such as cell phones, pagers or audio equipment of any type when working on or near any fuel-related component. Highly flammable mixtures are always present and may be ignited. Failure to follow these instructions may result in serious personal injury.

WARNING: Always disconnect the battery ground cable at the battery when working on an evaporative emission (EVAP) system or fuel-related component. Highly flammable mixtures are always present and may be ignited. Failure to follow these instructions may result in serious personal injury.

1. Remove the Evaporative Emission (EVAP) canister assembly. For additional information, refer to Evaporative Emission Canister See: Evaporative Emission Control Canister > Removal and Replacement > Evaporative Emission Canister.

2. Disconnect the EVAP canister vent solenoid electrical connector, release the pin-type retainer and remove the EVAP canister wire harness.

3. Remove the 3 EVAP canister tray bolts.
- To install, tighten to 5 Nm (44 lb-in).

4. Disconnect the EVAP canister purge tube-to-EVAP canister quick connect coupling. For additional information, refer to Fuel Delivery and Air Induction.

5. Disconnect the EVAP canister fuel vapor tube-to-EVAP canister quick connect coupling. For additional information, refer to Fuel Delivery and Air Induction.

6. Remove the EVAP canister from the tray.

7. Depress the locking tab outward, rotate the EVAP canister vent solenoid clockwise and remove it from the EVAP canister.

8. NOTE: Do not apply oil to the EVAP canister O-ring seal. Clean water may be applied to aid reassembly.

To install, reverse the removal procedure.
- Carry out the Evaporative Emission System Leak Test. For additional information, refer to Evaporative Emission System Leak Test See: Evaporative Emissions System > Component Tests and General Diagnostics > Evaporative Emission System Leak Test.

_____________________________________

Let me know if this helps.

Take care,
Joe
Was this
answer
helpful?
Yes
No
Wednesday, September 19th, 2018 AT 6:20 PM
Tiny
DIGDARX
  • MEMBER
  • 7 POSTS
Hi Joe, thanks for the quick reply. I really appreciate it. The reply was helpful as I realized that I needed to remove the canister from the tray. Without doing that I would never have gotten enough leverage or maybe even clearance for removing the canister vent solenoid.

It was very difficult to both remove and install the new part. I unfortunately even swapped the o-ring from the old one to the new one as I literally could not get it installed otherwise. I hope the o-ring was not the cause to begin with. It did look like it was in pretty good shape though.

Also, I do not have a way to clear the code. If this did really solve my P0446 code then after driving it for about forty miles or so it would clear itself, is that right?

Also, one last thing I noticed when I was putting everything back was this cable looks severely chewed up. I am including a picture. This wiring sits in the tray near number 7 in the diagram you posted here: (https://www.2carpros.com/images/question_images/233352/original.jpg). Please let me know if that could also be an issue for the P0446 code as that will be my next step if the CEL does not clear itself. Also, if that is the case please let me know if you have any information on the part for this wiring and how to replace it.

Thanks again for all your help!
Was this
answer
helpful?
Yes
No
+1
Thursday, September 20th, 2018 AT 4:08 PM
Tiny
DIGDARX
  • MEMBER
  • 7 POSTS
Sorry, just noticed the picture is a bit out of focus on the chewed up part. I can take another tomorrow in better light if that would more helpful.
Was this
answer
helpful?
Yes
No
Thursday, September 20th, 2018 AT 4:10 PM
Tiny
JACOBANDNICKOLAS
  • MECHANIC
  • 108,300 POSTS
Hi.
The picture is fine, however, it is hard to determine where it is going. If I look on a schematic, I will never find them. Can you find where it leads? Also, is there a part number on the tag attached to it? If that is running to the vent solenoid, that could be the problem.

As far as the reset, it should reset after the drive cycle is completed. Most parts stores will test codes for people, but they will not delete them. I am not sure where you are located, but if you purchased the part at a nationally recognized parts store, ask if they will do it.

Let me know what happens. Also, if the wires are not broken under the insulator, I would put electrical tape in each one to prevent a short.

Let me know if you need anything or have other questions.

Joe
Was this
answer
helpful?
Yes
No
Thursday, September 20th, 2018 AT 7:56 PM
Tiny
DIGDARX
  • MEMBER
  • 7 POSTS
Sorry for the delay, I have not had a chance to check where that wiring leads. I will try and get a picture or description as to where it is coming from and where it leads to later tonight.

Also, just wanted to mention, since replacing the canister vent solenoid the vehicle probably has been driven roughly 80 miles. I am not sure what distance is needed to complete a drive cycle but the CEL is still on right now as I have not had a chance get it cleared at the shop. Also no other symptoms have presented other than the light just being on.
Was this
answer
helpful?
Yes
No
Tuesday, October 2nd, 2018 AT 11:58 AM
Tiny
DIGDARX
  • MEMBER
  • 7 POSTS
I realized my daughter did not need the Escape today so I went ahead and gave it a closer look. I am including two images. The first shows the tag and numbers on the electrical plugs more clearly. The second shows where the wire is coming from under the body. I felt with my hands and believe the other end leads to the electrical connection on the canister vent solenoid itself. I believe this has to be it!

In fact, if I am understanding this correctly, I could unplug the connection at the canister vent solenoid and then the other end right where the wires are badly chewed up and that entire wiring harness could/would/should be replaced.

Does that make sense? Please let me know what you think when you have a chance.
Was this
answer
helpful?
Yes
No
Tuesday, October 2nd, 2018 AT 12:23 PM
Tiny
JACOBANDNICKOLAS
  • MECHANIC
  • 108,300 POSTS
Hi and welcome back.

Yes, you are exactly correct. According to the part number, that is for the canister vent solenoid. Also, you have connectors on both sides. Either replace it as a unit or repair the wiring.

As far as the light, some turn off right away and others require being reset with a scanner. If you had one, I bet the same code would come up for you. The solenoid wasn't the problem, but rather the wiring to it. So even if you completed the drive cycle, the part is not working due to the wiring issue.

Let me know if you get it replaced. I want to make sure that is the problem.

Take care,
Joe
Was this
answer
helpful?
Yes
No
Tuesday, October 2nd, 2018 AT 5:38 PM
Tiny
DIGDARX
  • MEMBER
  • 7 POSTS
I agree, both parts I replaced were probably fine. Unfortunately I caught it too late!

Anyway, hopefully this wiring unit does the trick. Do you know where I can purchase this wiring unit myself? I searched for part number 14C018 and was not able to locate it anywhere.
Was this
answer
helpful?
Yes
No
+1
Wednesday, October 3rd, 2018 AT 2:08 AM
Tiny
JACOBANDNICKOLAS
  • MECHANIC
  • 108,300 POSTS
The only place you will get one is either a salvage yard or a dealer. Is the one you have repairable?
Was this
answer
helpful?
Yes
No
Wednesday, October 3rd, 2018 AT 6:23 PM
Tiny
DIGDARX
  • MEMBER
  • 7 POSTS
I had a friend take a look at it as I did not know the first thing about repairing those wires. He checked it out and told me there were multiple failure points and so he did not advise repairing it.

I tried finding the part locally at a salvage yard as you mentioned. Unfortunately that was a no go and I ended up just getting it done at the shop. Kind of stinks because if I could have just gotten the part I would have been able to complete it on my own. Oh well.

And I am really glad to have found your site, it is nice to know there is an extremely valuable resource here! Thanks again for all your help, I really appreciate it!
Was this
answer
helpful?
Yes
No
Friday, October 12th, 2018 AT 7:22 AM
Tiny
JACOBANDNICKOLAS
  • MECHANIC
  • 108,300 POSTS
Well, at least you were knowledgeable when you took the vehicle in for repairs. That way, they could not take advantage.

Also, you are very welcome. If you lived next door, we could have fixed it together. LOL

Take care and have a good weekend.

Joe
Was this
answer
helpful?
Yes
No
Friday, October 12th, 2018 AT 4:28 PM

Please login or register to post a reply.

Sponsored links