Hi and thanks for using 2CarPros.
First, I suspect there is a wiring issue at the new crankshaft position sensor. First, here are the directions specific to replacement of the part. Review them to confirm you did everything suggested.
_________________________
Crankshaft Position Sensor
WARNING: The exhaust pipe from the turbo can be extremely warm, so exercise extreme care.
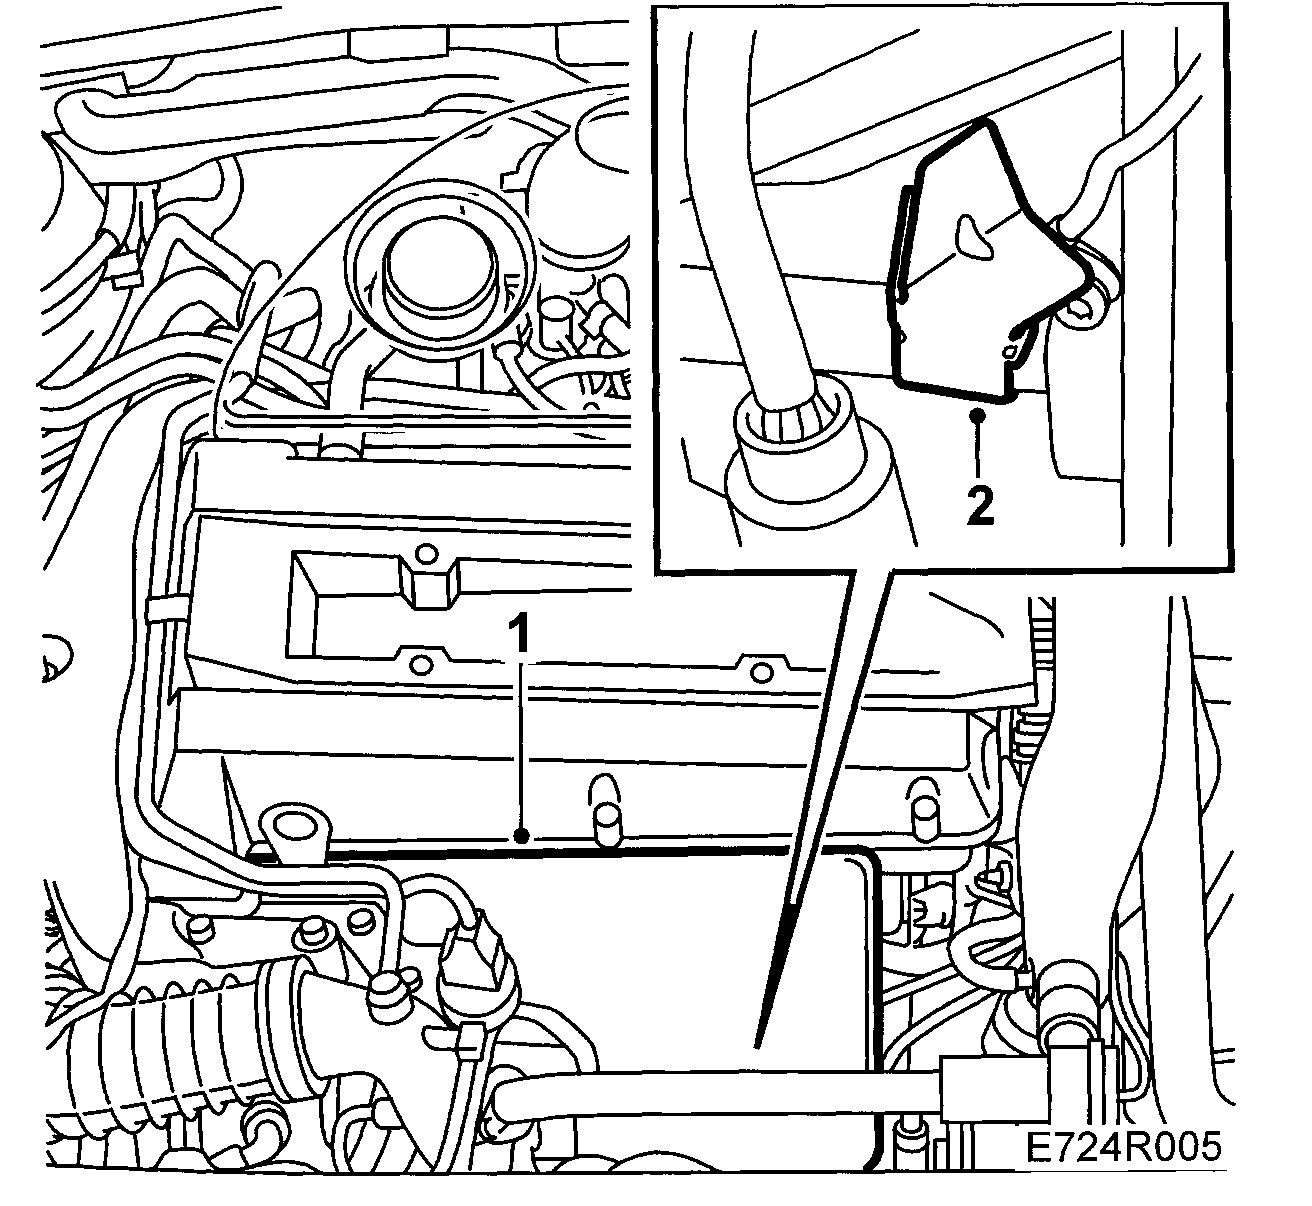
To remove
1. Undo the exhaust manifold heat shield.
Picture 1
2. Undo the screw securing the heat shield and sensor.
3. Detach the sensor and O-ring.
Picture 2
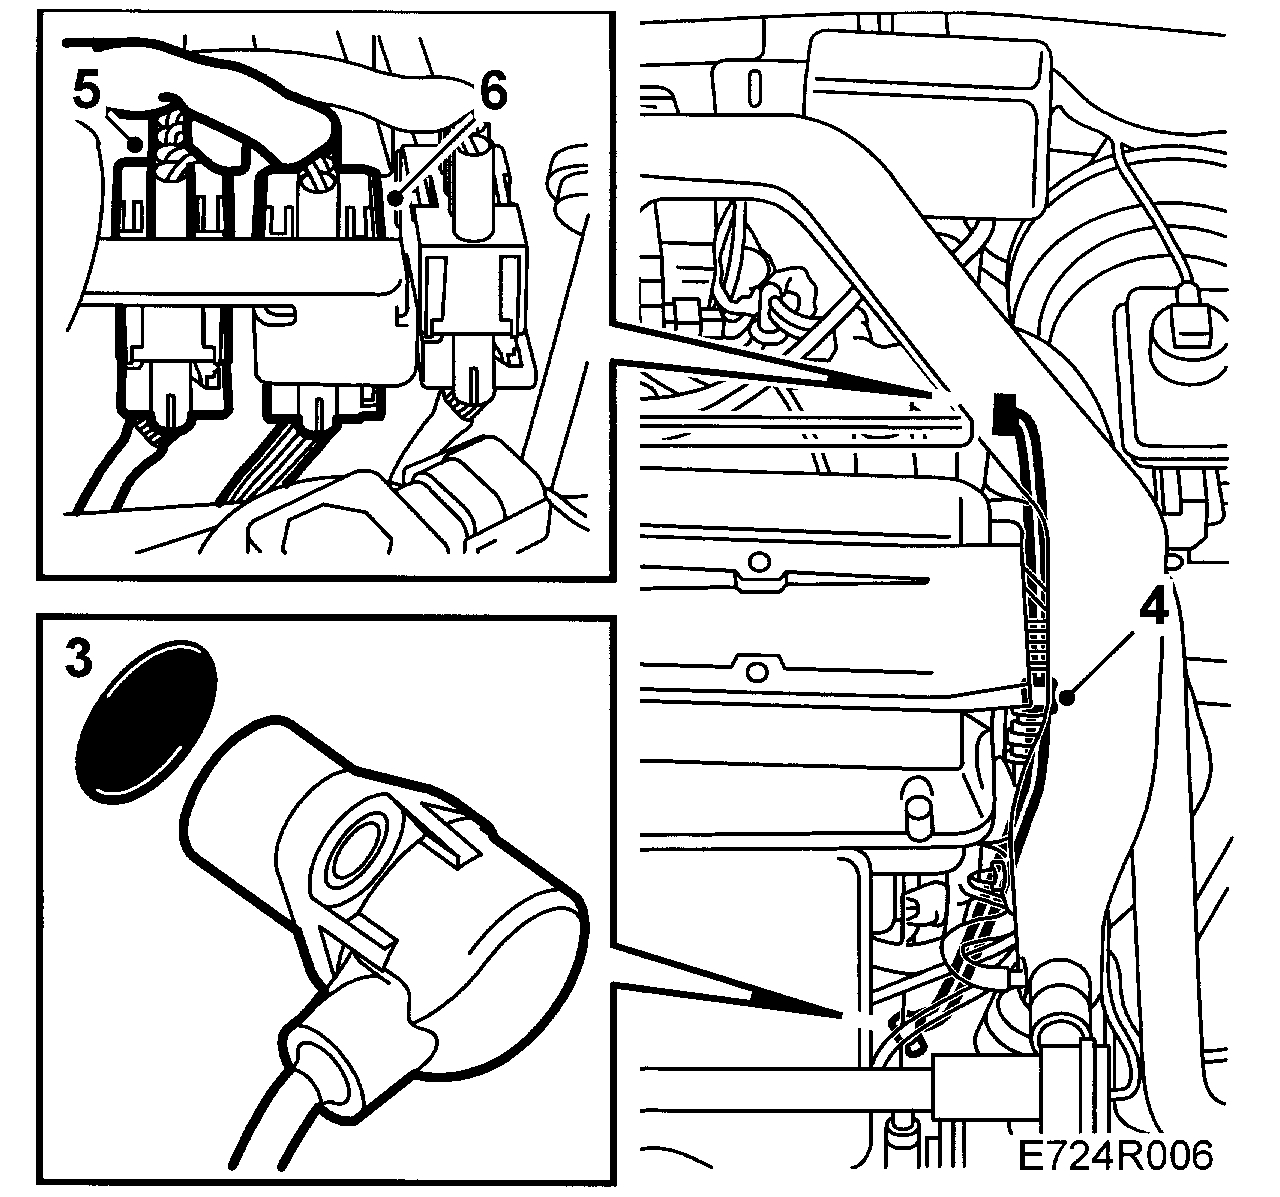
4. Follow the sensor connecting cable and undo the clip on the water pipe.
5. Detach the connector from the holder.
6. Unplug the connector.
7. Change the sensor.
To fit
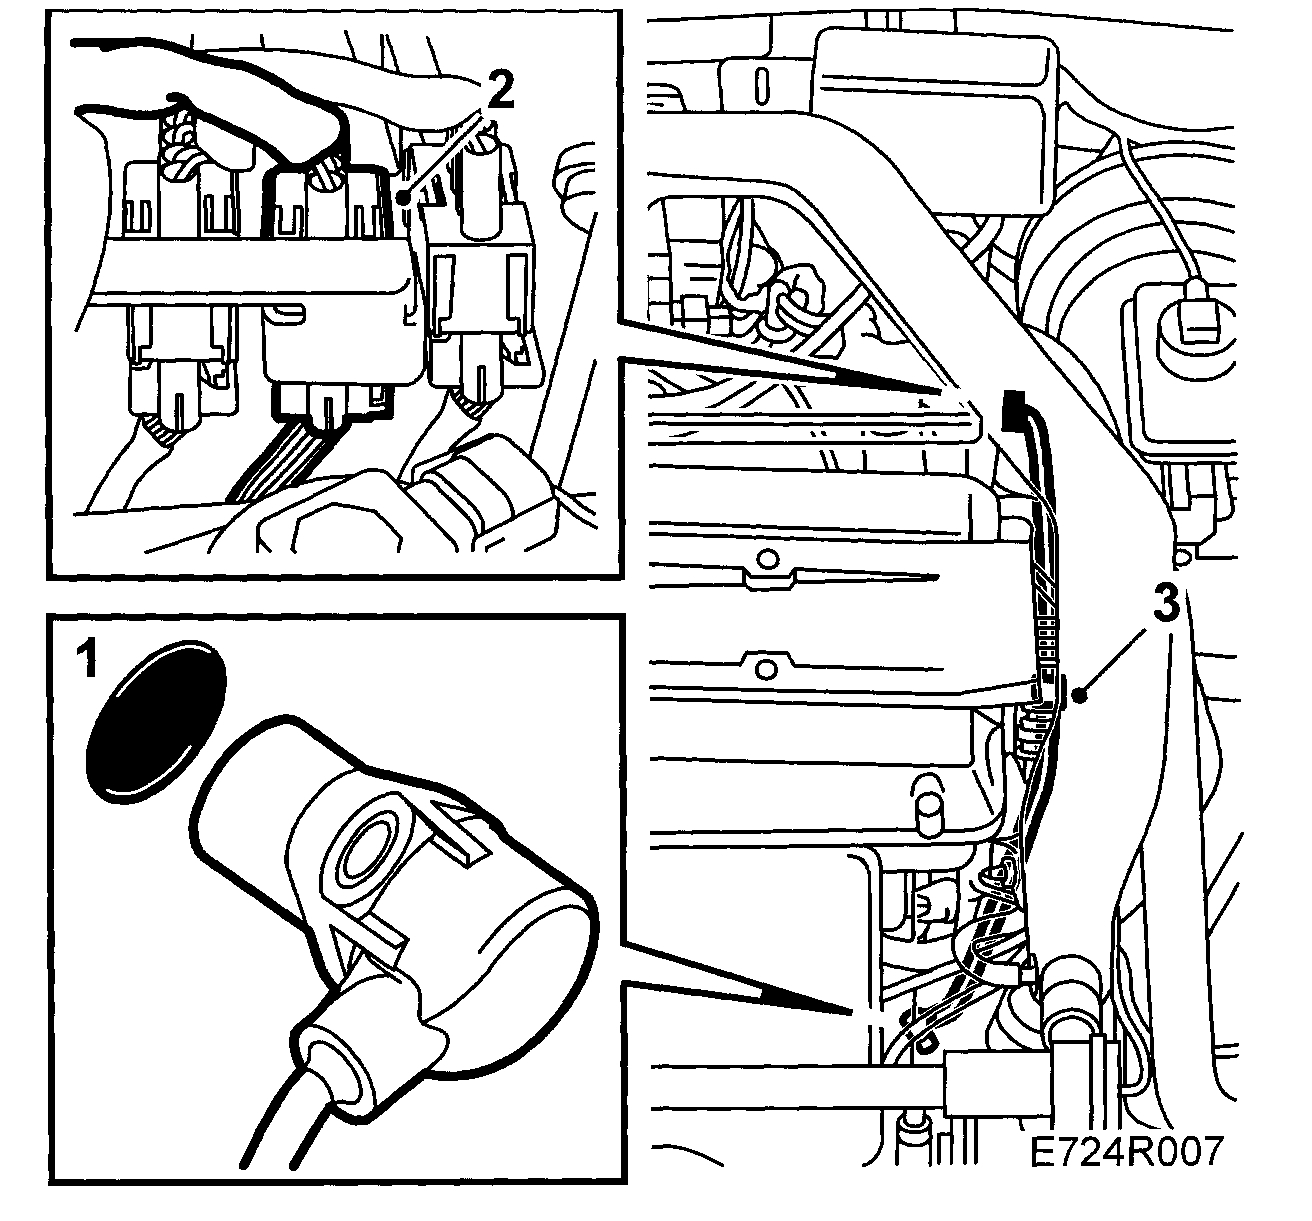
1. Fit the sensor provisionally so that the cable runs along the water pipe. Change the O-ring if necessary and lubricate it with engine oil.
Picture 3
2. Spray the connector with Kontakt 61 (part no. 30 04 520), press together the connector and fit it in the holder.
3. Secure the cables with the retaining clip. Take care not to pinch or damage the cables with the clip.
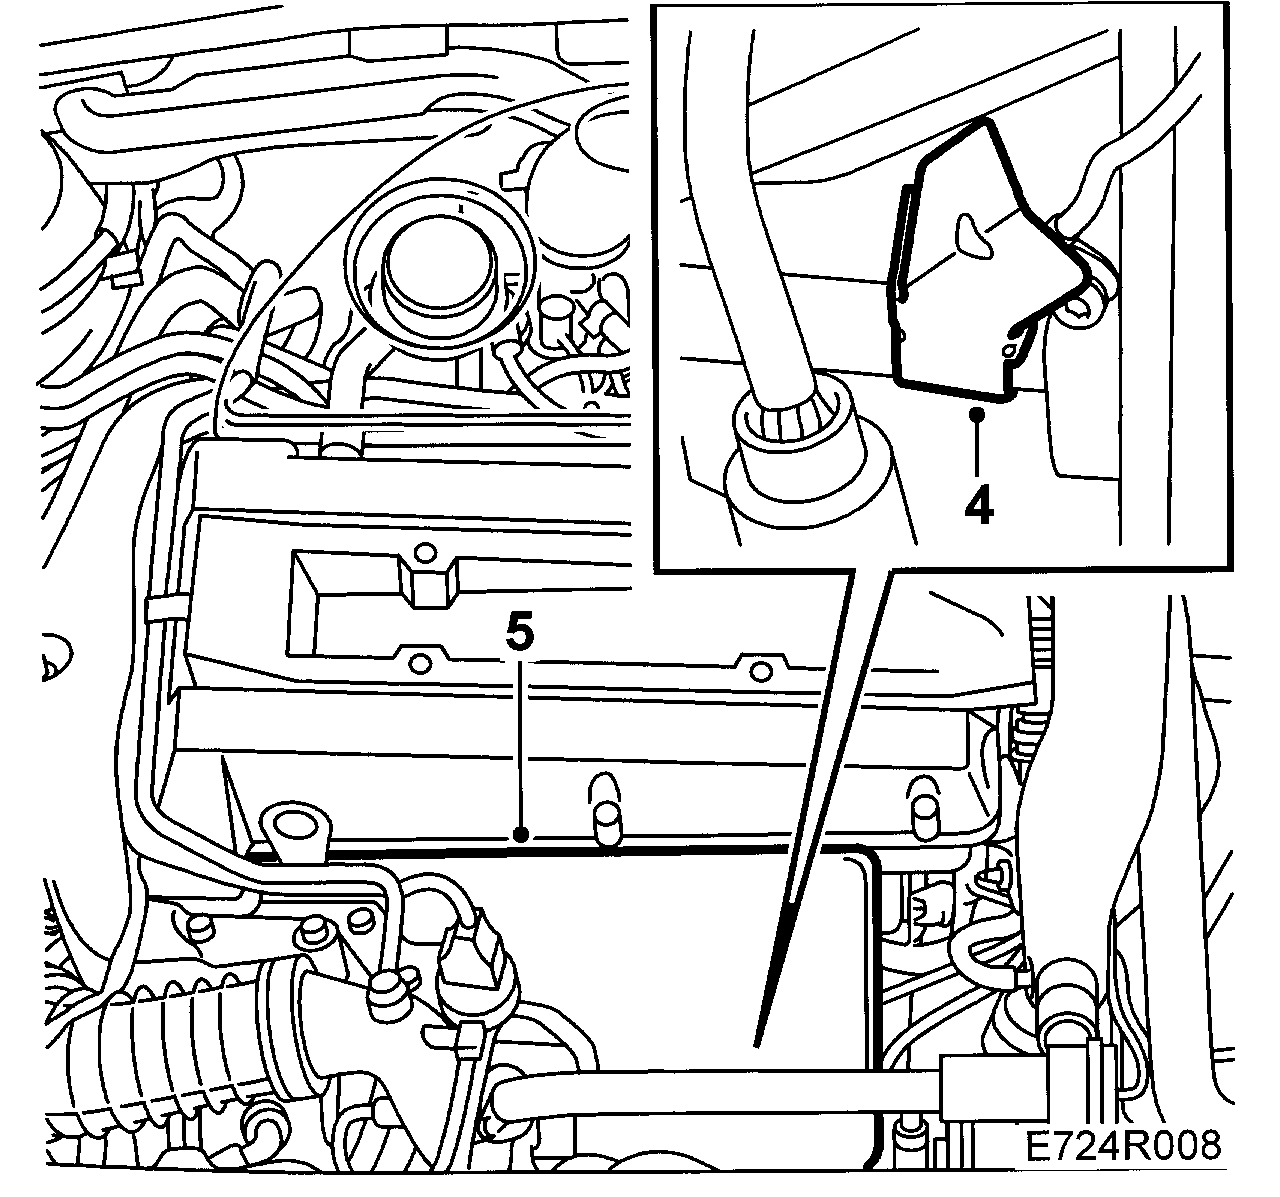
4. Press in the sensor and screw it on with the O-ring fitted together with the heat shield. Make sure the O-ring is positioned correctly so that the sensor bottoms in the engine block. Otherwise, there is a risk of the sensor mounting lug breaking off.
Picture 4
5. Lubricate the screw for the exhaust manifold heat shield with Molykote 1000 or equivalent (part no. 30 20 271) and fit the heat shield.
6. Start the engine and check for oil leaks.
Tightening torque 50 Nm (36 lbf ft)
____________________________________________________________
Next, based on the code, here is a description of the code. The last thing it suggests is to check wiring for bad connections or damaged wiring.
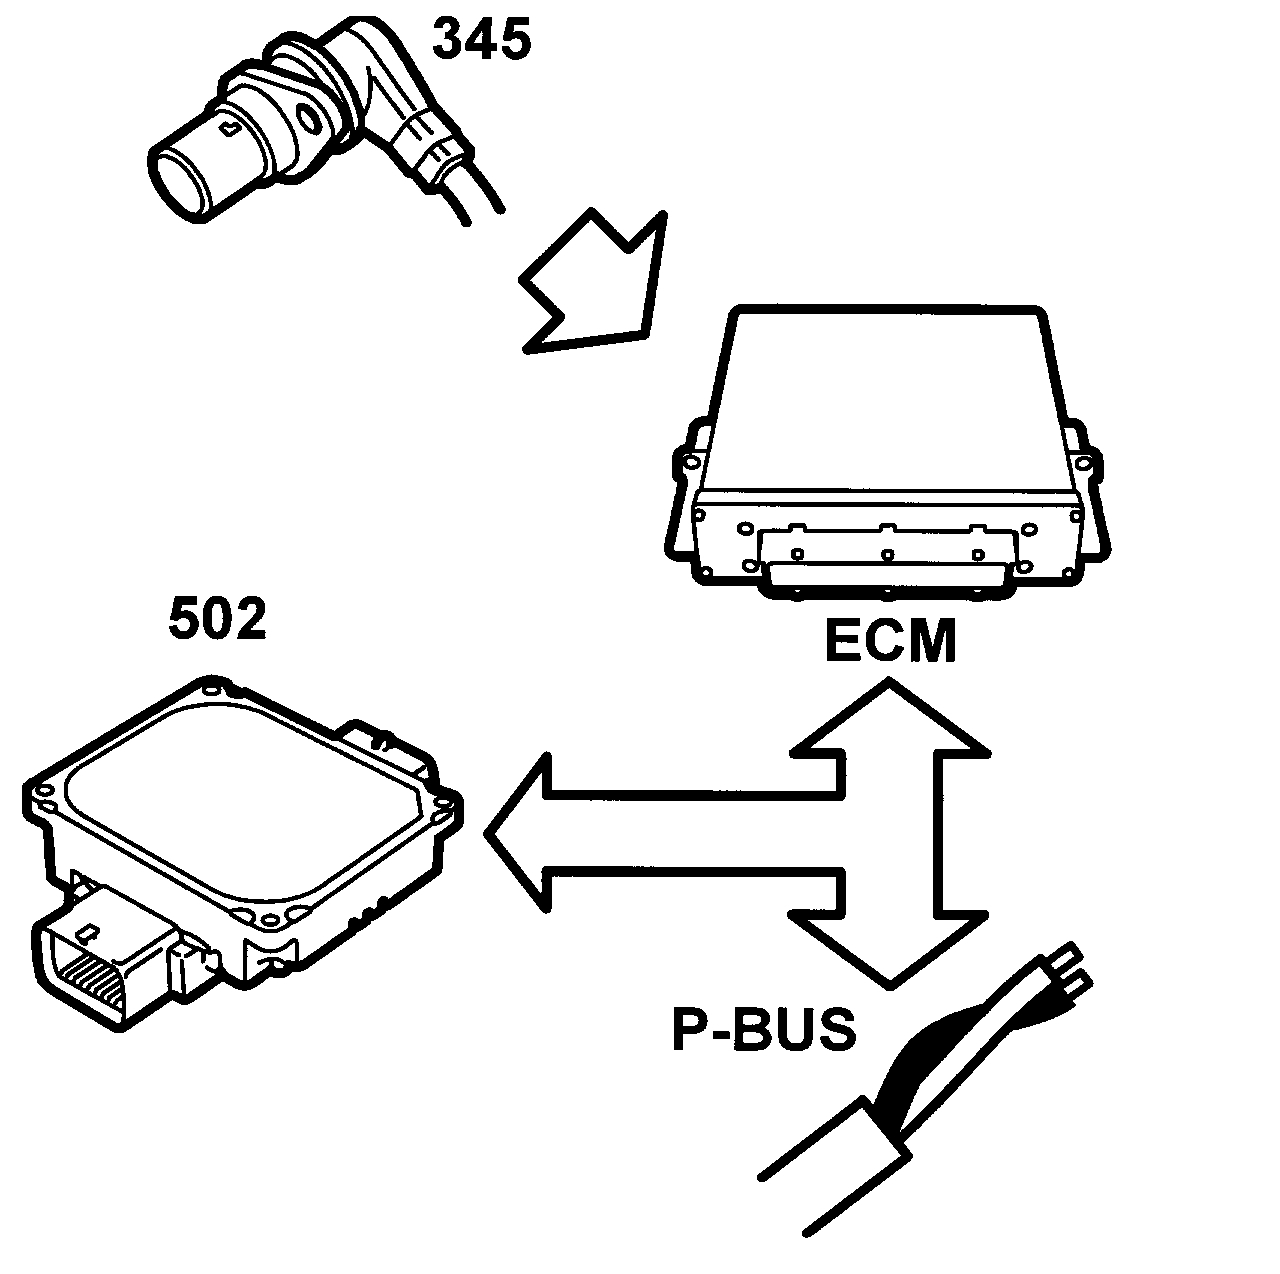
P0725
Engine RPM Signal. Incorrect
Picture 5
Fault symptoms
CHECK GEARBOX warning lamp on.
Conditions
The input speed has exceeded 500 rpm after switching on the ignition.
Fault criteria
The TCM receives information from the bus, transmitted by the ECM, about the current engine speed. If the ECM transmits a message which says that the information is incorrect a P0725 diagnostic trouble code is generated.
Diagnostic help
The engine speed can be read with the diagnostic tool. - Choose " Read Values / Activate " and " Engine Speed (Bus from Trionic)"
Check the wiring
Jiggle the wiring harness at several points and in different directions to reveal intermittent breaks and short circuits in the various leads. Observe the multi-meter, test lamp or diagnostic instrument while carrying out this check
__________________________________________
Let me know if this helps or if you have other questions.
Take care,
Joe.
Images (Click to make bigger)
Thursday, January 17th, 2019 AT 3:11 PM