Hi and thanks for using 2CarPros.
The code indicates:
DTC P0017
Crankshaft Position (CKP) - Exhaust Camshaft Position (CMP) Correlation Bank 1
Make sure the engine oil is clean and full.
Here are the diagnostic checks.
CIRCUIT/SYSTEM VERIFICATION
1. IMPORTANT: The supply of clean pressurized engine oil to the CMP actuator is essential to CMP actuator performance.
Observe the engine oil level. The engine oil level should be within operating range. Refer to Approximate Fluid Capacities.
2. Ensure that the vehicle has the correct engine oil and is not old, burnt or contains additives. Refer to Checking Things Under the Hood in Service and Appearance Care within the Owner's Manual.
- If the vehicle has the incorrect engine oil, is old, burnt, or contains additives then change the oil and filter.
3. Test the engine oil pressure for correct operation. Refer to Oil Pressure Diagnosis and Testing. See: Engine Oil Pressure > Component Tests and General Diagnostics
4. Allow the engine to reach operating temperature.
- If the engine cranks but does not run, observe the CMP variance parameter while cranking. The CMP variance parameter should be 0 degrees.
5. Set the parking brake and place the vehicle in park for automatic, or neutral for manual.
6. Observe the CMP variance parameter. The CMP Variance will rise for 1-2 seconds until the CMP Angle parameter matches the Desired CMP parameter. The CMP Variance should again return to 0 degrees.
7. IMPORTANT: The engine will run rough and may require throttle input to keep running.
Command the CMP actuator to 20 degrees. The Desired CMP parameter should match the CMP Angle parameter.
CIRCUIT/SYSTEM TESTING
- Inspect the engine or review the service history of the vehicle for any recent repairs involving the timing chain, camshaft, or crankshaft.
- If recent repairs were made, refer to Camshaft Timing Drive Components Cleaning and Inspection (Fourth Design) and inspect the timing chain and sprockets for proper alignment.
- Inspect the CMP actuator.
- Inspect the engine timing components.
REPAIR INSTRUCTIONS
Perform the Diagnostic Repair Verification after completing the diagnostic procedure. See: A L L Diagnostic Trouble Codes ( DTC ) > Verification Tests
Camshaft Timing Drive Components Cleaning and Inspection (Fourth Design) for timing chain, sprockets, and CMP actuator filter screen replacement
________________________________________________
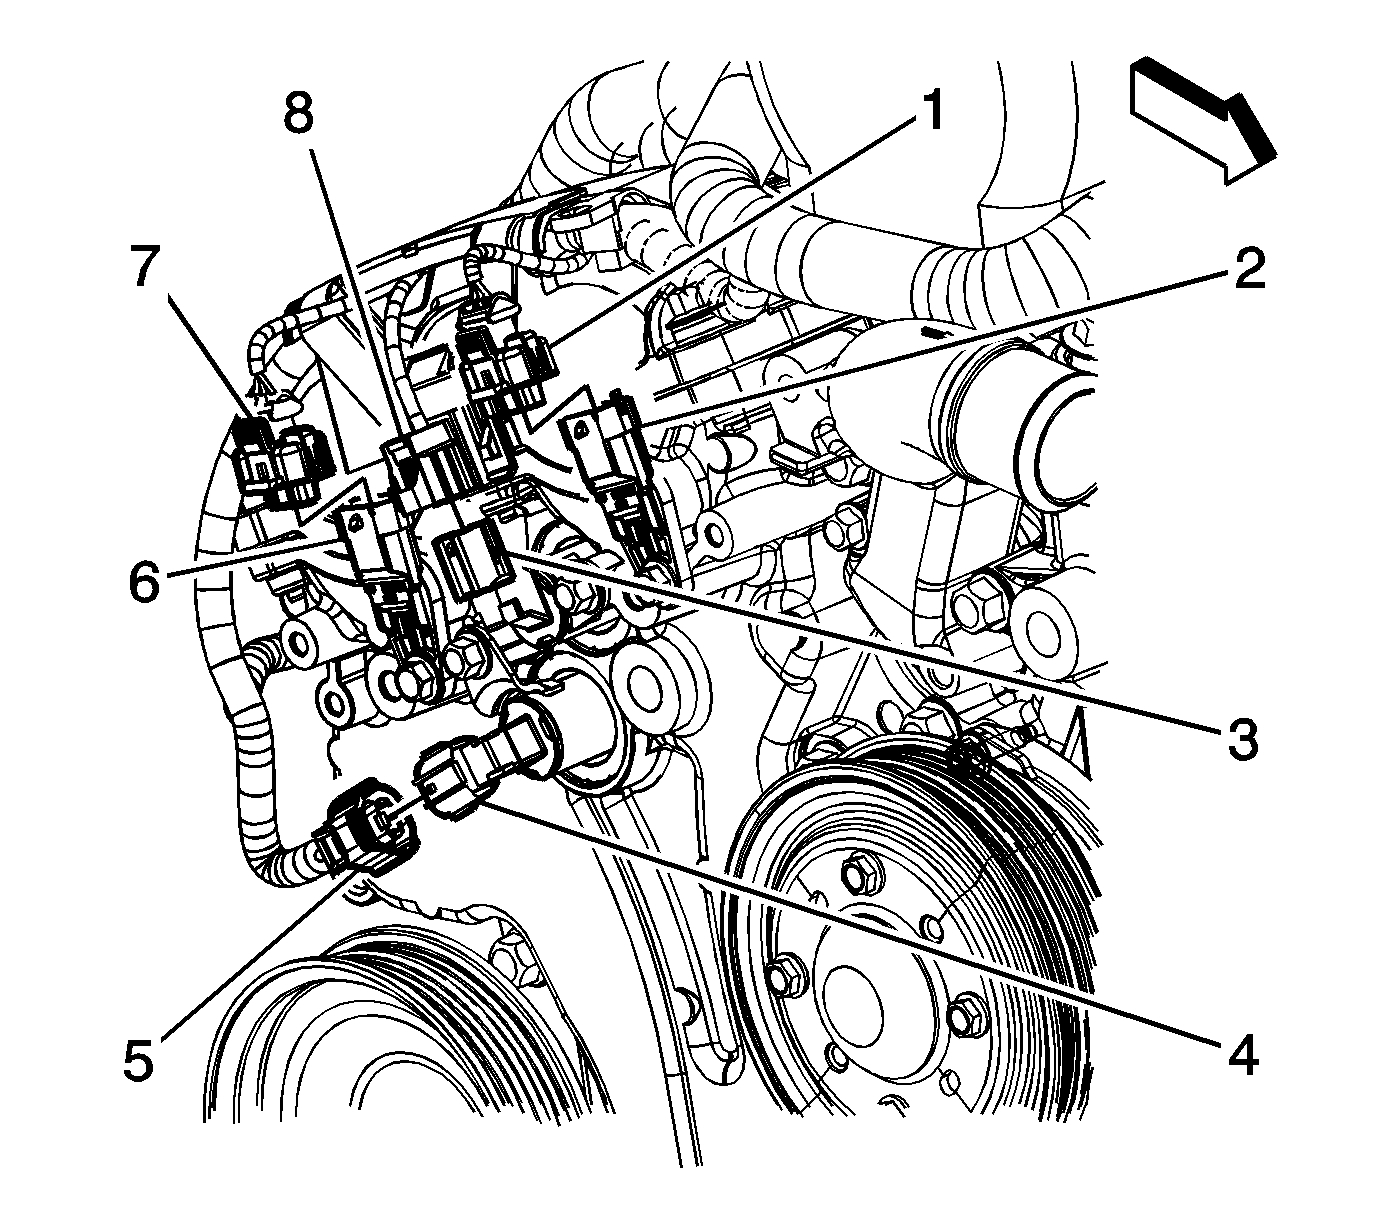
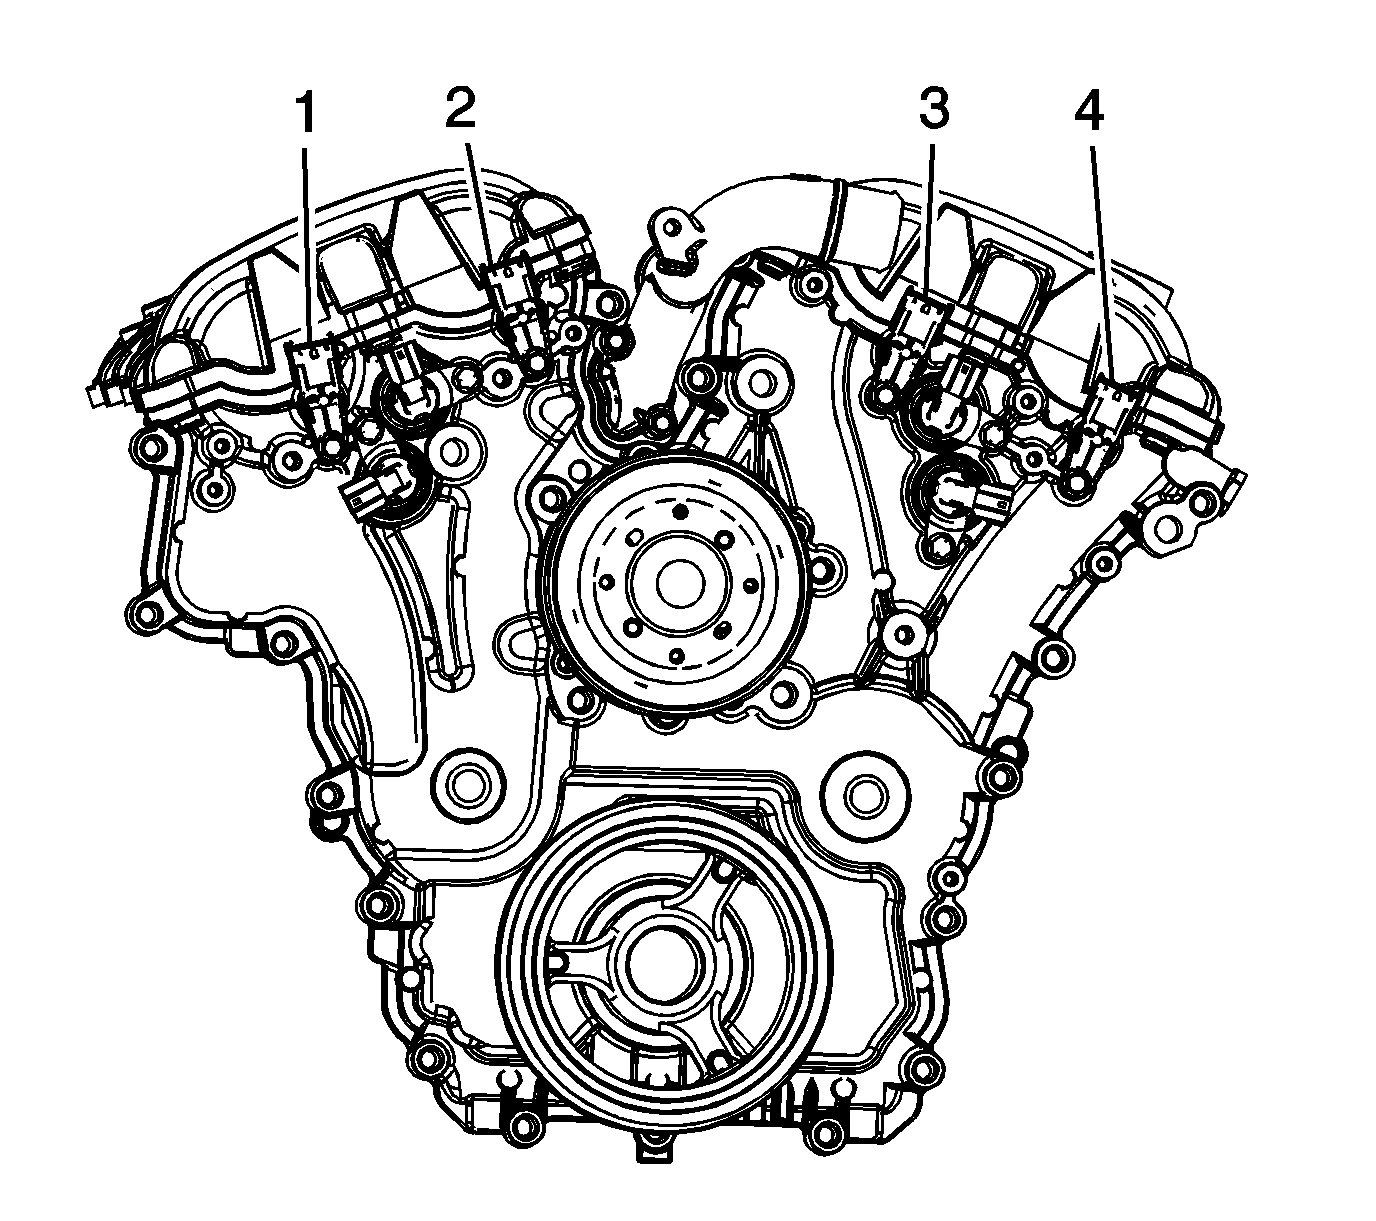
Here are the directions for replacement of the sensor. Make sure where it bolts into the engine, it is clean and nothing is blocking pressure to the sensor. The attached pictures correlate with these directions.
CAMSHAFT POSITION SENSOR REPLACEMENT - BANK 1 (RIGHT SIDE) EXHAUST
CAMSHAFT POSITION SENSOR REPLACEMENT - BANK 1 (RIGHT SIDE) EXHAUST
REMOVAL PROCEDURE
1. Remove the engine mount strut and bracket.
2. Disconnect the engine wiring harness electrical connector (7) from the bank 1 exhaust camshaft position (CMP) sensor (6).
3. Remove the CMP sensor bolt and sensor (1).
INSTALLATION PROCEDURE
1. NOTE: Refer to Fastener Notice.
Install the CMP sensor (1) and bolt.
Tighten the bolt to 10 N.M (89 lb in).
2. Connect the engine wiring harness electrical connector (7) to the bank 1 exhaust CMP sensor (6).
3. Install the engine mount strut and bracket.
_______________________________
Let me know if this helps.
Joe
Images (Click to make bigger)
Friday, January 11th, 2019 AT 8:02 PM