Welcome to 2CarPros.
A few things can cause this problem. If you provide the trouble code you got, I may be able to help you pinpoint the cause easier.
As far as the issue, it could be a vacuum leak to the EGR solenoid, a faulty EGR valve, Carbon Buildup in either the EGR or Intake or restriction in the EGR Tube or other component.
Here are the directions for EGR replacement and the pictures correlate with them. I'm adding this to help locate the part and so you can remove it for inspection.
_________________________________________________
PROCEDURES
REMOVAL
If the EGR system operates incorrectly, replace the entire EGR valve and transducer together. The EGR valve and electrical transducer are calibrated together.
1. Remove the air cleaner lid, disconnect the inlet air temperature sensor and makeup air hose.
2. Remove the negative battery cable.
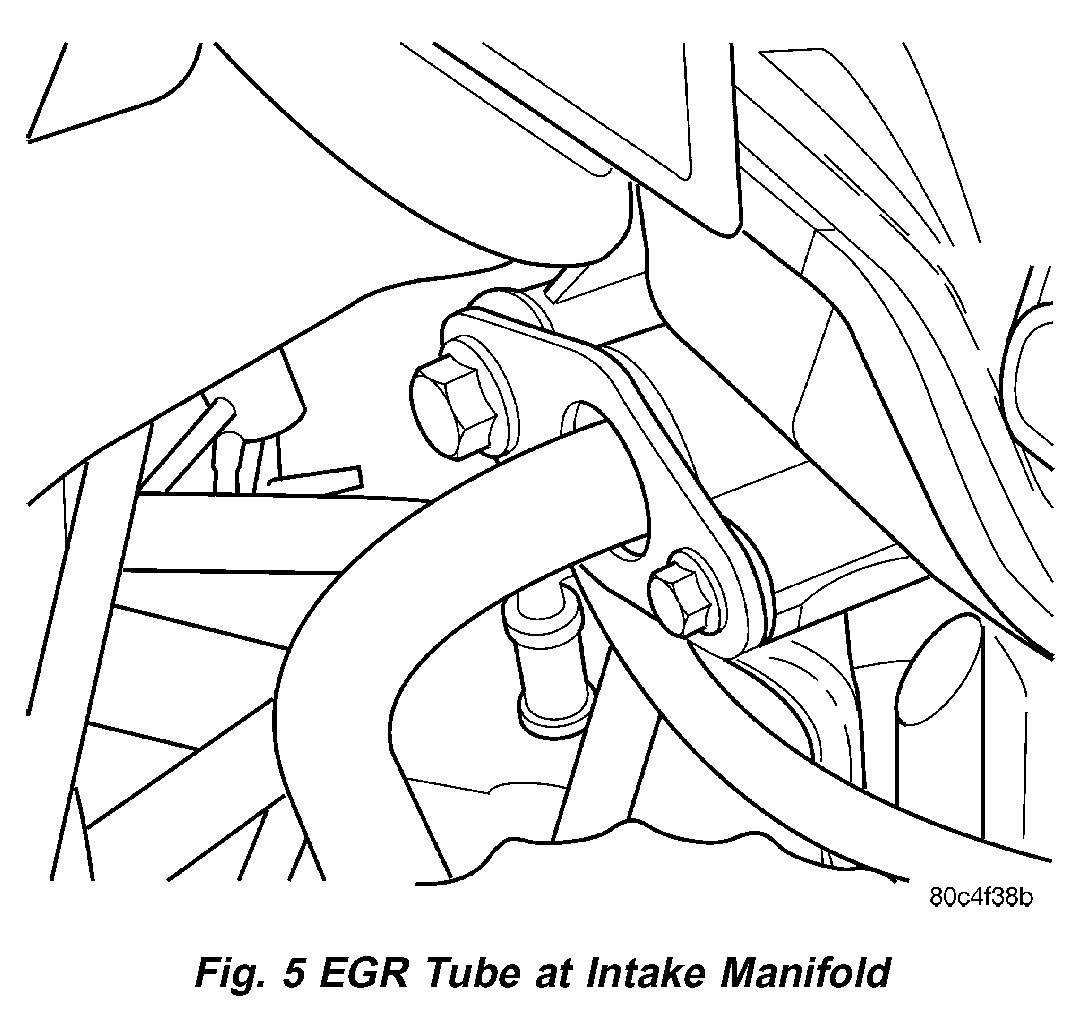
EGR Tube At Intake Manifold
3. Loosen the bolts at the intake manifold
4. Remove EGR tube bolts at EGR Valve.
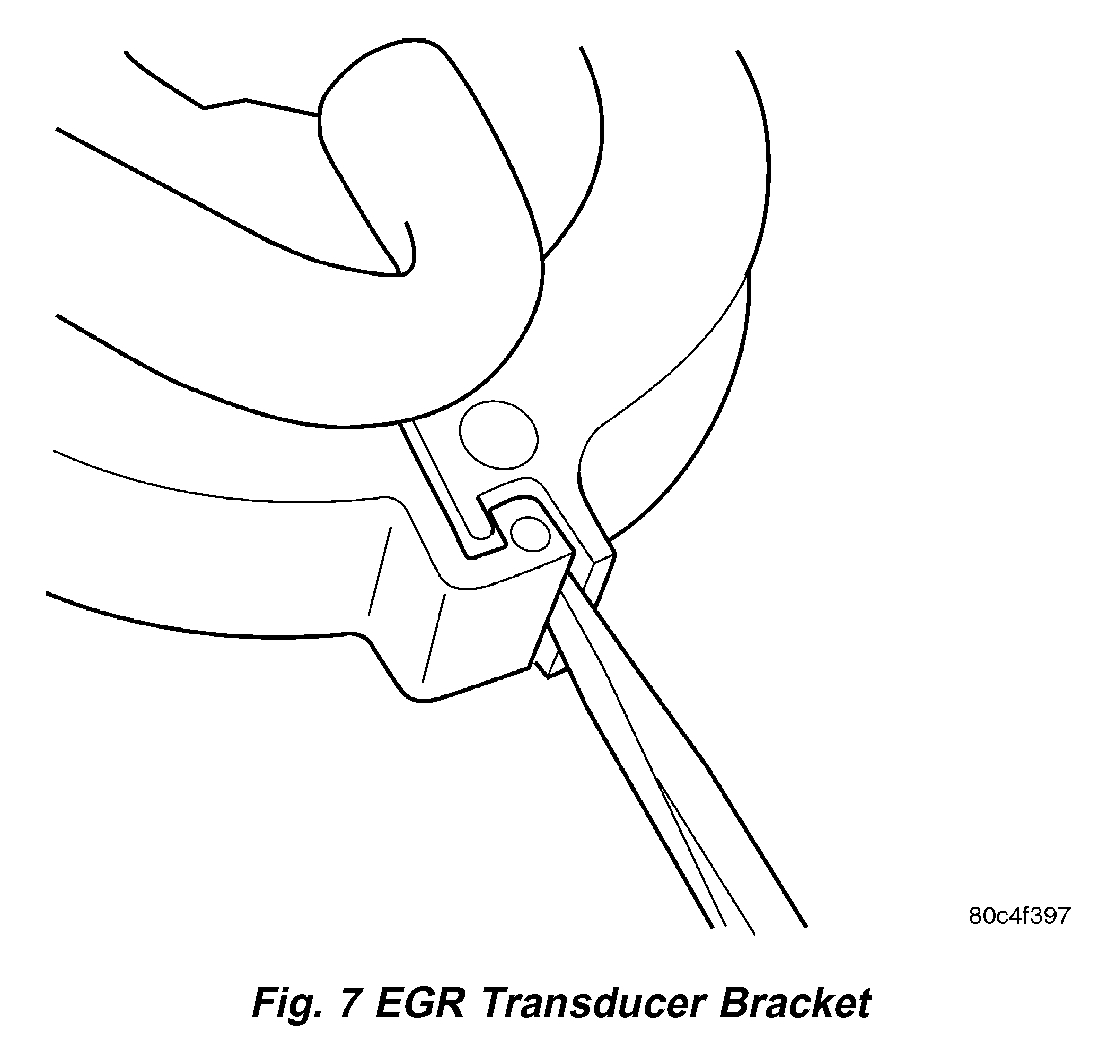
EGR Transducer Bracket
EGR Transducer Bracket
5. Unclip EGR transducer bracket, and remove from bracket.
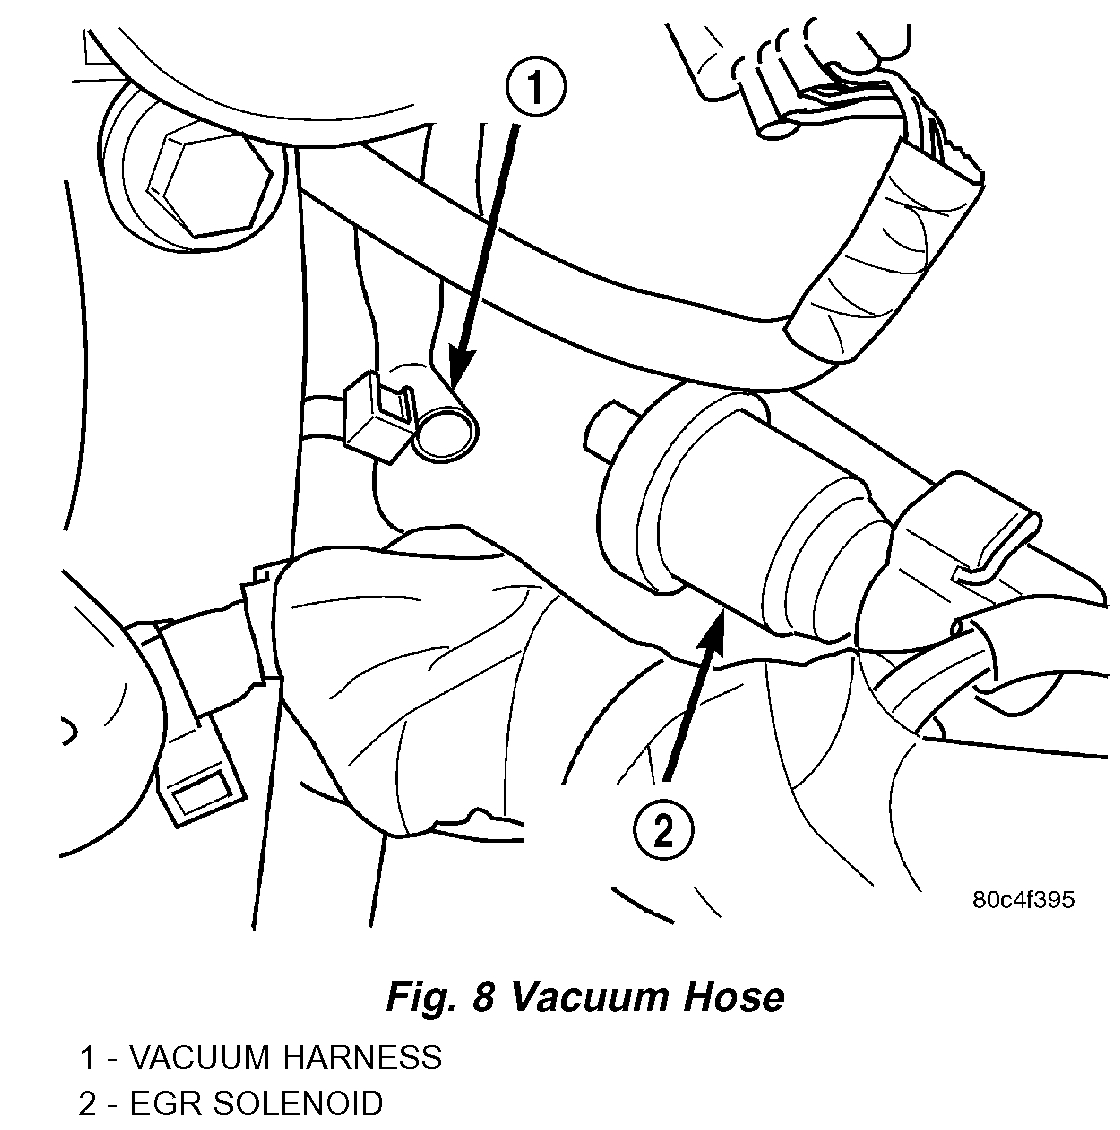
Fig.8 Vacuum Hose
6. Disconnect the vacuum supply hose to EGR transducer solenoid.
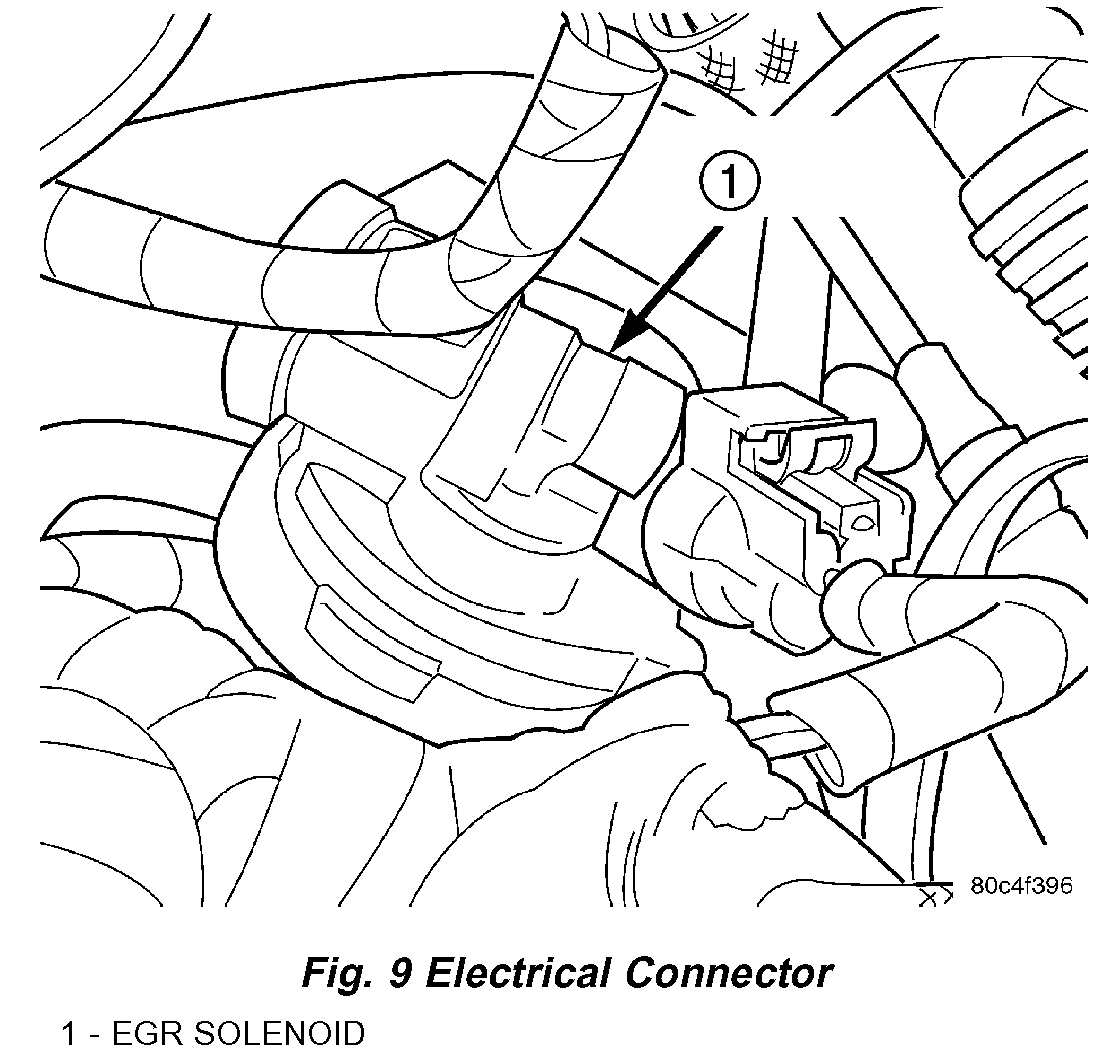
Fig.9 Electrical Connector
7. Unlock the connector then disconnect the electrical connector from solenoid.
8. Remove the 2 bolt at EGR valve to cylinder head. Remove EGR valve and transducer.
9. Clean gasket surfaces. Discard old gaskets. If necessary, clean EGR passages.
INSTALLATION
If the EGR system operates incorrectly, replace the entire EGR valve and transducer together. The EGR valve and electrical transducer are calibrated together.
1. Connect vacuum supply tube to solenoid.
2. Attach electrical connector to solenoid.
3. Install EGR transducer into the bracket and snap closed.
4. Loosely install EGR valve with new gaskets.
5. Finger tighten EGR tube fasteners.
6. Tighten EGR valve mounting screws to 22 N.m (195 in. lbs.) torque.
7. Tighten EGR tube fasteners to 11 N.m (97 in. lbs.) torque.
NOTE: Make sure that the hoses are routed away from the hot EGR tube and Valve and clipped.
8. Install the negative battery cable.
9. Install the air cleaner lid, connect the inlet air temperature sensor and makeup air hose.
______________________________________
Let me know what you find or if you have other questions.
Take care,
Joe
Images (Click to enlarge)
Mar 6, 2019 at 2:13 PM