Hi,
I know the feeling. Hang in there. I am going to provide the directions from A to Z for shoe replacement and adjustment. Take a look through the directions to confirm everything is together correctly and if the directions for the adjuster and adjuster spring install help. All of the attached pics correlate with these directions. I realize you don't need all of them, but I'm adding everything in the event you skipped a step.
________________________________________________________________
2003 Ford Focus L4-2.0L SOHC VIN P
Procedures
Vehicle Brakes and Traction Control Drum Brake System Brake Shoe Service and Repair Procedures
PROCEDURES
Removal
pic 1
All vehicles
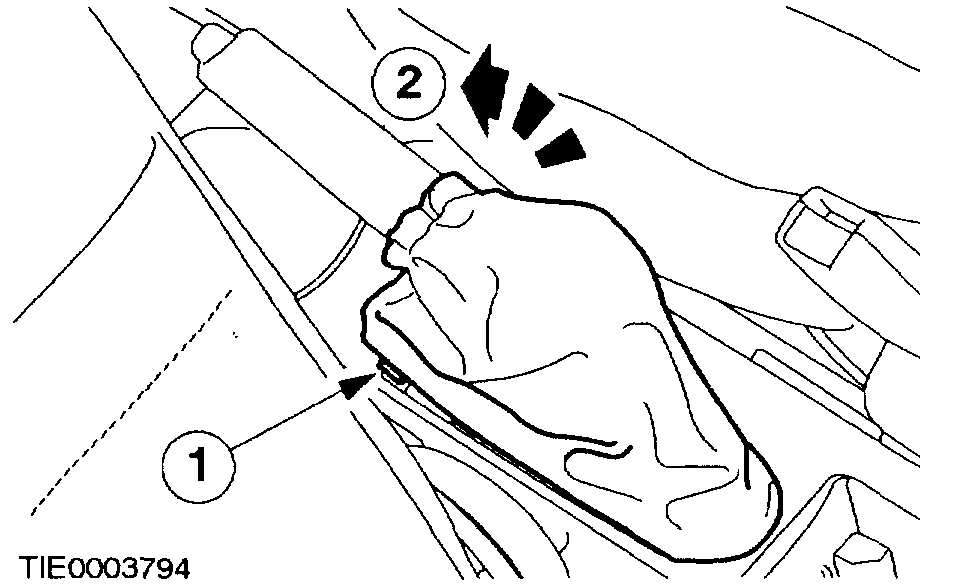
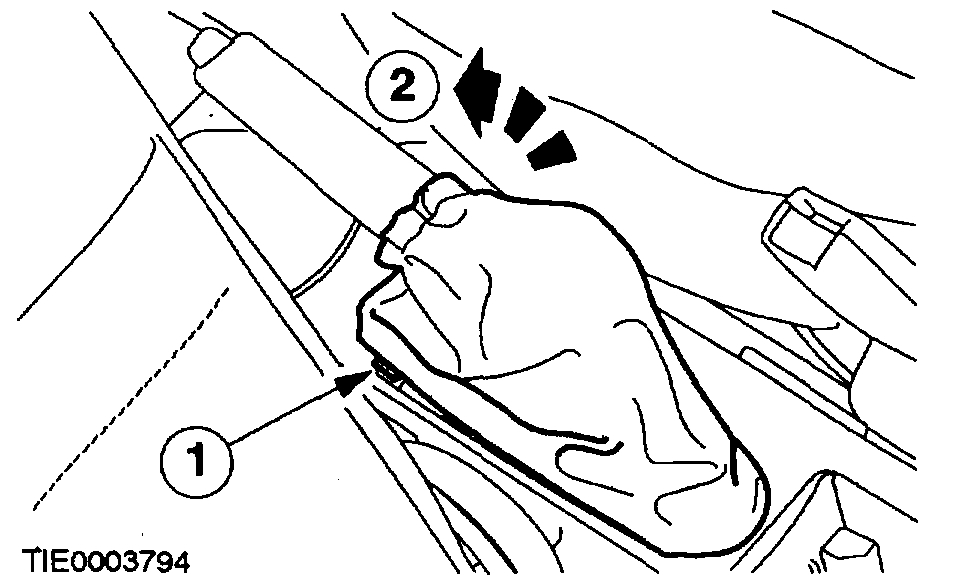
1. Remove the parking brake control boot.
1 Detach the boot clip.
2 Remove the boot.
2. NOTE: Make sure the rear brakes are at a cool temperature.
Release the parking brake control to its lowest position.
pic 2
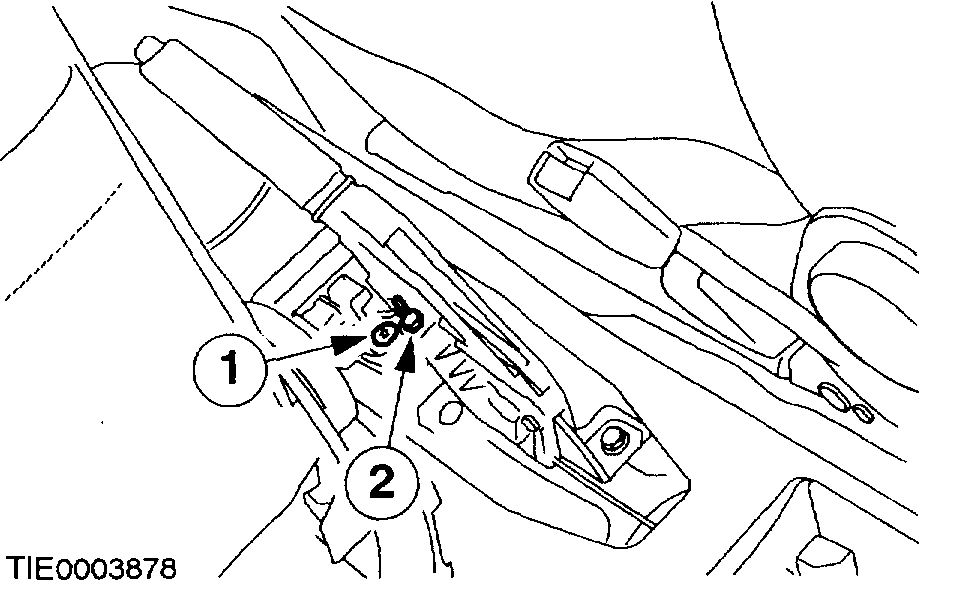
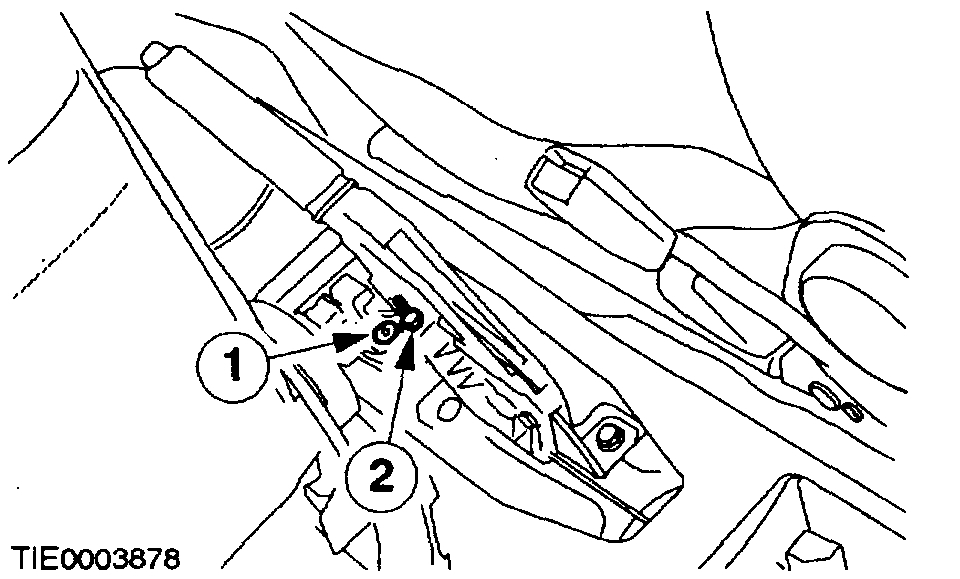
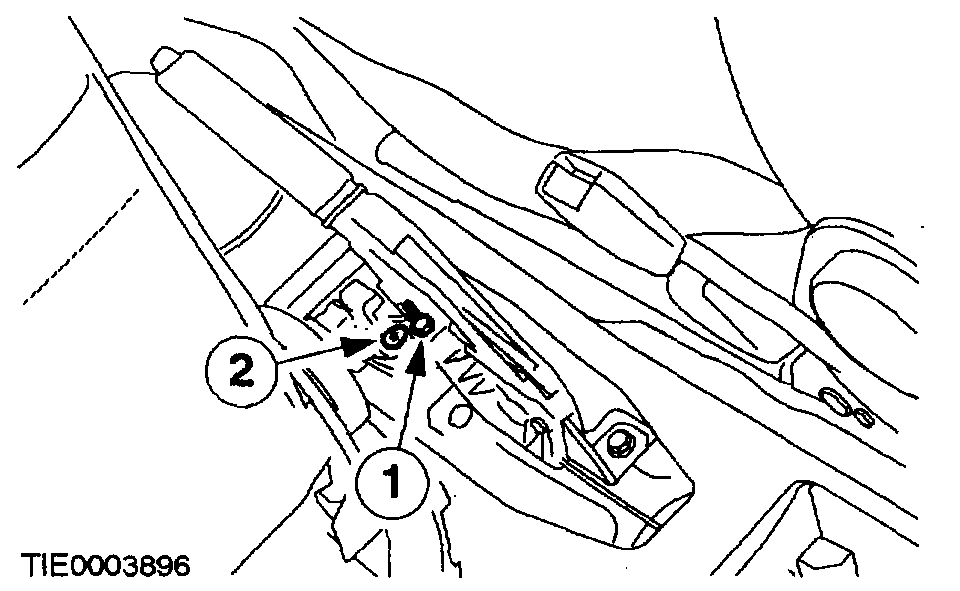
3. Loosen the parking brake cable adjustment nut until there is no tension in the cable.
1 Remove the retaining clip.
2 Loosen the adjustment nut.
4. Remove the wheels and tires.
pic 3
Vehicles with anti-lock brakes
5. Detach the wheel speed sensor.
pic 4
All vehicles
6. CAUTION: Do not remove the brake drum by means of the hub retaining nut.
Remove the brake drum and hub assembly.
pic 5
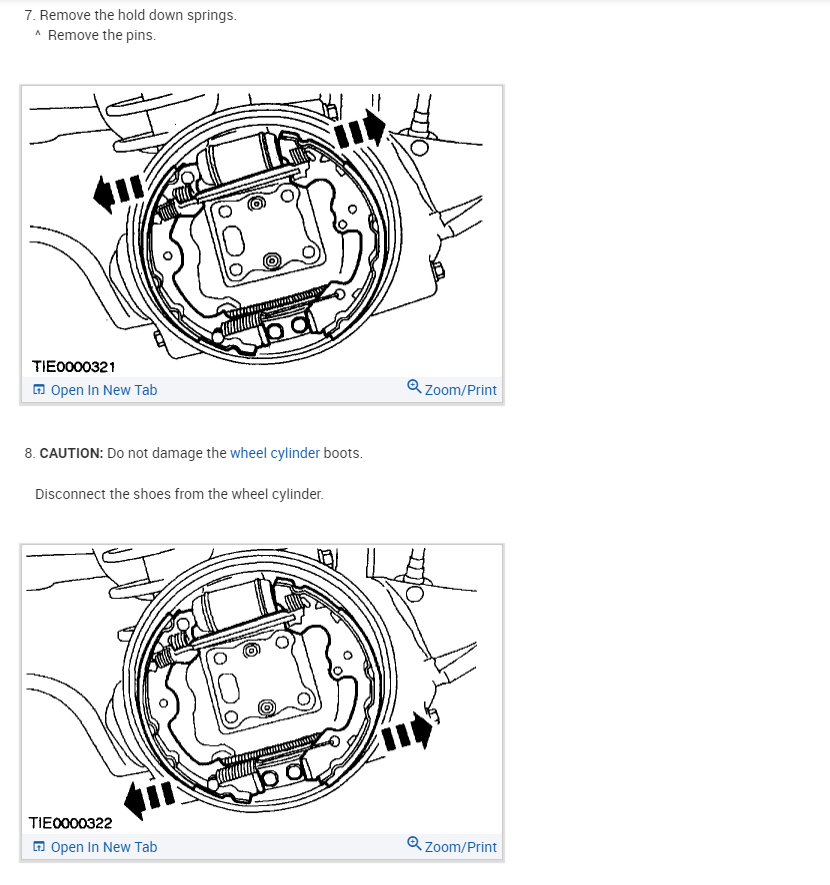
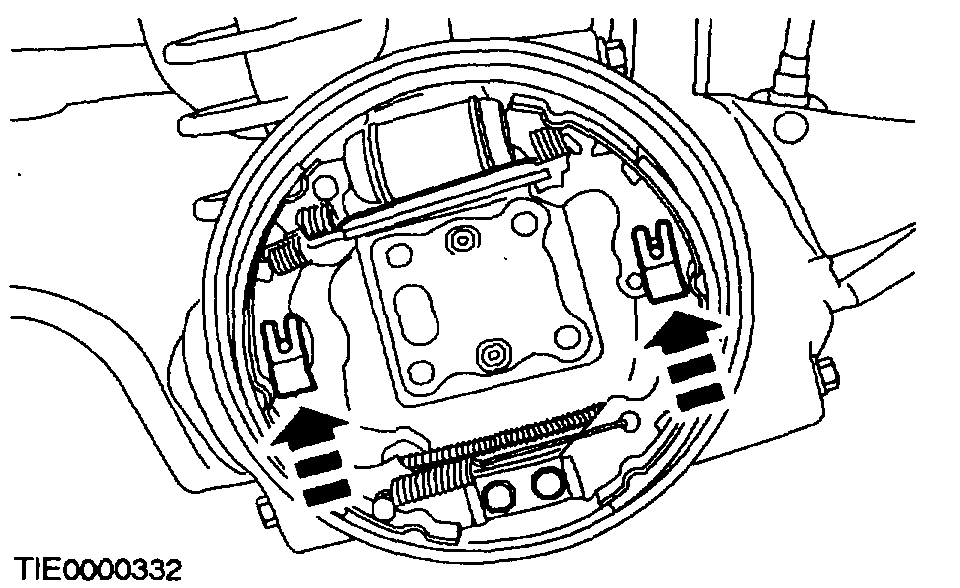
7. Remove the hold down springs.
^ Remove the pins.
pic 6
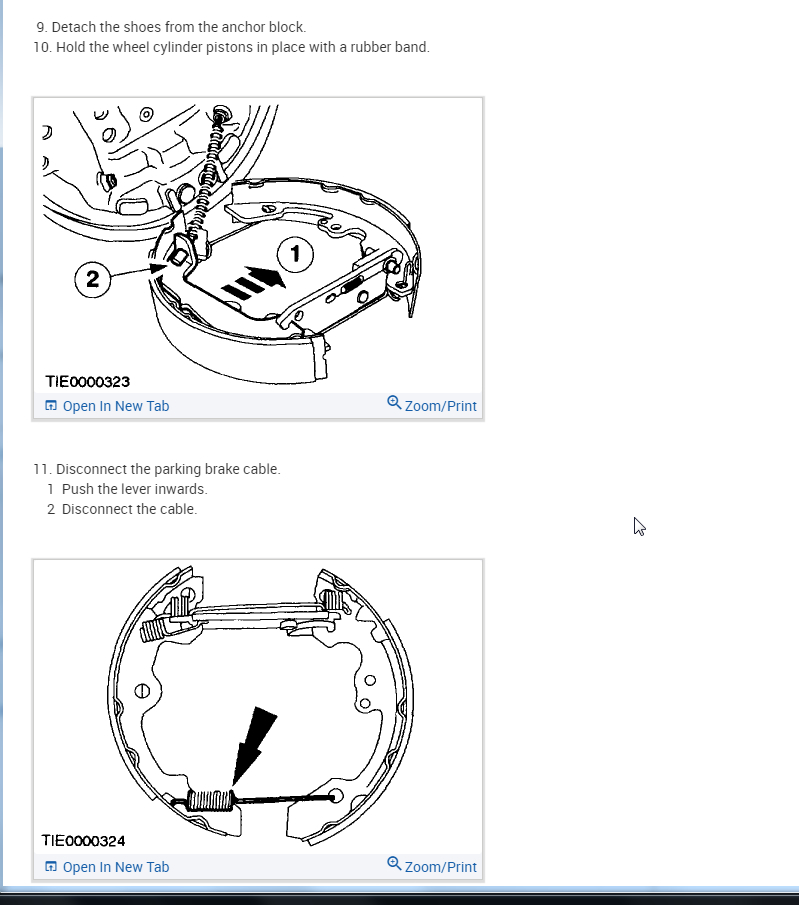
8. CAUTION: Do not damage the wheel cylinder boots.
Disconnect the shoes from the wheel cylinder.
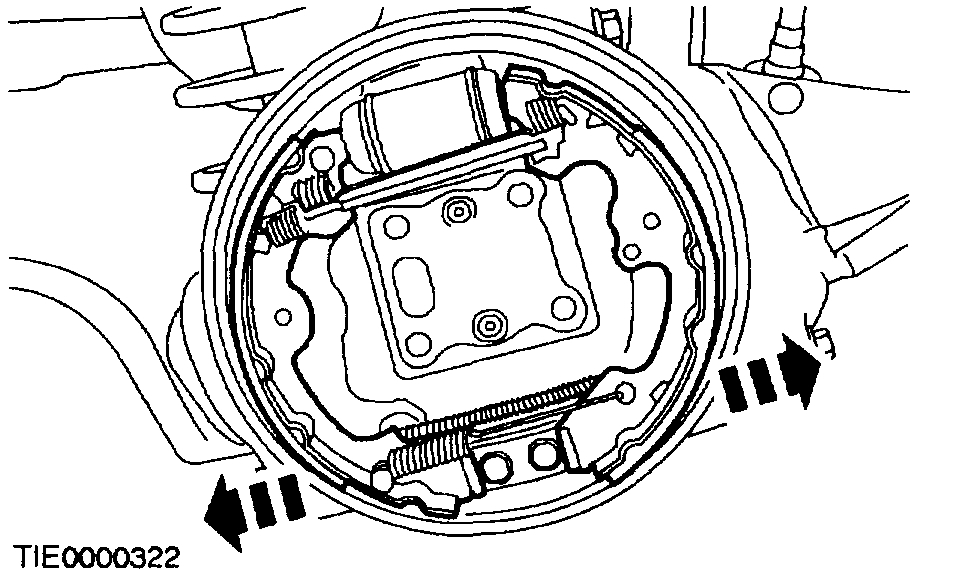
pic 7
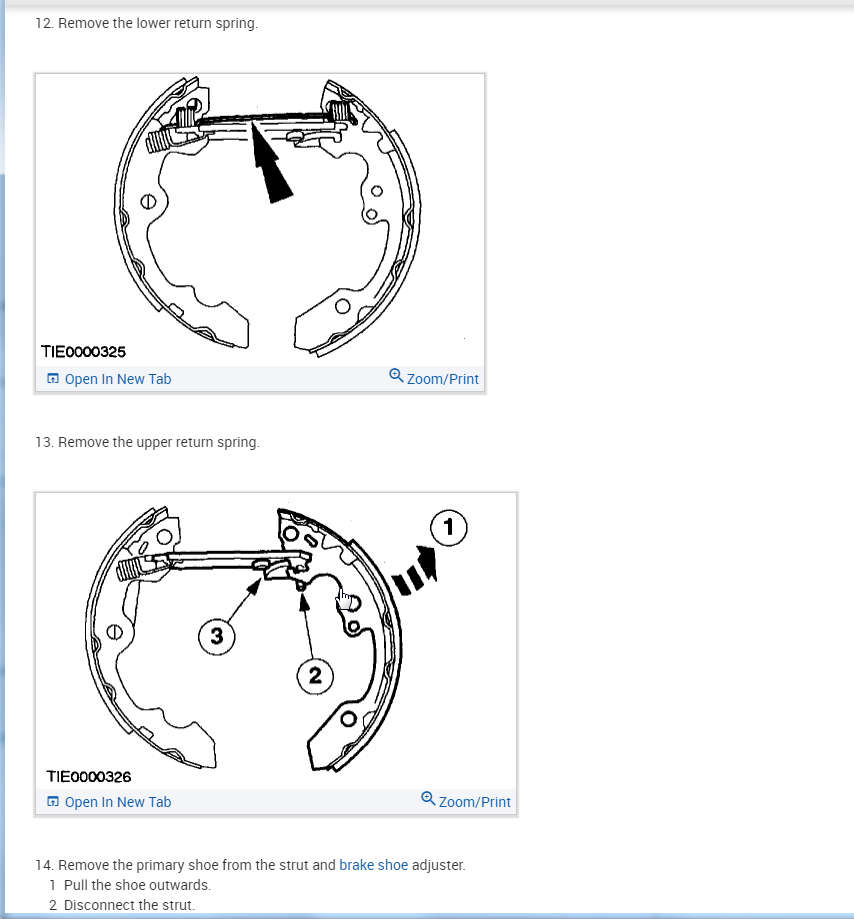
9. Detach the shoes from the anchor block.
10. Hold the wheel cylinder pistons in place with a rubber band.
pic 8
11. Disconnect the parking brake cable.
1 Push the lever inwards.
2 Disconnect the cable.
pic 9
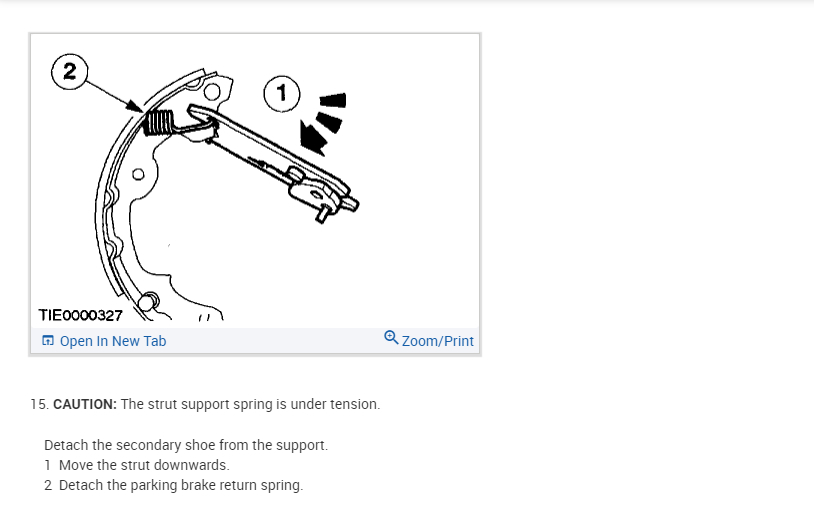
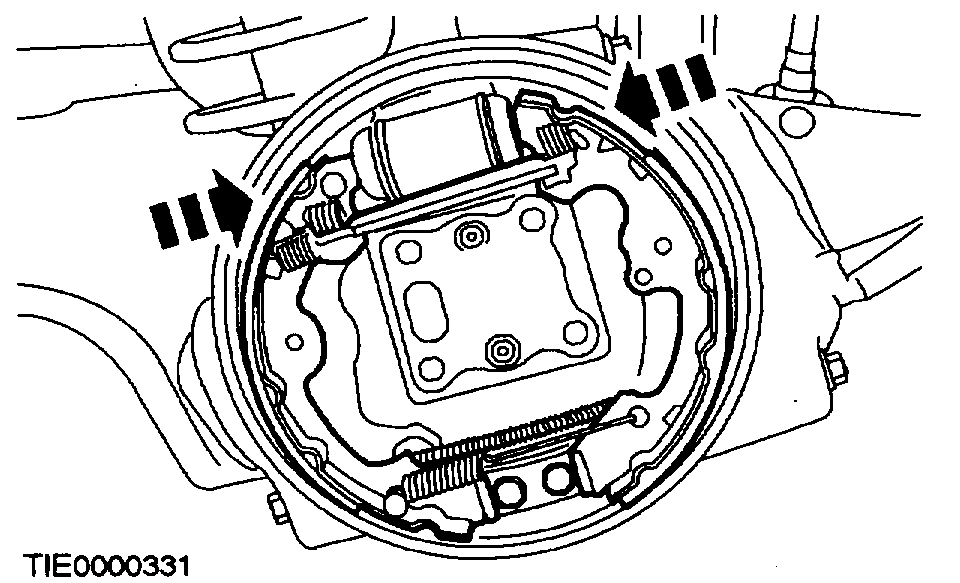
12. Remove the lower return spring.
pic 10
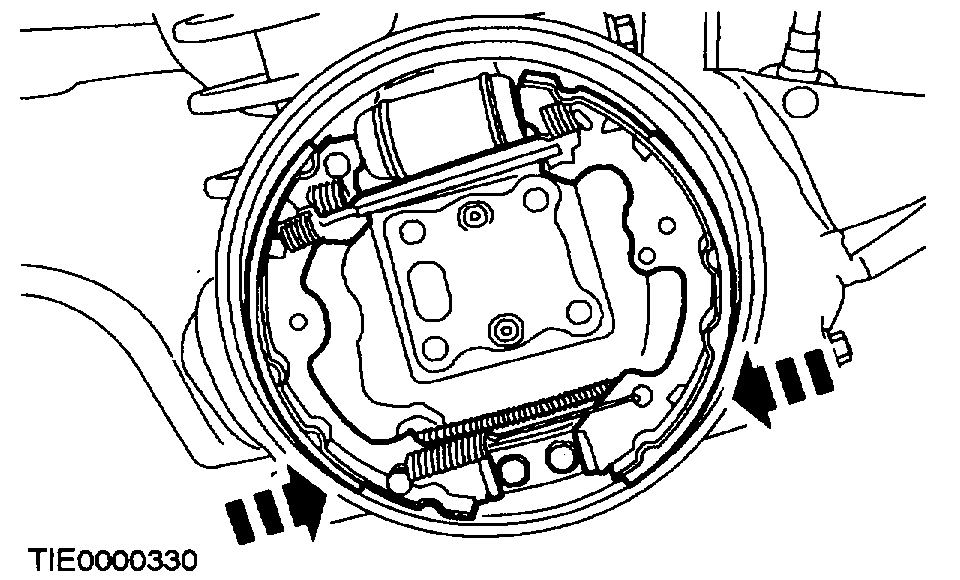
13. Remove the upper return spring.
pic 11
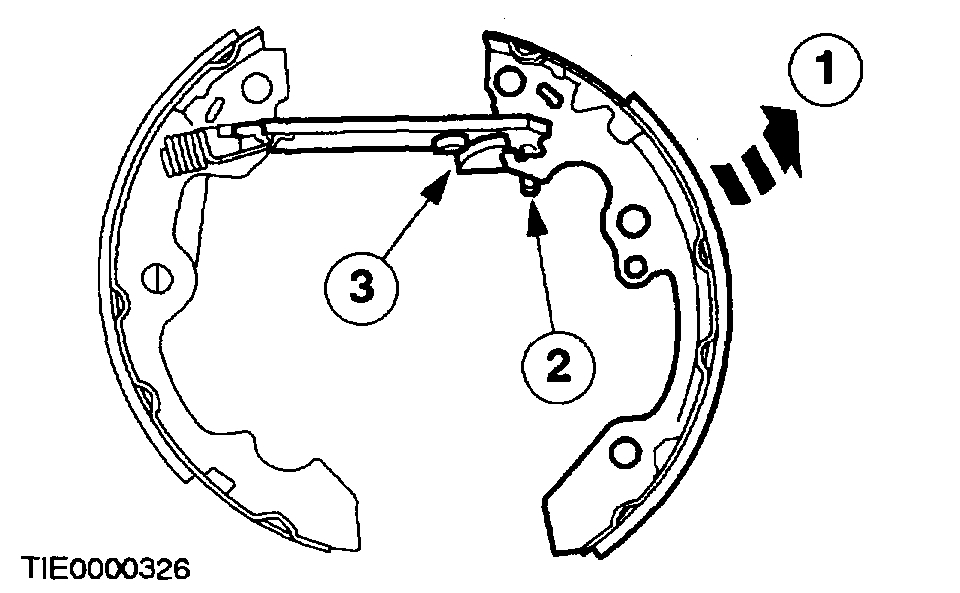
14. Remove the primary shoe from the strut and brake shoe adjuster.
1 Pull the shoe outwards.
2 Disconnect the strut.
3 Release the strut.
pic 12
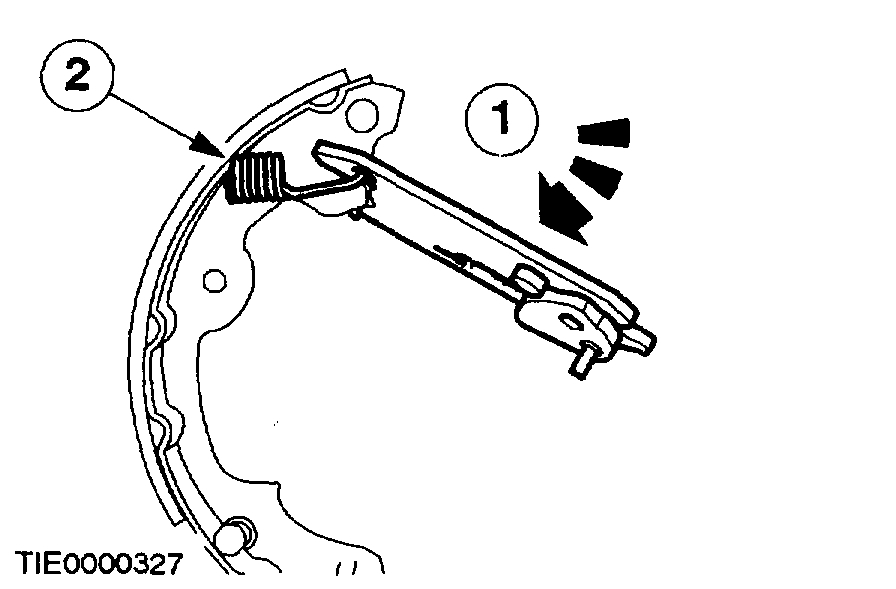
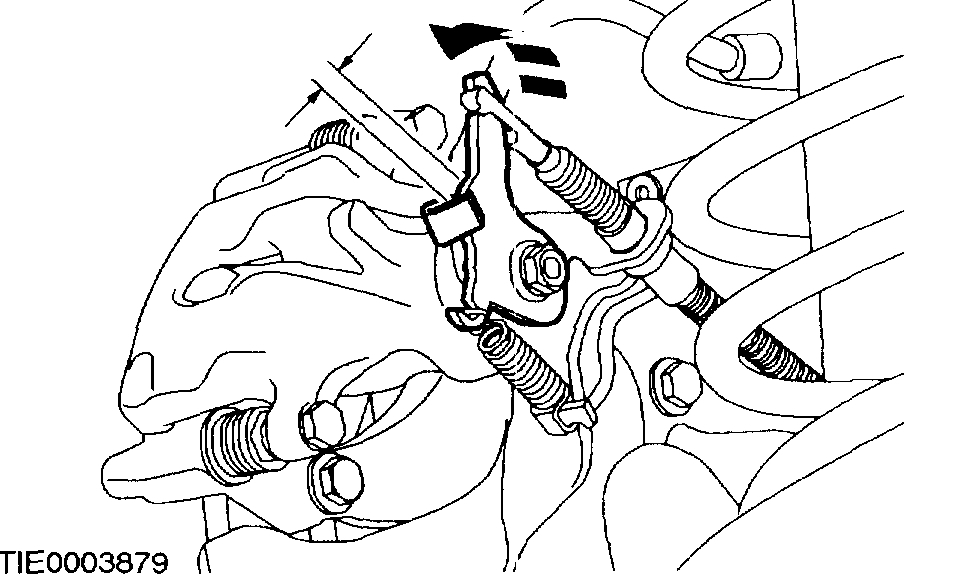
15. CAUTION: The strut support spring is under tension.
Detach the secondary shoe from the support.
1 Move the strut downwards.
2 Detach the parking brake return spring.
Installation
All Vehicles
1. Clean, check and apply silicon dielectric compound grease to the backing plate contact points.
pic 13
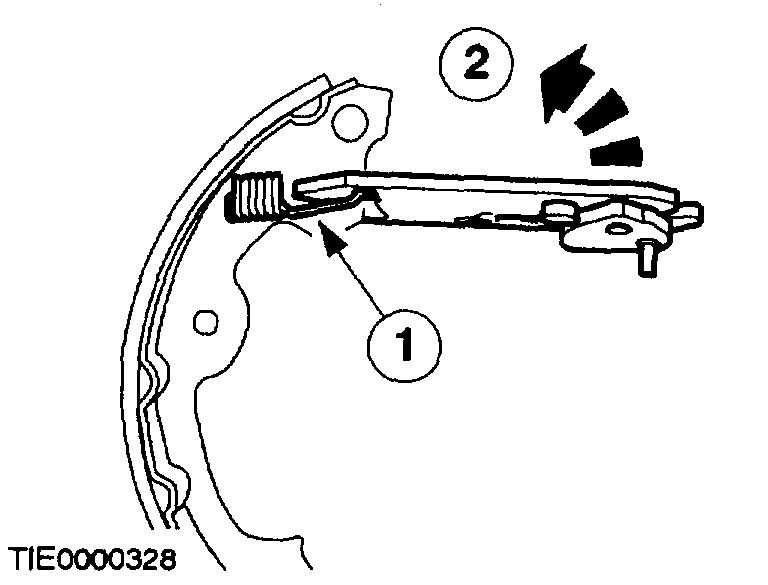
2. Install the strut support to the secondary shoe.
1 Install the parking brake return spring.
2 Move the strut upwards.
pic 14
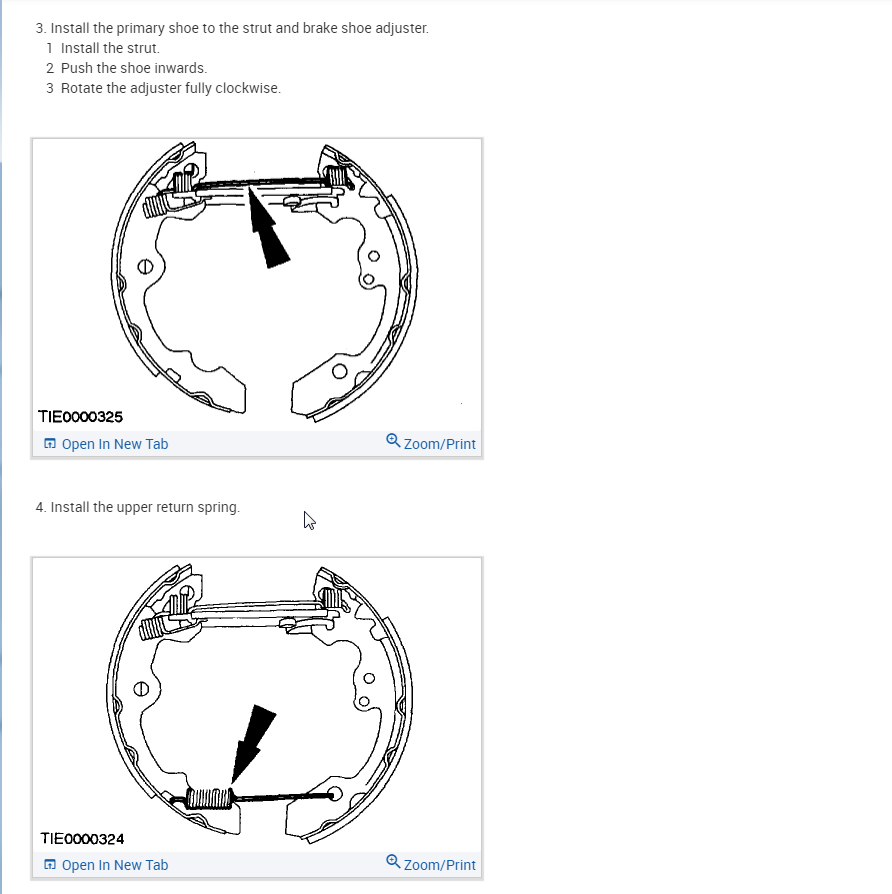
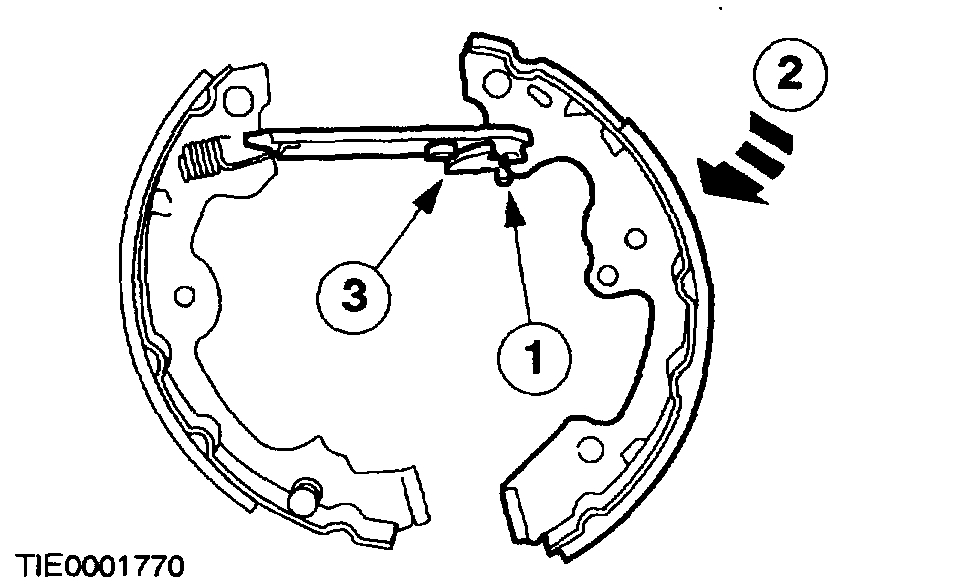
3. Install the primary shoe to the strut and brake shoe adjuster.
1 Install the strut.
2 Push the shoe inwards.
3 Rotate the adjuster fully clockwise.
pic 15
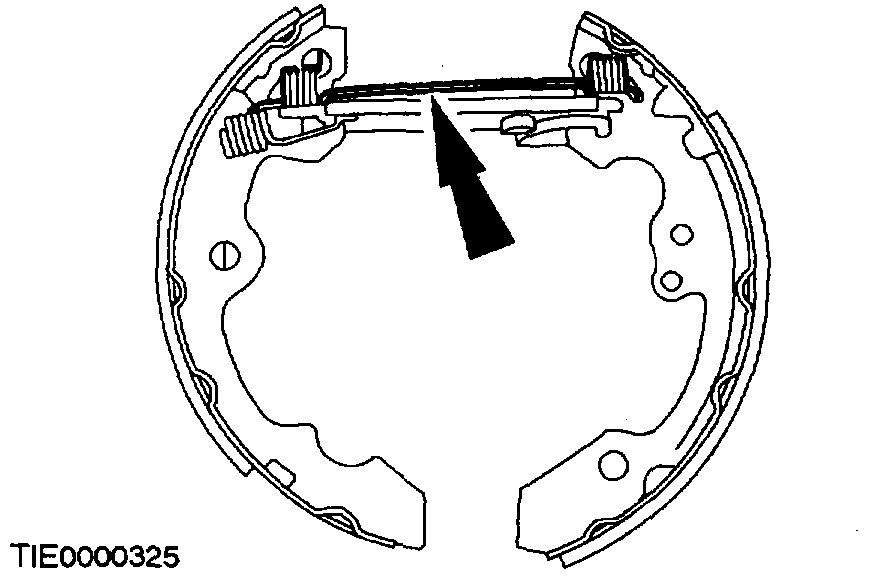
4. Install the upper return spring.
pic 16
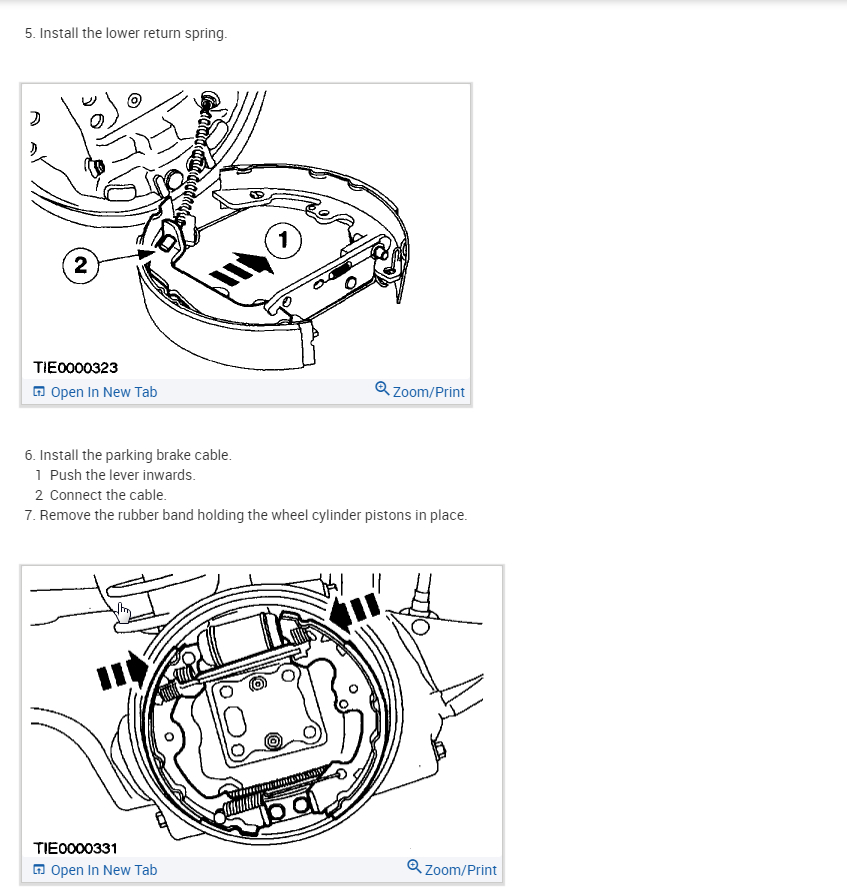
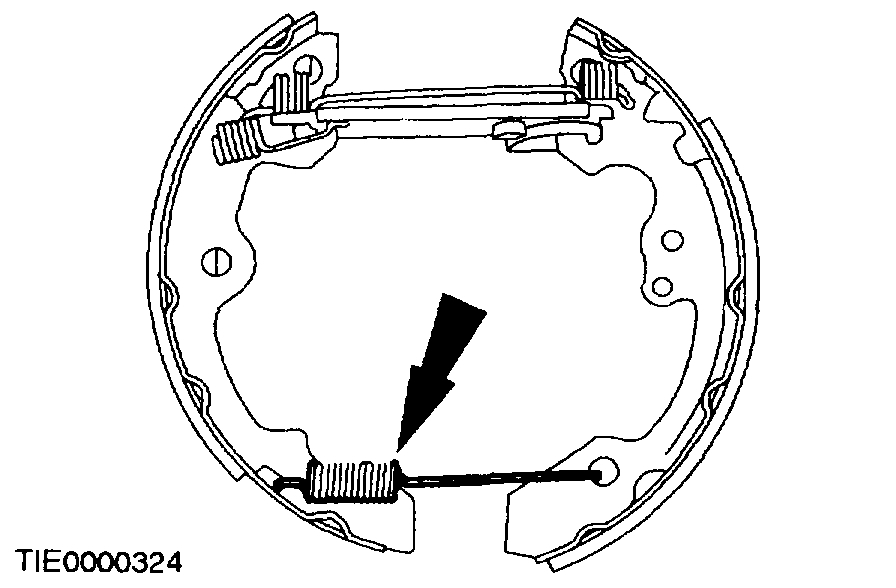
5. Install the lower return spring.
pic 17
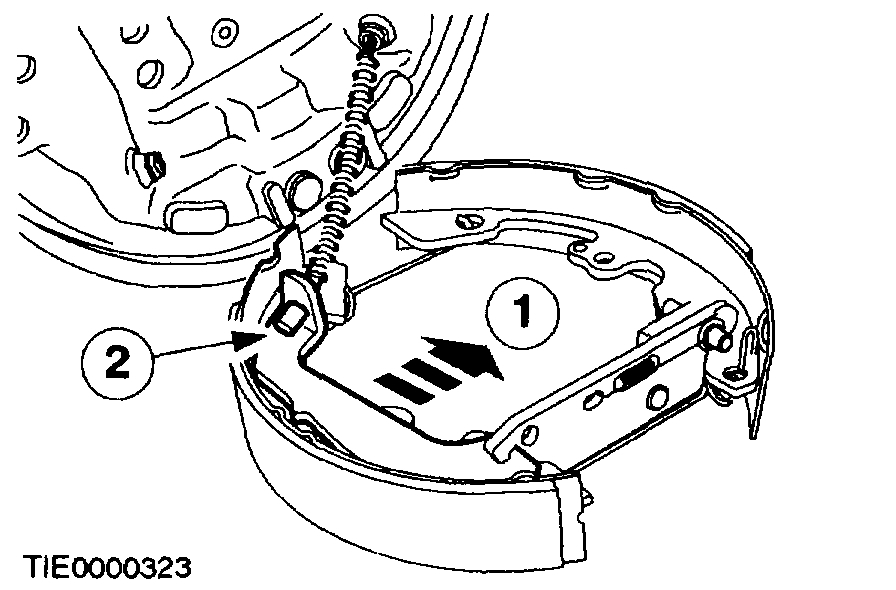
6. Install the parking brake cable.
1 Push the lever inwards.
2 Connect the cable.
7. Remove the rubber band holding the wheel cylinder pistons in place.
pic 18
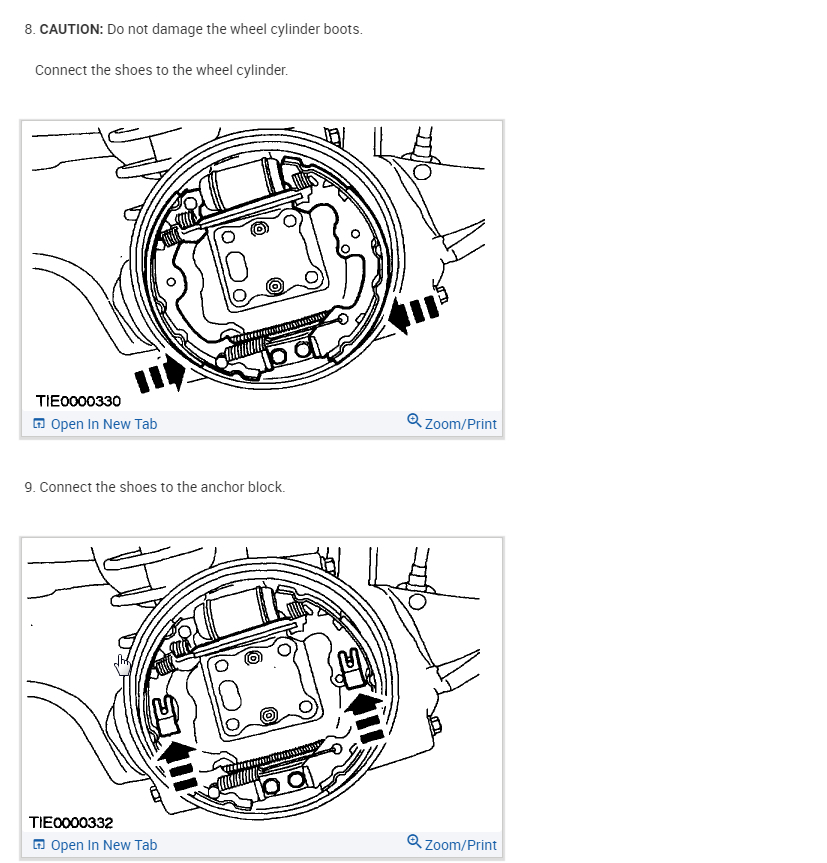
8. CAUTION: Do not damage the wheel cylinder boots.
Connect the shoes to the wheel cylinder.
pic 19
9. Connect the shoes to the anchor block.
pic 20
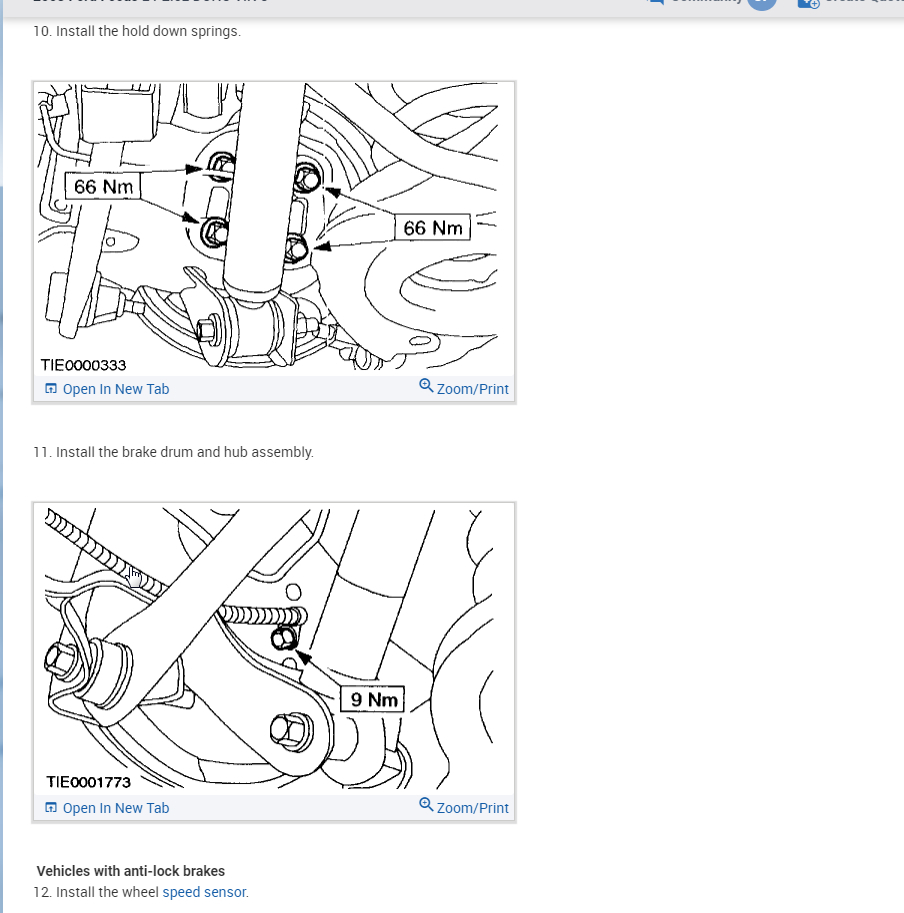
10. Install the hold down springs.
pic 21
11. Install the brake drum and hub assembly.
pic 22
Vehicles with anti-lock brakes
12. Install the wheel speed sensor.
All Vehicles
13. Install the wheels and tires.
14. NOTE: The internal auto adjuster must be set and the brake shoes centralized to the brake drum.
Rotate the rear wheels and apply the brake pedal four times.
15. Carry out parking brake cable adjustment.
______________________________________________________
Here are the directions for adjustment of the parking brake. Just adding them if needed.
2003 Ford Focus L4-2.0L SOHC VIN P
Adjustments
Vehicle Brakes and Traction Control Parking Brake System Parking Brake Cable Adjustments
ADJUSTMENTS
Parking Brake Cable Adjustment
pic 23
All Vehicles
1. Remove the parking brake control boot.
1 Detach the boot clip.
2 Remove the boot.
2. NOTE: Make sure the rear brakes are at a cool temperature.
Release the parking brake control to its lowest position.
pic 24
3. Loosen the parking brake cable adjustment nut until there is no tension in the cable.
1 Remove the retaining clip.
2 Loosen the adjustment nut.
4. Apply and release the brake pedal to make sure the rear brakes are correctly adjusted.
5. Raise and support the vehicle.
6. Make sure the parking brake cable and conduit is correctly routed and located in its clips.
pic 25
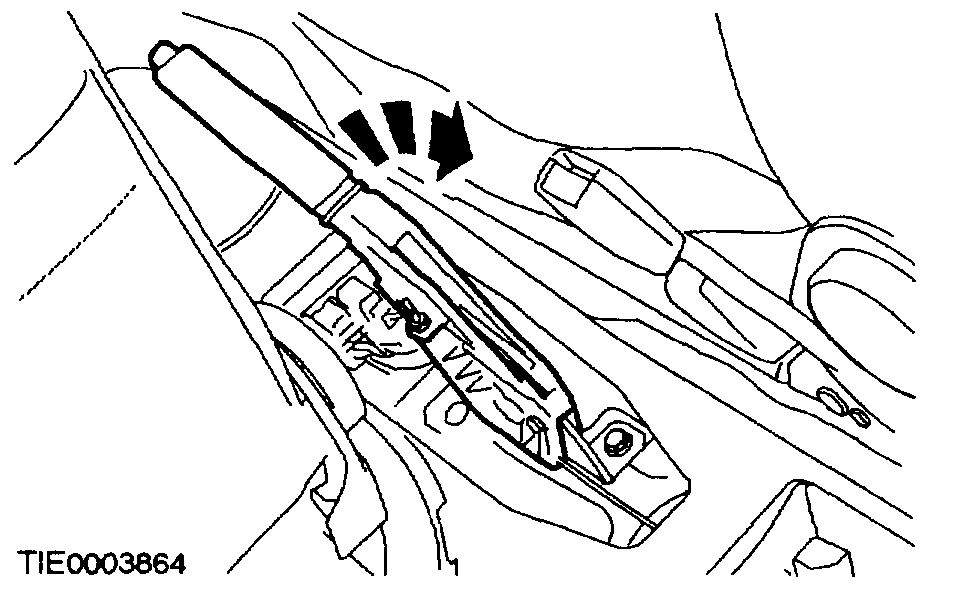
7. Raise the parking brake control up four notches.
pic 26
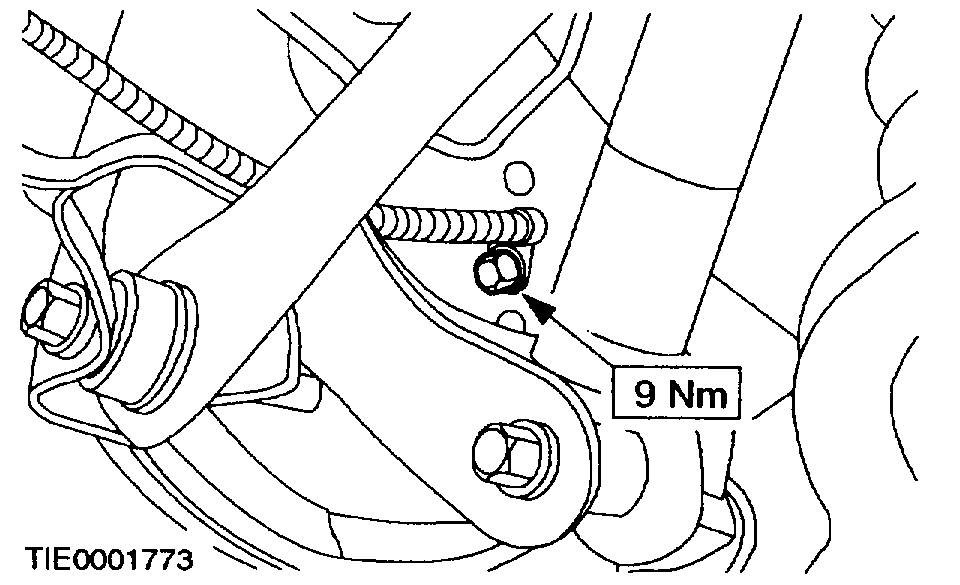
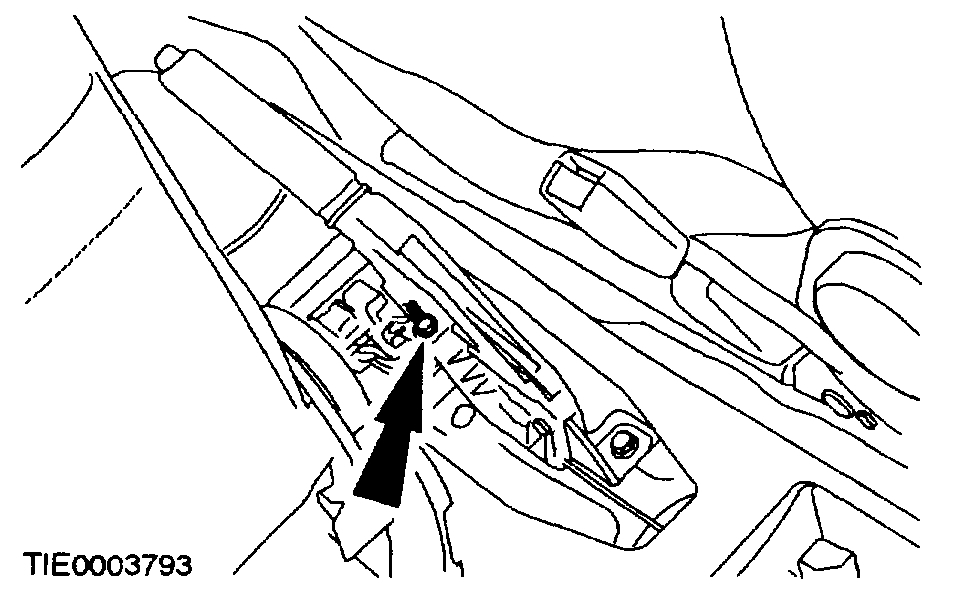
8. Tighten the parking brake cable adjustment nut until increased torque is noticed.
9. Apply and release the handbrake lever several times with sufficient force to settle the parking brake system.
10. Release the parking brake control to its lowest position.
pic 27
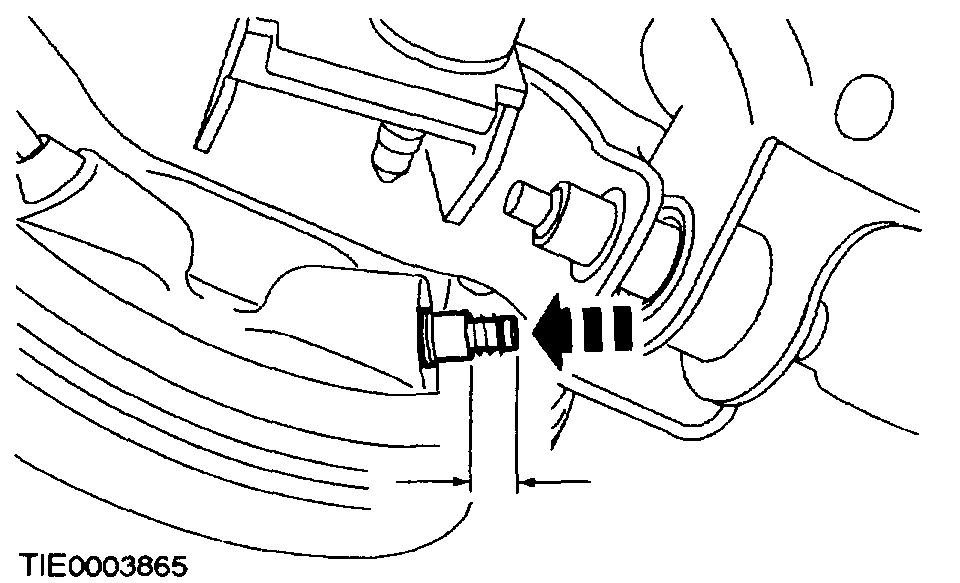
Vehicles with rear drum brakes
11. CAUTION: If adjusting the cable does not affect the plunger movement, then the cable is either damaged, binding or seized. Install a new cable and conduit.
NOTE: The total movement of both the left-hand side and the right-hand side plungers added together should be between 1 mm and 8 mm.
Check the movement of the plunger in the left-hand side and the right-hand side backing plates. If further adjustment is required, adjust the cable using the parking brake cable adjustment nut.
pic 28
Vehicles with rear disc brakes
12. CAUTION: If adjusting the cable does not affect the caliper parking brake lever movement, then the cable is either damaged, binding or seized. Install a new cable and conduit.
NOTE: The total movement between both the left-hand side and the right-hand side caliper parking brake lever and the stop added together should be between 0.5 mm and 2 mm.
Check the movement of the caliper parking brake lever on the left-hand side and right-hand side. If further adjustment is required, adjust the cable using the parking brake cable adjustment nut.
13. Rotate the rear wheels to make sure that no brake drag is apparent.
pic 29
14. Install the parking brake adjustment nut retaining clip.
1 Make sure the parking brake adjustment nut is in the correct position after adjustment.
2 Install the retaining clip.
15. Install the parking brake control boot.
______________________________________________
Let me know if that helps.
Take care,
Joe
Images (Click to enlarge)
Mar 15, 2021 at 7:41 PM