Good evening,
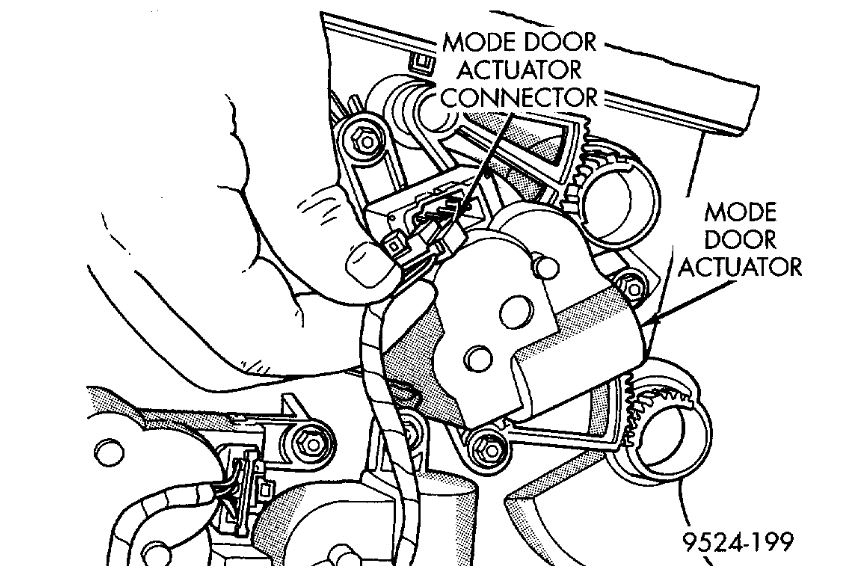
There is a mode door actuator inside the dash that controls the defroster. It requires removal of the instrument panel or the dashboard. This is a big job.
Roy
REMOVAL
1. Remove the lower steering column cover.
2. Remove the metal knee blocker panel.
Range Indicator
imageOpen In New TabZoom/Print
3. Disconnect the transmission range indicator cable end from shift lever by flexing the HOOP on the transmission shift cable rearward and slip the indicator cable loop off the lever pin.
4. Disconnect the clip holding the indicator cable to the steering column/transmission shift cable bracket.
5. Remove the instrument cluster bezel.
6. Rotate top of the cluster rearward.
7. Disconnect the wire connector from back of the instrument cluster.
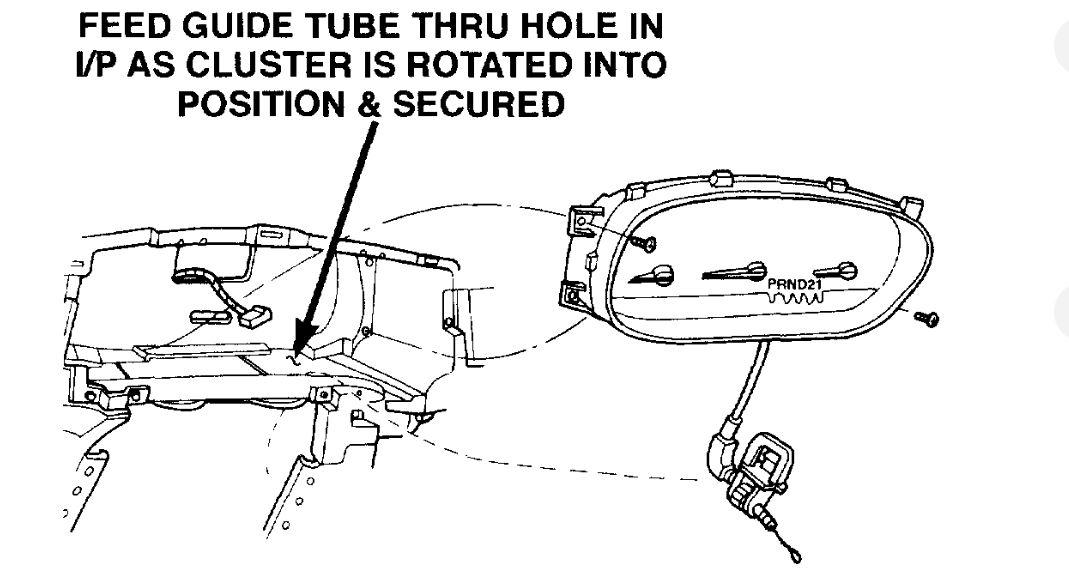
Removing And Installing Cluster
imageOpen In New TabZoom/Print
8. Remove the instrument cluster carefully while guiding the range indicator cable and guide tube through the opening to avoid any damage.
INSTALLATION
1. Verify the free travel of the range indicator cable from P to 1 by gently pulling on the cable and relaxing the cable. DO NOT SNAP THE CABLE ONCE IT IS PULLED.
2. Position the instrument cluster in instrument panel and route the indicator cable and guide tube through the opening in the instrument panel. Position the cluster by leading the bottom in first, connect the wire connector, and rotate upward.
3. Install the screws to hold the instrument cluster to the instrument panel.
4. Install the instrument cluster bezel.
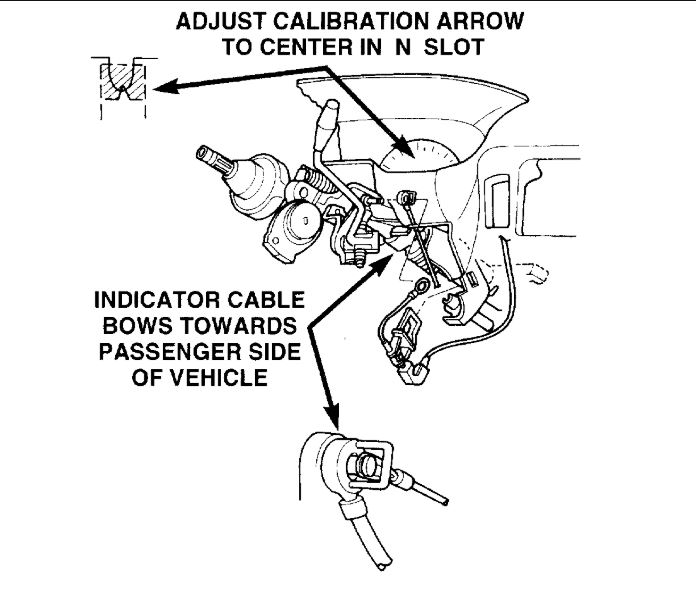
Range Indicator Cable
imageOpen In New TabZoom/Print
5. Connect the clip to hold the indicator cable to steering column/transmission shift cable bracket. The indicator cable and guide tube should BOW towards the passenger side of the vehicle.
6. Connect indicator cable loop end to shift lever by flexing the hoop on the transmission shift cable rearward, then slip the indicator cable loop over the shift lever pin and into the groove.
7. Assuming the transmission shift system is properly adjusted, place the shift lever in neutral N position.
NOTE: The parking brake should have been engaged for safety purposes.
8. Using the indicator adjuster thumbwheel on the indicator clip below the steering column. Rotate the indicator thumb wheel to position the indicator calibration arrow to the center of the N slot on the instrument cluster mask.
9. After the indicator has been properly adjusted, move the shift lever through each gear position to verify the appropriate gear position has been selected and the slot is fully covered by the indicator. The left edge of the indicator will just peek at the left edge of the P slot in Park.
10. If the indicator is not covering each of the selected gear positions when selected, place the shift lever back into neutral N and readjust the indicator. Repeat the process until each gear is covered when selected.
11. Install the metal knee blocker panel.
12. Install the lower steering column cover.
Images (Click to enlarge)
Mar 15, 2019 at 7:02 PM