Good afternoon,
You will need:
1. floor jack.
2. jack stand
3. Electric or air powered gun.
4. The special tools are listed in the procedure.
5. 32,34 or 36 mm socket for removal of the axle nut. The reason for me listing 3 is there are different sizes based on 2 WD, AWD or different engine.
6. 18 mm socket for removal of the strut bolts.
Let me know if you have any other questions.
Roy
Front Wheel Drive Shaft Replacement
Special Tools
J 2619-01 - Slide Hammer
J 42128 - Hub Puller
J 44394-A - A Seal Protector
J 45341 - Rear Wheel Drive Shaft Removal Tools
Removal Procedure
1. Raise and support the vehicle. Refer to Lifting and Jacking the Vehicle (See: Vehicle Lifting > Procedures > Lifting and Jacking the Vehicle).
2. Remove the tire and wheel assembly. Refer to Tire and Wheel Removal and Installation (See: Wheels and Tires > Removal and Replacement).
imageOpen In New TabZoom/Print
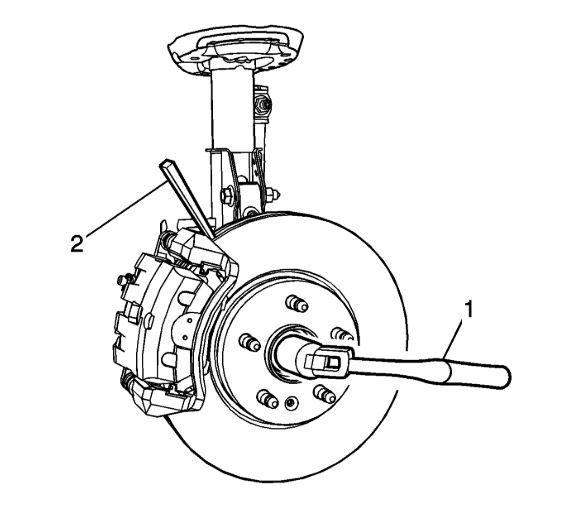
3. Insert a punch or a drift (2) in the cooling fins of the brake rotor.
4. Rotate the brake rotor until it rest against the brake caliper mounting bracket.
5. Using a breaker bar and the proper size socket (1), loosen the wheel drive shaft nut.
imageOpen In New TabZoom/Print
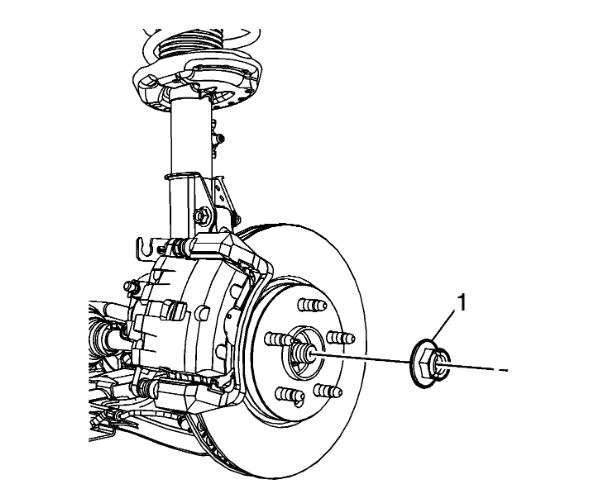
6. Remove the wheel drive shaft nut (1) and discard.
imageOpen In New TabZoom/Print
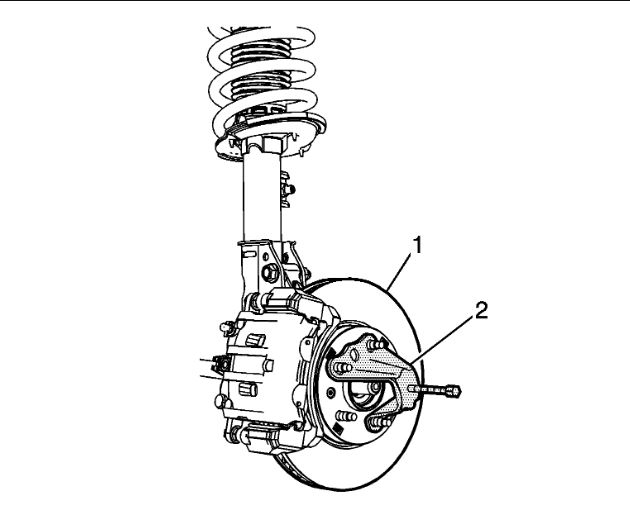
7. Using the J 42128 - puller (2), separate the wheel drive shaft from the wheel hub (1).
8. Separate the stabilizer link from the lower control arm. Refer to Stabilizer Shaft Link Replacement (See: Stabilizer Link > Removal and Replacement > Stabilizer Shaft Link Replacement).
9. Separate the outer tie rod end from the knuckle. Refer to Steering Linkage Outer Tie Rod Replacement (See: Tie Rod > Removal and Replacement > Steering Linkage Outer Tie Rod Replacement).
10. Separate the lower control arm from the knuckle. Refer to Lower Control Arm Replacement (See: Control Arm > Removal and Replacement > Lower Control Arm Replacement).
imageOpen In New TabZoom/Print
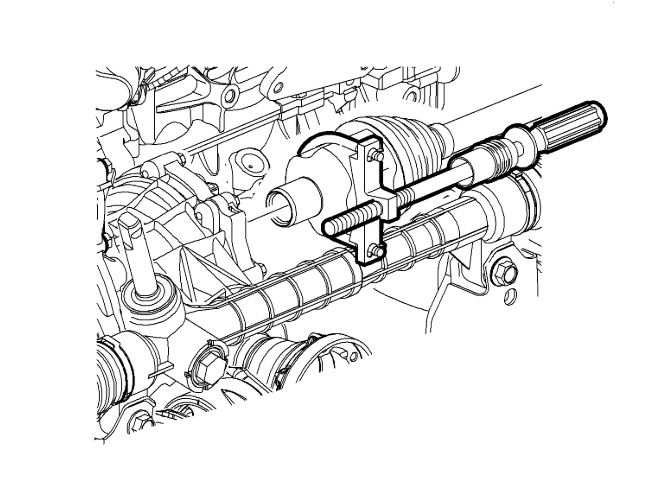
Note: The front axle shaft seal must be replaced once the wheel drive shaft has been removed. Replace with NEW only. DO NOT reuse the front axle shaft seal.
11. Using the J 2619-01 - hammer and the J 45341 - tool , remove the wheel drive shaft from the vehicle.
12. Remove the front axle shaft seal.
For those vehicles equipped with the 6T30/6T40/6T456T/50 transmission, refer to Front Wheel Drive Shaft Seal Replacement - Left Side (See: Seals and Gaskets, A/T > Removal and Replacement > Front Wheel Drive Shaft Seal Replacement - Left Side) for the left front axle shaft seal or Front Wheel Drive Shaft Seal Replacement - Right Side (See: Seals and Gaskets, A/T > Removal and Replacement > Front Wheel Drive Shaft Seal Replacement - Right Side) for the right front axle shaft seal.
For those vehicles equipped with the 6T70/6T75 transmission, refer to Front Wheel Drive Shaft Seal Replacement - Left Side (See: Seals and Gaskets, A/T > Removal and Replacement > Front Wheel Drive Shaft Seal Replacement - Left Side) for the left front axle shaft seal or Front Wheel Drive Shaft Seal Replacement - Right Side (See: Seals and Gaskets, A/T > Removal and Replacement > Front Wheel Drive Shaft Seal Replacement - Right Side) for the right front axle shaft seal.
Images (Click to enlarge)
May 31, 2020 at 10:07 AM