Hi and thanks for using 2CarPros.
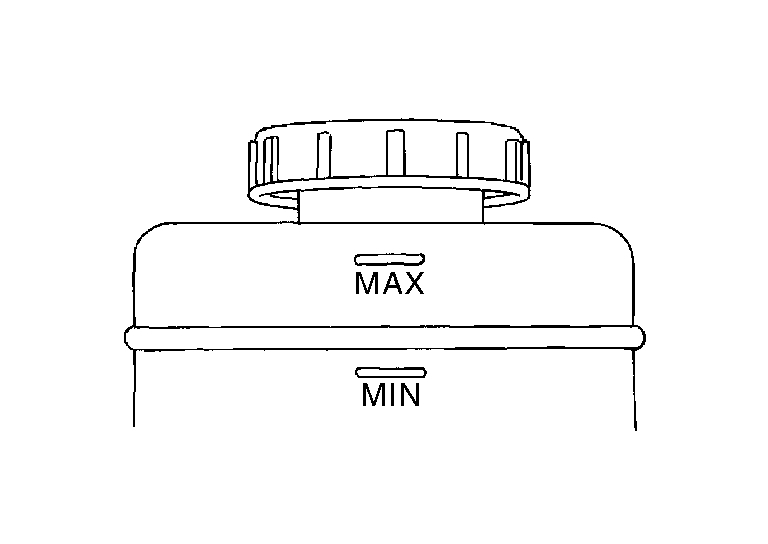
The clutch on this vehicle is hydraulic. First, confirm the clutch fluid under the hood in the reservoir is full. See picture 1
Also, take a look through this link":
https://www.2carpros.com/articles/clutch-doesnt-work-sometimes-or-not-at-all
Next, if it is low or empty, check for leaks between the clutch master cylinder (the clutch pedal attaches to this) and what is called the slave cylinder which is mounted at the transmission.
If you see no leaks and the fluid is full, either the clutch master cylinder is bad or the slave cylinder.
The easiest way to check which one is by opening the bleeder on the slave and depressing the clutch pedal. A strong flow of fluid should shoot out. If it is weak or does nothing but drain, replace the clutch master cylinder. Here are directions for that, The attached pictures correlate with these directions.
REMOVAL AND REPLACEMENT
CLUTCH MASTER CYLINDER
Removal and Installation
CAUTION:
- Do not spill clutch fluid onto painted surfaces. If fluid spills, wipe up immediately and wash the affected area with water.
- Do not disassemble clutch master cylinder.
NOTE:
When removing components such as hoses, tubes/lines, etc., cap or plug openings to prevent fluid from spilling.
REMOVAL
1.Remove battery. Refer to "Removal and Installation" See: Battery > Removal and Replacement > Removal and Installation.
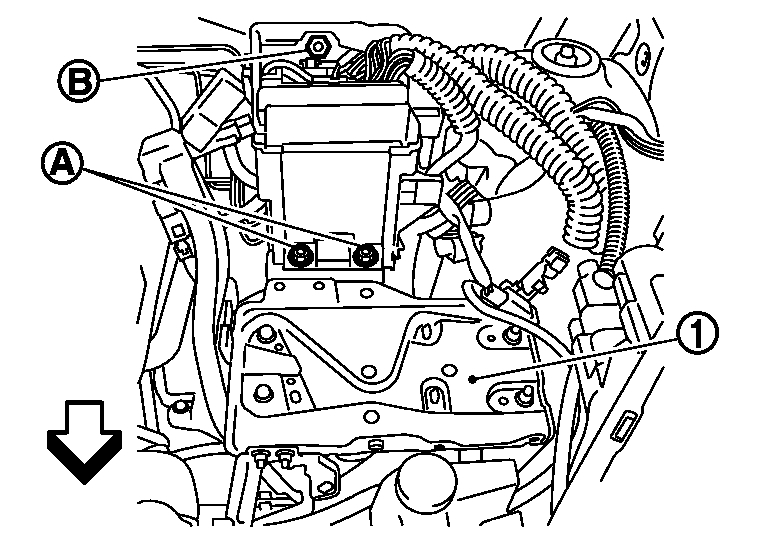
Picture 2
2.Remove IPDM E/R bracket bolts (A) and nut (B).
White arrow indicates : Front
3.Remove IPDM E/R bracket (1).
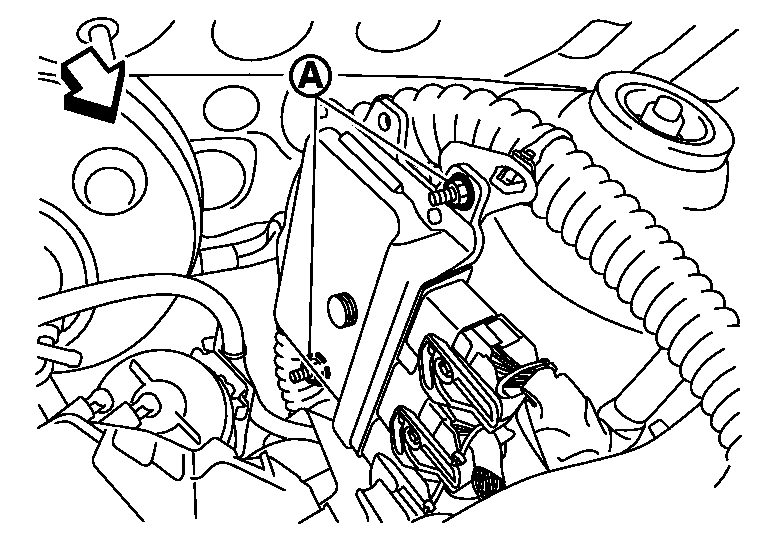
Picture 3
4.Remove ECM bracket nuts (A).
White arrow indicates : Front
Picture 4
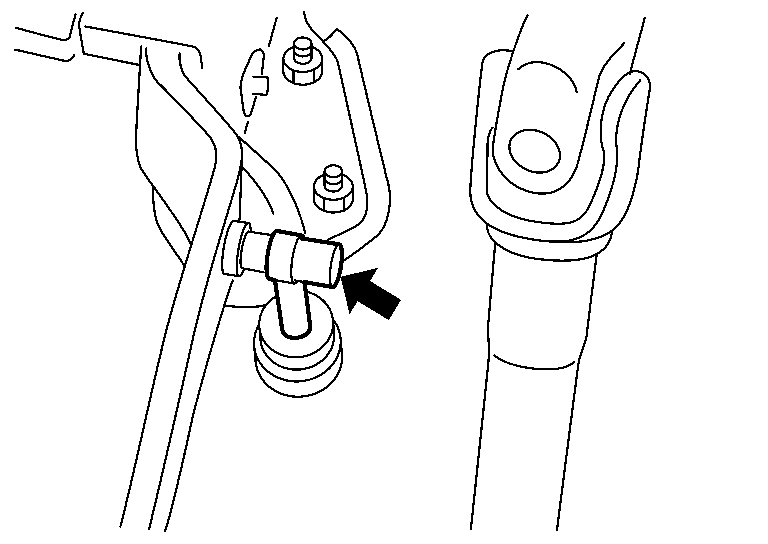
5.Remove master cylinder rod end (Black arrow) from clutch pedal.
6.Use one of the following methods to remove hose from master cylinder.
- Drain clutch fluid from reservoir tank and remove hose. Refer to "Draining" See: Clutch Fluid > Procedures > Draining.
- Remove hose from master cylinder.
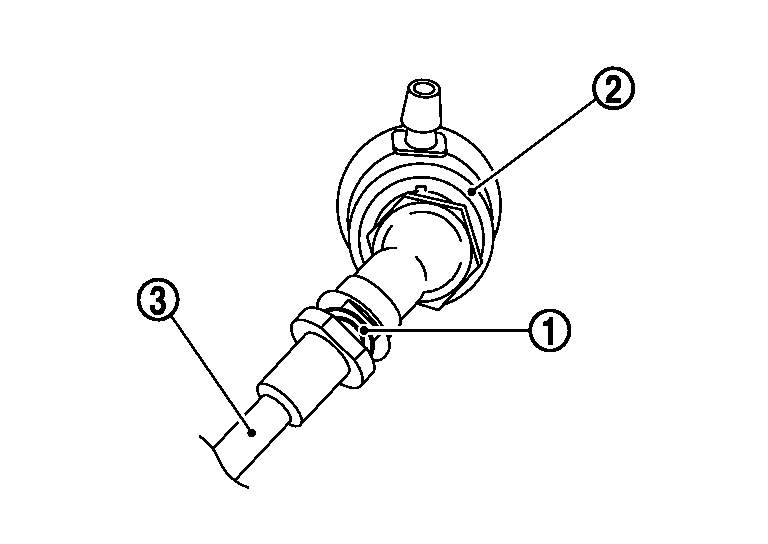
Picture 5
7.Pull up the lock pin (1) from connector of master cylinder (2) and separate clutch tube (3).
8.Rotate master cylinder clockwise by 45 degrees and then remove master cylinder from the vehicle.
INSTALLATION
CAUTION:
Do not spill clutch fluid onto painted surfaces. If fluid spills, wipe up immediately and wash the affected area with water.
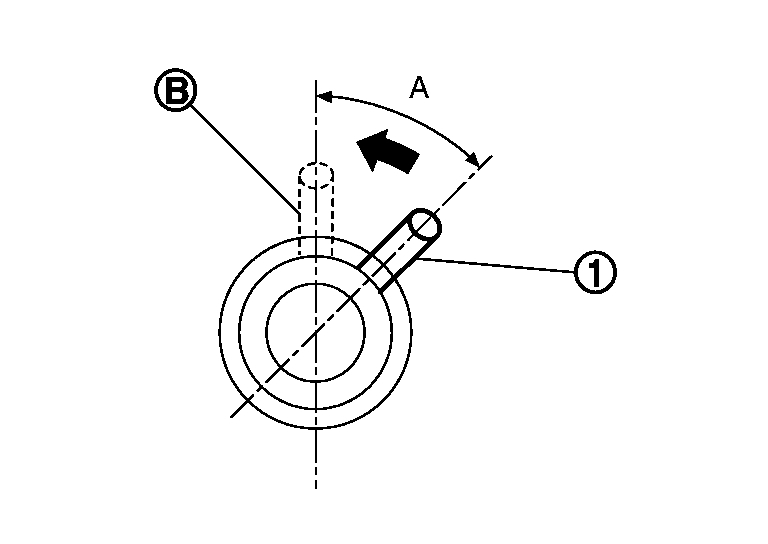
Picture 6
1.With the nipple (1) rotated clockwise by 45 degrees, insert clutch master cylinder into the mounting hole. Rotate the clutch master cylinder counterclockwise by 45 degrees (A) as shown to secure it. At this time, nipple is in the upward (B).
2.Install master cylinder rod end to clutch pedal.
CAUTION:
Press master cylinder rod end into clutch pedal until it stops.
3.Install reservoir hose to master cylinder.
4.Press down the lock pin into connector of master cylinder until it stops.
5.Install clutch tube into connector of master cylinder until it stops.
6.Fill with clutch fluid and bleed clutch hydraulic system. Refer to "Refilling" See: Clutch Fluid > Procedures > Refilling.
7.Installation of the remaining components is in the reverse order of removal.
_________________________________________________
CSC (CONCENTRIC SLAVE CYLINDER)
Removal and Installation
CAUTION:
- Do not reuse CSC (concentric slave cylinder). CSC slides back to the original position every time when removing transaxle assembly. At this time, dust on the sliding parts may damage the seal of
CSC and may cause clutch fluid leakage.
- Do not disassemble CSC.
- Do not spill clutch fluid onto painted surfaces. If fluid spills, wipe up immediately and wash the affected area with water.
REMOVAL
1.Remove transaxle assembly. Refer to "Removal and Installation" See: Manual Transmission/Transaxle > Removal and Replacement > Removal and Installation.
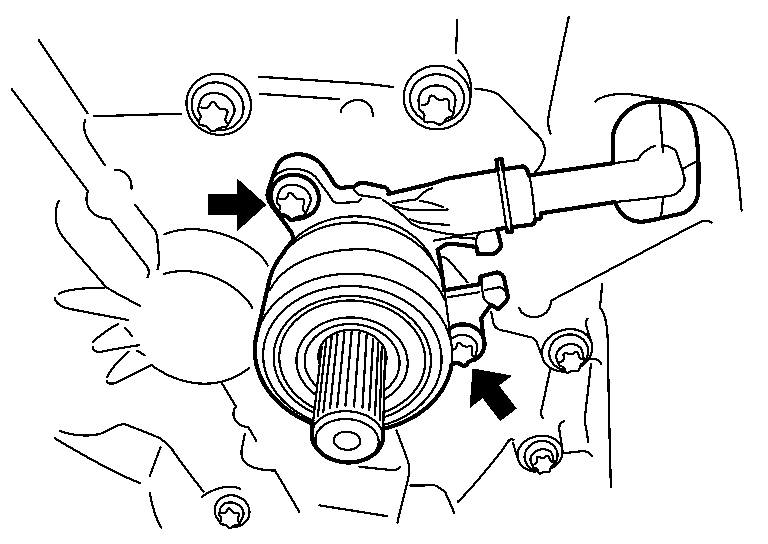
Picture 7
2.Remove CSC bolts and the CSC from clutch housing.
INSTALLATION
1.Install CSC to clutch housing and then tighten CSC bolts to the specified torque.
CAUTION:
- Do not reuse CSC.
- Do not insert and operate CSC when transaxle is removed. Piston and stopper of CSC components may fall off.
2.Install transaxle assembly. Refer to "Removal and Installation" See: Manual Transmission/Transaxle > Removal and Replacement > Removal and Installation.
Let me know if this helps or if you have other questions.
Joe
Images (Click to make bigger)
Thursday, February 7th, 2019 AT 7:31 PM