This sounds like the TIPM is out which is common, here are the instructions on how to replace it which is easy because it self initializes.
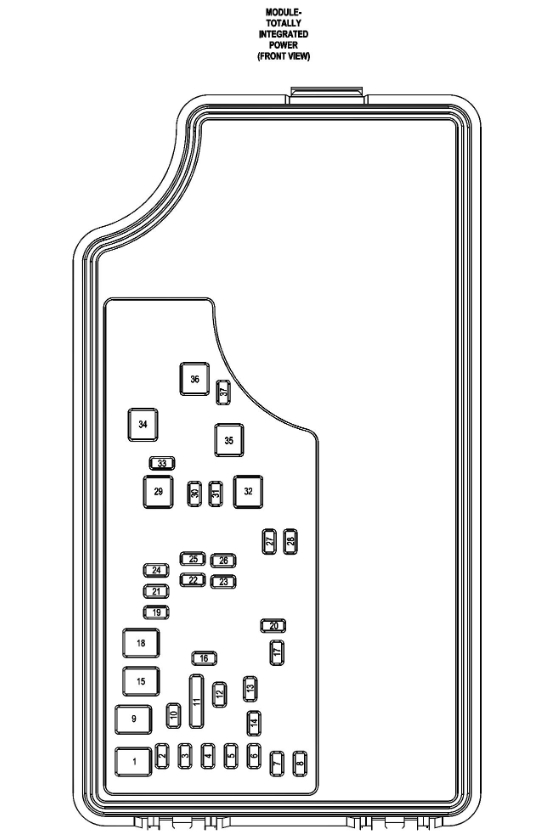
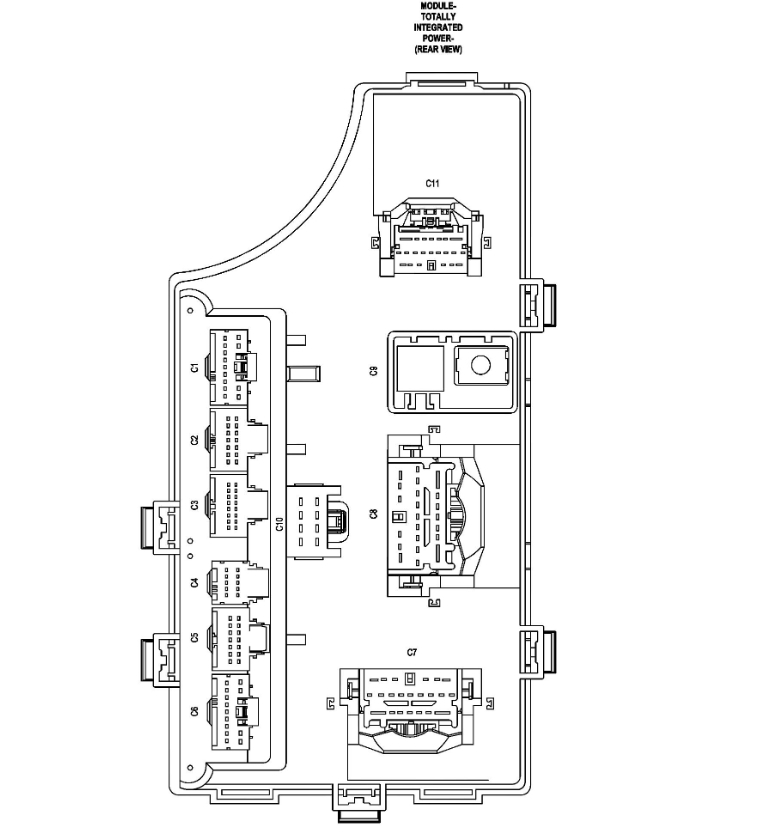
The Totally Integrated Power Module (TIPM) is serviced as a unit with the engine compartment wire harness. If any internal circuit of the TIPM or the TIPM housing is faulty or damaged, the entire TIPM and engine compartment wire harness unit must be replaced.
REMOVAL
Refer to Wiring Diagrams for more information on the locations of the affected connectors.
1. Open hood.
2. Disconnect and isolate the battery negative cable.
3. Disconnect each of the engine compartment wire harness connectors.
4. Remove the fasteners that secure each of the engine compartment wire harness ground eyelets to the vehicle body and chassis components.
5. Disengage each of the retainers that secure the engine compartment wire harness to the vehicle body and chassis components.
6. Disengage and remove the TIPM housing from its mounting bracket.
7. Remove the TIPM and the engine compartment wire harness from the engine compartment as a unit.
INSTALLATION
NOTE: If the Totally Integrated Power Module (TIPM) is being replaced with a new unit, be certain to transfer each of the fuses and relays from the old power distribution center to the proper cavities of the new power distribution center. Refer to Wiring Diagrams for the proper power distribution center cavity assignments.
1. Position the TIPM in the engine compartment.
2. Align the TIPM on its mounting bracket and install.
3. Route the engine compartment wire harness from the TIPM through the engine compartment, engaging each of the harness retainers to the mounting provisions in the vehicle body and chassis components. Refer to Wiring Diagrams for more information on the harness routing and retainer locations.
4. Install and tighten the fasteners that secure each of the engine compartment wire harness ground eyelets to the vehicle body and chassis components. Refer to Wiring Diagrams for more information on the ground eyelet locations.
5. Reconnect each of the engine compartment wire harness connectors. Refer to Wiring Diagrams for more information on the locations of the affected connectors.
6. Torque nut retaining positive battery cable at TIPM to 9.6 - 14.1 N.m (85 - 130 in. lbs.).
7. Reconnect the battery negative cable.
8. Close hood.
9. Verify vehicle and system operation.
Check out the diagrams (Below). Please let us know what happens.
Images (Click to enlarge)
Dec 18, 2007 at 3:14 PM