Hi,
Replacing the brake master cylinder isn't too hard of a job. And yes, you need to remove the two nuts that mount it to the brake booster.
First, here is a link that shows how in general one is replaced. You can use this as a guide.
https://www.2carpros.com/articles/how-to-replace-a-brake-master-cylinder
The new brake master cylinder will need bench bled before install. Here is a video that shows how that is done:
https://youtu.be/WDxvEQrMkBg
Here are directions specific to your vehicle. The attached pics below correlate with the directions.
_______________________________
2006 Chrysler Truck PT Cruiser L4-2.4L VIN B
LHD Without ABS
Vehicle Brakes and Traction Control Hydraulic System Brake Master Cylinder Service and Repair Procedures Master Cylinder LHD Without ABS
LHD WITHOUT ABS
MASTER CYLINDER
REMOVAL
LHD WITHOUT ABS
NOTE: Before proceeding, Refer to Service Precautions.
CAUTION: The vacuum in the power brake booster must be pumped down before removing the master cylinder to prevent the booster from sucking in any contamination. This can be done by pumping the brake pedal while the engine is not running until a firm brake pedal is achieved.
1. With the engine not running, pump the brake pedal 4-5 strokes until the pedal feel is firm.
2. If applicable to access battery negative terminal, unclip the air cleaner cover (two clips) and move the cover aside.
3. Remove the air cleaner housing by pulling straight up.
4. Disconnect the negative (ground) cable from the battery and isolate the cable.
5. Unlatch the power distribution center, lift it up, and move it to the side.
pic 1
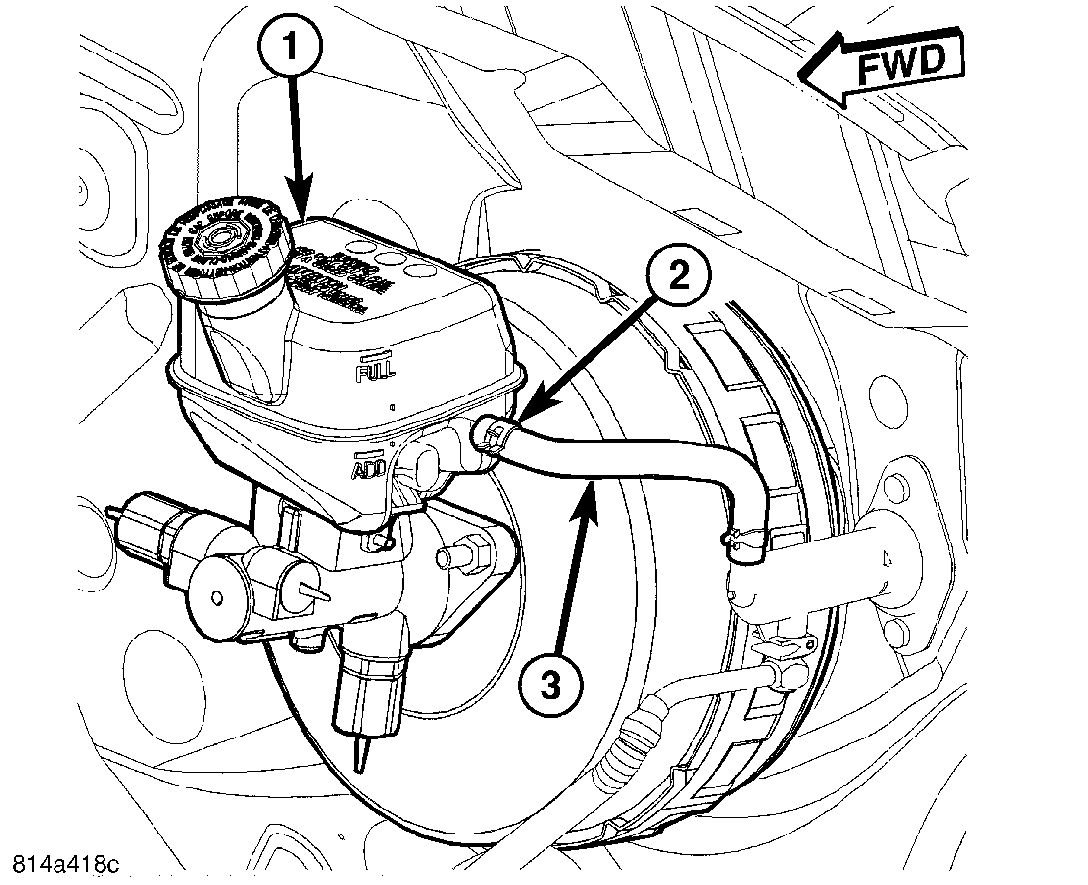
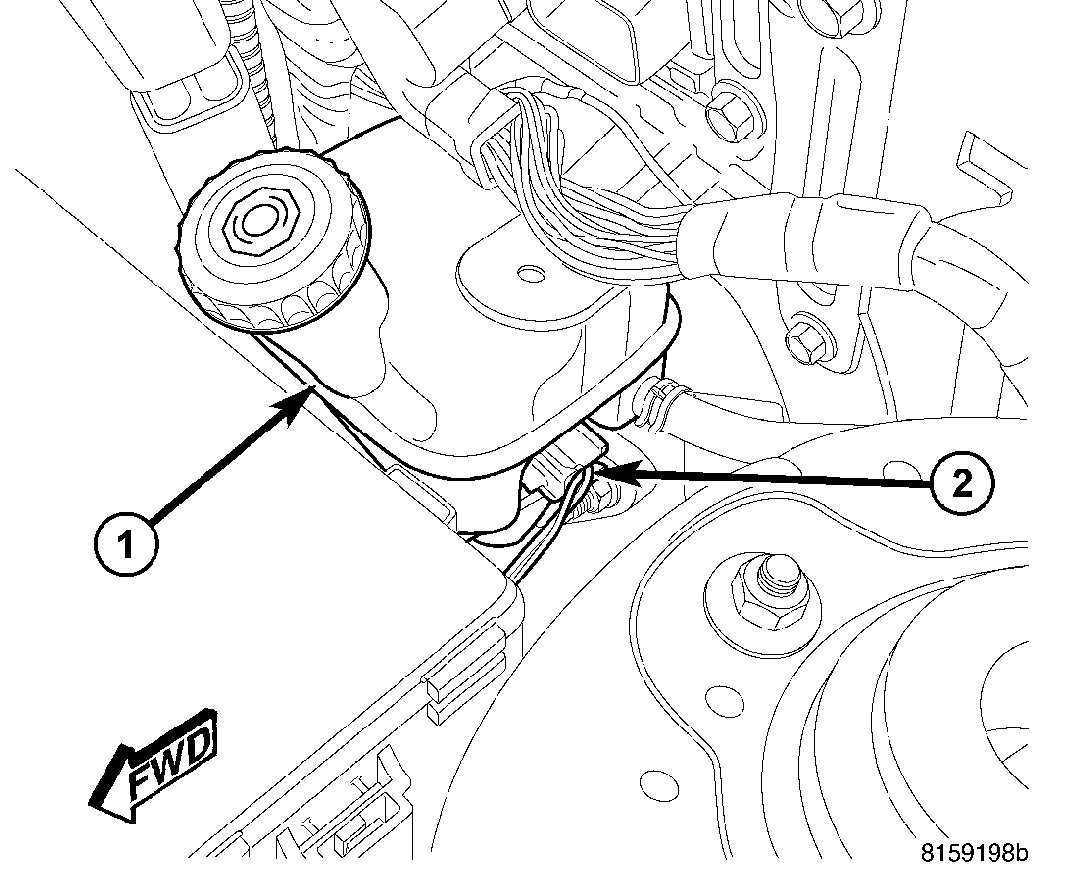
6. Remove the vehicle wiring harness connector (2) from brake fluid level switch in master cylinder brake fluid reservoir (1).
pic 2
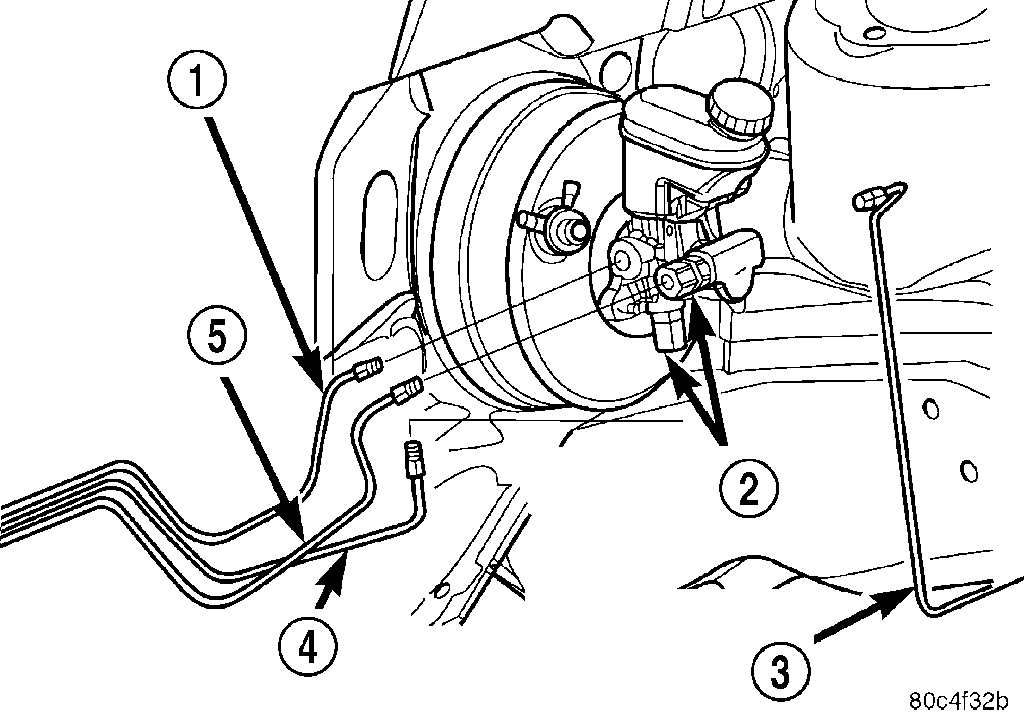
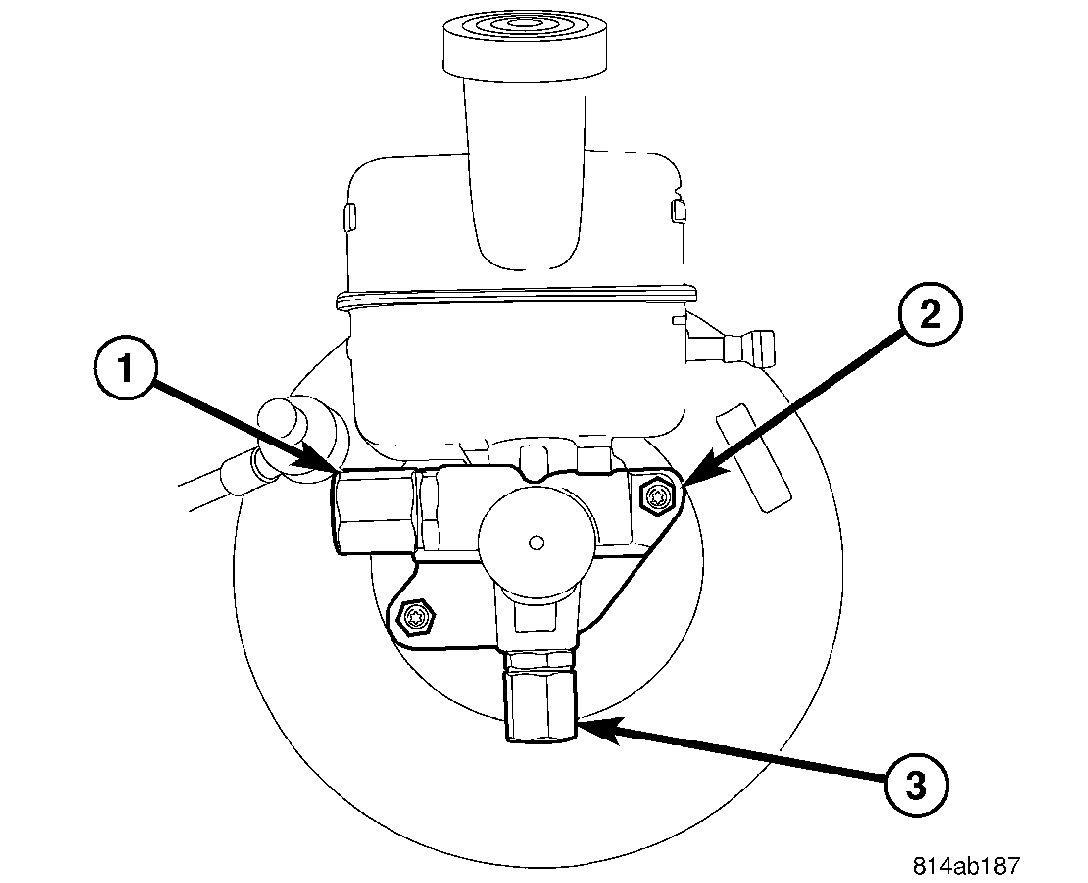
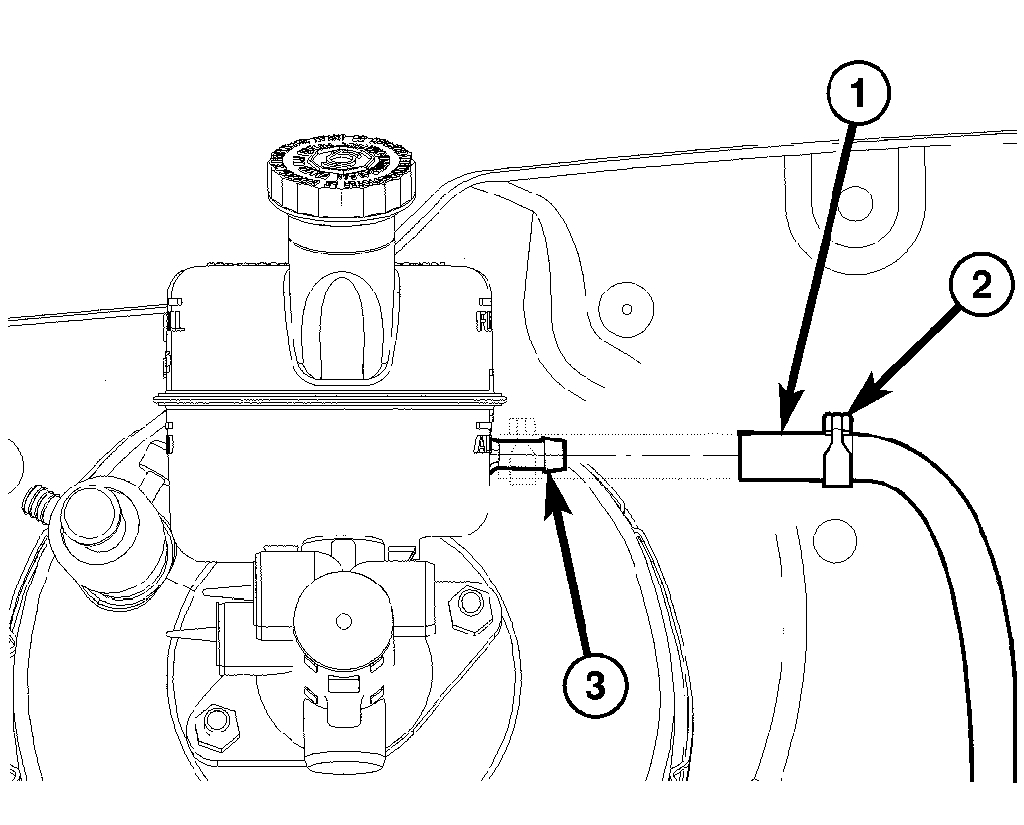
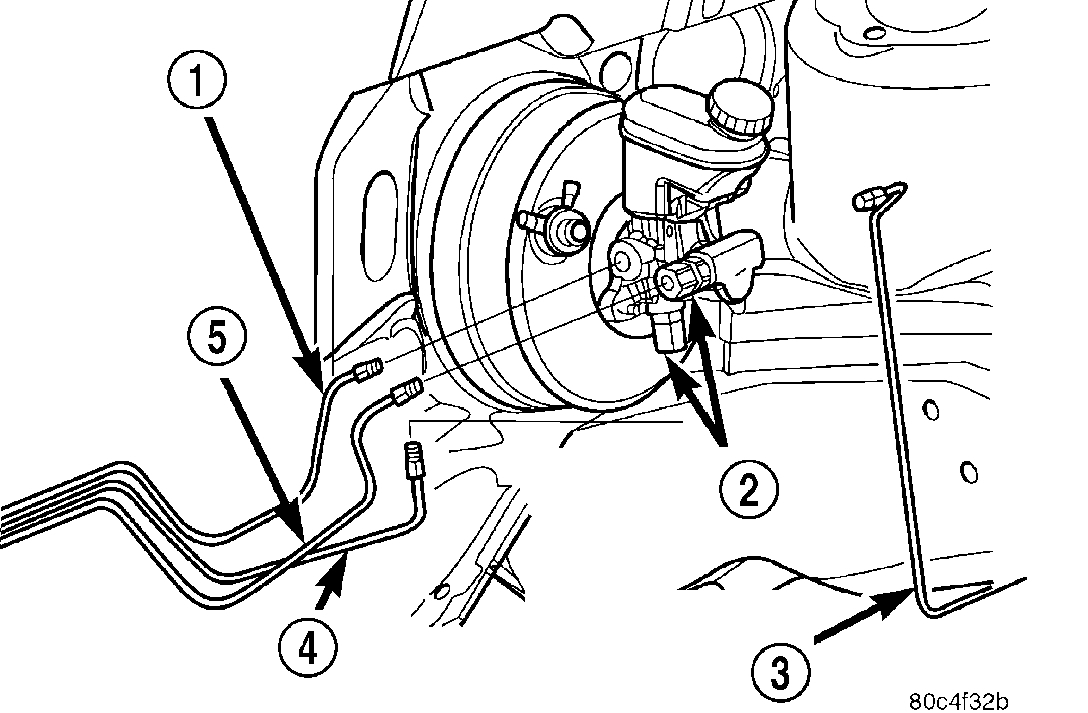
7. Disconnect the two front brake tubes (1, 3) from the master cylinder, and the two rear brake tubes (4, 5) from the proportioning valves (2). Install plugs at all of the open brake tube outlets on the master cylinder.
pic 3
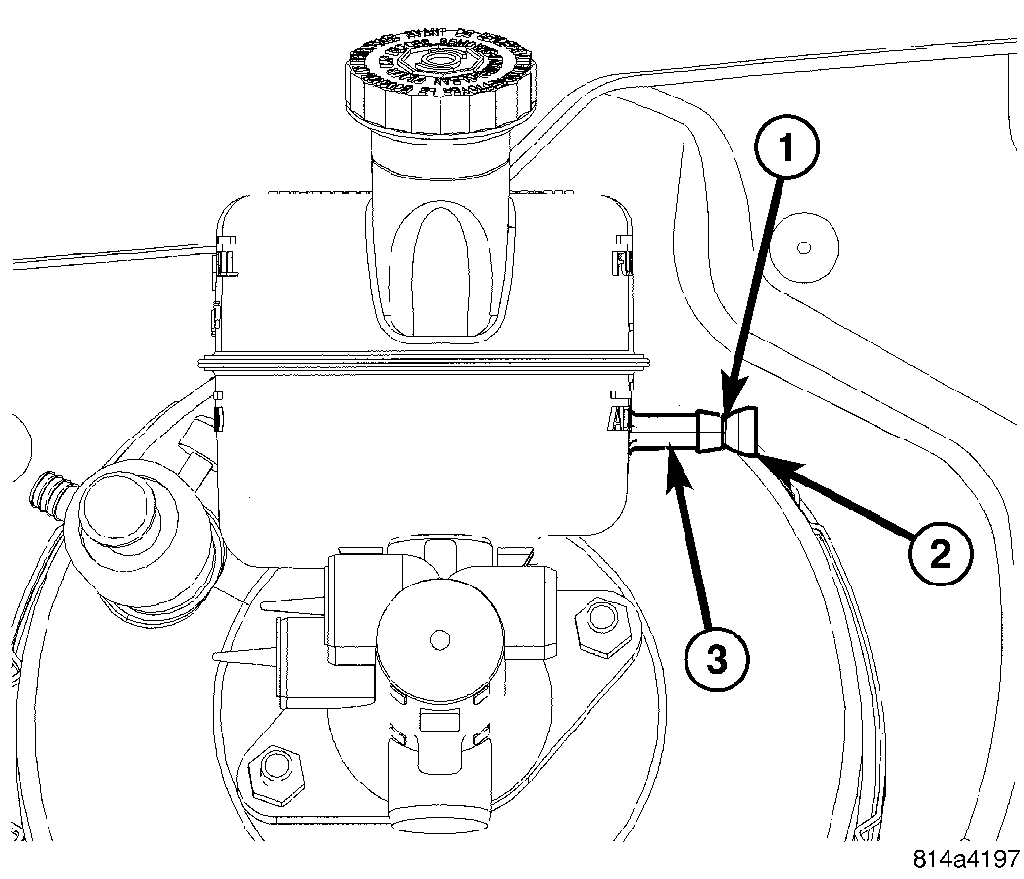
8. If equipped with a manual transaxle, remove the hose clamp (2) and slide the clutch actuator hose (3) off the reservoir port.
9. Clean the area around where the master cylinder attaches to the power brake booster using a suitable brake cleaner such as Mopar Brake Parts Cleaner or equivalent.
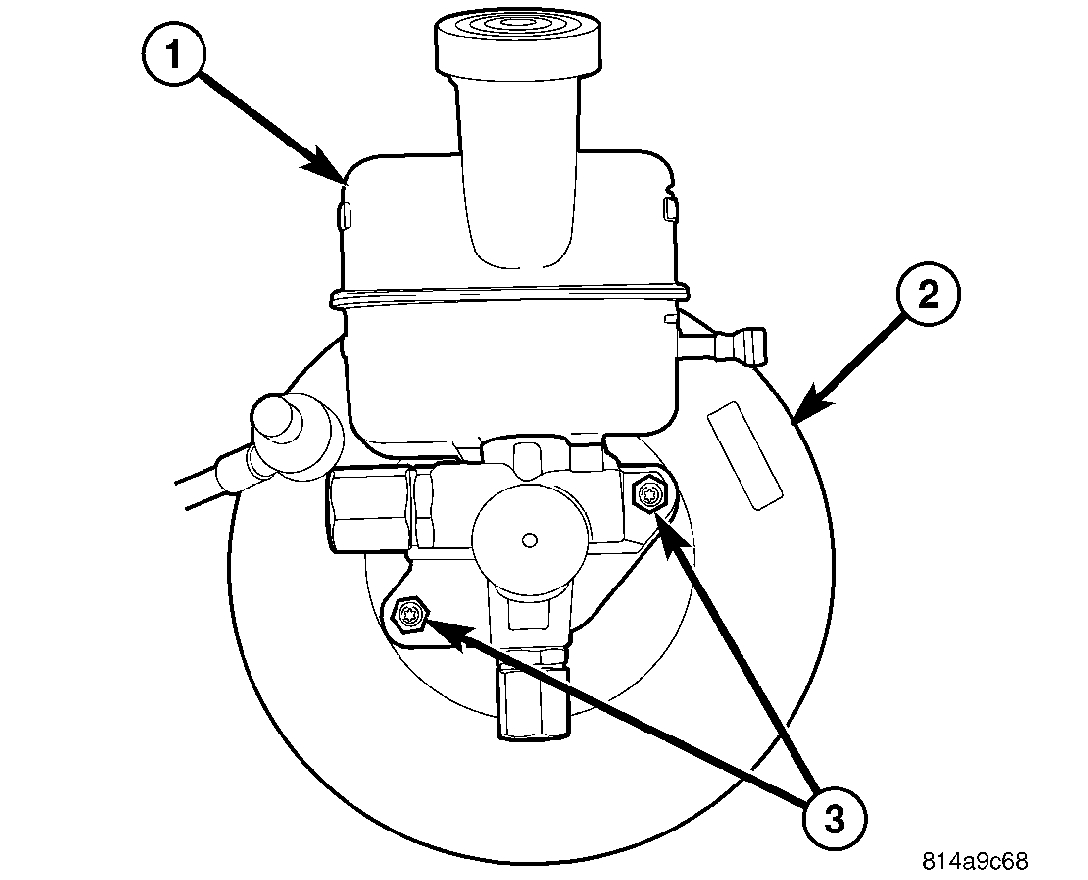
pic 4
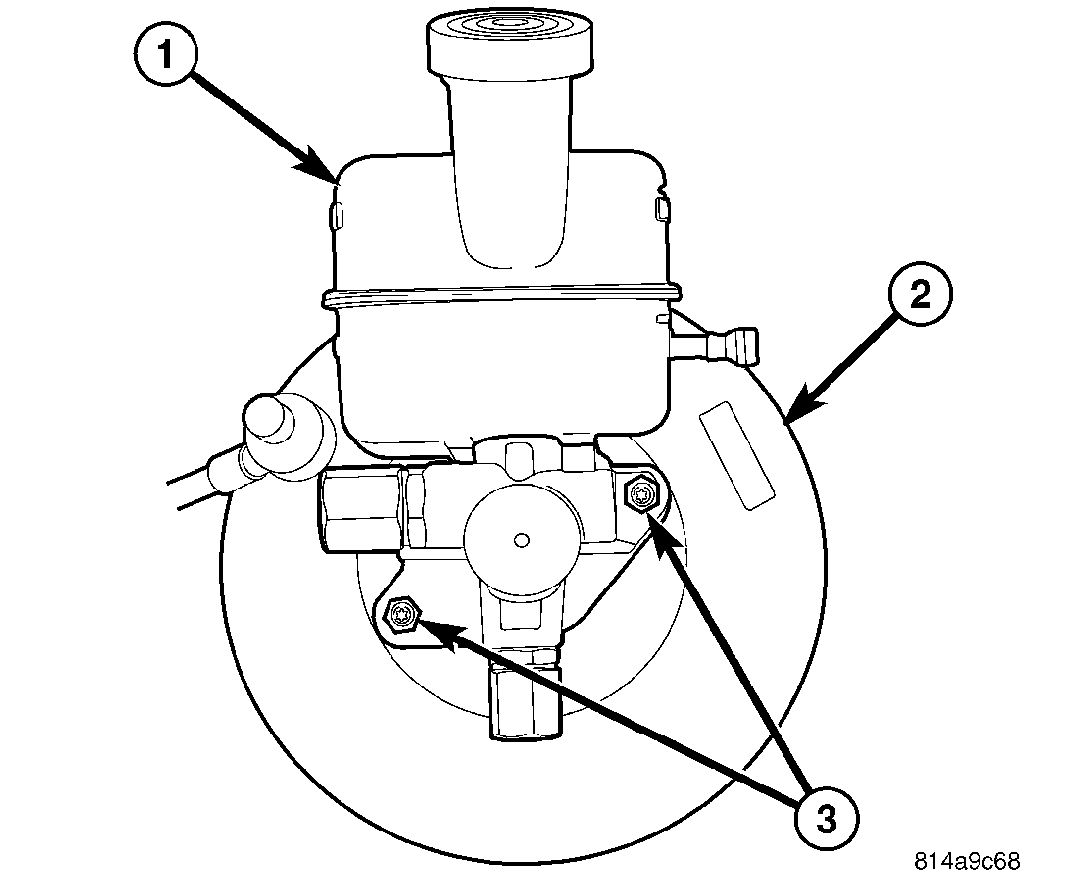
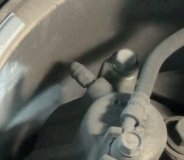
10. Remove the two nuts (3) attaching the master cylinder (1) to the power brake booster (2).
11. Slide the master cylinder straight out of the power brake booster.
pic 5
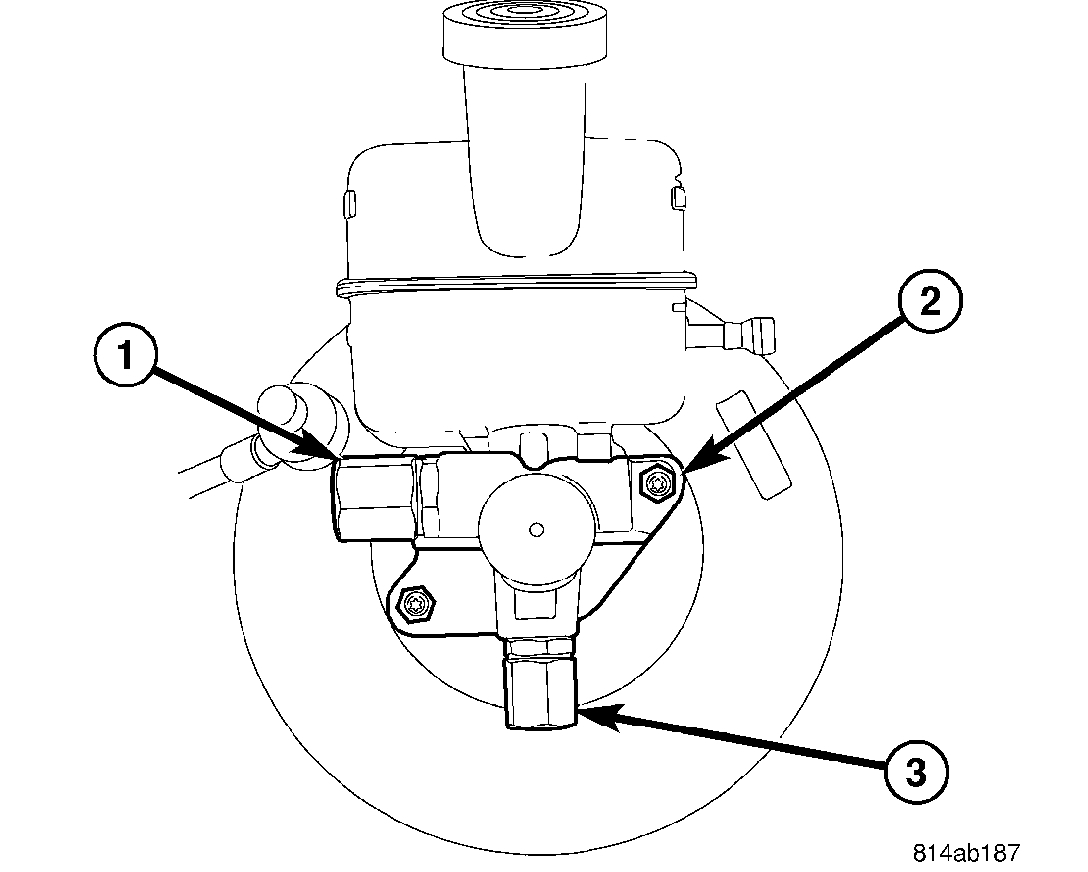
12. To remove the proportioning valves (1, 3), thread each from the master cylinder (2).
INSTALLATION
pic 6
1. If removed, install the proportioning valves (1, 3) in their master cylinder ports. The valves are identical, so they can be installed in either master cylinder port going to the rear brakes. Make sure the O-rings on the proportioning valves are new. Tighten the proportioning valves to 27 Nm (20 ft. lbs.).
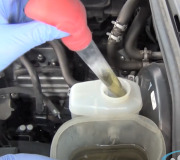
NOTE: The master cylinder must be bled before installing it on the vehicle.
2. Bench bleed the master cylinder.
3. Wipe the face of the power brake booster clean where the master cylinder seal comes in contact when it's installed. Do not get any cleaner or debris inside the booster.
pic 7
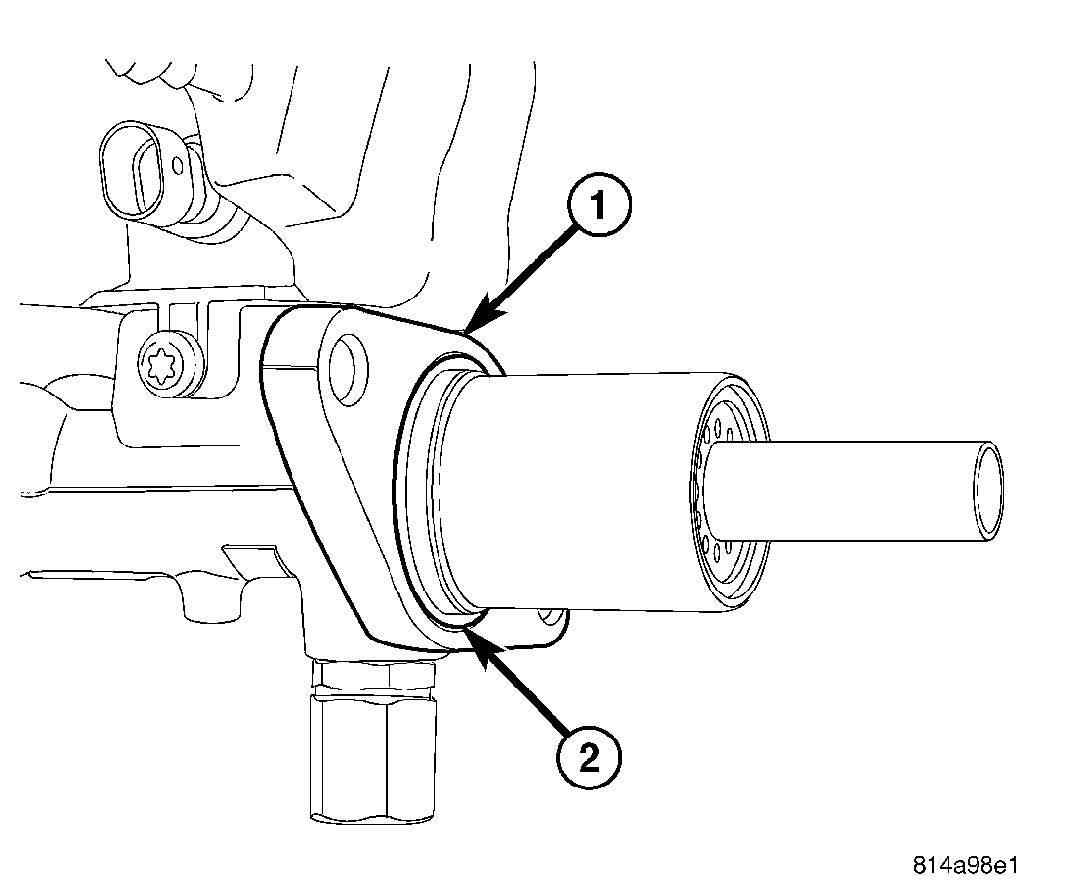
CAUTION: When installing a master cylinder on the vehicle, a NEW vacuum seal (2) MUST be installed on the master cylinder mounting flange (1).
4. If the master cylinder does not have a NEW vacuum seal (2) installed on the mounting flange (1), remove it. Install a NEW vacuum seal on the master cylinder mounting flange making sure the seal fits squarely in its groove.
CAUTION: If resistance is met during master cylinder insertion into power brake booster, the master cylinder push rod may not be lined up with the booster push rod. Remove the master cylinder, realign and insert it again.
5. Line the master cylinder mounting holes up with the mounting studs on the power brake booster. Ensure the master cylinder piston push rod lines up with the booster push rod, then carefully slide the master cylinder into the power brake booster until it contacts the face of the booster.
pic 8
6. Install the two master cylinder mounting nuts (3). Tighten each nut to 25 Nm (221 inch lbs.).
pic 9
7. If equipped with a manual transaxle and a NEW reservoir is being installed, using an appropriate cutting tool, cut the clutch actuator port (3) at the center of the "V" groove (1) opening the port. Discard the severed plug (2).
pic 10
8. If equipped with a manual transaxle, slide the clutch actuator hose (1) onto the reservoir port. Install the hose clamp (2) just past the upset bead (3) on the port.
pic 11
9. Connect the four brake tubes (1, 3, 4, 5) to the master cylinder ports and proportioning valves (2). Tighten the tube nuts to a torque of 17 Nm (145 inch lbs.).
Right front brake tube (1)
Left front brake tube (3)
Left rear brake tube (4)
Right rear brake tube (5)
pic 12
10. Connect the brake fluid level switch wiring connector (2) at the switch.
11. Install the power distribution center.
12. Connect the negative (ground) cable on the battery.
13. Install the air cleaner housing.
14. Reinstall the air cleaner cover (two clips).
15. Fill the master cylinder to the proper level.
WARNING: Be certain a firm brake pedal is achieved prior to attempting to operate the vehicle. If a firm brake pedal cannot be achieved, bleed the brake hydraulic system and check for leaks.
16. Road test the vehicle to ensure proper operation of the brakes.
______________________________
I hope this helps. Let me know if you have other questions.
Take care and God Bless,
Joe
Images (Click to make bigger)
Friday, March 12th, 2021 AT 10:06 PM