Okay no problem. I will list removal/installation procedures for the oil pan first since it is necessary to replace the pump. then pump replacement procedures will follow.
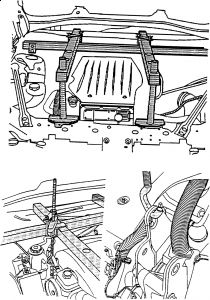
((( An engine support fixture like this supports the engine so the mounts can be loosened for undercar engine work"”typical for front wheel drive vehicles )))
REMOVAL:
Disconnect the negative battery cable.
Remove the hood.
Remove the engine mount struts from the engine.
Without disconnecting the refrigerant lines, remove the air conditioning compressor mounting bolts and set the compressor aside.
Remove the right engine mount strut bracket from the engine.
Install a suitable engine support fixture. Verify that the engine will be safely supported.
Raise and safely support the vehicle.
Disconnect the three-way catalytic converter pipe from the right side (rear) exhaust manifold.
Drain the engine oil into a suitable container.
Detach the oil level sensor wiring harness connector from the sensor in the oil pan.
Remove the starter motor.
Remove the transaxle brace from the oil pan.
Remove the lower transaxle mount nuts.
Remove the lower engine mount nuts.
Raise the engine using the adjustable hooks on the engine support fixture, to gain access for oil pan removal.
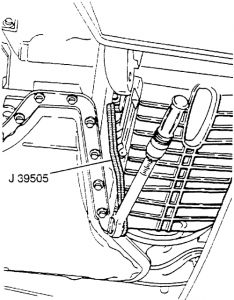
There are bolts that go through the side of the oil pan and thread into the main bearing caps. GM recommends their special tool J 39505 be used on the right side (rear) oil pan side bolts, to reach up in the narrow area between the engine oil pan and the transaxle case to remove these bolts. This special tool is also used at assembly so the bolts can be properly tightened. Use care is using a substitute wrench to remove the right side (rear) oil pan side bolts.
Remove the left side (front) oil pan side bolts.
Remove the oil pan side rail mounting bolts.
Remove the oil pan from the vehicle.
((( This special wrench is recommended by GM for removing and installing the right side (rear) oil pan side bolts. A box wrench with a slight offset may also be used )))
INSTALLATION:
Clean all parts well. If the engine has high mileage, evaluate changing the oil pump at this time. Please see the procedure in this section. Make sure the oil pan gasket rails and the engine gasket sealing surfaces are clean.
Apply a small amount of sealer GM #1234579, or equivalent, on either side of the rear main bearing cap, where the seal surface on the cap meets the engine block. Press sealant into the gap with a putty knife.
Install the oil pan gasket, then position the oil pan to the engine. Hand-start a few side rail bolts. Install, then finger-tighten all side rail bolts. Then torque to 18 ft. lbs. (25 Nm).
Install the left side (front) oil pan side bolts. Torque to 37 ft. lbs. (50 Nm).
Install the right side (rear) oil pan side bolts, using special tool J 39505 or equivalent. Torque to 37 ft. lbs. (50 Nm).
Using the adjustable hooks on the engine support fixture, lower the engine enough so the lower transaxle mount nuts can be installed. Also install the lower engine mount nuts and the transaxle brace to the oil pan.
Install the remaining components in the reverse order of the removal process. Refill the engine with clean engine oil. A filter change is also recommended.
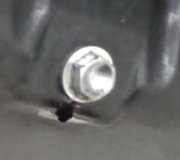
((( Engine oil pan bolt arrangement and main bearing cap sealing locations"”3.1L and 3.4L (VIN E) engines )))
REMOVAL:
Remove the oil pan using the procedure found above.
Some engines may have a crankshaft oil deflector (also called a "windage tray"). Remove the retaining nuts and remove the oil deflector.
Remove the bolt attaching the oil pump to the rear crankshaft bearing cap.
Remove the oil pump and driveshaft.
INSTALLATION:
Clean all parts well. Inspect the driveshaft at both ends for rounding of the corners. Replace, if necessary. If the original pump is being considered for reuse, inspect the pump body and the pump cover for cracks, scoring, casting imperfections, or any obvious damage.
Rotate the pump driveshaft as necessary to engage the with the oil pump. Make sure it turns smoothly. Some technicians will fill the oil pump through the opening next to the driveshaft to shorten the time it take the engine to buildup oil pressure on initial startup after an oil pump replacement. Turning the driveshaft as oil is being added fills the pump cavity.
Install the pump and driveshaft assembly to the engine. Install the retaining bolt and tighten to:
3.1L engines: 30 ft. lbs. (41 Nm)
3.4L engines: 40 ft. lbs. (54 Nm)
Install the oil pan using the procedure found above.
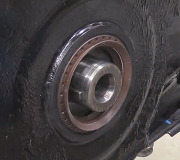
((( Oil pump arrangement"”3.1L and 3.4L engines )))
If you need further assistance just let me know.
Thanks for using 2CarPros.com!
Thursday, March 12th, 2009 AT 12:50 AM