Unless they are using used parts or removingand/or insalling it wrong you shouldn't have this issue.
here's how to do this yourself
Before servicing the vehicle, refer to the Precautions Section.
Unlock the steering column so the steering linkage is free to move.
Disconnect negative battery cable.
Remove front wheels.NOTE
Place a drift through the caliper into the edge of the rotor to keep the rotor from turning when the nut is removed.
Remove cotter pin, retainer, nut and washer.
Remove brake caliper and support it with a piece of wire to avoid damaging the brake hose.
Remove brake rotor.
Remove brake line support bracket and Anti-lock Brake System (ABS) wire bracket from the upper control arm.
Place a jackstand or jack under the lower control arm.
Separate axle shaft from the hub by placing a block of wood against the outer edge of the axle (to protect the threads), then strike the block of wood sharply with a hammer. Do not remove the axle at this time.
Separate tie rods from the steering knuckles.
Remove lower shock absorber bolts.
Separate upper ball joint from the steering knuckle and suspend the steering knuckle on a wire.
Remove skid plate, if equipped.
Remove halfshaft-to-axle tube bolts.
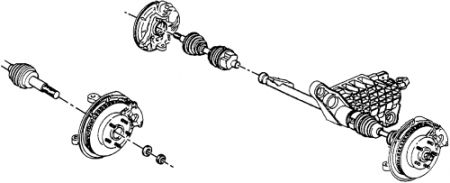
Halfshafts and related components
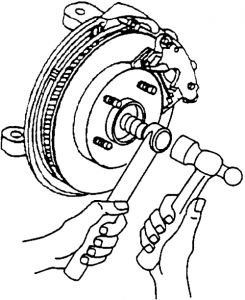
Tap the halfshaft out of the hub without damaging the threads
Remove halfshaft by moving it forward and supporting it away from the frame.
Remove halfshaft from the hub and bearing assembly.
Separate halfshaft from the differential using a block of wood and a hammer.
To install:
NOTE
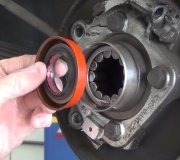
It is essential that the differential carrier and axle seals are not lubricated or damaged during installation. Prior to shaft installation, cover the shock mounting bracket, lower control arm ball stud and ALL other sharp edges with a cloth or rag to help protect the boot.
Install the axle into the carrier. With both hands on the tripod housing, align the splines on the shaft with the carrier. Then center the axle into the carrier seal and push the shaft straight into the carrier until the snapring is properly seated.NOTE
Be careful when supporting the lower control arm that any components are damaged with the supporting device.
Raise the lower control arm using a jackstand or jack until the full weight of the arm is supported.NOTE
It is necessary to slightly start the knuckle onto the axle while at the same time guiding the lower ball joint into position on the knuckle.
Install lower ball joint, the lower shock absorber and the upper ball joint.
Install axle washer and nut. Tighten the nut to 103 ft. lbs. (140 Nm).
Install ABS and brake line brackets to the top of the upper control arm.
Install caliper and rotor.
Install tire and wheel assembly.
Install differential carrier shield.
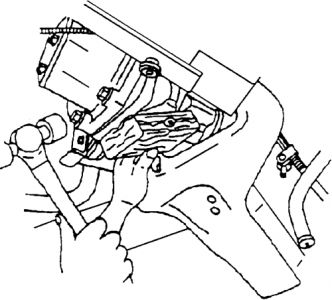
Using a block of wood and a mallet, disengage the halfshaft from the differential assembly
Wednesday, January 28th, 2009 AT 8:19 PM