Hi and thanks for using 2CarPros.com.
First, I would contact a dealer because I feel it may be under the emissions warranty for eight years or 80,000 miles. See the first picture I attached.
If you fail to get help from GM, here are the directions. The remaining pictures correlate with these directions.
________________________________
CAMSHAFT POSITION EXHAUST ACTUATOR REPLACEMENT
Camshaft Position Exhaust Actuator Replacement
Special Tools
* EN-45059 - Angle Meter
* EN-48749 - Timing Chain Retention Tool Kit
* EN-48953 - Camshaft Actuator Locking Tool
For equivalent regional tools, refer to Special Tools See: Engine > Electrical / Mechanical Repair > Special Tools.
Removal Procedure
1. Remove the air cleaner assembly. Refer to Air Cleaner Assembly Replacement See: Air Cleaner Housing > Removal and Replacement > Air Cleaner Assembly Replacement.
2. Remove the camshaft cover. Refer to Camshaft Cover Replacement See: Valve Cover > Removal and Replacement > Camshaft Cover Replacement.
3. Remove the spark plugs. Refer to Spark Plug Replacement See: Spark Plug > Removal and Replacement > Spark Plug Replacement.
4. Remove the engine splash shield. Refer to Engine Splash Shield Replacement - Right Side .
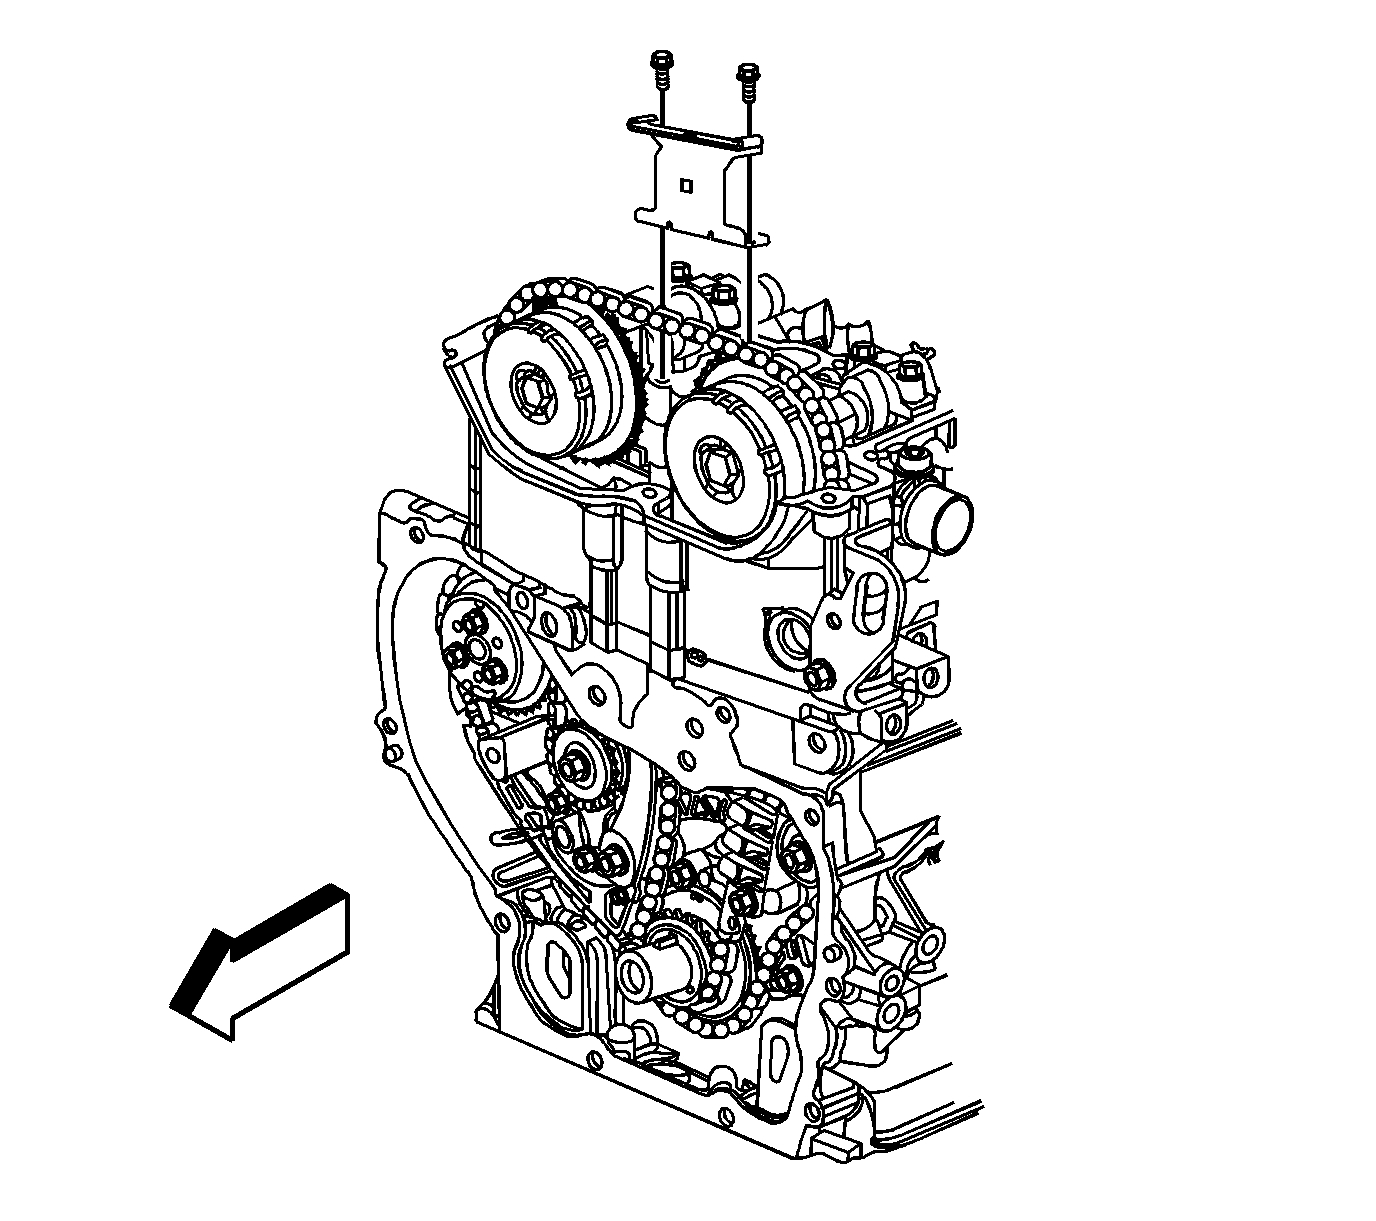
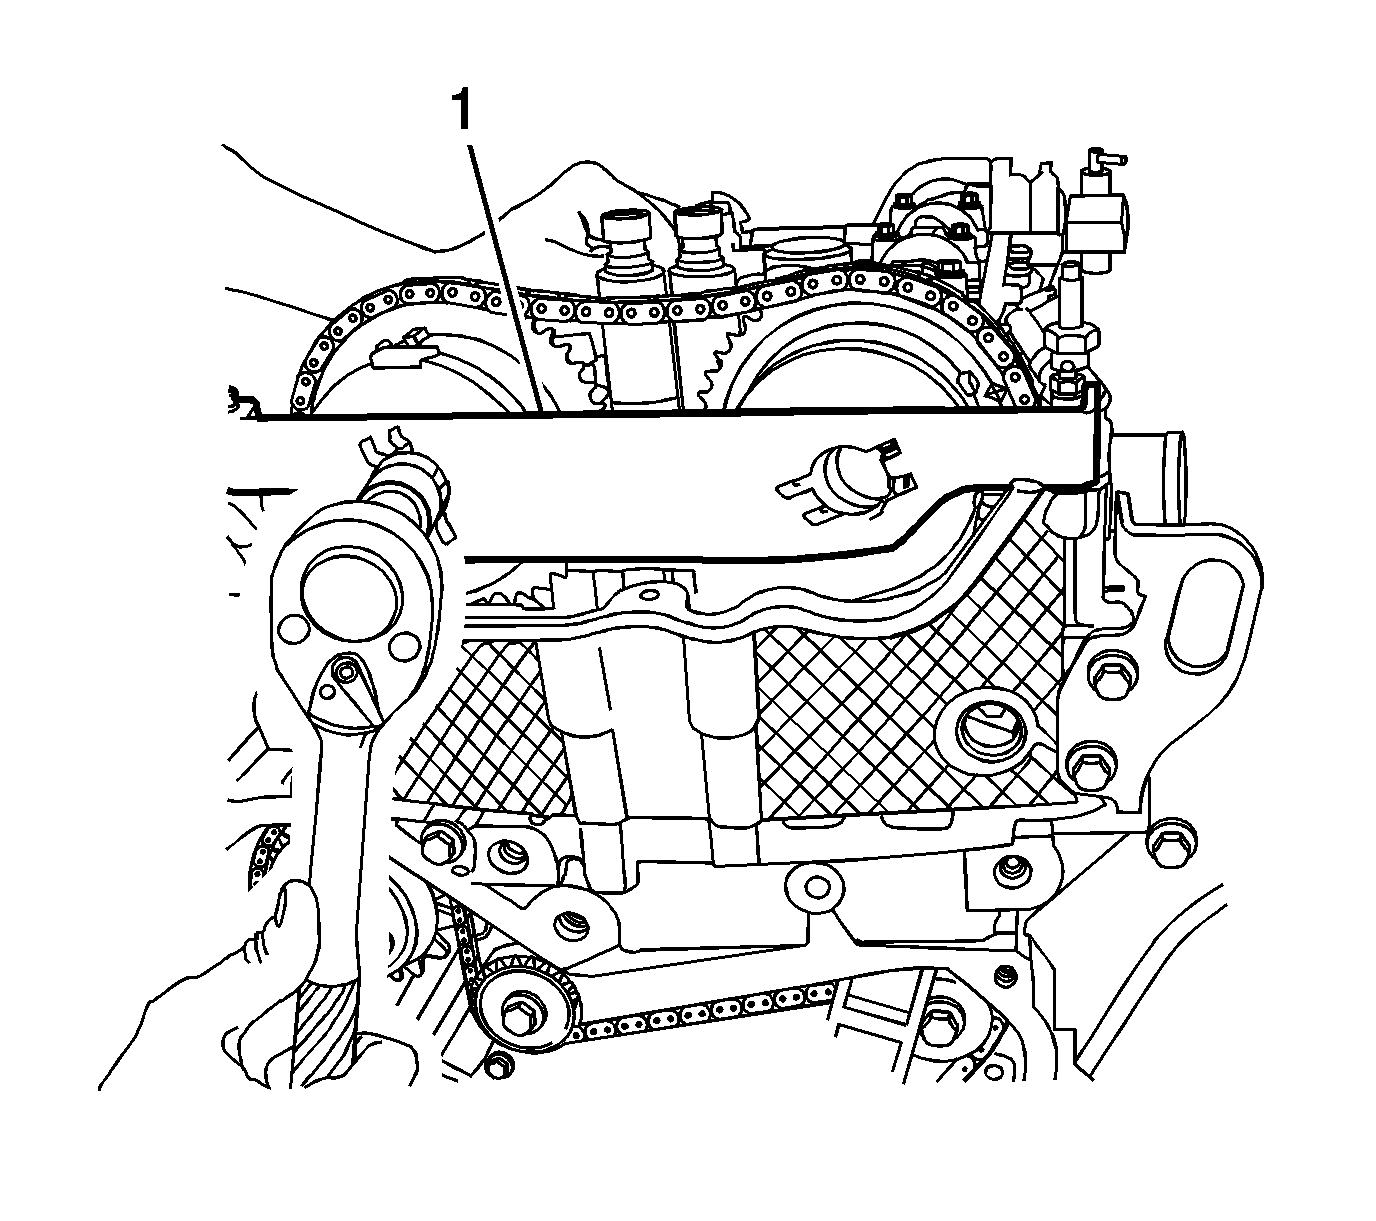
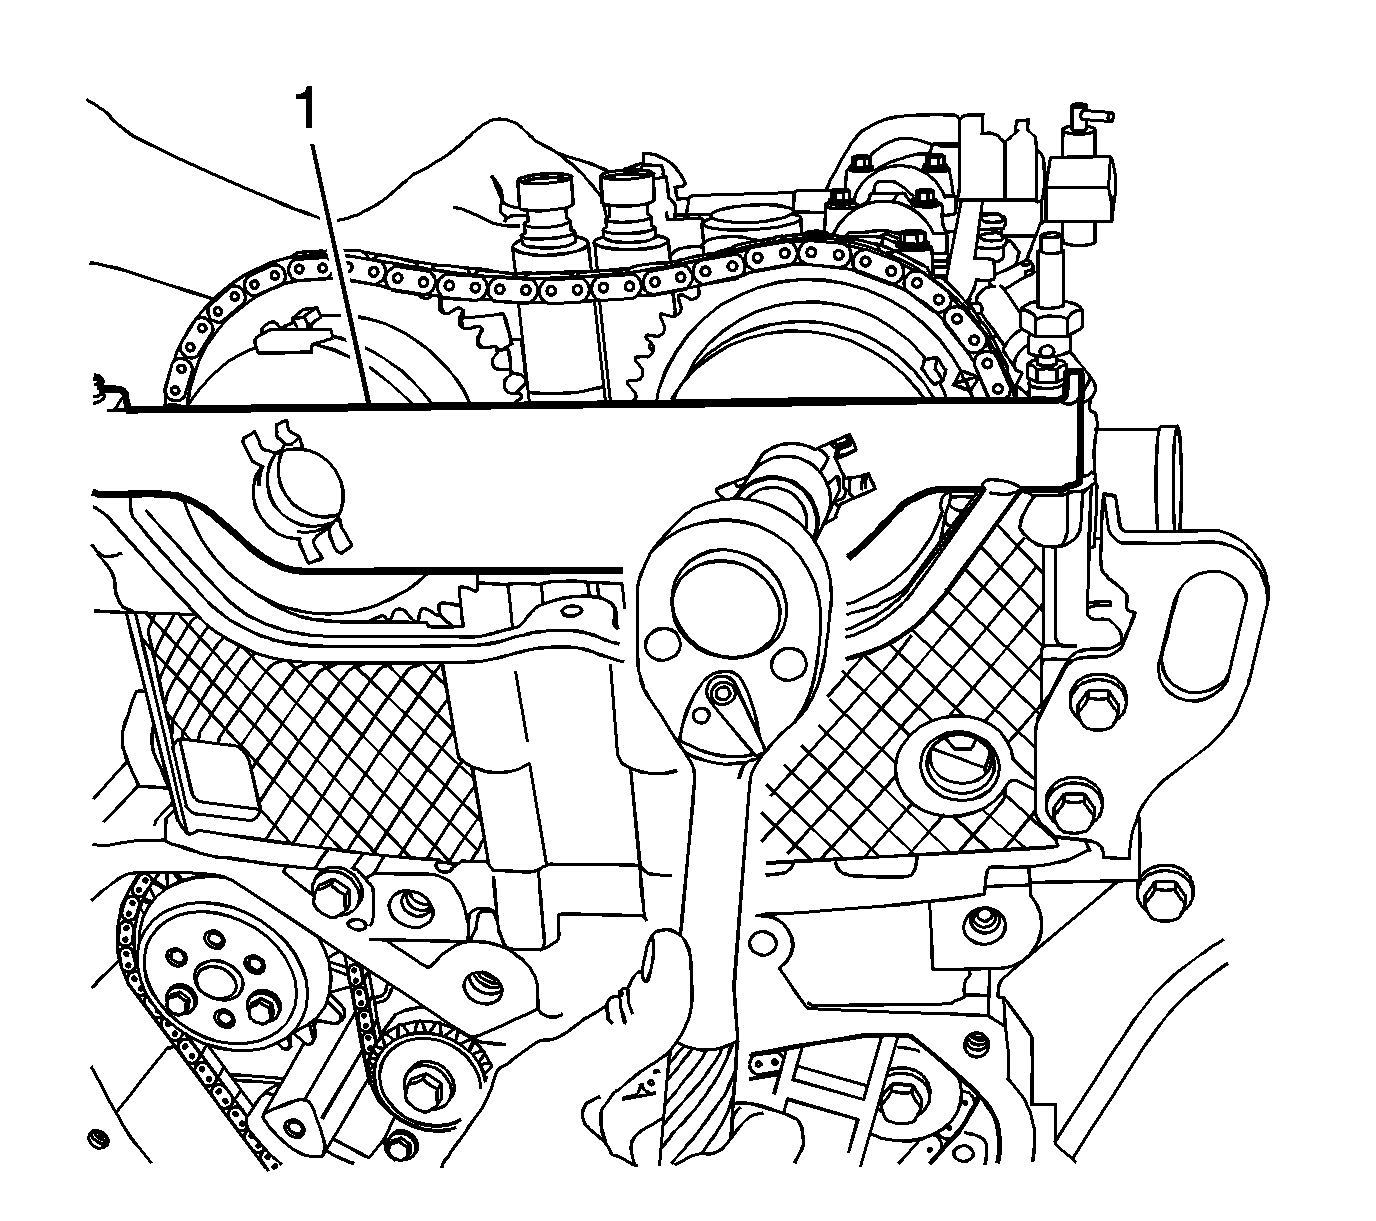
5. Rotate the crankshaft clockwise and install the EN-48953 - locking tool(1).
Caution:
Refer to Fastener Caution See: Vehicle > Technician Safety Information > Fastener Caution.
6. Install the camshaft actuator retainer bolts and tighten to 10 Nm (89 lb in).
7. Use a wrench on the camshaft flats to hold the camshaft.
8. Loosen, but do not remove the exhaust camshaft actuator bolt.
9. Remove the EN-48953 - locking tool(1).
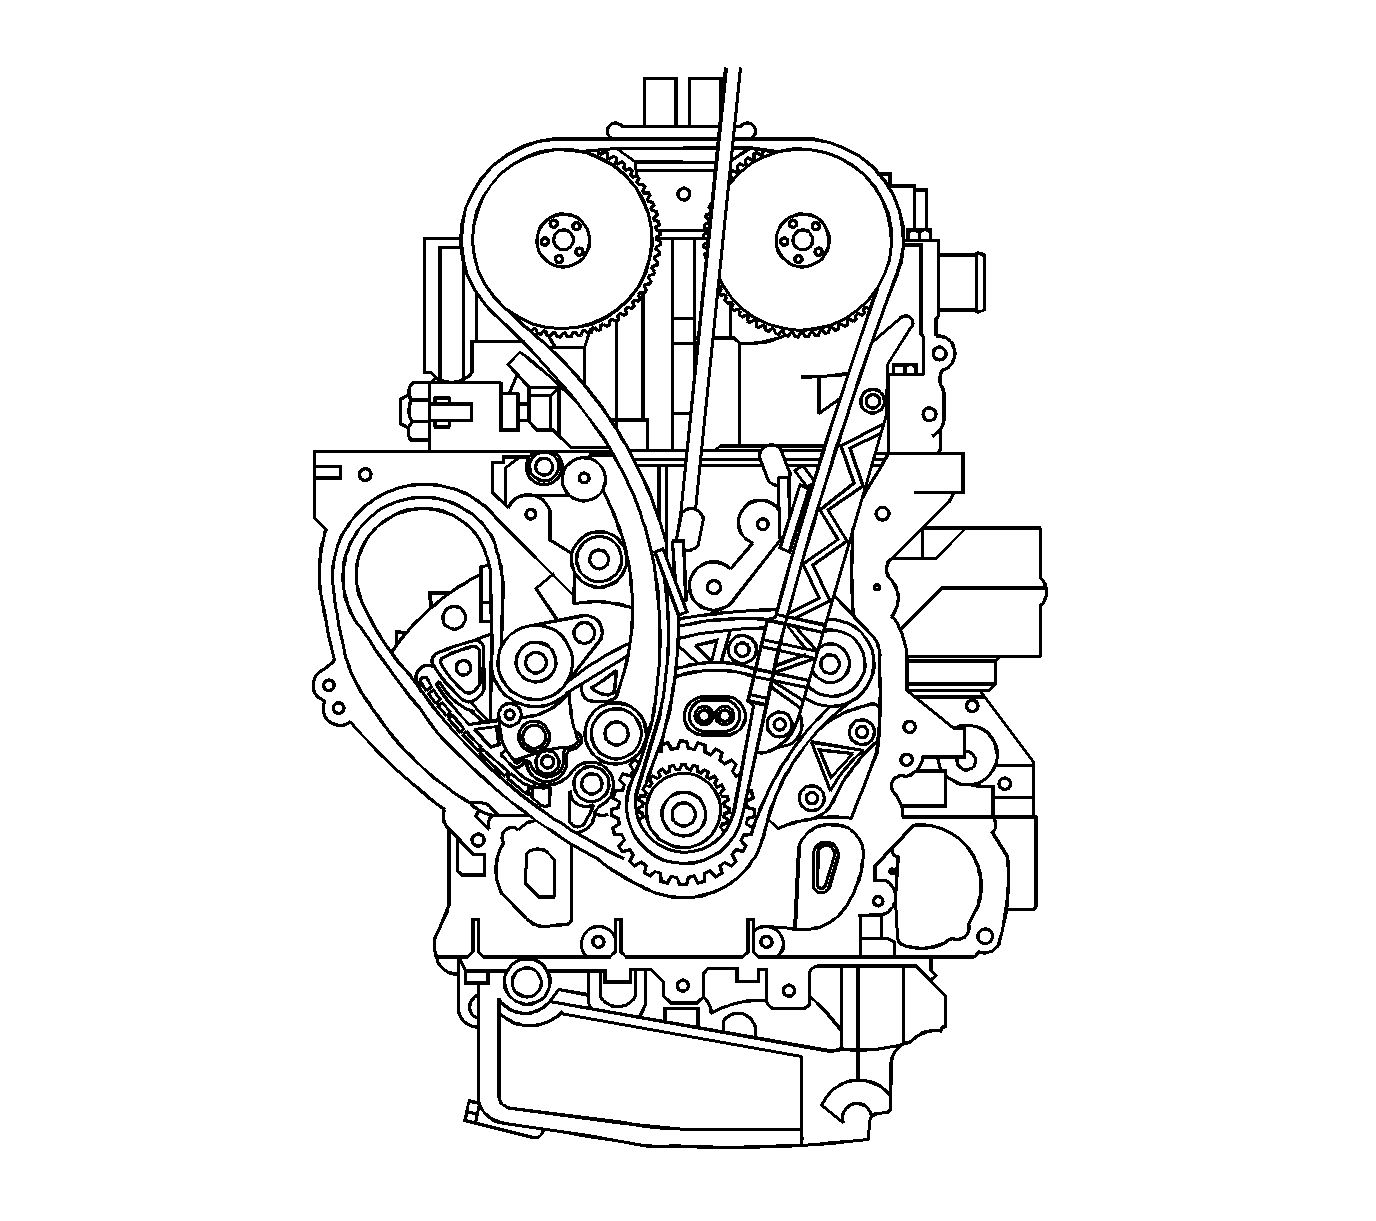
10. Clean the timing chain and gears with solvent.
Note:
Ensure the timing chain and the camshaft position actuators are marked for proper assembly.
11. Mark the intake and exhaust camshaft actuators and the respective locations on the timing chain.
12. Remove the upper timing chain guide bolts and guide.
13. Remove the timing chain tensioner.
Note:
* The camshaft actuators should not rotate during the removal or installation.
* Ensure the tips of the EN-48749 - retention tool are fully engaged into the timing chain. The retention tool rod can be used on the back side of the chain to ensure the teeth from the retention tool are engaged.
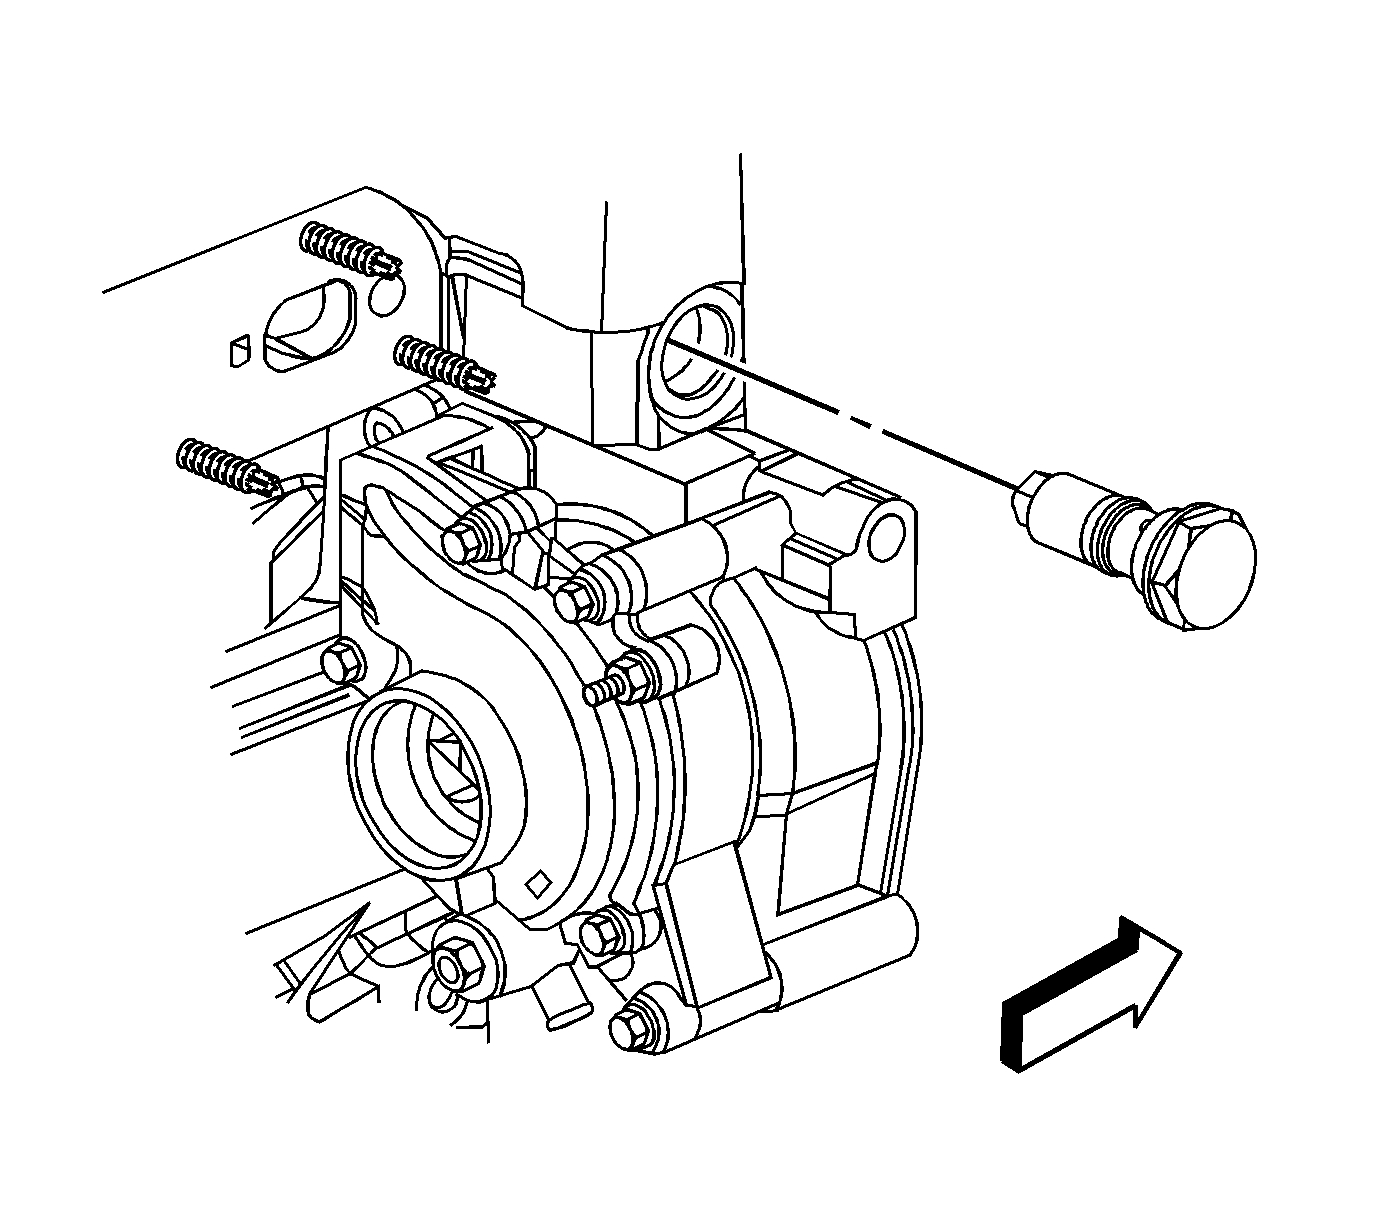
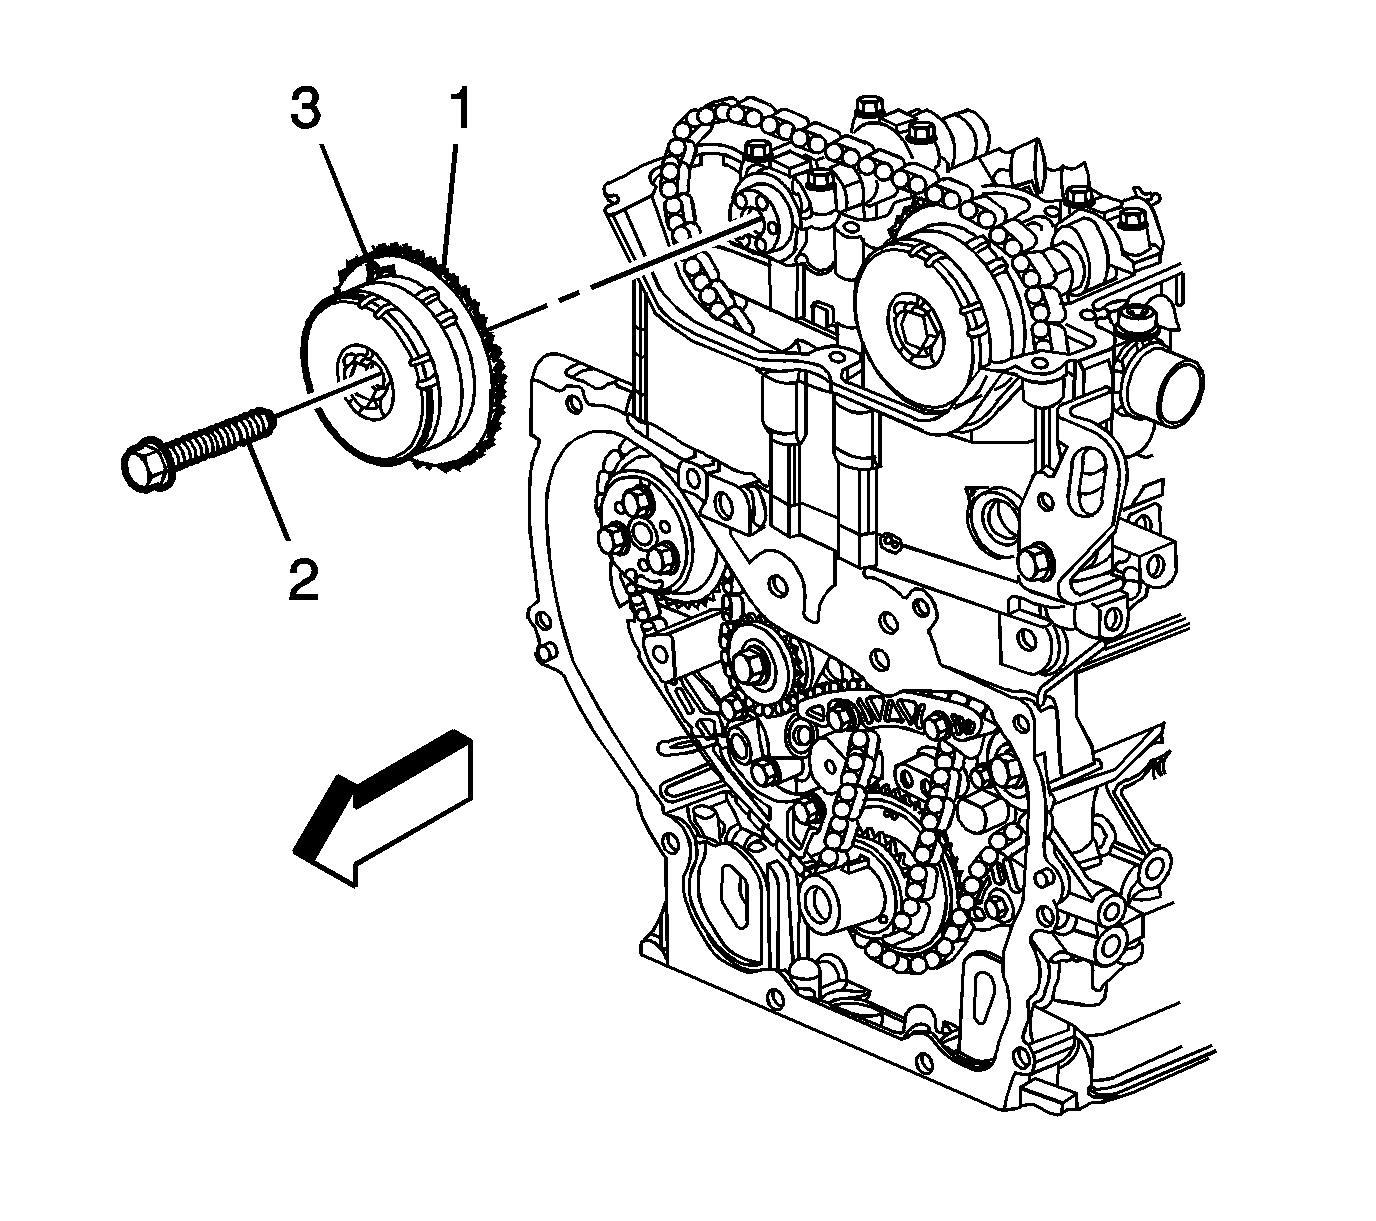
14. Install the EN-48749 - retention tool(1) to the exhaust side of the timing chain.
15. Remove and discard the exhaust camshaft actuator bolt (2).
16. Remove the exhaust camshaft actuator (3) from the camshaft while also removing the actuator from the timing chain.
Installation Procedure
Note:
* Ensure that the alignment mark made previously on the intake camshaft actuator is still aligned properly with the mark on the timing chain.
* If replacing the camshaft actuator, transfer the mark made on the old actuator to the new actuator.
* The exhaust camshaft may need to be rotated clockwise to fully set the camshaft actuator.
1. Install the timing chain onto the exhaust camshaft actuator.
2. Align the exhaust camshaft actuator alignment mark made previously with the timing chain mark and install the actuator onto the camshaft.
3. Install a NEW exhaust camshaft actuator bolt (2) until snug.
Note:
Ensure that the alignment mark previously on the exhaust camshaft actuator is still aligned properly with the timing chain. If the mark made previously on the intake camshaft actuator is not aligned properly, refer to Camshaft Timing Chain, Sprocket, and Tensioner Replacement See: Timing Chain > Removal and Replacement > Camshaft Timing Chain, Sprocket, and Tensioner Replacement.
4. Remove the EN-48749 - retention tool(1) from the exhaust side of the timing chain.
Note:
Failure to reset the tensioner will allow the tensioner to over extend. limiting the timing chain life.
5. Reset and install the timing chain tensioner. Refer to Timing Chain Tensioner Replacement See: Timing Chain Tensioner > Removal and Replacement > Timing Chain Tensioner Replacement.
6. Install the EN-48953 - locking tool(1).
7. Install the camshaft actuator retention tool bolts and tighten 10 Nm (89 lb in).
8. Tighten the NEW camshaft actuator bolt to 30 Nm (22 lb ft) plus an additional 100 degrees using the EN-45059 - meter. Use a wrench on the camshaft flats to hold while tightening the fastener.
9. Remove the camshaft actuator retainer EN-48953 - locking tool(1).
10. Install the upper timing chain guide and bolts and tighten to 10 Nm (89 lb in).
11. Install the camshaft cover. Refer to Camshaft Cover Replacement See: Valve Cover > Removal and Replacement > Camshaft Cover Replacement.
12. Install the spark plugs. Refer to Spark Plug Replacement See: Spark Plug > Removal and Replacement > Spark Plug Replacement.
13. Install the engine splash shield. Refer to Engine Splash Shield Replacement - Right Side .
14. Install the air cleaner assembly. Refer to Air Cleaner Assembly Replacement See: Air Cleaner Housing > Removal and Replacement > Air Cleaner Assembly Replacement.
__________________________________________________
I hope this helps. Let me know if you have other questions. Also, the size engine you listed, 2.7L, does not exist. Therefore and since you indicated it was a four cylinder, I used the 2.4L engine specs which are specific to this vehicle.
Take care,
Joe
Images (Click to enlarge)
Aug 13, 2018 at 5:30 PM