Front turn signal bulb replacement

Tiny
DCSPARKS
  • MEMBER
  • 2002 BUICK LESABRE
  • 6 CYL
  • AWD
  • AUTOMATIC
  • 91,982 MILES
How do you replace the bulb?
Saturday, October 17th, 2009 AT 12:39 PM

3 Replies

Tiny
JACOBANDNICKOLAS
  • MECHANIC
  • 108,192 POSTS
You will have to remove the headlight assemblies. Not too difficult

1. Remove the headlamp fasteners
2. Using a pry bar, gently pry in the center area of the headlamp assembly. Pry the headlamp assembly straight forward in order to unsnap the headlamp ball stud from the ball stud socket.
3. Slide the headlamp straight forward and disconnect the headlamp electrical connectors from the forward lamp wiring harness.
4. Remove the headlamp from the vehicle.
1. Install the headlamp to the vehicle.
2. Connect the electrical connectors.
3. Position the headlamp in order to align the locator pins with the headlamp mounting bracket.
4. Press the headlamp rearward in order to engage the ball stud with the ball stud socket.

NOTE: Refer to Fastener Notice in Service Precautions.

5. Install the headlamp fasteners.

Tighten
Tighten the headlamp mounting fasteners to 9 N.M (80 lb in).

See the diagrams below for fastener locations
Was this
answer
helpful?
Yes
No
Wednesday, November 4th, 2009 AT 1:23 PM
Tiny
ADB80
  • MEMBER
  • 1 POST
  • 2004 BUICK LESABRE
Electrical problem
2004 Buick Lesabre 6 cyl Two Wheel Drive Automatic

How do I get access to the lenz compartment.
I see no visable screws or bolts. Are the bolts inside the trunk?
Was this
answer
helpful?
Yes
No
+1
Monday, June 3rd, 2019 AT 7:49 PM (Merged)
Tiny
BLUELIGHTNIN6
  • MECHANIC
  • 16,542 POSTS
Working from the trunk.

1. Locate and remove the 2 retaining knobs (doohickeys that you fasten
the trunk cargo net to) on each side that hold the hard plastic trunk
liner to the rear light assemblies.

2. Move the plastic plate that holds the spare tire back away from the
plastic trunk liner. This releases the bottom of the plastic piece.

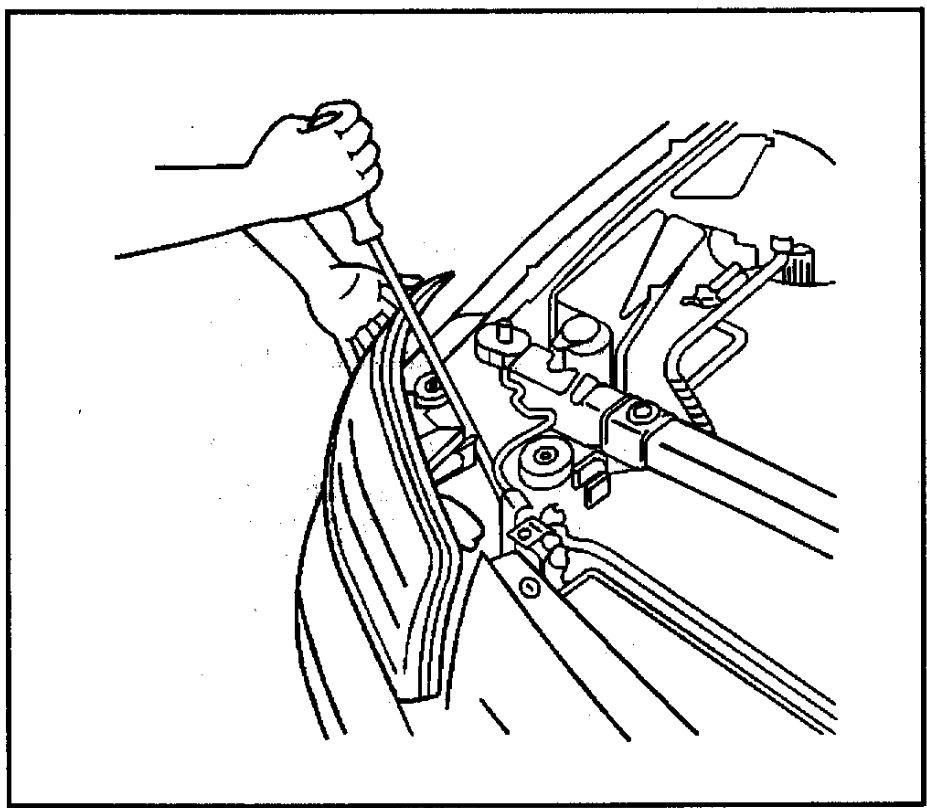
3. With a large screw driver, pry the long plastic piece that goes
from side to side by prying up from the bumper. It's held in place by
some push in holders. Remove the large plastic piece.

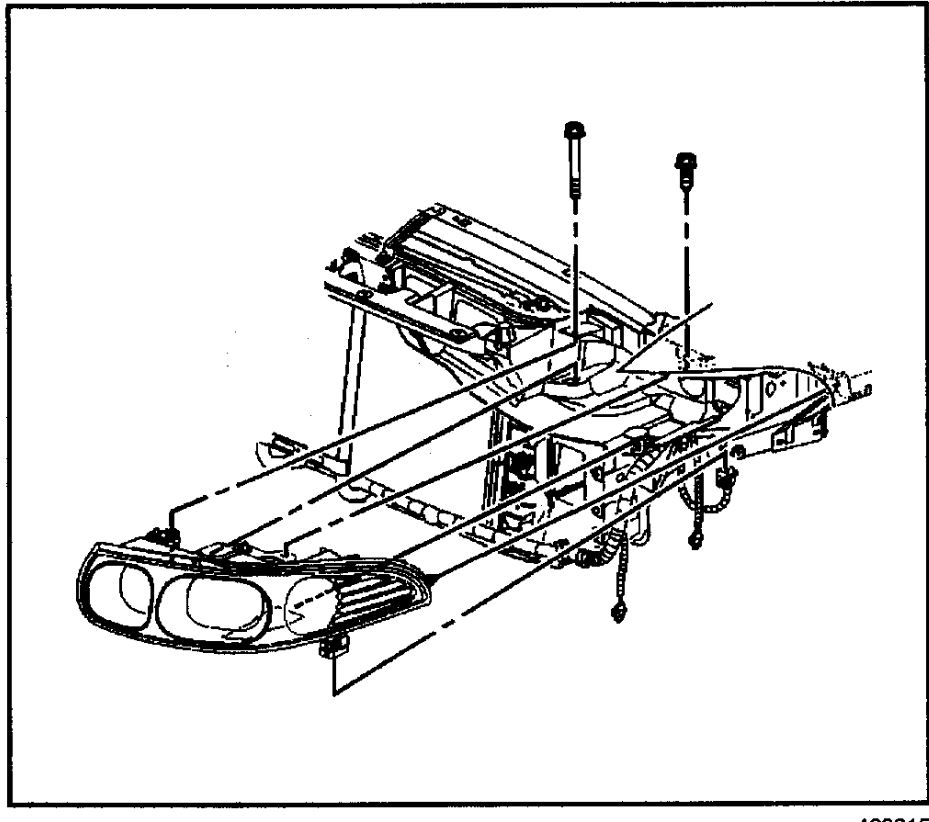
4. Locate the 5 studs (threaded posts) on each light assembly. Three
will be located vertically in a line, and the other two will be
outboard.

5. Using a 10 mm socket remove 4 of the 5 nuts fastening the light
assembly to the body. DO NOT remove the lowest nut of the 3 in a
vertical line as this does not fasten the light assembly to the car.

6. Hand pull the light assembly from the car body.

7. Remove the bad lamp. Twist lamp socket and pull out of assembly.
Pull the lamp and replace with a # 194.

8. If replacing a tail lamp replace with a #3057 (book says #3357).

9. Test light prior to reassembly.

10. Ensure gasket material for assembly and studs is intact. This
keeps water/dust out and dampens movement (prevents rattling and
increases the life of the lamps).

11. Use reverse instruction for reassembly
Was this
answer
helpful?
Yes
No
+4
Monday, June 3rd, 2019 AT 7:49 PM (Merged)

Please login or register to post a reply.

Sponsored links