One thing to keep in mind, when inspecting parts, is how the suspension parts are "loaded". That simply means the car has to be jacked up and supported in such a way as to put no forces on the parts. The jack stands should be under the car's frame rails. That lets the tire / wheel hang down freely so you can move them with a pry bar or by hand.
Lets start with the lower control arm bushings. While hanging freely, use about a 2-foot pry bar to move the arms away from the frame they're bolted to. There should be no or very little visible movement. Any movement means they aren't holding that wheel in alignment as the car bounces down the road.
While the wheel / tire is still installed, use them as a handle to turn the steering system left and right a little. This works best with the steering wheel unlocked so you don't feel the normal knocking of the locking mechanism. Tug the tire left and right lightly a couple of times per second. If either the inner or outer tie rod end has looseness, you'll feel the knocking. Next, have a helper do that while you watch or feel underneath to determine if that play is in the inner or outer tie rod end. GM doesn't have a lot of trouble in this area, but the outers wear out more often.
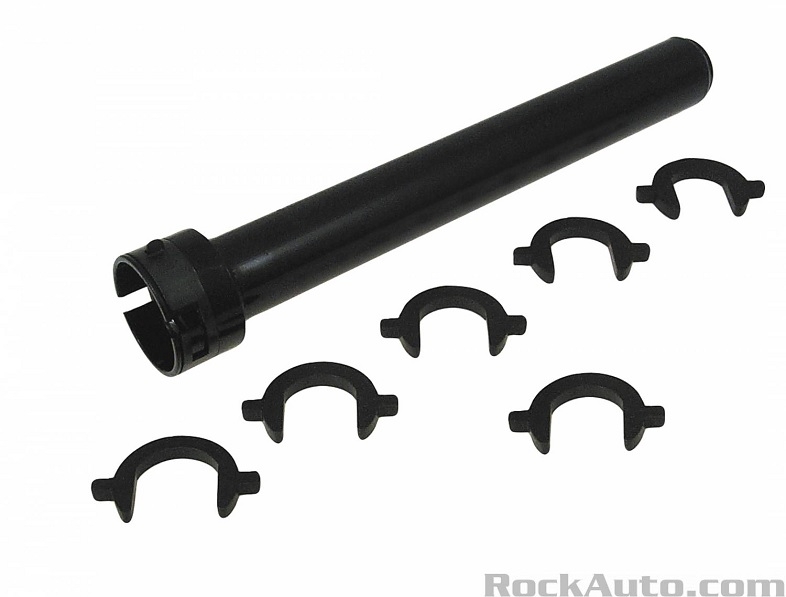
A lot of GM inner tie rod ends require a special socket with a set of different sizes of crow's foot wrenches to grab two flats on the back side of the ball and socket. Check out the first photo. You can borrow that tool from any auto parts store that rents or borrows tools. In my city, they make you buy the tool, then you get a full refund when you return it. If you choose to keep a tool, you still return it, then they order or give you a brand new one. Pick the crow's foot that fits the joint. While holding it in place, slide the socket over it so the two tabs slide into the two slots on the tube. There's a stamped steel ring to rotate that locks the wrench to the tube. Pull out gently on it to keep the wrench on the flats, then use a 1/2" ratchet to unscrew the joint. Normal threads. Turn it counterclockwise to unscrew it. Other tie rod designs require a different special socket to fit a standard hex head around the joint. Those come in two different sizes. Some of them have both sizes built into one tool. All of these are roughly 15" long to slide over the threaded shaft.
Oops, forgot to mention the accordion boot has to be removed first. There's a small spring clamp around the small end. It's common to find a squeeze band around the inner, larger end. Once the ends are snapped together, there's a section to crimp to compress and tighten that band. If you run into frustration trying to stretch them to get them off, and to squeeze them to put it together, . . . welcome to my world. Try whatever you can dream up. At worst you'll have to replace that band. In a pinch, a larger nylon tie strap will do the job. There's a special pliers to tighten the crimp when installing that band. It has a shoe in the middle to push the crimp down. That's mainly for use on CV joints where that crimp could stick up high enough to hit something as the shaft rotates. If you have the room and can fit that pliers in there, it can be used to loosen the band too. Grab the crimped section loosely, then twist the pliers left and right to tug on the crimp. That will stretch it, sometimes enough to allow the band to be unsnapped.
Be aware there's a small metal tube plugged into both of the boots. That just transfers air in them back and forth as you steer. Nothing has to be sealed, but don't forget to pop that back in when the boot is reinstalled.
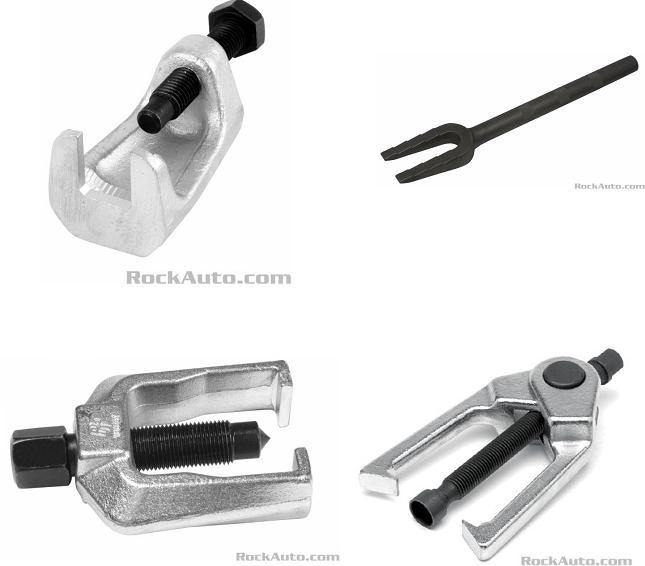
The third photo shows some tools for removing the outer tie rod's tapered stud from the steering arm. An alternative trick is to bang on the side of the arm next to the stud once the nut is removed. The shock is often enough to break the taper.
When you screw the inner and outer ends together, it's okay to use a light coating of axle or wheel bearing grease on the threads. This ensures they're free and not rusted tight for the alignment specialist. Don't use penetrating oil. Many years ago I used Chrysler's "Rust Penetrant" thinking it would be a good rust preventive for vehicles I saw every year for maintenance alignments. What I found was it opened up the threads very nicely, but then it was easy for water to find its way in later and rust developed, making the joint too tight to turn by hand a year later. Now I use Chrysler's "Spray White Lube". That's a lithium-based grease. You can find that at hardware stores under many different names.
Do not use anti-seize compound on anything related to steering and suspension parts. Fasteners tightened to specs will quickly work loose. Same with lug nut studs. Mechanics caught using anti-seize compound on those studs will usually be fired.
Consider making a measurement of the old parts before you remove them, then set the new parts to the same dimension, then tighten the locknut. That will get you close to the correct adjustment. Hand-tight with a regular open-end wrench is sufficient. Those will be loosened to make the "toe" adjustments. Those are always the last two adjustments during the alignment.
To check the lower ball joints, grab the tire and turn it left and right like you did for the tie rod ends, but now tug much harder. You're using the tire as the handle, and you're tugging against the tie rod ends. You need the higher forces to make slop in the ball joint show up. You might have to watch the joint while a helper tugs on the tire. Sometimes this can be a little tricky because the normal, slight turning makes the ball joint's boot turn and falsely look like there's play in the ball and socket. It's better to feel for the looseness. This is another part GM doesn't have a lot of trouble with on their car models.
When you want to check struts, this can't be done now with the suspension hanging down. It's the strut at the end of its travel that's holding everything up. That pressure prevents slop from showing up. What you CAN do for starters is to push the plastic dust boot up, then look around the top of the body where the shaft comes out, for wetness or signs of oil leakage. If you see a lot of caked-on mud, the oil leaked out a long time ago and dust stuck to it, creating that mess. If given enough time for this to occur, it makes for a miserable car to drive, with a lot of bouncing.
This next strut test is a little harder. The car must be jacked up, but not enough for the tire to come off the ground. You just need enough room to reach over the tire, through the coil spring, then under the dust boot. Reach your fingertip up, over the top of the strut body, so it's touching the shaft. With your other hand, tug in and out of the top of the tire. If you feel the shaft walking back and forth, you can be sure the oil has leaked out a long time ago. This too can be a little tricky because you may cause that corner of the car to move up and down a little. The shaft moving up and down can falsely feel like that sideways play. Typically when there's this type of wear, it's pretty evident as there's more than enough play to feel. This type of wear can cause a single knock when turning one way, then another single knock when returning to straight. Bumpy roads make them knock too. This is a rather common cause of elusive knocks that are hard to find.
There's always a hard rubber jounce bumper on the strut's shaft, under the plastic dust boot. Those don't fail or fall off very often. The more common problem is when the spring and other parts are being transferred to a new strut, and that bumper gets overlooked. You don't want to drive a car with that bumper missing. It causes a hard, harsh banging when going over big bumps, such as when entering a driveway. The banging can be bad enough to loosen your teeth!
The upper mounts sit on top of the coil springs and have bearings in them to allow for easier steering. Each mount holds up all the weight of that corner of the car. These caused a lot of clunking over bumps in the 1980s, but lately they don't wear out too often. To check for that wear and resulting looseness, watch the large nut in the center, under the hood, while prying up and down on the tire. If it's bad enough, you'll feel it in the pry bar. A little movement is normal, but I wouldn't want to see more than 1/16" up and down.
There's two more problems with these upper mounts. One is if dirt gets into them, it can make turning left and right feel difficult or have tight spots. That can also cause "memory steer". That's when the steering wheel stays wherever you put it rather than returning freely to center on its own. That makes for a very tiring car to drive. The other problem is some designs have a tendency to break or crumble apart, allowing the strut shaft, and wheel / tire to shift in and out on top a little. That's usually accompanied by a dull thumping sound over bumpy roads. The problem here is that wear is next to impossible to see during an inspection, and it only shows up when the parts are disassembled to be transferred to the new strut. That's when we have to tell you more parts are needed than first thought.
Of course any testing of struts and upper mounts can be ignored since you're replacing them with Quick Struts. You're getting all new parts.
One last thing, especially on older, higher-end Chrysler products, is there's a rubber isolator under the bottom of the coil spring where it rests in the plate welded to the strut body. Those have a steel ring inside to provide support and hold the rubber in place. Over time the rings rust away, then the rubber gets hammered out and deteriorates. That alone lowers ride height by 1/2". You have to get replacements from the dealer. If you choose to leave them out, you have to do that on both sides so the car remains level. Here too, if the car came with them, they will be on the new Quick Struts.
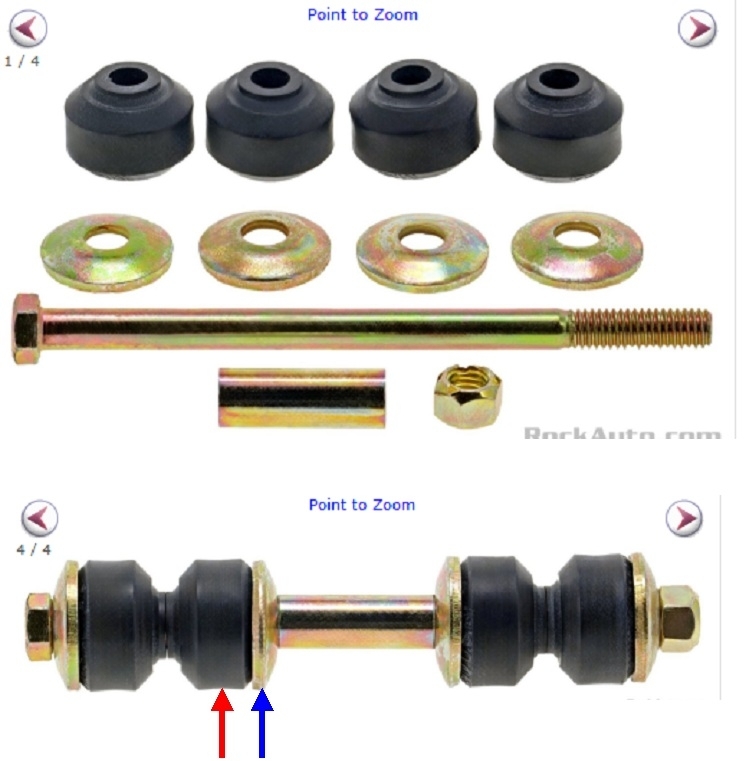
Your model uses the most common anti-sway bar link design. It has been around since forever. See the fourth photo. The top shows the pieces you get in the kit for one link. When these fail, they sound like a tambourine on bumpy roads. Getting the old ones off usually requires an air-powered cutoff tool or an angle grinder. The nuts get rusted tight and commonly round off. The big secret to these is you do not fully tighten the nut when installing them. Rather, run the nut down until the rubbers expand to exactly the same diameter as the steel washers, as shown in the fourth photo, (red and blue arrows), at the bottom. GM used to use shock absorbers with a threaded stud on top, and two rubbers like those shown here. The same applies. When tightening the nut, do so just until the rubbers expand to the same diameter as the metal washers. If those are over-tightened, they'll bind or pinch when that stud needs to tip and swivel a little as the vehicle bounces up and down.
Here's a link to a page with a whole bunch of dandy articles that can explain some of these procedures better:
https://www.2carpros.com/articles
There are also some dandy videos you might want to check out. The second one has to do with struts on a Ford truck, but the information might still apply.
https://youtu.be/OMUFSut2ERA
https://youtu.be/sug_NoHfXG0
Let me know if you have more questions, and please keep me updated on your progress.
Images (Click to enlarge)
Apr 17, 2026 at 6:38 PM