Hi:
If the rear brakes are out of adjustment, the brake shoes won't touch the drum with enough force to really make them functional unless you pump the brakes several times. That will give you a spongy pedal.
Since you have rear drum brakes, here is what I suggest. Lift one side of the vehicle at a time and turn the adjuster until there is a drag on the tire when you turn it. Next, pump the brakes a few times to center the brake shoes and then check if the adjustment again. If you lost that drag and the wheels spins very easily, adjust again until you just get a slight drag when turning the wheel. When you spin the tire, it should turn maybe a full turn and then stop. If it keeps spinning, the brake needs further adjustment.
When I say a slight drag, the wheel should still be easy to turn, but it should not spin freely. I hope that makes sense. LOL Also, make sure to pump the brakes a few times and then recheck. During adjustment, you can cause the shoes to become slightly off center, so you will have a drag until you apply the brakes again.
Do this on both sides. I feel that is what is causing your spongy pedal. Tell me. If you pump the brakes several times when driving, does it become firmer?
______________________________________________________________
I am going to provide the directions for both rear brake shoe replacement and parking brake adjustment. You will note at the end of the directions for replacement, it says to pump the brakes to set the self adjuster. Between you and I, this process has never worked for me. I am including these in case you plan to replace the rear shoes if they are excessively worn and hoping it helps you get a good view of all the components and how they work.
_____________________________________________________________
Brake shoe replacement. The attached pics correlate with the directions.
1998 Honda Accord DX Sedan L4-2254cc 2.3L SOHC MFI
Procedures
Vehicle Brakes and Traction Control Drum Brake System Brake Shoe Service and Repair Procedures
PROCEDURES
Rear Brake Shoes Replacement
CAUTION: Frequent inhalation of brake pad dust, regardless of material composition, could be hazardous to your health.
- Avoid breathing dust particles.
- Never use an air hose or brush to clean brake assemblies. Use an OSHA-approved vacuum cleaner.
pic 1
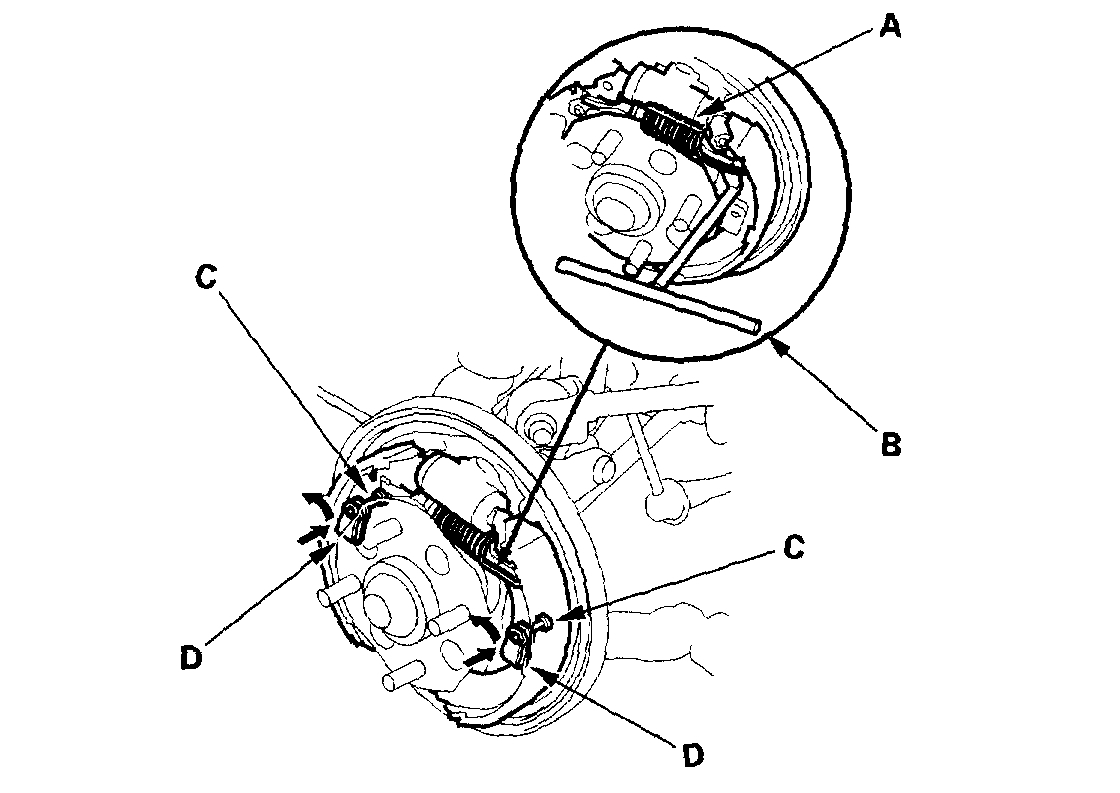
1. Disengage the upper return spring (A) with the tool (B)
2. Remove the tension pins (C) by pushing the retainer spring (D) and turning them.
pic 2
3. Lower the brake shoe assembly (A), and remove the lower return spring (B). Make sure not to damage the dust cover on the wheel cylinder.
4. Disconnect the parking brake cable from the parking brake lever.
5. Remove the brake shoe assembly.
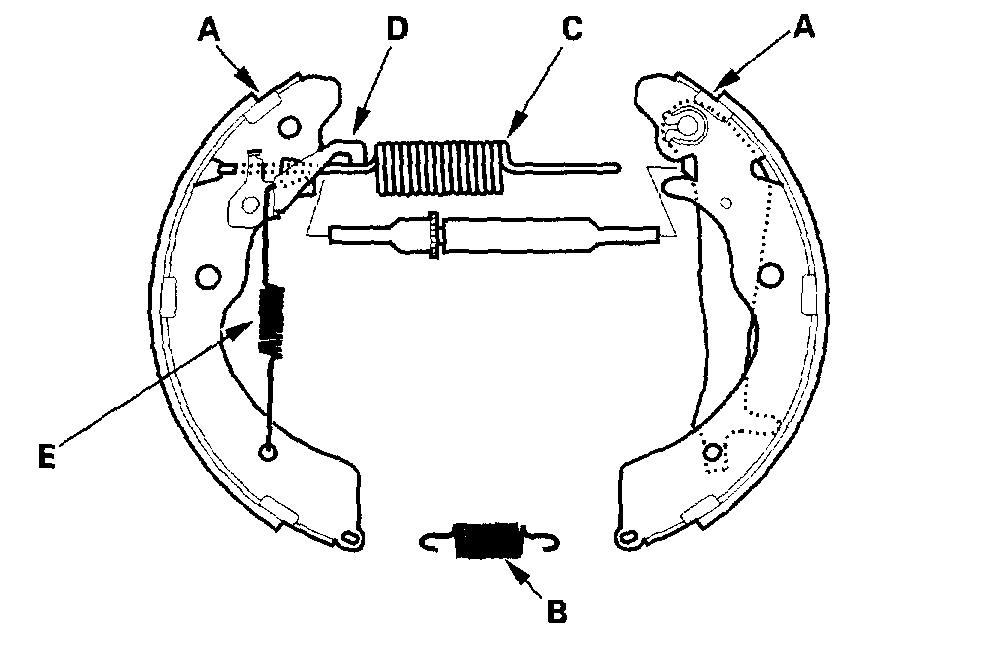
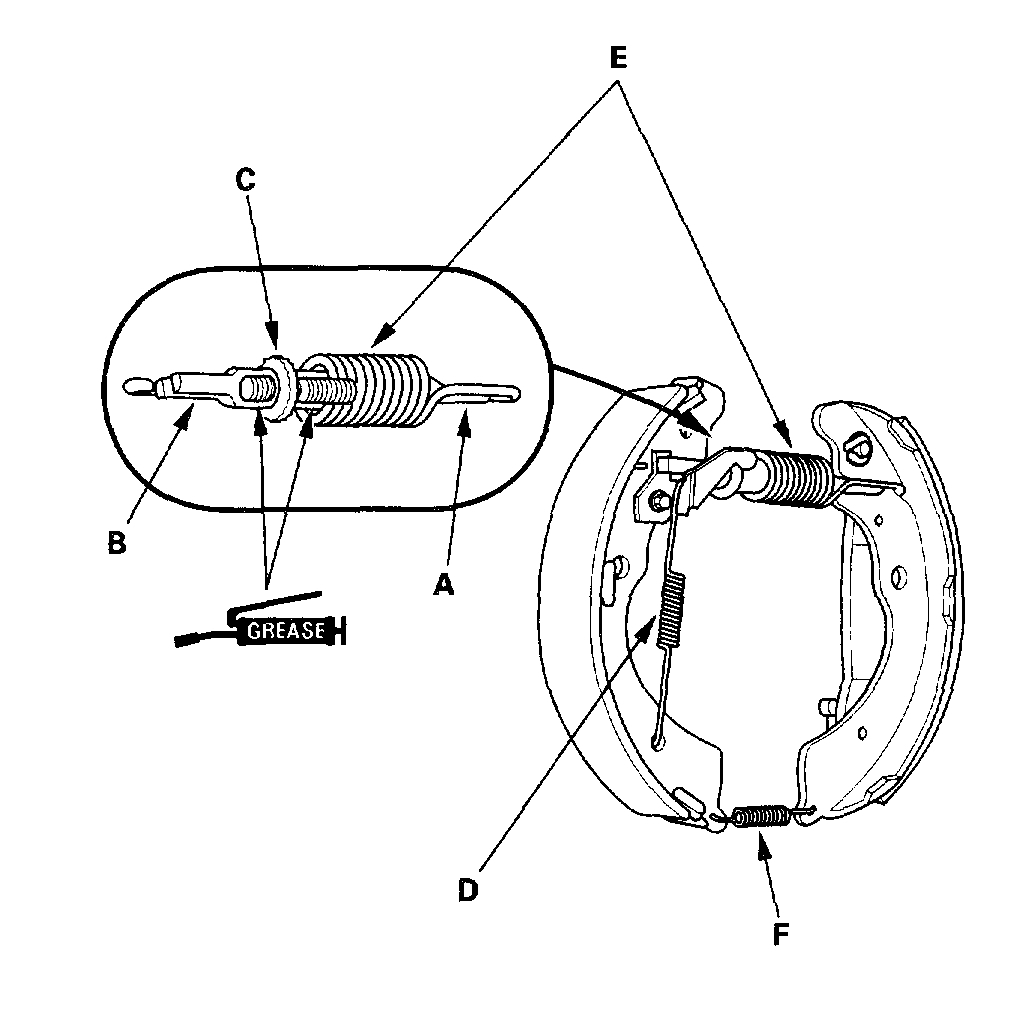
6. Remove the upper return spring (C), self-adjuster lever (D), and self-adjuster spring (E), and separate the brake shoes.
pic 3
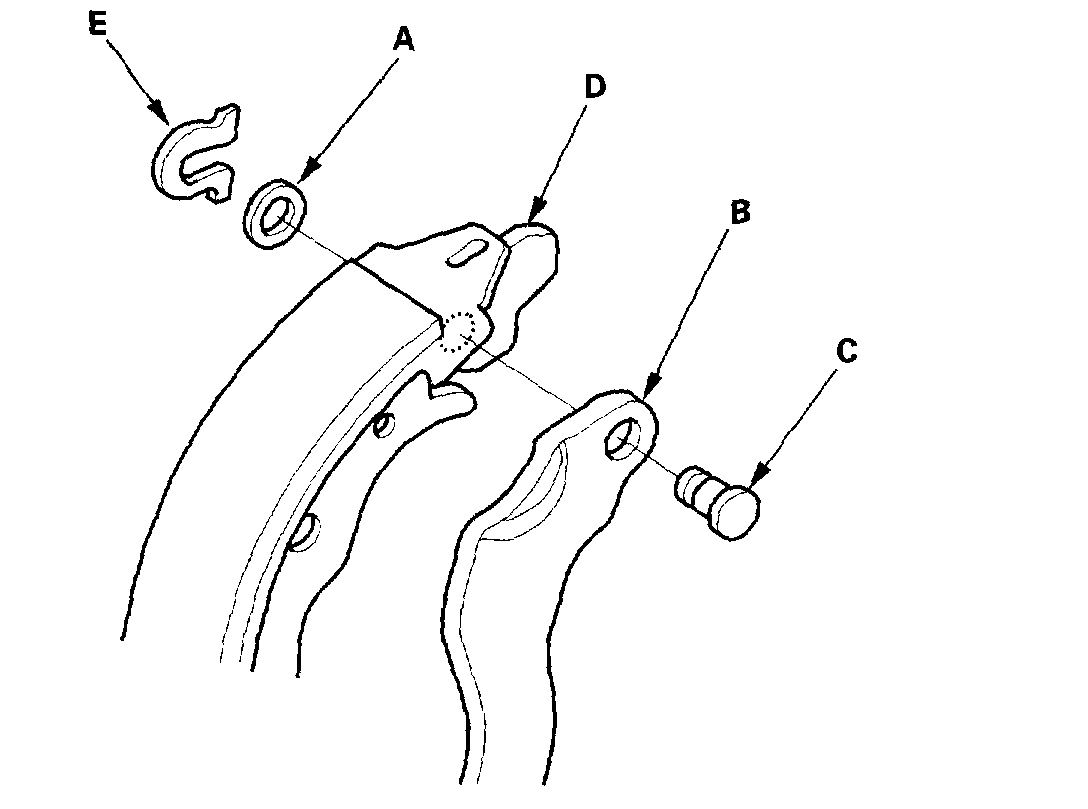
7. Remove the wave washer (A), parking brake lever (B), and pivot pin (C) from the brake shoe (D) by removing the U-clip (E).
pic 4
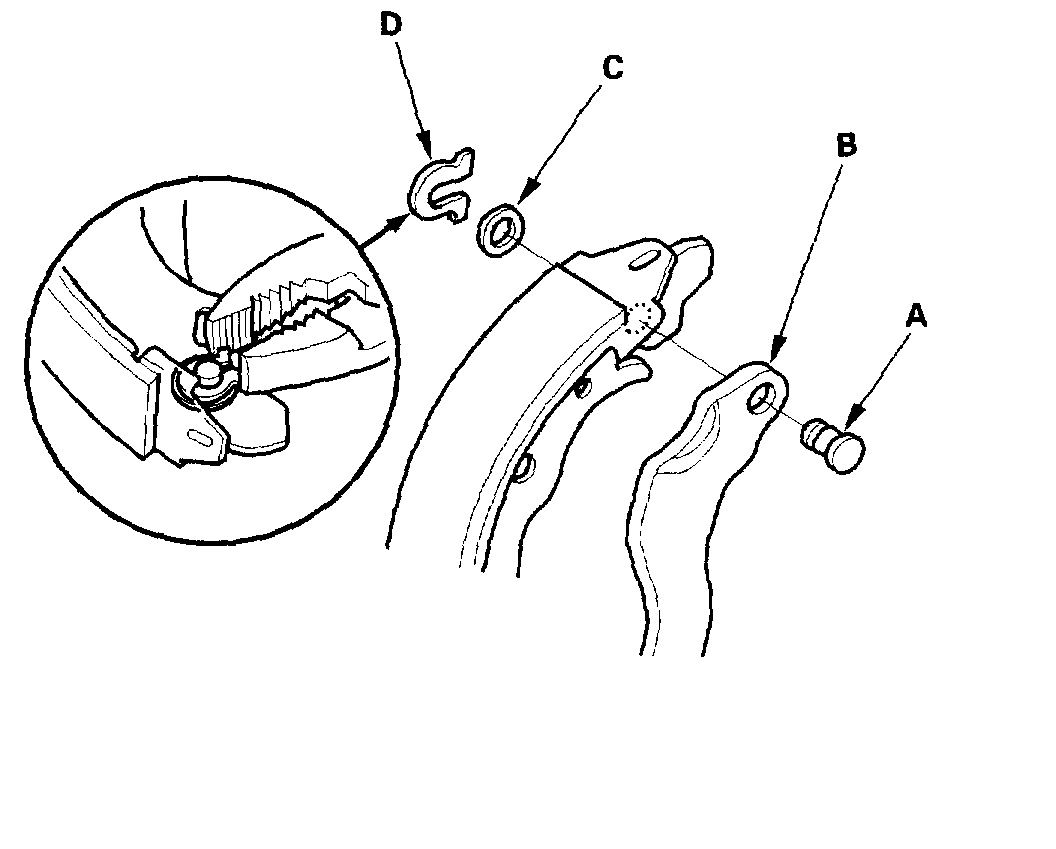
8. Apply brake cylinder grease (P/N: 08733-B0202) or equivalent rubber grease to the sliding surface of the pivot pin (A), and insert the pin into the brake shoe.
9. Install the parking brake lever (B) and wave washer (C) on the pivot pin, and secure with a new U-clip (D).
- Install the wave washer with its convex side facing out.
- Pinch the U-clip securely to prevent the pivot pin from coming out from the brake shoe.
10. Connect the parking brake cable to the parking brake lever.
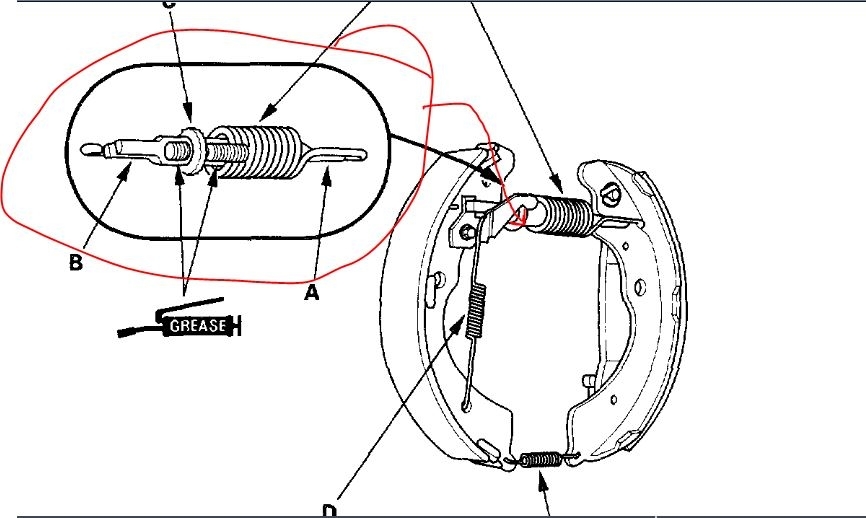
pic 5
11. Clean the threaded portions of clevises A and B. Coat the threads of the clevises with grease. To shorten the clevises, turn the adjuster bolt (C).
12. Hook the self-adjuster spring (D) to the adjuster lever first, then to the brake shoe.
13. Install the Devises and upper return spring (E), noting the installation direction. Be careful not to damage the wheel cylinder dust covers.
14. Install the lower return spring (F).
pic 6
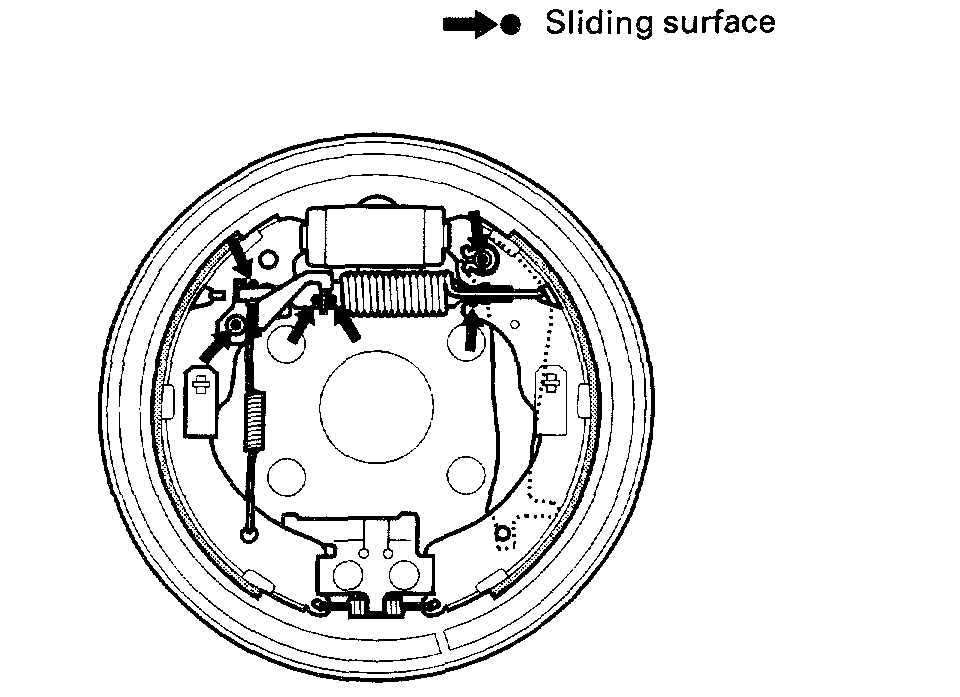
15. Apply brake cylinder grease (P/N: 08733-B020E) or equivalent rubber grease to the sliding surfaces shown. Wipe off any excess. Don't get grease on the brake linings.
pic 7
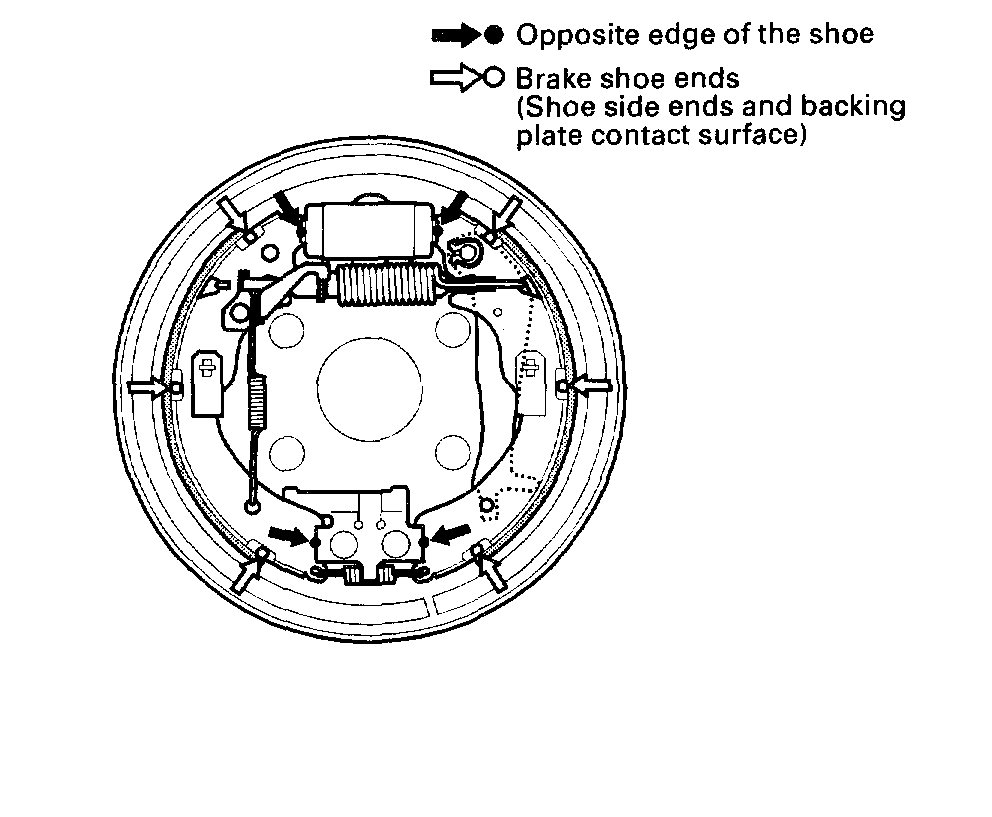
16. Apply Molykote 44MA to the brake shoe ends and opposite edges of the shoes shown. Wipe off any excess. Don't get grease on the brake linings.
pic 8
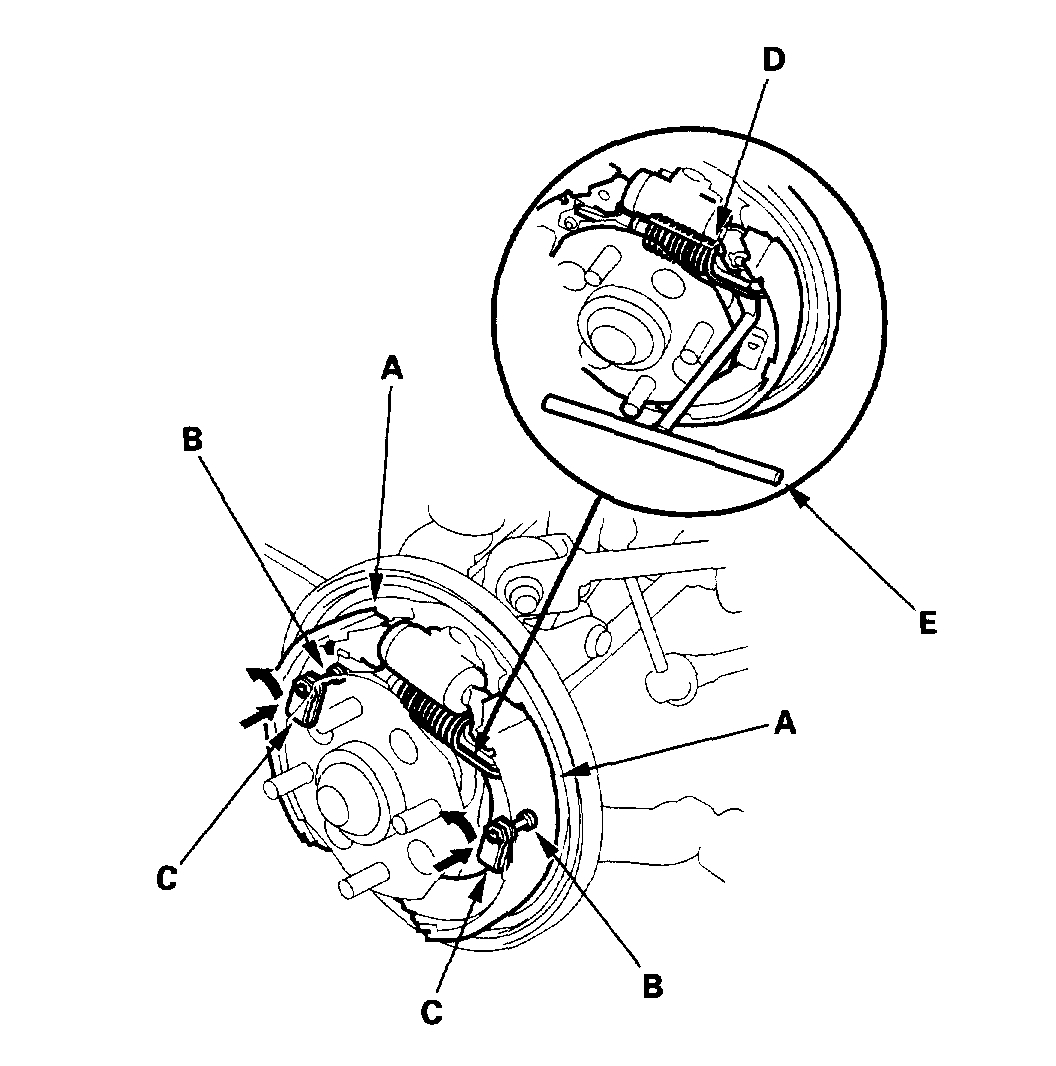
17. Install the brake shoes (A) onto the backing plate. Be careful not to damage the wheel cylinder dust covers.
18. Install the tension pins (B) and the retainer springs (C).
19. Hook the upper return spring (D) with the tool (E).
20. Install the brake drum.
21. If the wheel cylinder has been removed, bleed the brake system.
22. Press the brake pedal several times to set the self adjusting brake.
23. Adjust the parking brake.
In Pic 9, I circled the adjuster.
________________________________________________
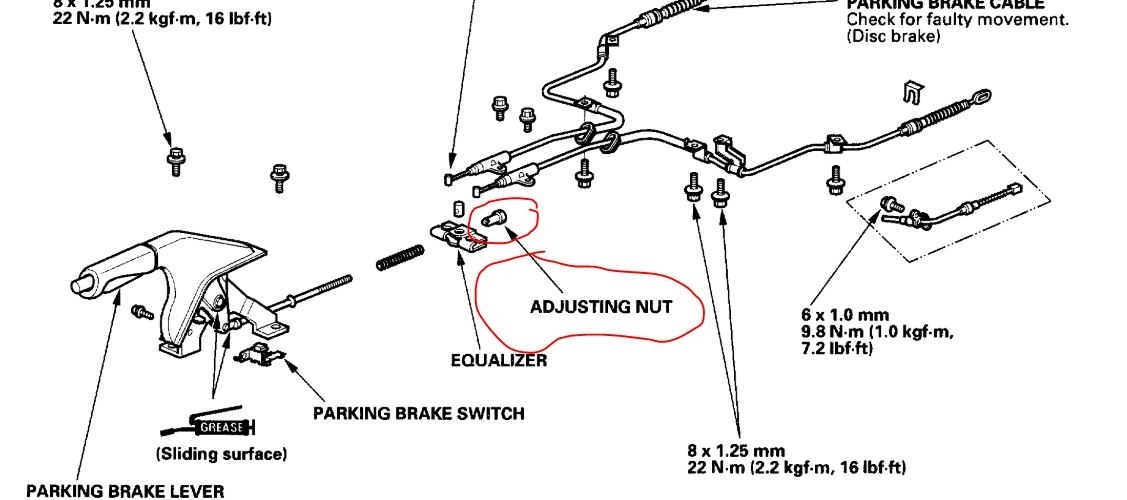
Parking brake adjustment.
In pic 10, I circled the adjuster for the parking brake.
Here are the manufacturer's suggestions for adjustment. I will tell you that when I check one, it should hold the vehicle stationary when the vehicle is placed in gear and your foot is off the brake. It should do this within the number of clicks recommended.
____________________________________________________-
1998 Honda Accord DX Sedan L4-2254cc 2.3L SOHC MFI
Adjustments
Vehicle Brakes and Traction Control Parking Brake System Parking Brake Cable Adjustments
ADJUSTMENTS
Check
pic 11
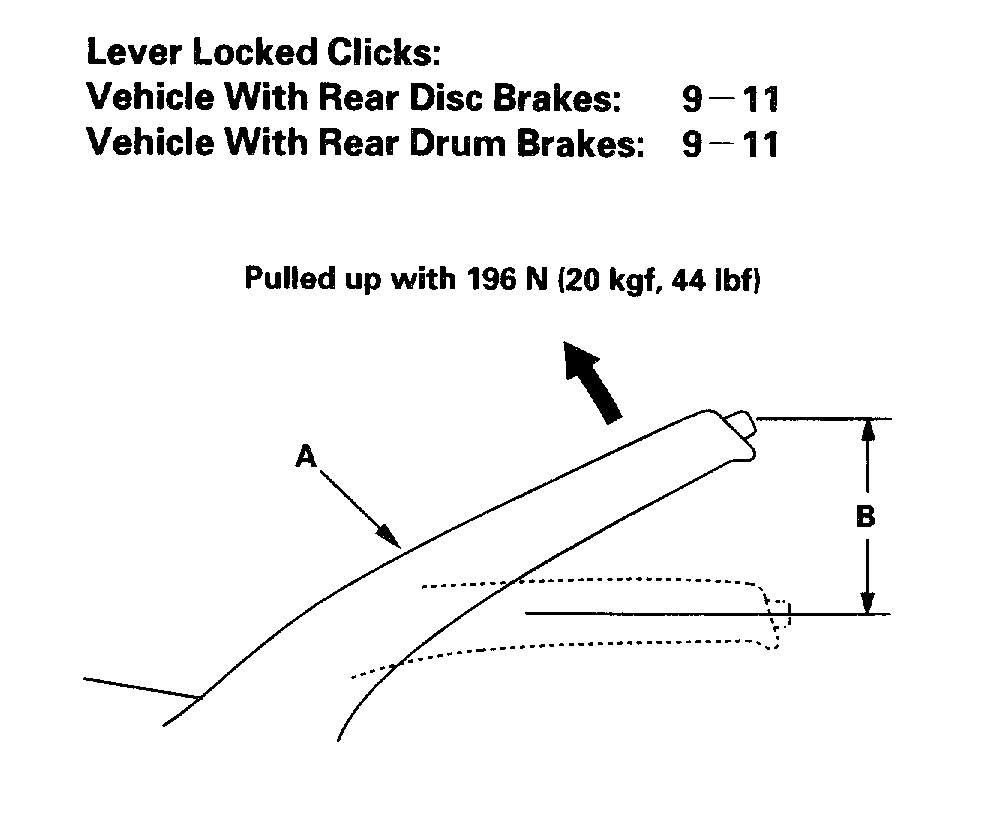
1. Pull the parking brake lever (A) with 196 N (20 kgf, 44 lbs.) force to fully apply the parking brake. The parking brake lever should be locked within the specified number of clicks (B).
2. Adjust the parking brake if the lever clicks are out of specification.
____________________________________
I hope this helps. Let me know.
Take care,
Joe
Images (Click to enlarge)
Apr 9, 2021 at 1:00 PM