Hi and thanks for using 2CarPros.
It is really based on symptoms. If you have brake fluid leaking between the master cylinder and the booster, the master cylinder is bad. The booster doesn't contain fluid.
Check out the diagrams (Below).
First, here is a link that shows in general how one is replaced:
https://www.2carpros.com/articles/how-to-replace-a-brake-master-cylinder
Here are the directions specific to your vehicle for replacing the master cylinder. Pictures 1, 2, and 3 correlate with these directions.
Master Cylinder Replacement
Notice: Do not spill brake fluid on the vehicle; it may damage the paint; if brake fluid does contact the paint, wash it off immediately with water.
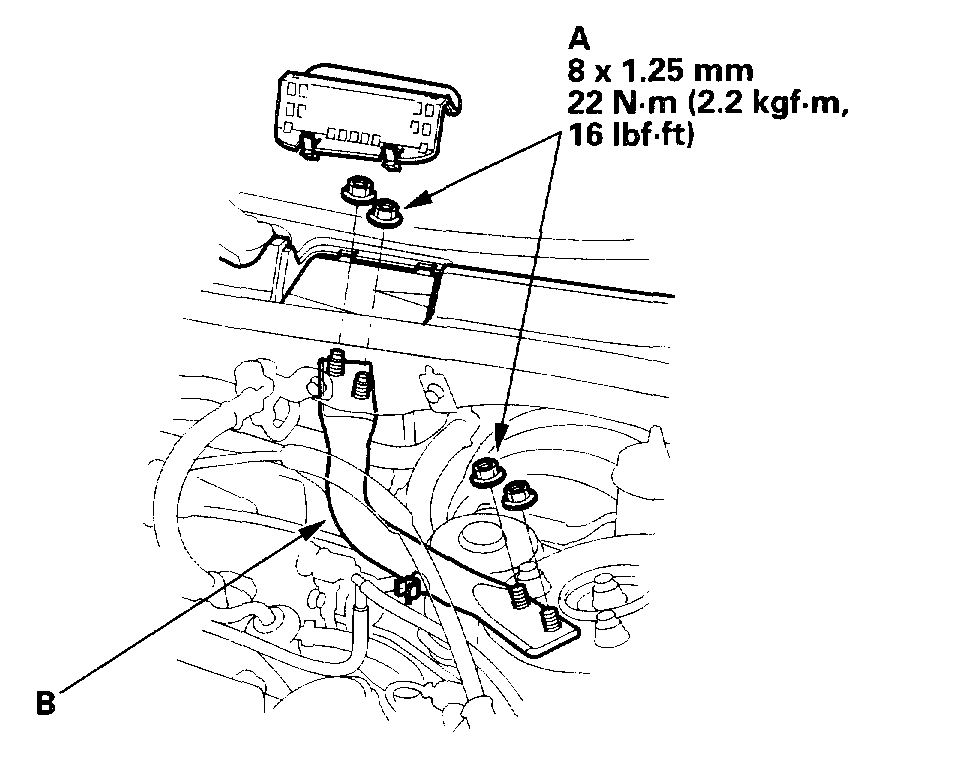
1. Remove the 8 mm flange nuts (A).
2. Remove the strut brace (B).
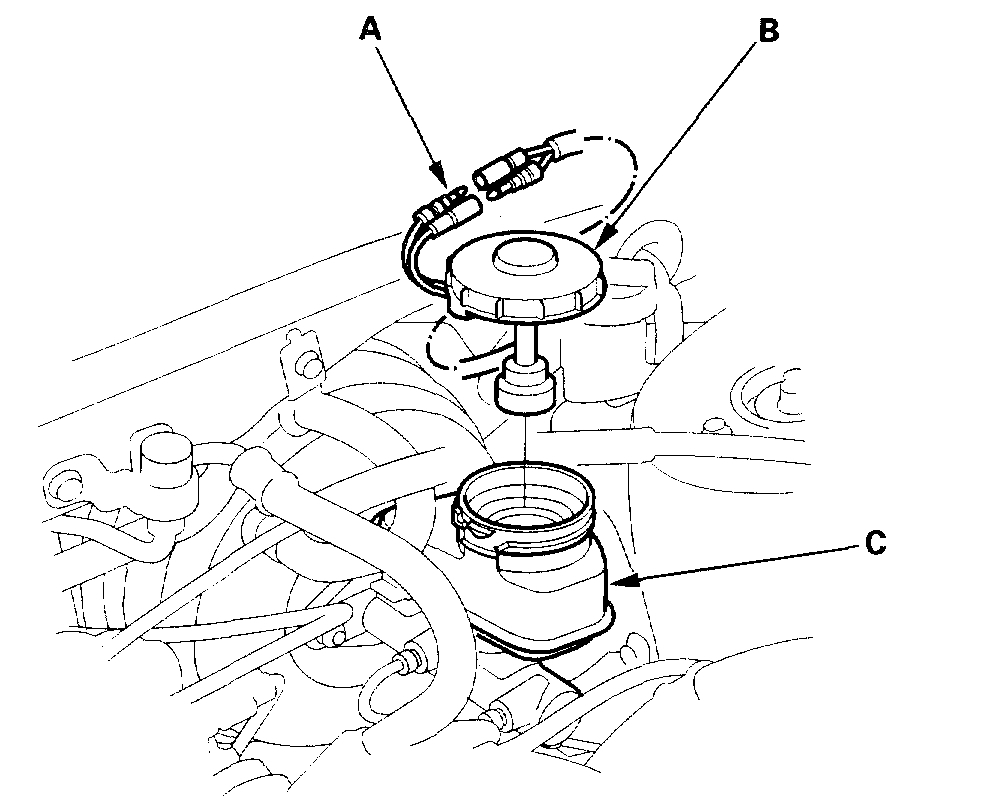
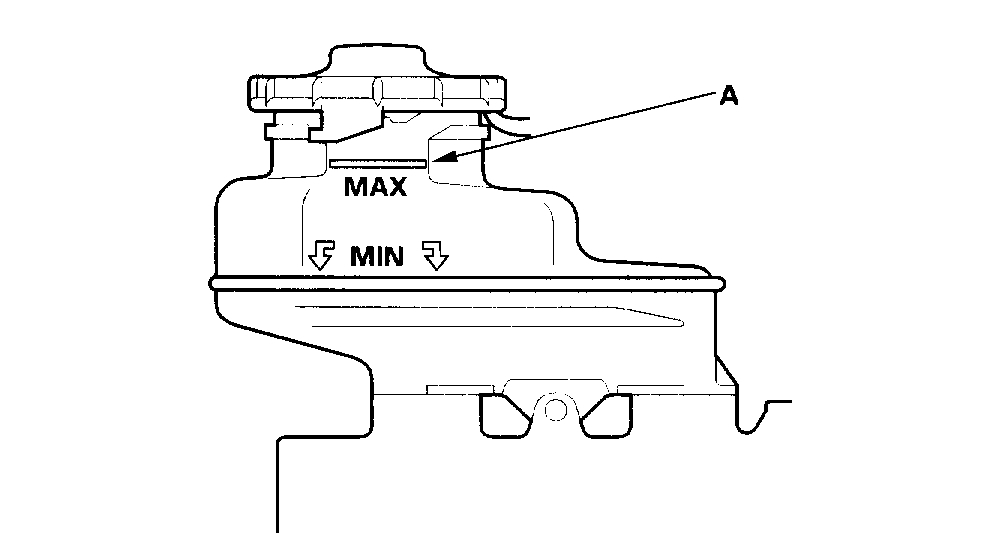
3. Disconnect the brake fluid level switch connectors (A), and remove the reservoir cap (B).
4. Remove the brake fluid from the master cylinder reservoir (C) with a syringe.
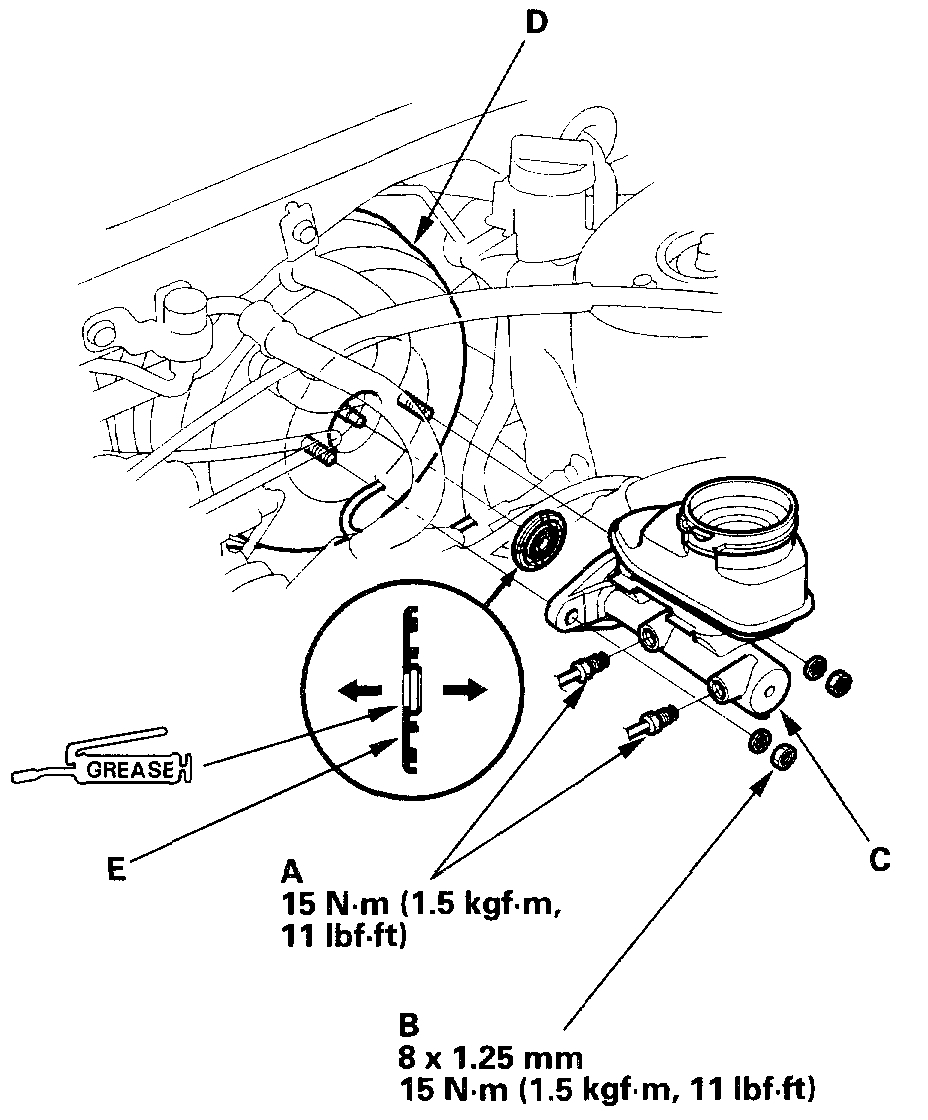
5. Disconnect the brake lines (A) from the master cylinder. To prevent spills, cover the hose joints with rains or shop towels.
6. Remove the master cylinder mounting nuts (B) and washers.
7. Remove the master cylinder (C) from the brake booster (D). Be careful not to bend or damage the brake lines when removing the master cylinder.
8. Remove the rod seal (E) from the brake booster.
9. Install the master cylinder in the reverse order of removal, and note these items:
- Replace all rubber parts with new ones whenever removed.
- Coat the lip of the new rod seal with recommended seal grease in the master cylinder set.
- Install the rod seal onto the brake booster with its grooved side toward the master cylinder.
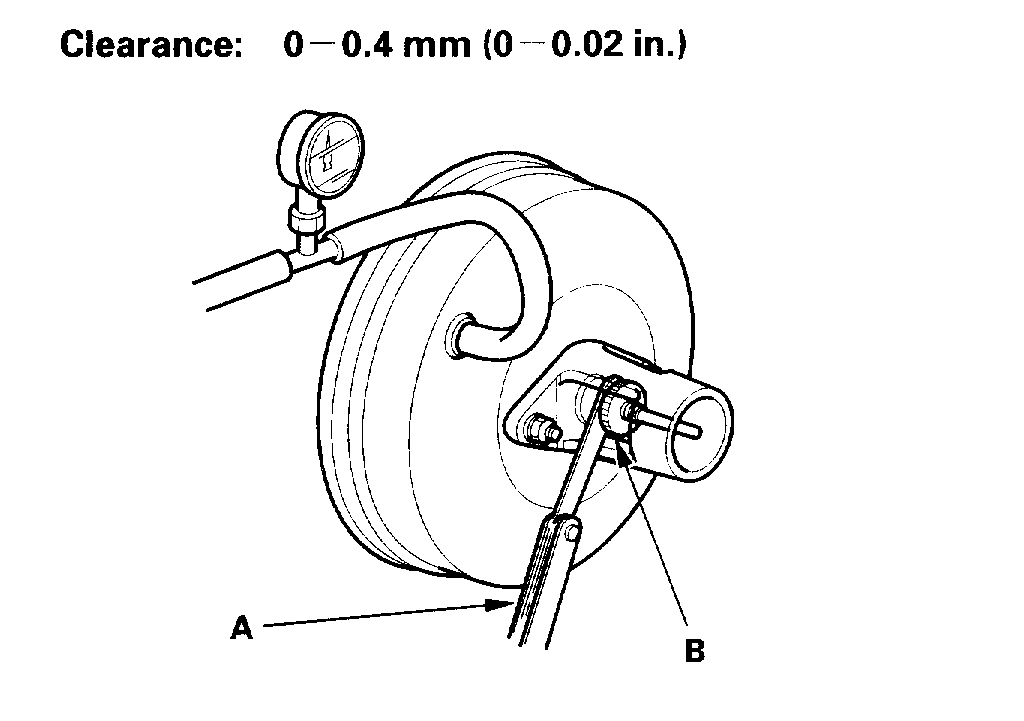
Next, you should check the push rod adjustment. Here are the directions for doing this. Pics 4-8 correlate with these directions.
Master Cylinder Pushrod Clearance Adjustment
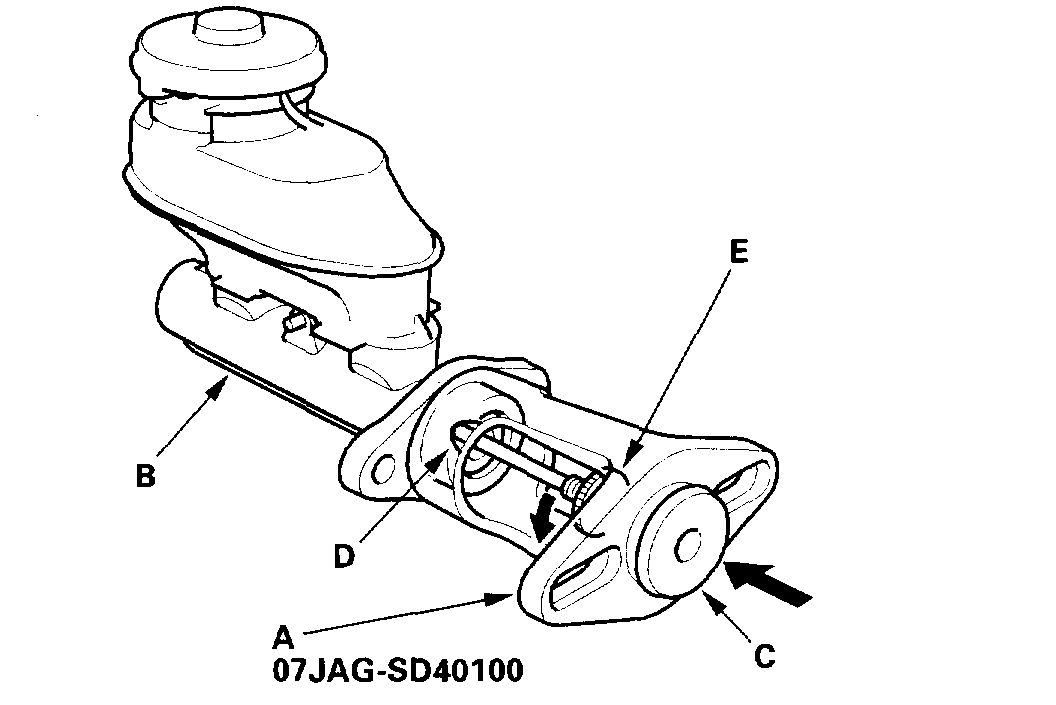
Special Tools Required
Pushrod Adjustment Gauge 07JAG-SD40100
NOTE: Master cylinder pushrod-to-piston clearance must be checked and adjustments made, if necessary, before installing the master cylinder.
1. Set the special tool (A) on the master cylinder body (B), push in the center shaft (C) until the top of it contacts the end of the secondary piston (D) by turning the adjusting nut (E).
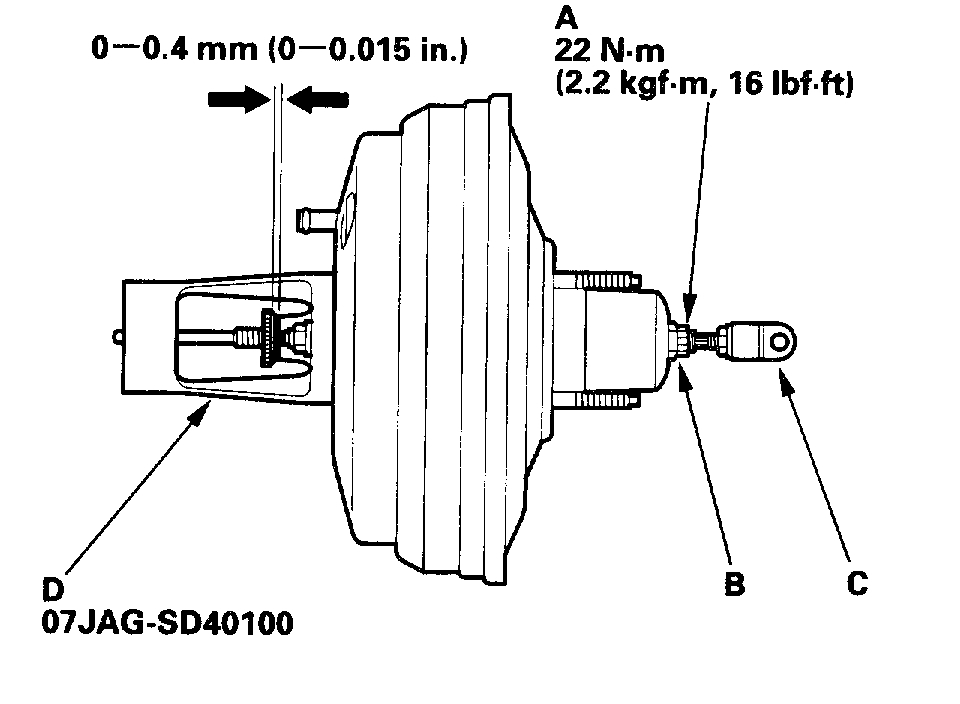
2. Without disturbing the center shaft's position, install the special tool (A) backwards on the booster.
3. Install the master cylinder nuts (B), and tighten to the specified torque.
4. Connect the booster in-line with a vacuum gauge (C) 0 - 101 kPa (0 - 760 mm-Hg, 30 inch-Hg) to the booster's engine vacuum supply, and maintain an engine speed that will deliver 66 kPa (500 mm-Hg, 20 inch-Hg of vacuum.
5. With a feeler gauge (A), measure the clearance between the gauge body and the adjusting nut (B) as shown. If the clearance between the gauge body and adjusting nut is 0.4 mm (0.02 inch), the pushrod-to-piston clearance is 0 mm. However, if the clearance between the gauge body and adjusting nut is 0 mm, the pushrod-to-piston clearance is 0.4 mm (0.02 inch) or more. Therefore it must be adjusted and rechecked.
6. If the clearance is incorrect, loosen the star locknut (A) and turn the adjuster (B) in or out to adjust.
- Adjust the clearance while the specified vacuum is applied to the booster.
- Hold the clevis (C) while adjusting.
7. Tighten the star locknut securely.
8. Remove the special tool (D).
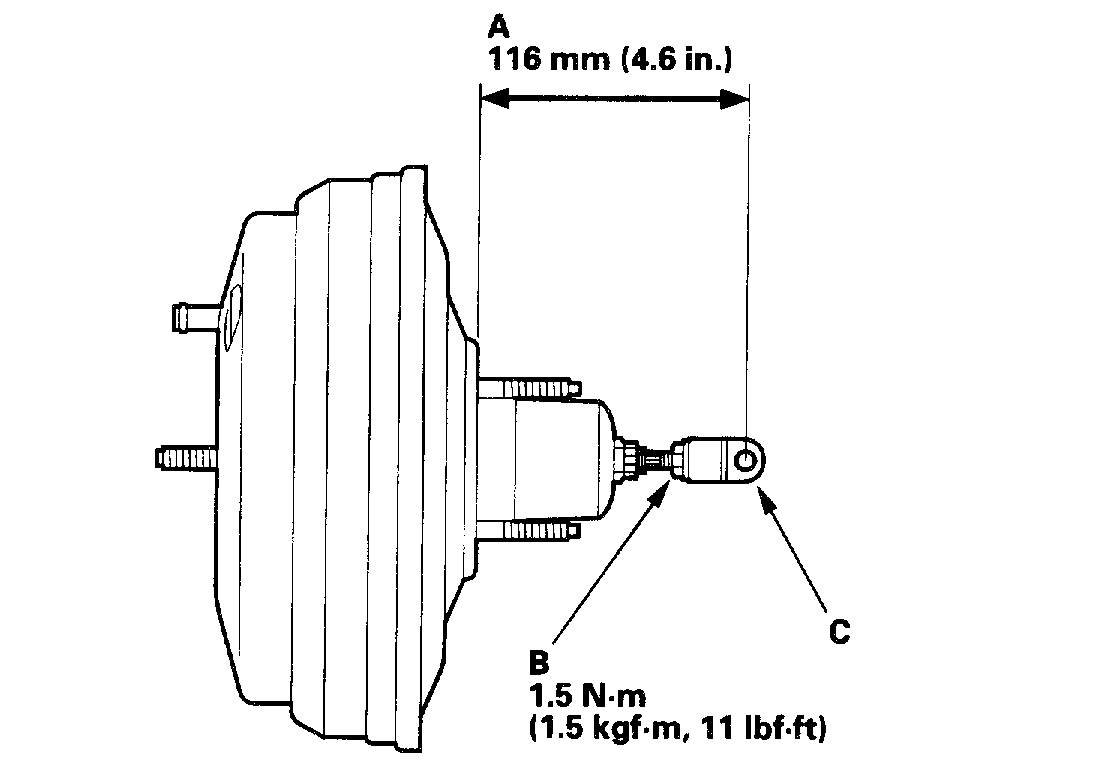
9. Check the pushrod length (A) as shown if the booster is removed. If the length is incorrect, loosen the pushrod locknut (B), and turn the clevis (C) in or out to adjust.
10. Install the master cylinder.
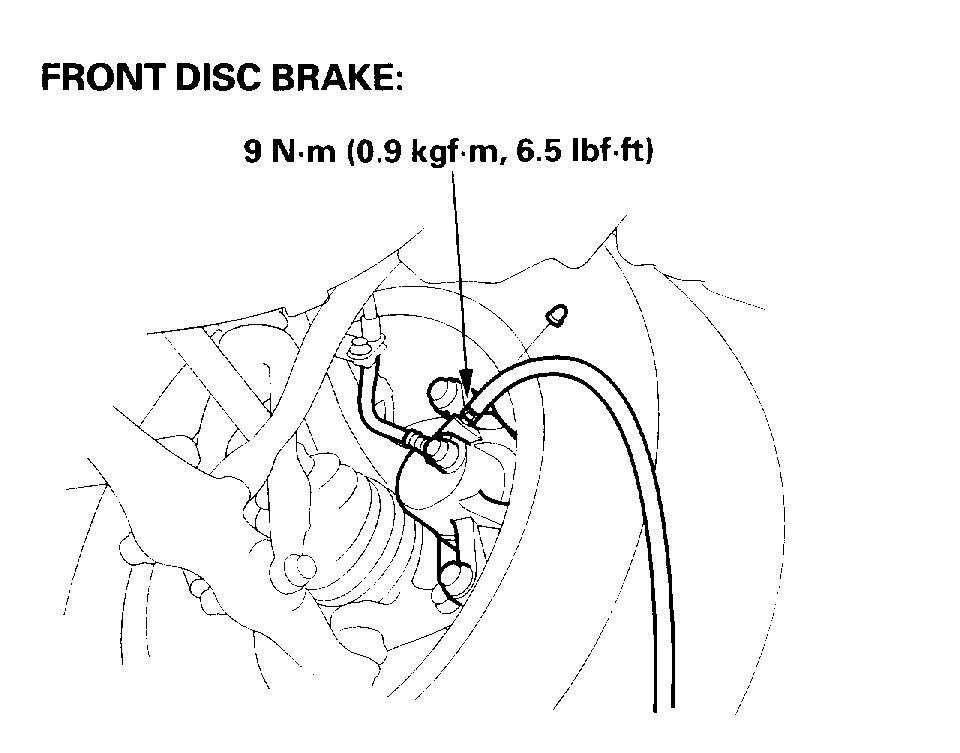
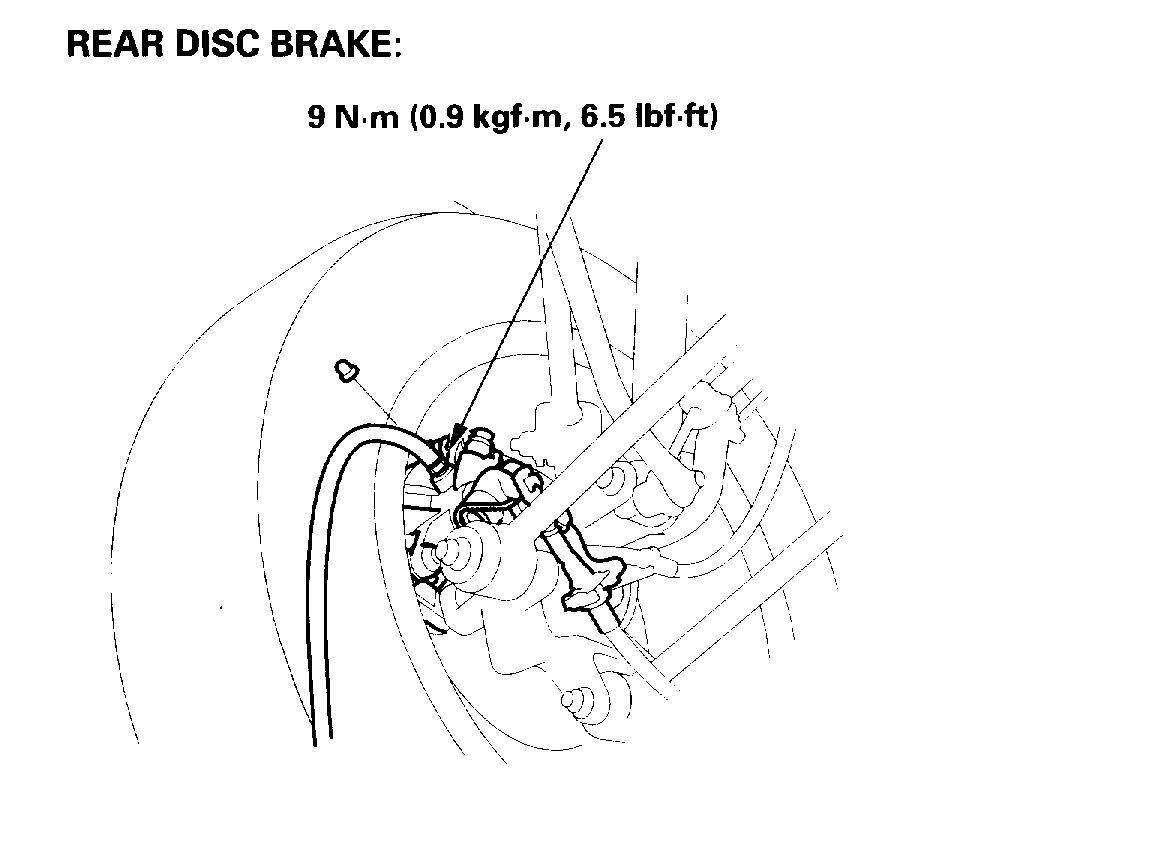
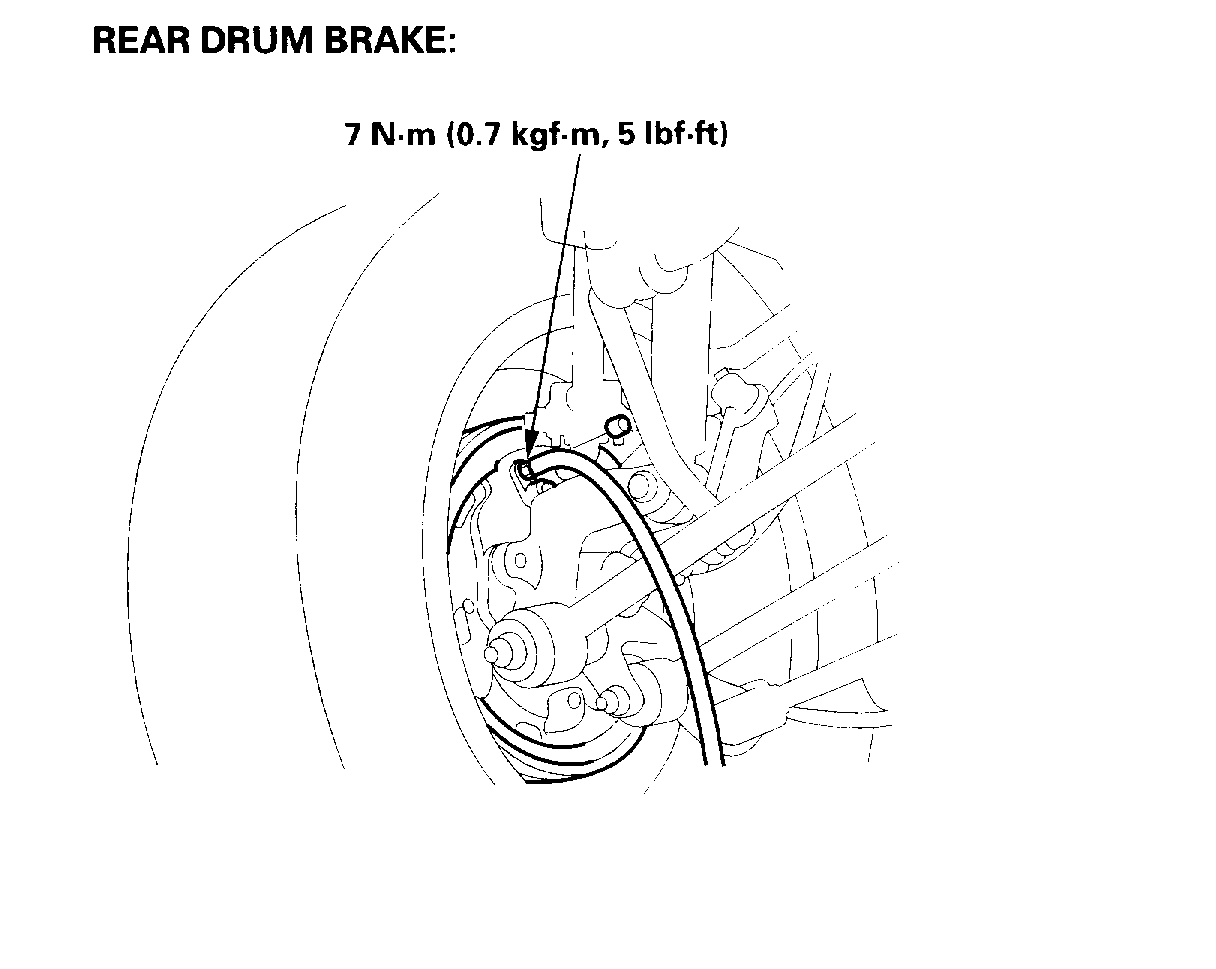
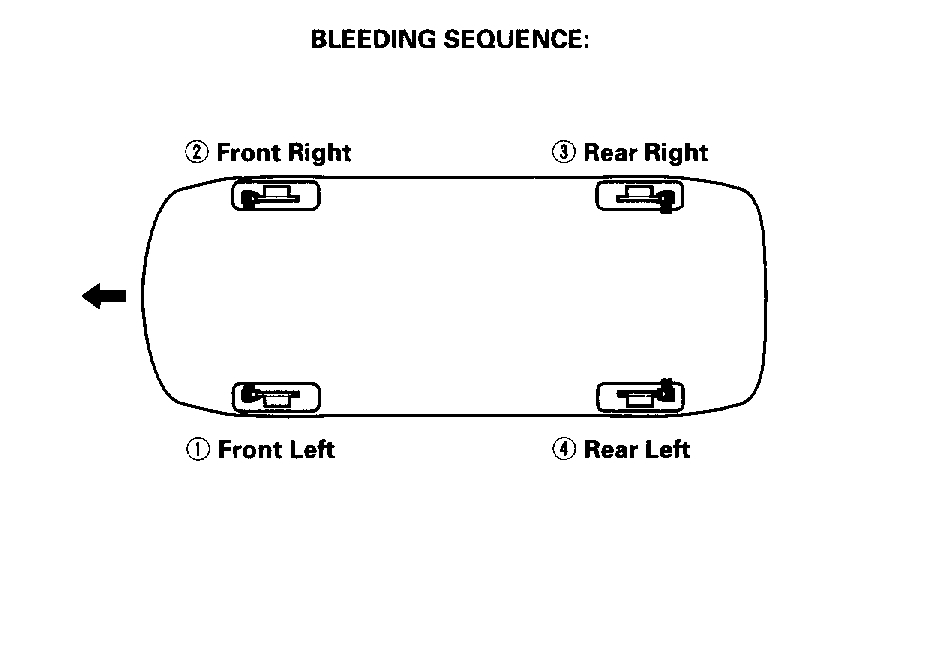
The master cylinder needs to be bench bleed. The directions are included in the aforementioned link. If you find air get into the system, here is the procedure for bleeding the system at the brakes. The remaining pictures correlate with these directions.
Check out the diagrams (Below). Please let us know what happens.
Images (Click to enlarge)
Apr 9, 2021 at 11:52 AM