Hi,
With the engine off, does the pedal pump up? Based on everything you've done, they should work and I believe you already know that. I am going to add the directions for bleeding from the manual to see if there is anything you missed. However, even if there was a bit of air in the system, the pedal should feel spongy at worst. Or if you did anything with the abs hydraulic unit, that would require a different process. I'll add both. One last thing. If the pedal goes to the floor with no resistance, are you sure everything is connected between the pedal and the master cylinder? When you bleed the system at each wheel, do you have good pressure when the fluid comes out? If there are no leaks, the push rod between the pedal and master cylinder is moving and depressing the pistons in the master cylinder, there is no air in the system, and there is no pedal, there is a chance you got a bad master cylinder.
Here is a link that discusses the most common causes of the pedal going to the floor:
https://www.2carpros.com/articles/brake-pedal-goes-to-the-floor
Here are the directions I have specific to your vehicle. The attached pics will correlate with the directions.
__________________________________
Change Vehicle Bookmarks Library Request Conversion Calculator Technician's Reference - Collision
brake bleeding
17
Community 37 Create Quote
2007 Ford Truck F 150 2WD V8-5.4L VIN 5
Procedures
Vehicle Brakes and Traction Control Hydraulic System Brake Bleeding Service and Repair Procedures
PROCEDURES
Brake System Bleeding
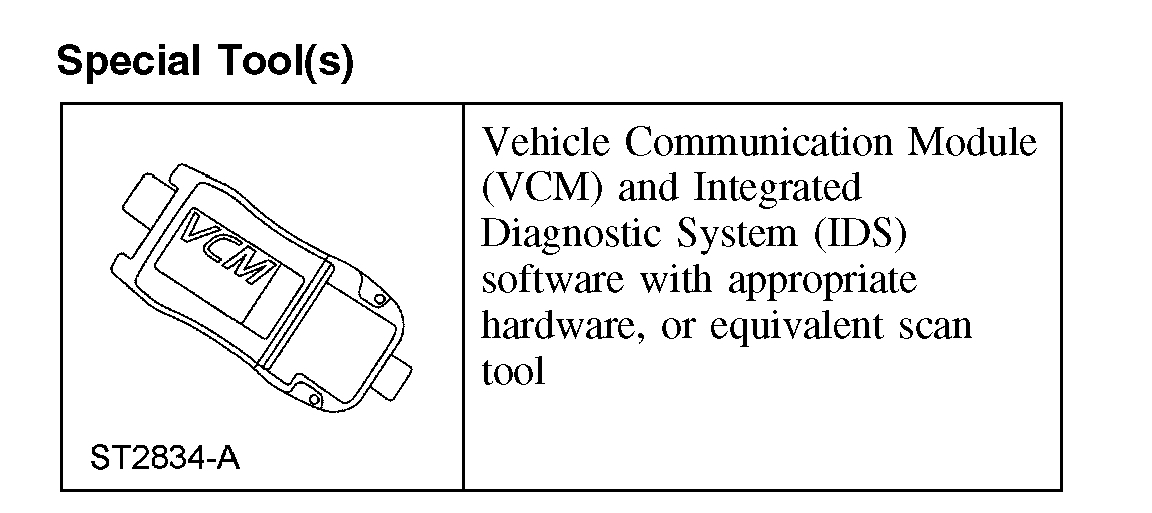
Special Tool(s)
pic 1
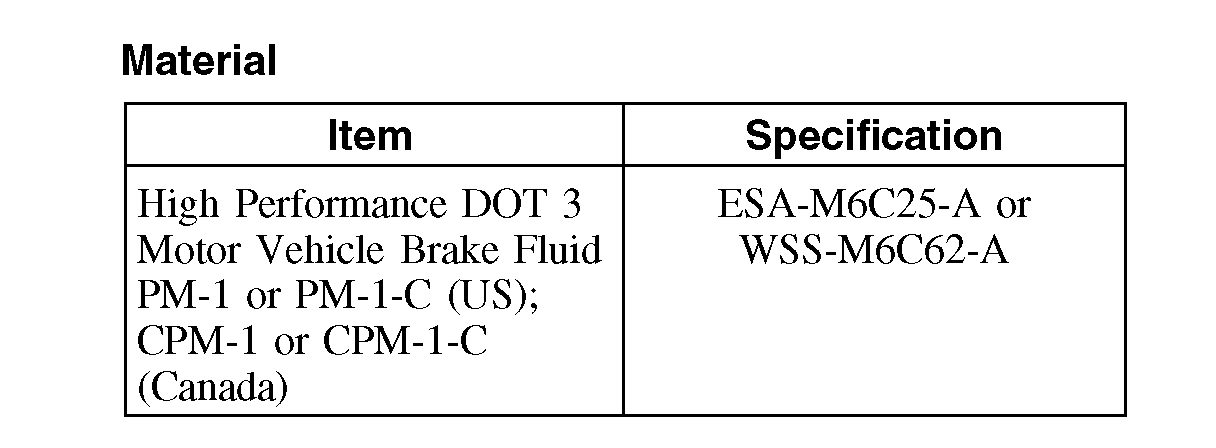
Material
pic 2
Master Cylinder - Bench
WARNING: Use of any other than approved DOT 3 motor vehicle brake fluid will cause permanent damage to brake components and will render the brakes inoperative. Failure to follow these instructions may result in personal injury.
WARNING: Carefully read cautionary information on product label. For EMERGENCY MEDICAL INFORMATION seek medical advice. In the USA or Canada on Ford/Motorcraft products call: 1-800-959-3673. For additional information, consult the product Material Safety Data Sheet (MSDS) if available. Failure to follow these instructions may result in personal injury.
CAUTION: Brake fluid is harmful to painted and plastic surfaces. If brake fluid is spilled onto a painted or plastic surface, immediately wash it with water.
CAUTION: Do not allow the brake master cylinder reservoir to run dry during the bleeding operation. Keep the brake master cylinder reservoir filled with clean, specified brake fluid. Never reuse the brake fluid that has been drained from the hydraulic system.
NOTE: When any part of the hydraulic system has been disconnected for repair or new installation, air may get into the system and cause spongy brake pedal action. This requires bleeding of the hydraulic system after it has been correctly connected. The hydraulic system can be gravity bled, manually bled or bled with pressure bleeding equipment.
1. Support the brake master cylinder body in a vise and fill the brake master cylinder reservoir with clean, specified brake fluid.
2. NOTE: Original equipment tubes are not intended to be used during this procedure.
Install short brake tubes with the ends submerged in the brake master cylinder reservoir.
3. Slowly press the primary piston until clear fluid flows from both brake tubes, without air bubbles.
4. Remove the short brake tubes and plug the brake tube ports.
Master Cylinder - In Vehicle
WARNING: Use of any other than approved DOT 3 motor vehicle brake fluid will cause permanent damage to brake components and will render the brakes inoperative. Failure to follow these instructions may result in personal injury.
WARNING: Carefully read cautionary information on product label. For EMERGENCY MEDICAL INFORMATION seek medical advice. In the USA or Canada on Ford/Motorcraft products call: 1-800-959-3673. For additional information, consult the product Material Safety Data Sheet (MSDS) if available. Failure to follow these instructions may result in personal injury.
CAUTION: Brake fluid is harmful to painted and plastic surfaces. If brake fluid is spilled onto a painted or plastic surface, immediately wash it with water.
CAUTION: Do not allow the brake master cylinder reservoir to run dry during the bleeding operation. Keep the brake master cylinder reservoir filled with clean, specified brake fluid. Never reuse the brake fluid that has been drained from the hydraulic system.
NOTE: When any part of the hydraulic system has been disconnected for repair or new installation, air may get into the system and cause spongy brake pedal action. This requires bleeding of the hydraulic system after it has been correctly connected. The hydraulic system can be gravity bled, manually bled or bled with pressure bleeding equipment.
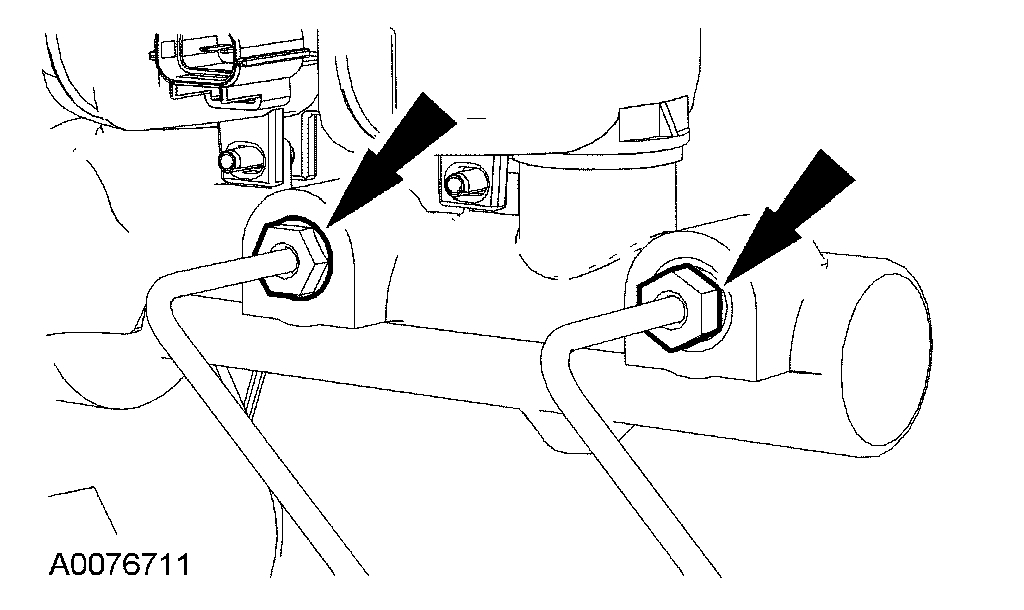
1. NOTE: When a new brake master cylinder has been installed or the system has been emptied or partially emptied, it should be primed to prevent air from getting into the system.
Disconnect the brake master cylinder outlet tubes.
pic 3
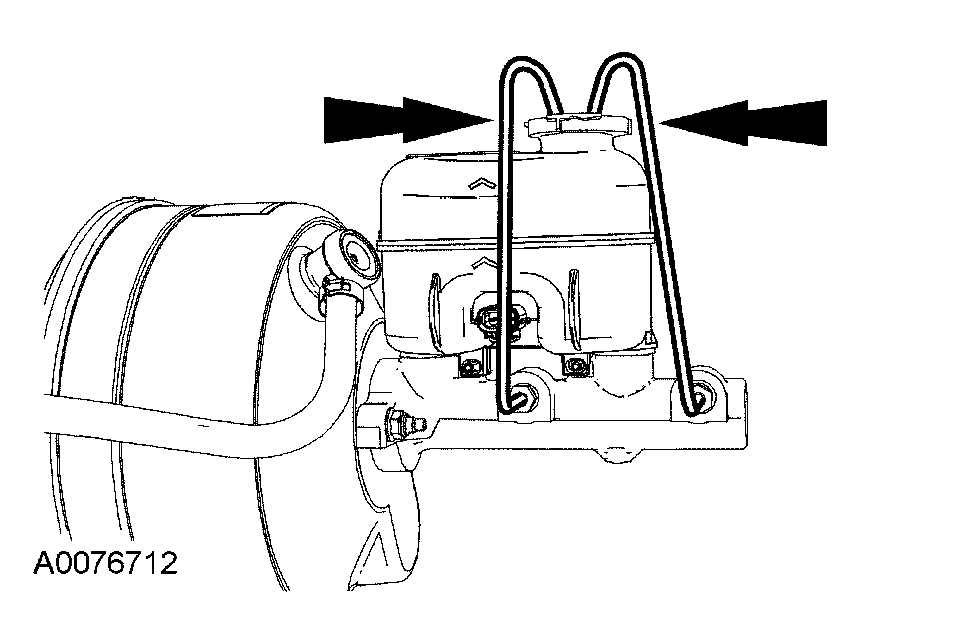
2. NOTE: Original equipment tubes are not intended to be used during this procedure.
Install short brake tubes with the ends submerged into the brake master cylinder reservoir and fill the brake master cylinder reservoir with clean, specified brake fluid.
pic 4
3. Have an assistant pump the brake pedal until clear fluid flows from both brake tubes, without air bubbles.
4. Remove the short brake tubes and install the brake outlet tubes.
5. Bleed each brake tube at the brake master cylinder as follows:
1 Have an assistant pump the brake pedal and then hold firm pressure on the brake pedal
2 Loosen the rear brake tube fitting until a stream of brake fluid comes out. Have an assistant maintain pressure on the brake pedal while tightening the brake tube fitting.
3 Repeat this operation until clear, bubble-free fluid comes out.
4 Refill the brake master cylinder reservoir as necessary. Repeat the bleeding operation for the front brake tube.
6. While the assistant maintains pressure on the brake pedal, tighten the brake tube fittings.
^ Tighten to 18 Nm (13 ft. lbs.).
Gravity Bleeding
WARNING: Use of any other than approved DOT 3 motor vehicle brake fluid will cause permanent damage to brake components and will render the brakes inoperative. Failure to follow these instructions may result in personal injury.
WARNING: Carefully read cautionary information on product label. For EMERGENCY MEDICAL INFORMATION seek medical advice. In the USA or Canada on Ford/Motorcraft products call: 1-800-959-3673. For additional information, consult the product Material Safety Data Sheet (MSDS) if available. Failure to follow these instructions may result in personal injury.
CAUTION: Brake fluid is harmful to painted and plastic surfaces. If brake fluid is spilled onto a painted or plastic surface, immediately wash it with water.
CAUTION: Do not allow the brake master cylinder reservoir to run dry during the bleeding operation. Keep the brake master cylinder reservoir filled with clean, specified brake fluid. Never reuse the brake fluid that has been drained from the hydraulic system.
NOTE: When any part of the hydraulic system has been disconnected for repair or new installation, air may get into the system and cause spongy brake pedal action. This requires bleeding of the hydraulic system after it has been correctly connected. The hydraulic system can be gravity bled, manually bled or bled with pressure bleeding equipment.
NOTE: When a new brake master cylinder has been installed or the system has been emptied or partially emptied, it should be primed to prevent air from getting into the system.
1. Fill the brake master cylinder reservoir with clean, specified brake fluid.
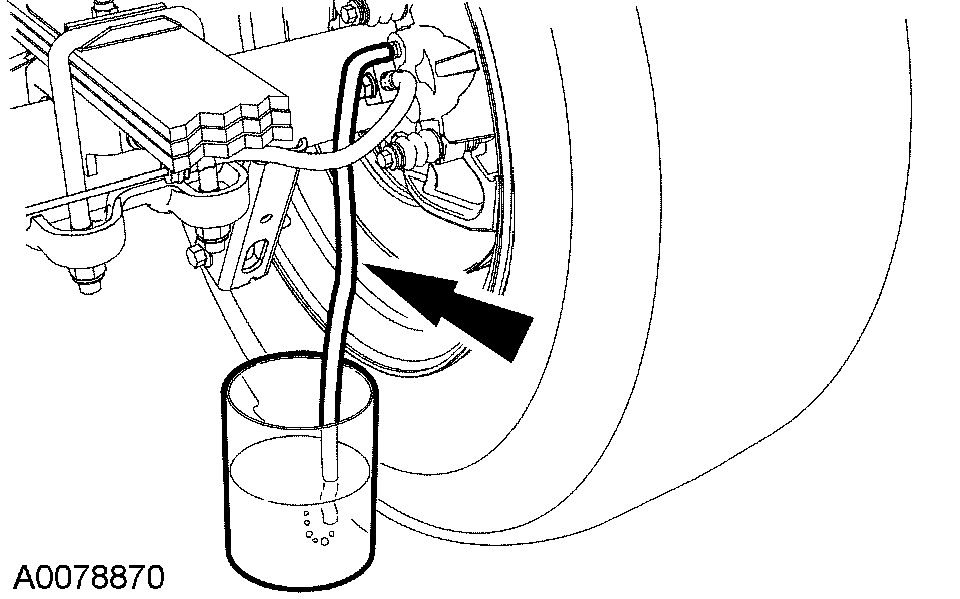
2. Connect a clear hose to the RH rear disc brake caliper bleeder screw and place the other end into a container partially filled with clean, specified brake fluid.
pic 5
3. Open the bleeder screw and leave it open until clear, bubble-free brake fluid flows.
^ Refill the brake master cylinder reservoir as necessary.
4. Tighten the disc brake caliper bleeder screw.
^ Tighten to 20 Nm (15 ft. lbs.).
5. Repeat Steps 1 through 4 for the 3 remaining brake calipers, going in order from the LH rear disc brake caliper to the RH front disc brake caliper and ending with the LH front disc brake caliper.
6. If the brake pedal feels spongy, repeat the bleed procedure.
Manual Bleeding
WARNING: Use of any other than approved DOT 3 motor vehicle brake fluid will cause permanent damage to brake components and will render the brakes inoperative. Failure to follow these instructions may result in personal injury.
WARNING: Carefully read cautionary information on product label. For EMERGENCY MEDICAL INFORMATION seek medical advice. In the USA or Canada on Ford/Motorcraft products call: 1-800-959-3673. For additional information, consult the product Material Safety Data Sheet (MSDS) if available. Failure to follow these instructions may result in personal injury.
CAUTION: Brake fluid is harmful to painted and plastic surfaces. If brake fluid is spilled onto a painted or plastic surface, immediately wash it with water.
CAUTION: Do not allow the brake master cylinder reservoir to run dry during the bleeding operation. Keep the brake master cylinder reservoir filled with clean, specified brake fluid. Never reuse the brake fluid that has been drained from the hydraulic system.
NOTE: When any part of the hydraulic system has been disconnected for repair or new installation, air may get into the system and cause spongy brake pedal action. This requires bleeding of the hydraulic system after it has been correctly connected. The hydraulic system can be gravity bled, manually bled or bled with pressure bleeding equipment.
1. Fill the brake master cylinder reservoir with clean, specified brake fluid.
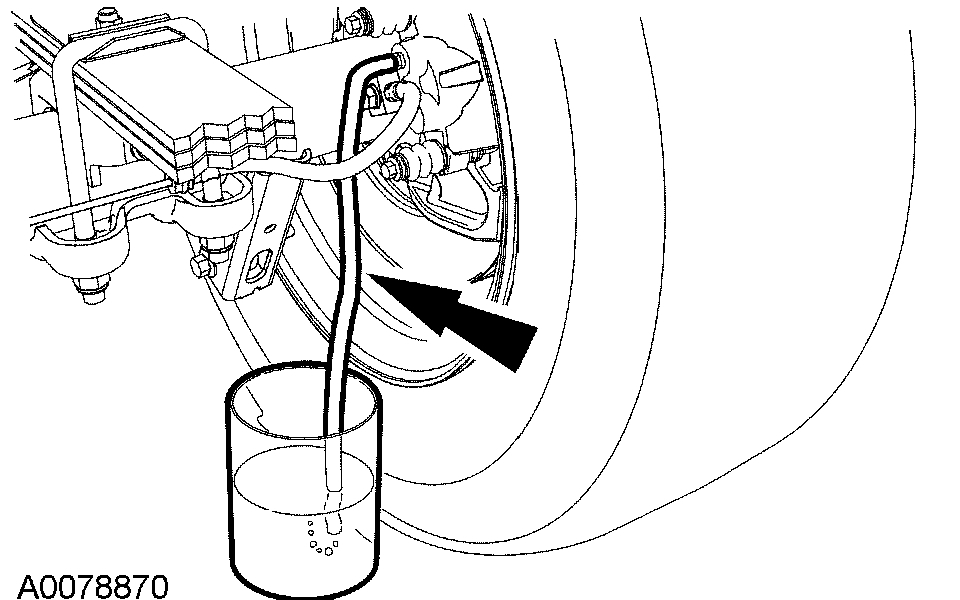
2. Connect a clear hose to the RH rear disc brake caliper bleeder screw and place the other end into a container partially filled with clean, specified brake fluid.
pic 6
3. Have an assistant pump the brake pedal and then hold firm pressure on the brake pedal.
4. Loosen the disc brake caliper bleeder screw until a stream of brake fluid comes out. Have an assistant maintain pressure on the brake pedal while tightening the disc brake caliper bleeder screw.
^ Repeat until clear, bubble-free fluid comes out.
^ Refill the brake master cylinder reservoir as necessary.
5. Tighten the disc brake caliper bleeder screw.
^ Tighten to 20 Nm (15 ft. lbs.).
6. Repeat Steps 1 through 5 for the 3 remaining brake calipers, going in order from the LH rear disc brake caliper to the RH front disc brake caliper ending with the LH front disc brake caliper.
7. If the brake pedal feels spongy, repeat the bleed procedure.
Anti-Lock Brake System (ABS) Hydraulic Control Unit Bleeding
NOTE: This procedure is only required when a new hydraulic control unit (HCU) is installed.
NOTE: When any part of the hydraulic system has been disconnected for repair or new installation, air may get into the system and cause spongy brake pedal action. This requires bleeding of the hydraulic system after it has been correctly connected. The hydraulic system can be gravity bled, manually bled or bled with pressure bleeding equipment.
1. Connect the scan tool and follow the ABS system bleed instructions.
2. Use the gravity bleed or manual bleed procedure(s) to bleed the system. Begin at the RH rear caliper.
________________________
Let me know.
Joe
Images (Click to enlarge)
Mar 10, 2021 at 10:58 AM