Hi and thanks for using 2CarPros.
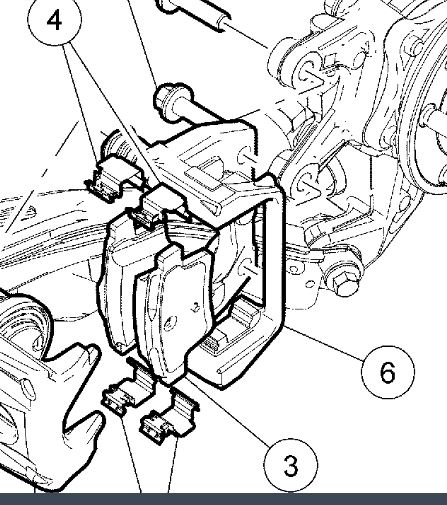
There really is not a trick. It should fit into the mount. Make sure to remove any rust or dirt that has developed over time. Most times, brake pads will get stuck when rust expands where the pad or spring clip hardware mounts. (See picture 1 component 4) I always remove the spring clips, take a small file, and take it back to clean metal then a touch of brake grease. If there is excessive rust under hardware, it presses in on the hardware and freezes the pads. And, it can cause it to be nearly impossible to install the new pad. Many times, I have had to hammer out old pads because they are so tight.
Here is a link that shows replacing brake pads. It may be helpful.
https://www.2carpros.com/articles/how-to-replace-rear-brake-pads-and-rotors
______________________________
Here are specific directions for your vehicle. Make sure, when you screw the caliper back in, the boot is clean and fully depressed. Otherwise, there will not be enough room for the pads to fit over the rotor.
_____________________________
Rear:
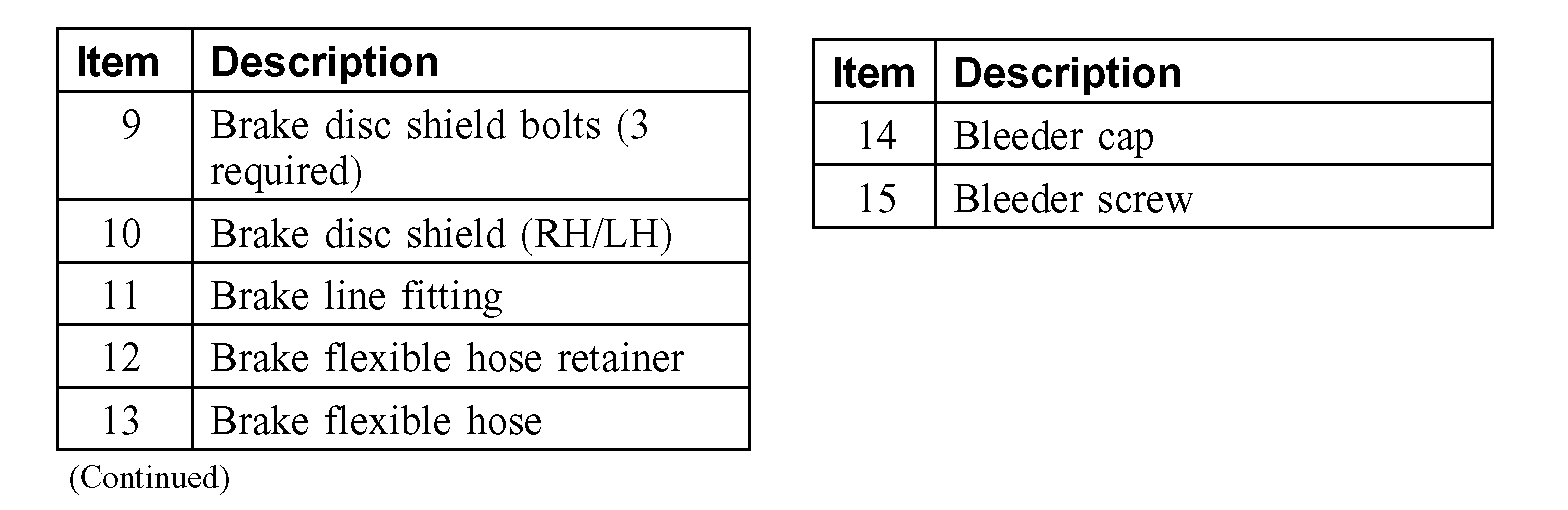
Brake Pads
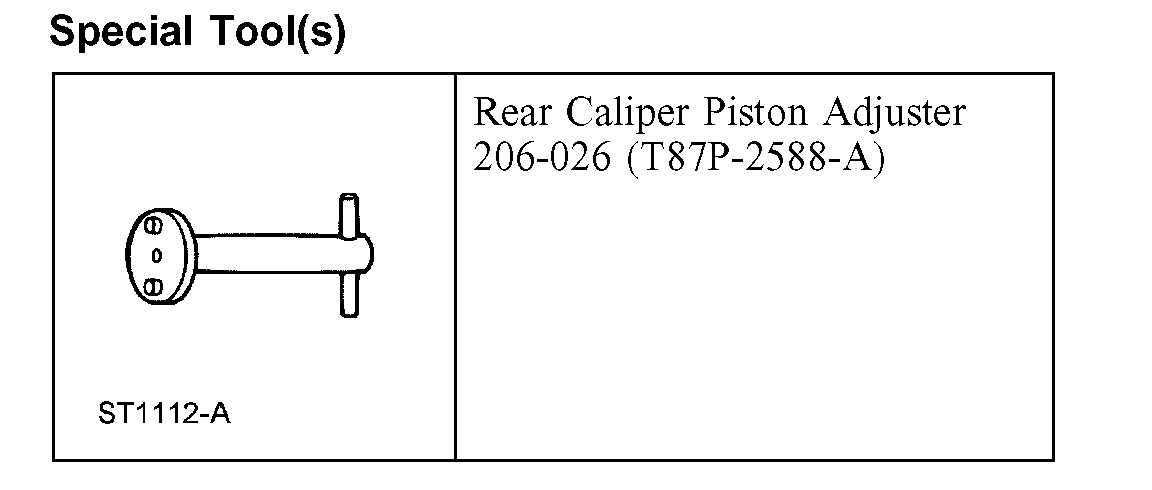
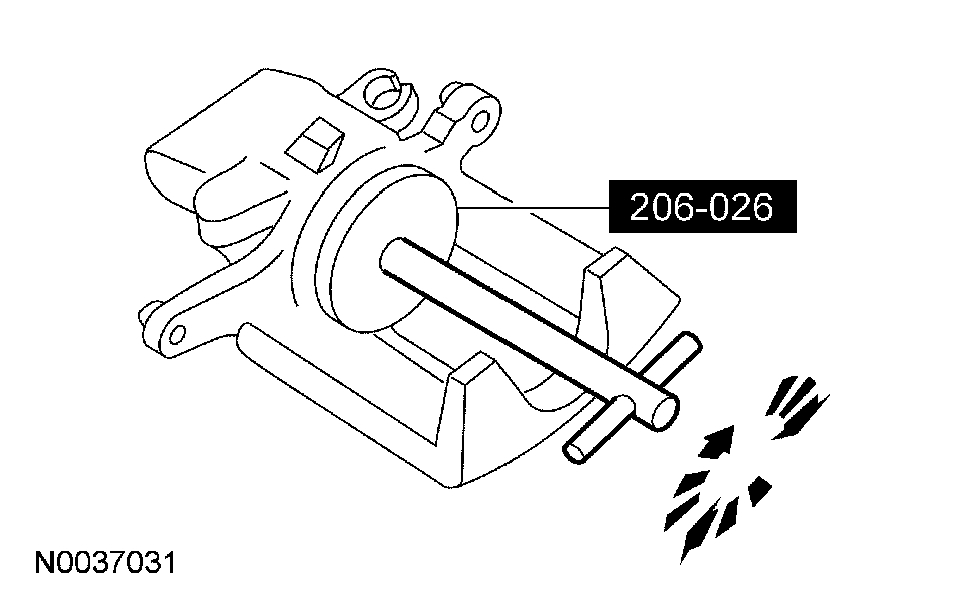
Special Tool(s) See picture 2
Removal
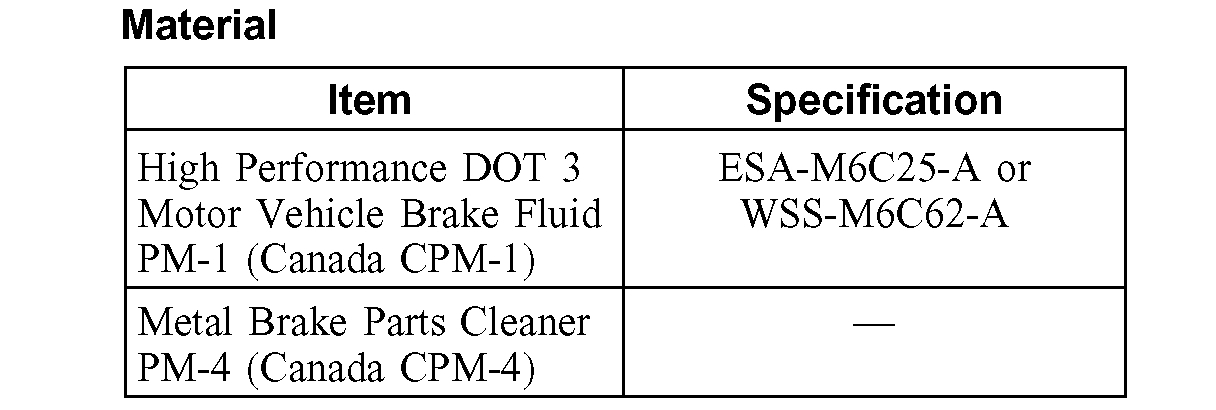
WARNING: Use of any other than approved DOT 3 motor vehicle brake fluid will cause permanent damage to brake components and will render the brakes inoperative. Failure to follow these instructions may result in personal injury.
WARNING: Brake fluid contains polyglycol ethers and polyglycols. Avoid contact with eyes. Wash hands thoroughly after handling. If brake fluid contacts eyes, flush eyes with running water for 15 minutes. Get medical attention if irritation persists. If taken internally, drink water and induce vomiting. Get medical attention immediately. Failure to follow these instructions may result in personal injury.
CAUTION: Brake fluid is harmful to painted and plastic surfaces. If brake fluid is spilled onto a painted or plastic surface, immediately wash it with water.
CAUTION: Do not allow the brake fluid to come in contact with the adhesive backing on the brake pads. If brake fluid is spilled onto the brake pads, new pads must be installed.
CAUTION: Use only specified brake parts cleaner. Use of other cleaners may leave a residue on the brake caliper preventing the brake pads adhesive surface from bonding with the brake caliper.
1. Check the brake fluid level in the brake fluid reservoir.
^ If required, remove fluid until the brake master cylinder reservoir is half full.
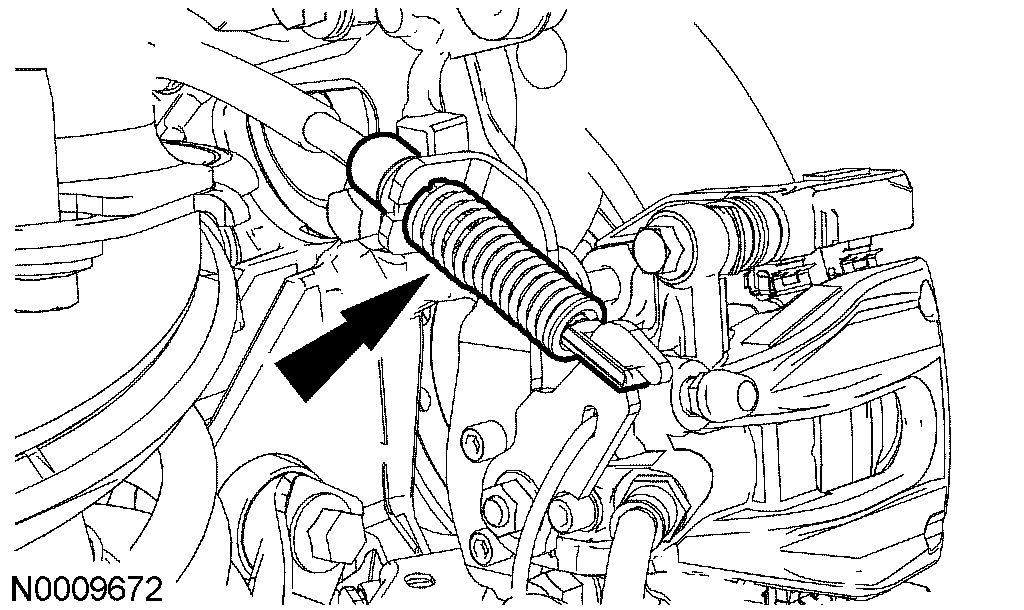
2. Release the tension on the parking brake cable.
3. Disconnect the parking brake cable end from the brake caliper lever and release the parking brake cable retainer from the caliper bracket.
4. NOTE: Loosen but do not remove the brake caliper bolts.
Loosen the brake caliper bolts.
5. CAUTION: Do not use the brake caliper sight hole to retract the pistons as this can damage the pistons and boots.
CAUTION: Do not allow the caliper to hang from the brake hose or damage to the hose can occur.
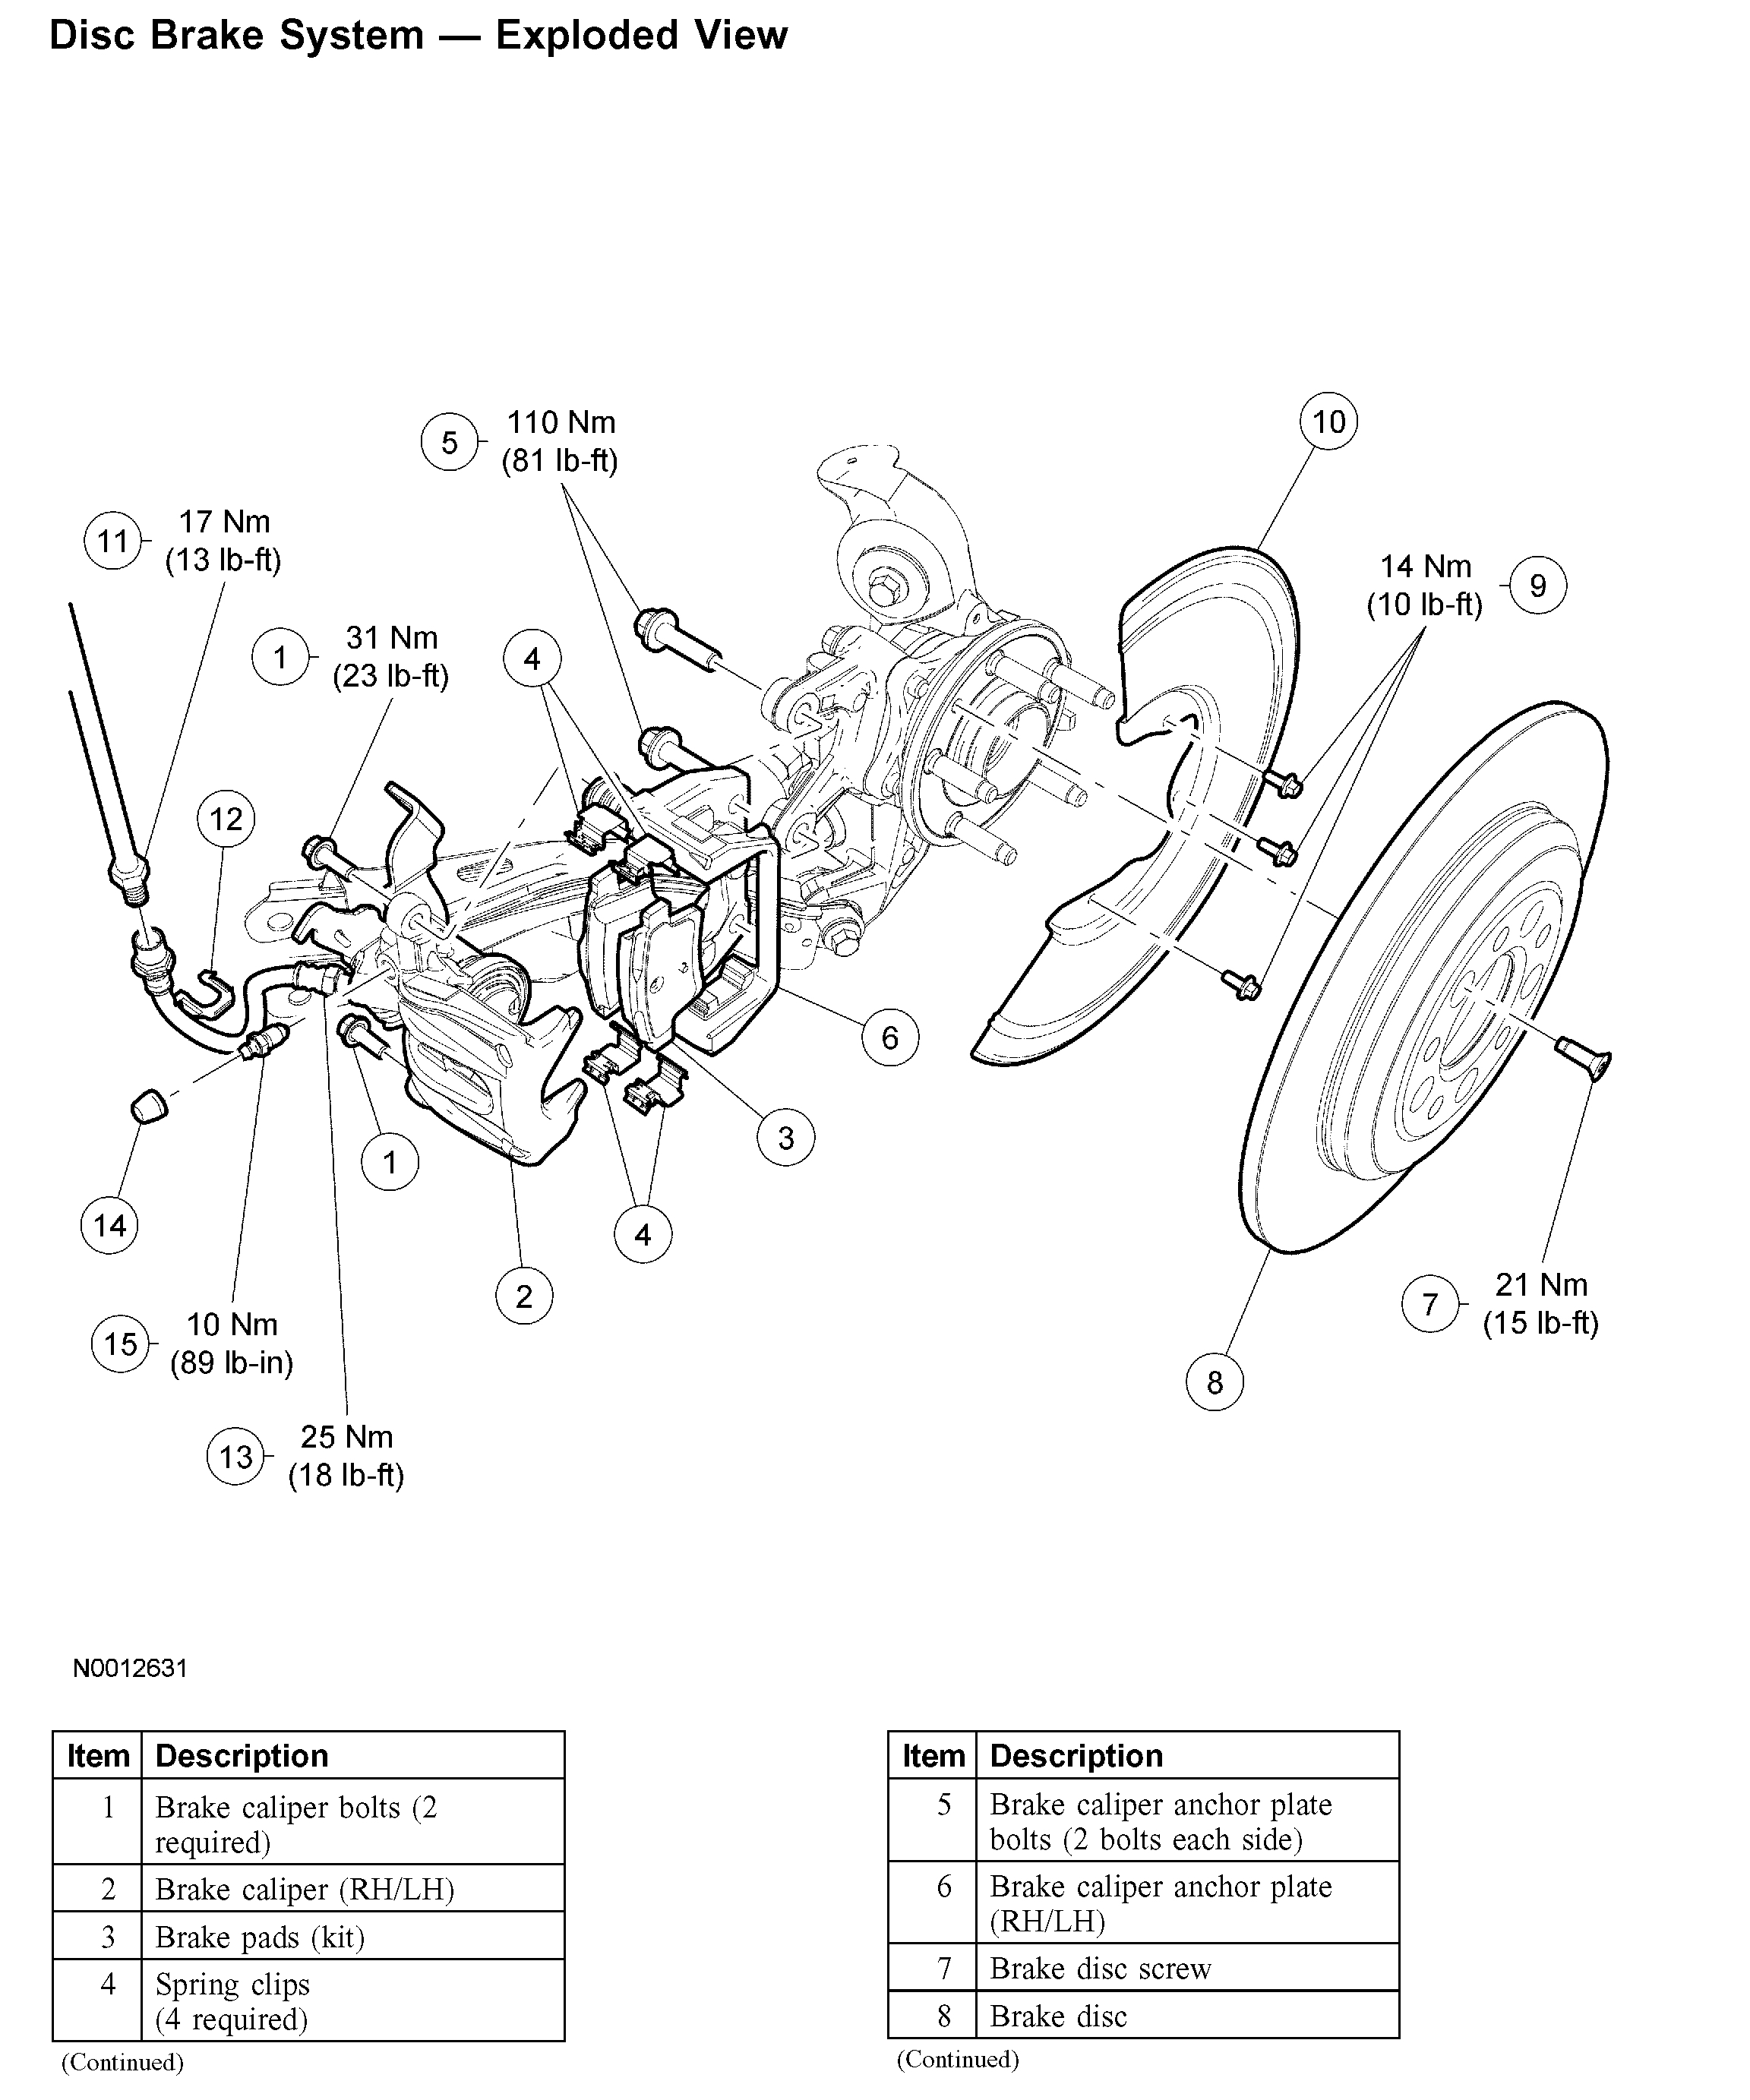
Remove the 2 brake caliper anchor plate bolts and discard. Position the brake caliper anchor plate, brake caliper, and brake pads aside.
^ Support the caliper with mechanic's wire.
6. CAUTION: When the brake pads are separated from the brake caliper, new brake pads must be installed. The brake pads are one-time use only.
NOTE: The brake pads must be separated from the brake caliper before the brake caliper can be removed from the brake caliper anchor plate.
Using a suitable tool, separate the brake pads from the caliper.
7. Remove and discard the brake pads and spring clips from the brake caliper anchor plate.
8. NOTE: Do not remove the anchor plate guide pins. The guide pins are press fit to the brake caliper anchor plate. If the guide pins are damaged a new anchor plate must be installed.
Inspect the brake caliper anchor plate assembly.
^ Check the guide pins and boots for binding or damage.
^ Install a new brake caliper anchor plate if it is worn or damaged.
Installation
1. NOTE: The LH caliper piston turns clockwise and the RH caliper piston turns counterclockwise.
Using the special tool, compress the brake caliper piston into its cylinder.
2. Clean the residual adhesive from the brake caliper fingers and pistons using the specified brake parts cleaner.
3. Position the brake caliper anchor plate and install 2 new bolts.
^ Tighten to 110 Nm (81 ft. lbs.).
4. CAUTION: Do not allow grease, oil, brake fluid or other contaminants to contact the brake pad or caliper mating surface. Do not install contaminated pads.
NOTE: Install all the new hardware supplied with brake pad kit.
Install the new spring clips and brake pads.
5. Position the brake caliper and install the 2 bolts.
^ Tighten to 31 Nm (23 ft. lbs.).
6. Connect the parking brake cable to the brake caliper.
7. Reload the tension on the parking brake cable.
8. If necessary, fill the brake fluid reservoir with clean specified brake fluid.
9. With the vehicle engine running, apply 89 - 133 N (20 - 30 lbs.) of pressure on the brakes for approximately 1 minute, to make sure the brake pads adhere to the caliper before any contamination can be introduced.
10. Test the brakes for normal operation.
________________________
Let me know if this helps. If the problem is you cannot fit the pad into the mount, then make sure to clean any rust or corrosion from under the spring clip. Use a file to do it. If you can fit the pads into the mount, but there is not enough room to fit over the rotor, then you need to depress the caliper piston further.
Feel free to ask more questions. Also, if I misunderstood the problem, let me know,
Joe
Images (Click to enlarge)
Dec 1, 2018 at 8:58 PM