Hi and thanks for using 2CarPros.com.
On this vehicle, it is straight forward. Take a look at these two links to see in general how to replace the pads and depress the caliper piston.
https://www.2carpros.com/articles/how-to-replace-front-brake-pads-and-rotors-fwd
https://www.2carpros.com/articles/how-to-replace-rear-brake-pads-and-rotors
Here are directions specific to your vehicle. I will start with the rear. Additionally, the first five pictures attached correlate with these directions. (rear)
Note: If the vehicle is equipped with air ride suspension, make sure to turn the system off prior to lifting the vehicle. There is a toggle switch in the trunk, usually on the driver's side. Failure to do so will damage the system.
_________________________________
REAR
Removal
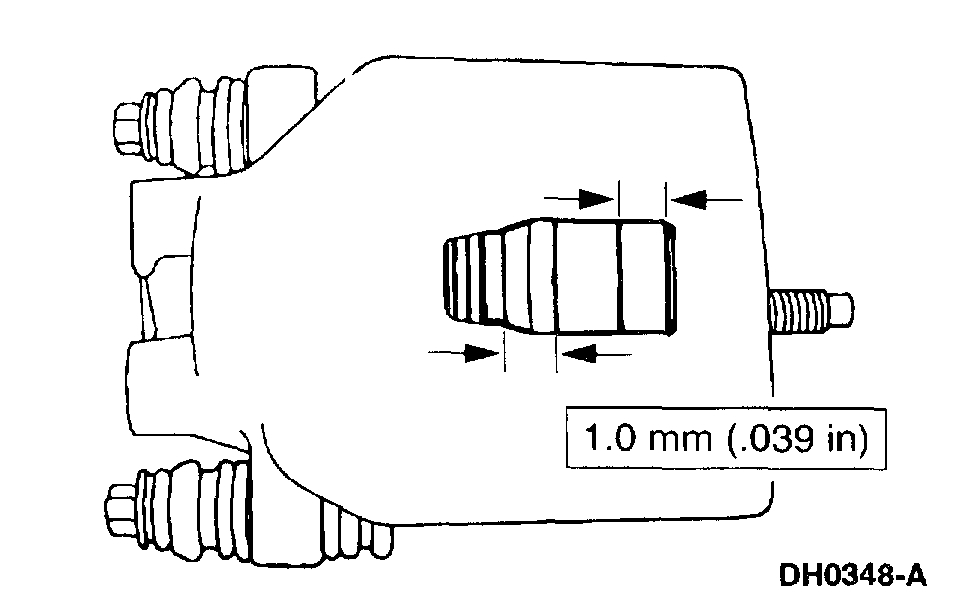
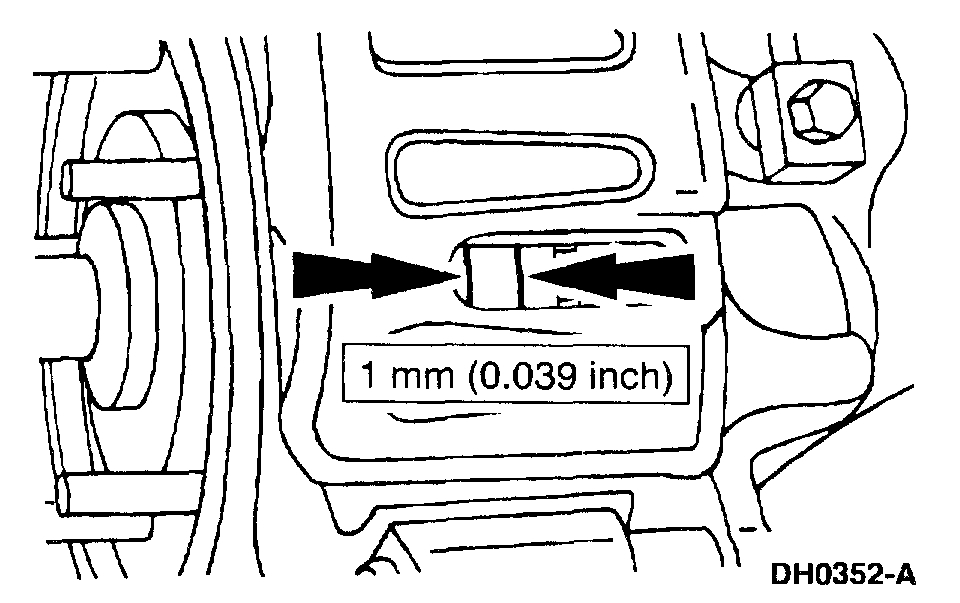
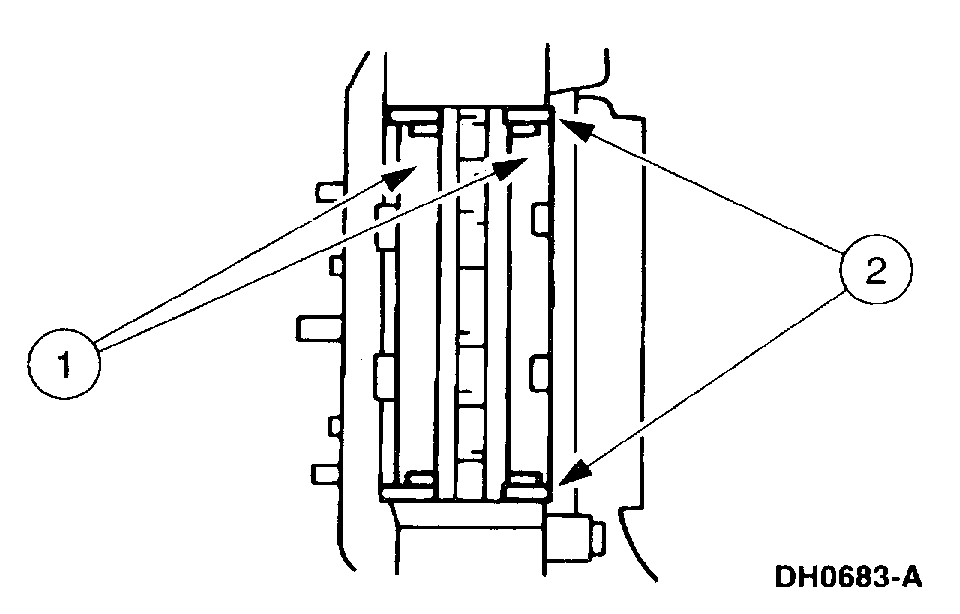
1. Inspect the brake pads for wear or contamination. Install new if worn to or past specification.
2. Note: It is not necessary to remove the rear wheel brake hose when performing this procedure.
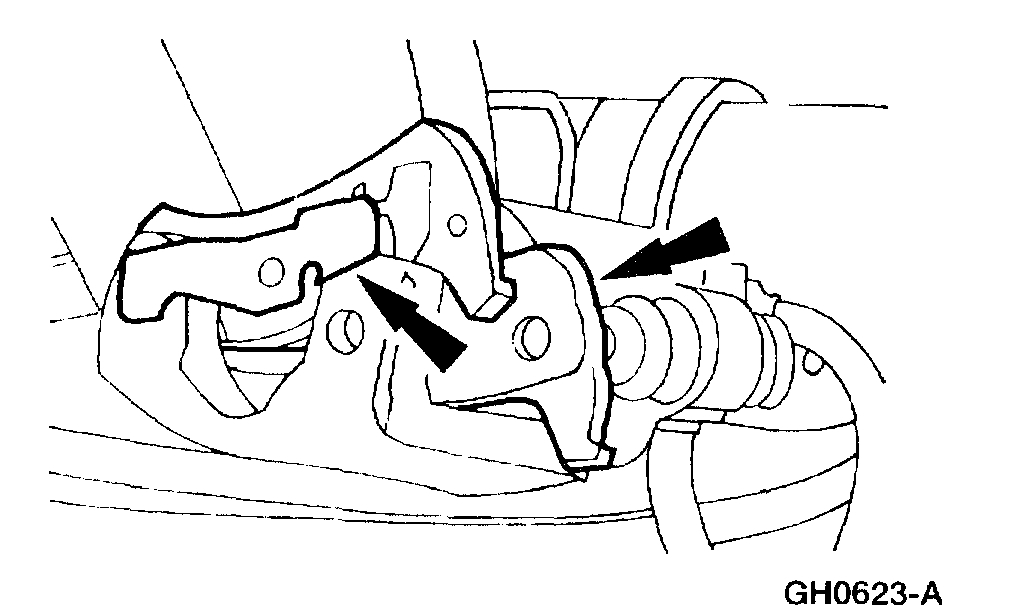
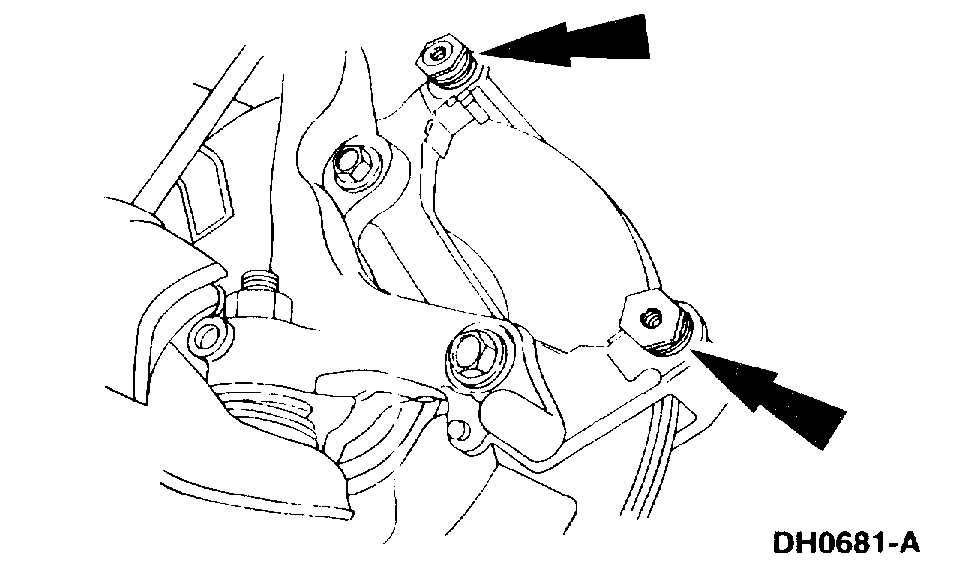
Remove the rear disc brake caliper.
3. Caution: Do not allow grease, oil, brake fluid or other contaminants to contact the brake pads.
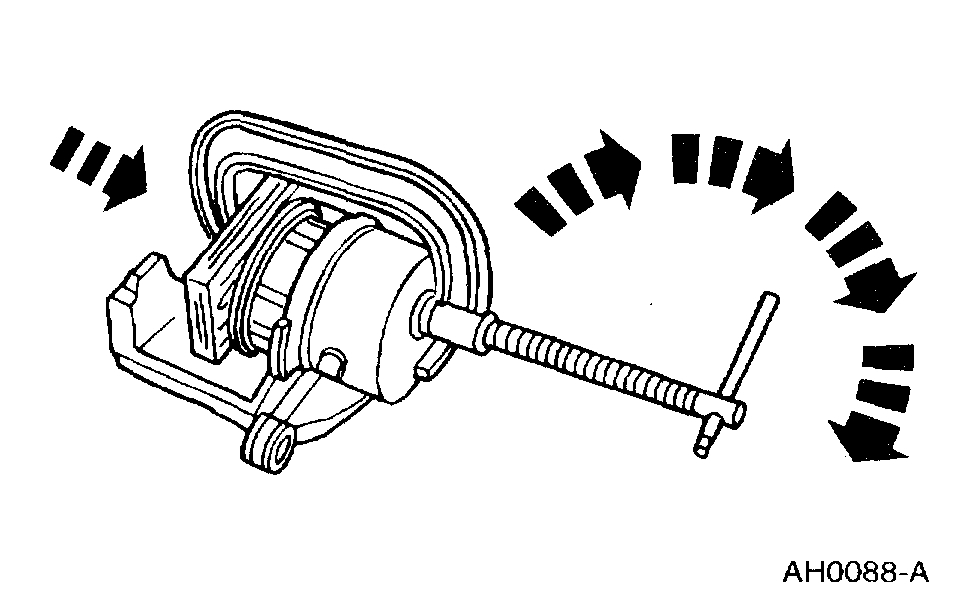
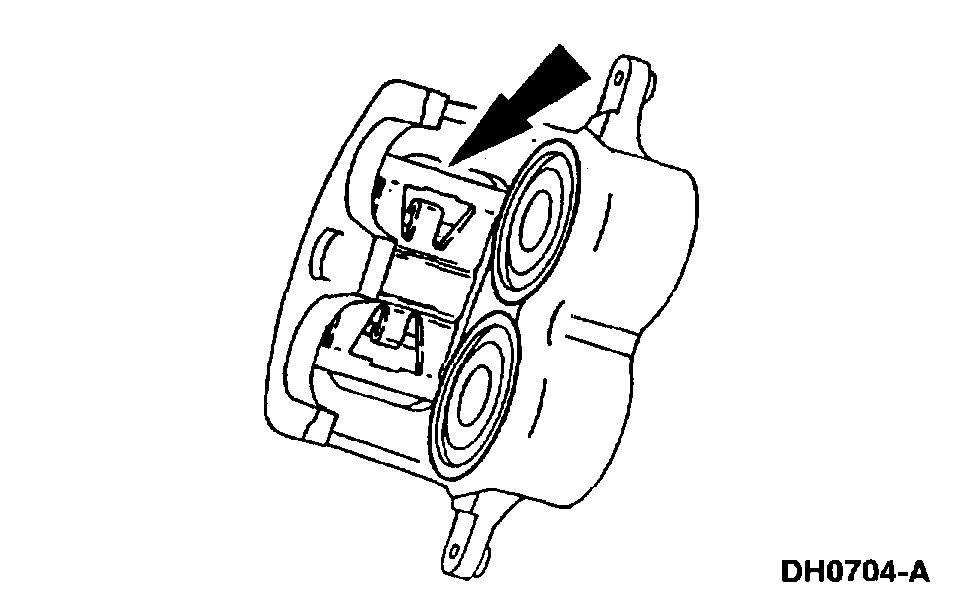
4. Note: Use a block of wood or used pad to protect the piston and boots.
Retract the caliper piston into the rear disc brake caliper.
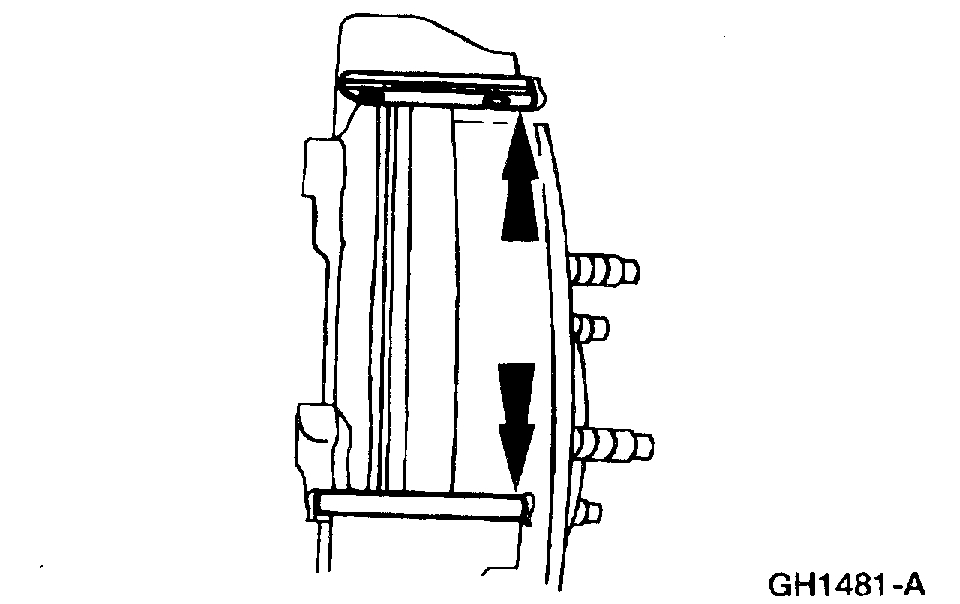
5. Make sure the slippers are clean and in good condition.
Installation
1. Caution: Install the brake pads in full axle sets. Do not replace worn brake pads on only one side of vehicle.
Install the brake pads.
2. Install the rear disc brake caliper.
3. Verify correct brake operation.
_____________________________________________________
Front Brakes Starting with picture 6, all remaining pictures correlate with front brakes.
FRONT
Removal
1. WARNING: The electrical power to the air suspension system must be shut off prior to hoisting, jacking or towing an air suspension vehicle. This can be accomplished by turning off the air suspension switch located in the luggage compartment. Failure to do so can result in unexpected inflation or deflation of the air springs, which can result in shifting of the vehicle during these operations.
Remove brake master cylinder filler cap. Check brake fluid level in brake master cylinder reservoir. Remove fluid until brake master cylinder reservoir is half full.
2. Raise and support the vehicle.
3. Remove the wheel and tire assembly.
4. Caution: Replace the pad if worn to or past the specified thickness above the metal backing plate or rivets. Replace the pads in complete axle sets.
Inspect the pads for wear and contamination.
5. Caution: Do not pry in caliper sight hole to retract pistons as this can damage the pistons and boots.
Caution: When removing the disc brake caliper, never allow it to hang from the brake hose. Provide a suitable support.
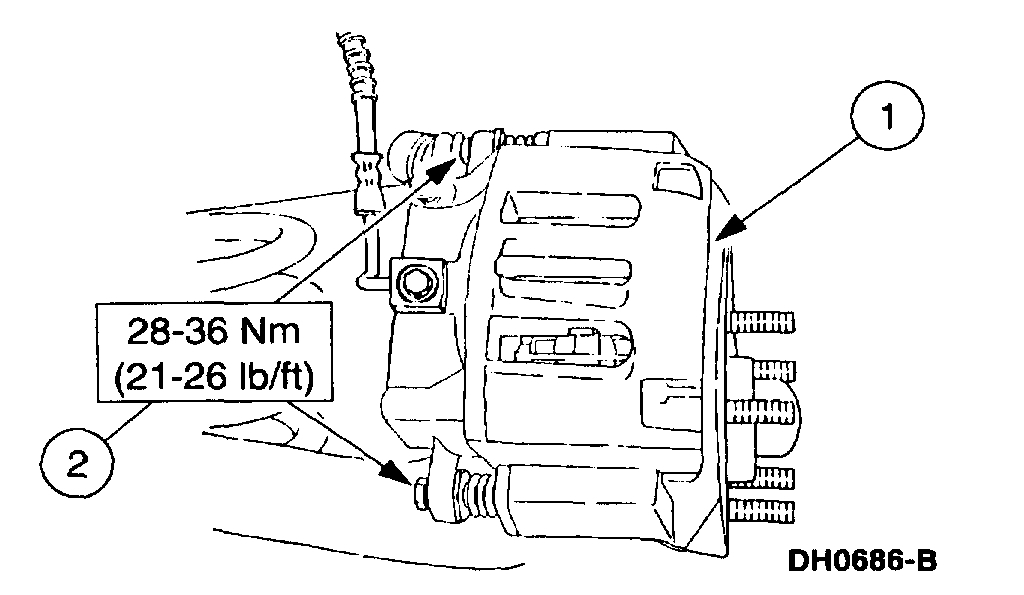
Remove the disc brake caliper.
1 Remove two front disc brake caliper bolts.
2 Lift the disc brake caliper off the front disc brake caliper anchor plate.
6. Remove the disc brake pad anti-rattle clip.
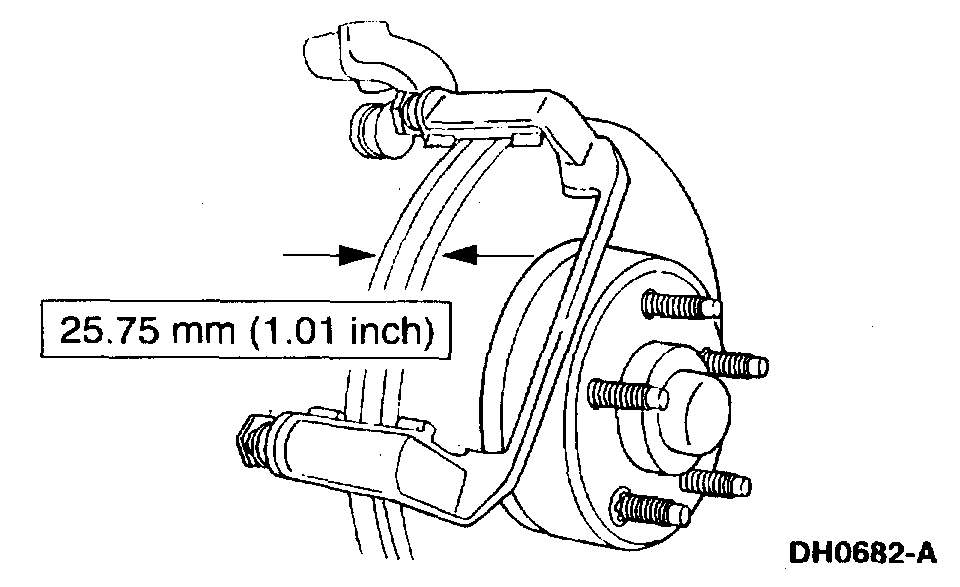
7. Measure the brake disc thickness.
- Replace the brake disc if not within specification.
8. Inspect the disc brake caliper.
- If leaks or damaged boots are found, disassembly is required.
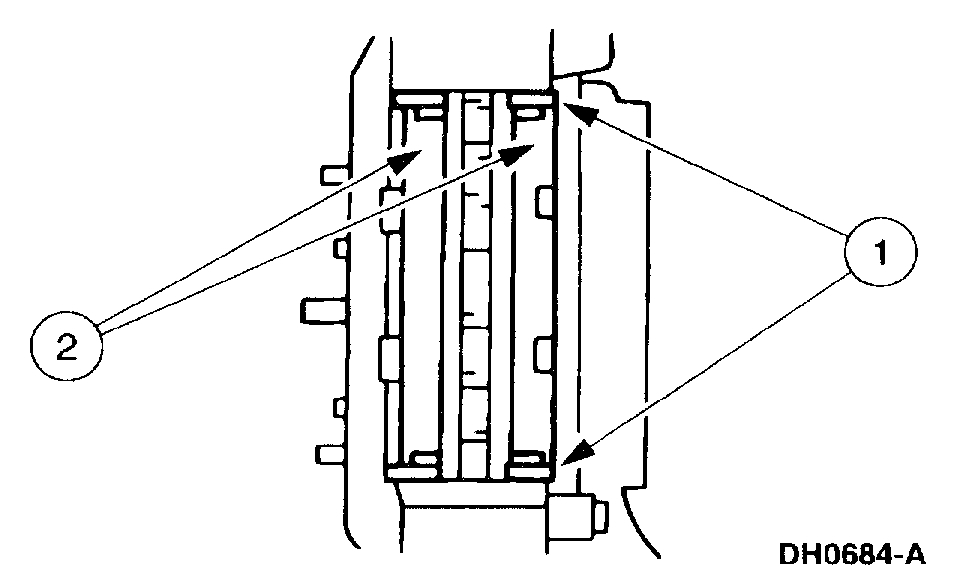
9. Remove the pads and stainless steel slippers.
1 Remove the pads and verify thickness.
2 Remove the front disc brake caliper anchor plate stainless steel slippers and discard.
10. Inspect the front disc brake anchor plate assembly.
- Check the guide pin boots for damage.
- Check the guide pins for binding and damage.
- Replace worn or damaged pins.
___________________Installation
1. Caution: Do not allow grease, oil, brake fluid or other contaminants to contact the pad lining material. Do not install contaminated pads.
Note: Replace all hardware supplied with pad kit.
Install the pads.
1 Install the new front disc brake caliper anchor plate stainless steel slippers.
2 Install the pads.
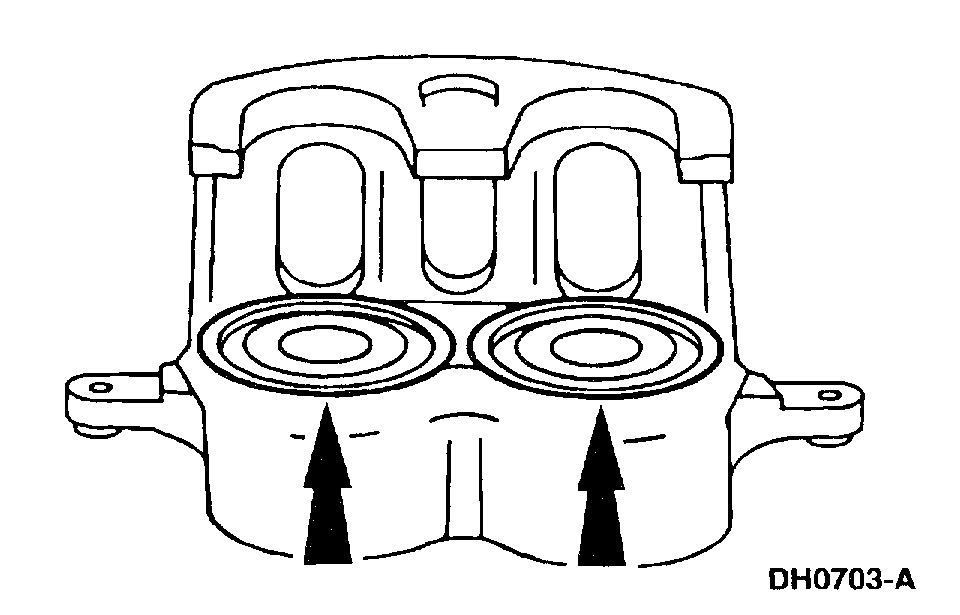
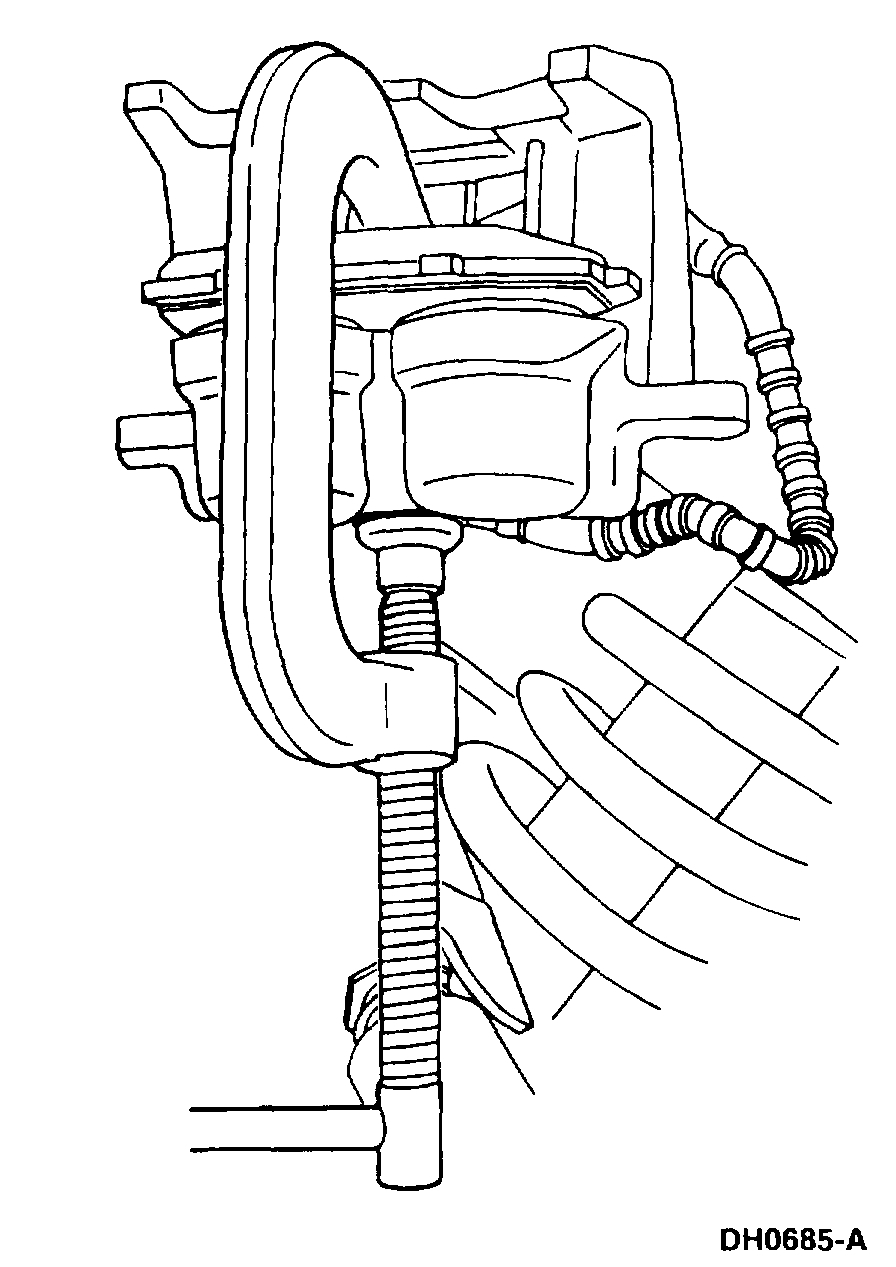
2. Note: Use-a wood block or used pad to protect pistons and boots.
Compress the Caliper pistons.
3. Install the disc brake pad anti-rattle clip.
4. Caution: Use care not to damage the bleeder screw or brake disc shield.
Install the disc brake caliper.
1 Install the disc brake caliper.
2 Install the disc brake caliper bolts.
5. Install the wheel and tire assembly.
6. Lower the vehicle.
7. Fill the brake master cylinder reservoir with clean High Performance DOT 3 Brake Fluid C6AZ-19542-AB or equivalent DOT 3 fluid meeting Ford specification ESA-WC25-A. If DOT 3 is not available, use DOT 4 Brake Fluid meeting Ford specification SAE-J-1704-DOT 4. Install brake master cylinder filler cap.
8. Note: If equipped with air suspension, reactivate the system by turning on the air suspension switch.
Inspect brake operation.
_________________________________
I hope this is helpful. Let me know if you have questions or need help with anything.
Take care,
Joe
Images (Click to enlarge)
Aug 28, 2018 at 7:23 PM