Welcome back:
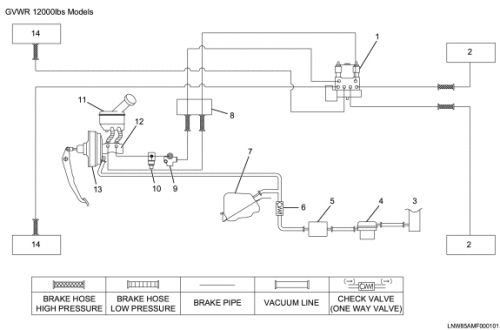
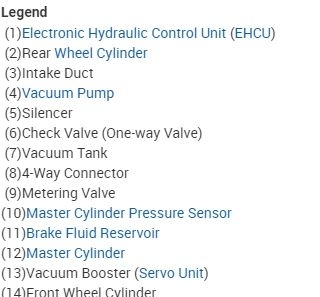
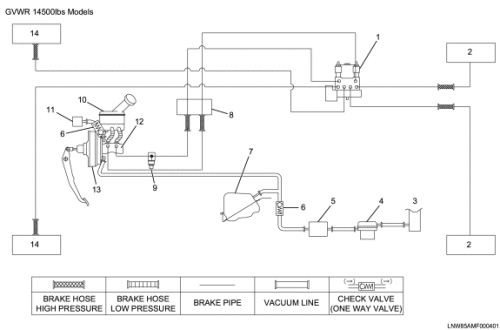
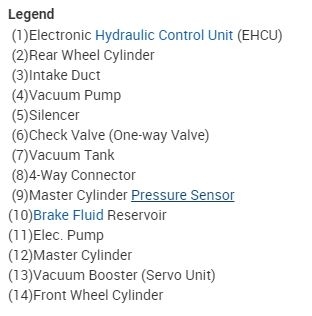
The first four pictures attached show the brake line routing and legend of each component. There are two different ones based on the vehicle's GVWR.
Next, here is the bleeding procedure for your vehicle. The remaining pictures correlate with the directions.
____________________
BLEEDING BRAKES
Bleeding Brakes
Use only hydraulic brake fluid recommended in Maintenance and Lubrication when replacing fluid lost during bleeding procedures.
The presence of air in the system is a result of low fluid in the reservoir, or of some part of the system having been disconnected. Bleeder valves are provided on the wheel cylinders.
Bleeding Sequence
It may be necessary to bleed the hydraulic system at all four wheels if air has been introduced through low fluid level or by disconnecting the brake lines. If a brake line is disconnected at the wheel cylinder, then that wheel cylinder only needs to be bled. If brake lines are disconnected at any fitting located between the master cylinder and wheel cylinders, then all the wheel cylinders served by the disconnected line must be bled.
Bleeding of the brake hydraulic circuit should be performed in the following sequence:
- Right and Left rear wheel-Right and Left front wheel.
Bleeding Procedure
The vehicle engine must be running to bleed the brakes. Apply the parking brake and block the vehicle wheels.
Fluid in the reservoir must be checked after bleeding it at each valve (bleeder screw) and replenished, if required. Brake pedal should be pumped up and down slowly and should be on the downstroke as the valve is closed.
Caution:
- Air bleeding without starting the engine will result in damage to the brake booster.
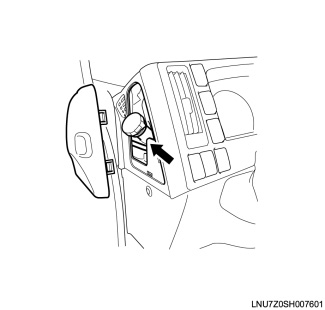
- Vehicle is equipped with ABS, be sure to remove the ABS 60A [FL-11] fuse (2008) or ABS 10A [F-7] (except 2008) from the fuse box before beginning the air bleeding procedure. If this is not done, the ABS may operate and force air into the H/U. Be sure to replace the fuse when the air bleeding procedure is complete.
1. Fill the reservoir with recommended brake fluid and keep at least one-half full of fluid during the bleeding operation.
pic 5
2. Bleed in the sequence recommended previously.
3. Remove the bleeder screw valve cap.
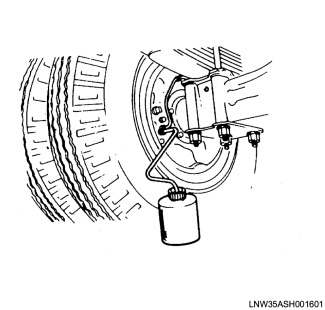
4. With the proper size box end wrench over the bleeder screw, attach a hose over the screw and allow the end to hang in a glass jar containing enough brake fluid to cover the end of the hose.
pic 6
5. Pump the brake pedal two or three times and then hold down.
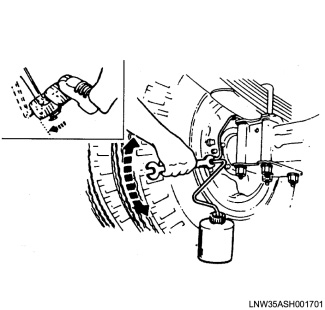
6. Open the bleeder screw about one-half turn and fully depress the brake pedal. Observe flow from the hose.
pic 7
7. Close the bleeder screw as soon as bubbles stop and the fluid flows in a solid stream. Release the brake pedal after closing the bleeder screw.
8. Repeat at the same bleeder until bubbles stop.
9. Repeat at the other bleeder screws in the proper sequence.
10. Replace the bleeder cap.
11. When the bleeding is complete on each wheel, check the level of brake fluid in the reservoir and replenish, as necessary.
Let me know if this helps.
Take care,
Joe
Images (Click to enlarge)
Jun 6, 2019 at 8:22 PM